1
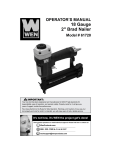
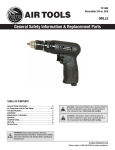
FP-797
1” Super Duty
Pistol Impact Wrench
IMPACTS
General Safety Information & Replacement Parts
TABLE OF CONTENTS
General Safety Information . . . . . . . . . . . . . . . . . . . . . . . . . . . . 2
Air Compressor and Air Tool Safety. . . . . . . . . . . . . . . . . . . . 2-3
Tool Specifications. . . . . . . . . . . . . . . . . . . . . . . . . . . . . . . . . . . 3
Installation . . . . . . . . . . . . . . . . . . . . . . . . . . . . . . . . . . . . . . . . . 4
Maintenance / Lubrication. . . . . . . . . . . . . . . . . . . . . . . . . . . . . 4
Operation. . . . . . . . . . . . . . . . . . . . . . . . . . . . . . . . . . . . . . . . . . 5
Troubleshooting . . . . . . . . . . . . . . . . . . . . . . . . . . . . . . . . . . . . . 6
Warranty. . . . . . . . . . . . . . . . . . . . . . . . . . . . . . . . . . . . . . . . . . . 6
Service Parts. . . . . . . . . . . . . . . . . . . . . . . . . . . . . . . . . . . . . . . . 7
WARNING: This product contains lead, a chemical known to
the State of California to cause cancer and birth defects or
other reproductive harm. Wash hands after handling.
WARNING: This product contains chemicals known to
the State of California to cause cancer and birth defects or
other reproductive harm. Wash hands after handling.
WARNING: Risk of injury to persons. Read and
understand operation instructions. Always become familiar
with all the instructions and warnings before operating any
pneumatic tool.
FLORIDA-PNEUMATIC.COM
Please contact 1-800-356-3392 for further assistance.
Safety Information
7.2.2.3 GENERAL SAFETY RULES
• Multiple hazards. Read and understand the safety instructions before
installing, operating, repairing, maintaining, changing accessories on,
or working near the power tool. Failure to do so can result in serious
bodily injury.
• Only qualified and trained operators should install, adjust or use the
power tool.
• Do not modify this power tool. Modifications may reduce the effectiveness of safety measures and increase the risks to the operator.
• Do not discard the safety instructions – give them to the operator.
• Do not use a tool if the tool has been damaged.
• Warnings shall be given against the risk of explosion or fire due to the
material being processed;
• Warnings shall be given against the risk of cutting.
7.2.2.4 PROJECTILE HAZARDS
• Failure of the work piece, of accessories, or even of the tool itself may
generate high velocity projectiles.
• Always wear impact-resistant eye protection during operation of the
tool. The grade of protection required should be assessed for each
use.
7.2.2.5 ENTANGLEMENT HAZARDS
• Entanglement hazard - choking, scalping and/or lacerations can occur
if neck ware, hair or gloves are not kept away from tool and accessories.
7.2.2.6 OPERATING HAZARDS
• Use of the tool may expose the operator’s hands to hazards including
crushing, impacts, cuts and abrasions and heat. Wear suitable gloves
to protect hands.
• Operators and maintenance personnel must be physically able to
handle the bulk, weight and power of the tool.
• Hold the tool correctly: be ready to counteract normal or sudden
movements – have both hands available.
• Maintain a balanced body position and secure footing.
• Keep hands away from rotating or reciprocation accessories, spindles
or other moving parts.
• Release the start and stop device in the case of an interruption of the
energy supply
• Use only lubricants recommended by the manufacturer.
7.2.2.7 REPETITIVE MOTIONS HAZARDS
• When using a power tool, you may experience discomfort in your
hands, arms, shoulders, neck, or other parts of your body.
• While using a power tool, position your body in a comfortable
posture. Maintain secure footing and avoid awkward or off-balanced
postures. Changing your posture during extended tasks may help
avoid discomfort and fatigue.
• If you experience symptoms such as persistent or recurring discomfort, pain, throbbing, aching, tingling, numbness, burning sensation,
or stiffness, do not ignore these warning signs. Promptly tell your
employer and consult a qualified health professional.
7.2.2.8 ACCESSORY HAZARDS
• Only use sizes and types of accessories and consumables that are
recommended by the power tool manufacturer.
7.2.2.9 WORKPLACE HAZARDS
• Slips, trips and falls are major causes of workplace injury. Be aware
of slippery surfaces caused by use of the tool and also of trip hazards
caused by the air line or hydraulic hose.
• Proceed with care in unfamiliar surroundings. Hidden hazards may
exist, such as electricity or other utility lines.
• This power tool is not intended for use in potentially explosive atmospheres and is not insulated from coming into contact with electric
power.
• Make sure there are no electrical cables, gas pipes etc. that could
cause a hazard if damaged by use of the tool.
7.2.2.10 DUST AND FUME HAZARDS
• Dust from some work processes can cause cancer, birth defects or
other respiratory diseases. Risk assessment of these hazards and
implementation of appropriate controls is essential.
FP Air Tools - Florida-Pneumatic Manufacturing Corporation
851 Jupiter Park Lane, Jupiter FL 33458
• If the pneumatic tool is used in a dust filled environment exhaust
air can cause a dust hazard
• Dusts and fumes generated when using power tools can cause
ill health (for example: cancer, birth defects, asthma and/or dermatitis); risk assessment of these hazards and implementation of
appropriate controls of is essential.
• Risk assessment should include dust created by the use of the tool
and the potential for disturbing existing dust.
• Operate and maintain the power tool as recommended in these
instructions, to minimize dust or fume emissions
• Direct the exhaust so as to minimized disturbance of dust in a dust
filled environment
• Where dusts or fumes are created, the priority shall be to control
them at the point of emission.
• All integral features or accessories for the collection, extraction or
suppression of airborne dust or fumes should be correctly used
and maintained in accordance with the manufacturer’s instructions.
• Select, maintain and replace the consumable/inserted tool as
recommended in these instructions, to prevent an unnecessary
increase in dust or fumes
• Use respiratory protection as instructed by your employer or as
required by occupational health and safety regulations;
7.2.2.11 NOISE HAZARDS
• Unprotected exposure to high noise levels can cause permanent,
disabling, hearing loss and other problems such as tinnitus (ringing, buzzing, whistling or humming in the ears);
• Risk assessment of these hazards and implementation of appropriate controls of is essential.
• Appropriate controls to reduce the risk may include actions such as
damping materials to prevent work pieces from ‘ringing’
• Use hearing protection as instructed by your employer or as
required by occupational health and safety regulations;
• Operate and maintain the power tool as recommended in these
instructions, to prevent an unnecessary increase in noise levels;
• Select, maintain and replace the consumable/inserted tool as
recommended in these instructions, to prevent an unnecessary
increase in noise. 7.2.2.12 VIBRATION HAZARDS
• Exposure to vibration can cause disabling damage to the nerves
and blood supply of the hands and arms;
• Wear warm clothing when working in cold conditions and keep
your hands warm and dry;
• If you experience numbness, tingling, pain or whitening of the skin
in your fingers or hands, stop using the power tool, and tell your
employer. You should also seek medical advice from a qualified
occupational health professional.
• Operate and maintain the power tool as recommended in these
instructions, to prevent an unnecessary increase in vibration;
• Select, maintain and replace the consumable/inserted tool as
recommended in these instructions, to prevent an unnecessary
increase in vibration levels;
• Support the weight of the tool in a stand, tensioner or balancer,
because the operator can then use a lighter grip to support the tool.
• Hold the tool with a light but safe grip taking account of the
required hand reaction forces, because the risk from vibration is
generally greater when the grip force is higher.
7.2.3 ADDITIONAL SAFETY INSTRUCTIONS FOR PNEUMATIC
POWER TOOLS - AIR SUPPLY & CONNECTION HAZARDS
• Air under pressure can cause severe injury.
• Always shut off air supply, drain hose of air pressure and disconnect tool from air supply when not in use, before changing accessories or when making repairs.
• Never direct air at yourself or anyone else.
• Whipping hoses can cause severe injury. Always check for damaged or loose hoses and fittings.
• Whenever universal twist couplings (claw couplings) are used, lock
pins must be installed.
• Do not exceed the maximum air pressure stated on the tool.
• Use whip check safety cables to safeguard against possible hose to
tool and hose to hose connection failure.
• Never carry an air tool by the hose.
Safety Information (continued)
AIR COMPRESSOR AND AIR TOOL SAFETY
WARNING: Some dust created by power sanding, sawing,
grinding, drilling and other construction activities contains
chemicals known to cause cancer, birth defects or other
reproductive harm. Some examples of these chemicals are:
1. Risk of Bursting. Do not adjust the regulator to result in output
pressure greater than the marked maximum pressure of this air
tool.
Lead from lead based paint, crystalline silica from bricks
and cement and other masonry products, arsenic and
chromium from chemically-treated lumber.
2. Ensure the hose is free of obstructions or snags. Entangled or
snarled hoses can cause loss of balance or footing and may
become damaged.
Your risk from those exposures varies, depending on how
often you do this type of work. To reduce your exposure to
these chemicals: work in a well-ventilated area, and work
with approved safety equipment, such as dust masks that
are specifically designed to filter out microscopic particles.
3. Never leave a tool unattended with the air hose attached.
4. Do not operate this tool if it does not contain a legible warning
label.
5. Do not continue to use a tool or hose that leaks air or does not
function properly.
6. Never direct a jet of compressed air toward people or animals.
7. Protect your lungs. Wear a face or dust mask if the operation is
dusty.
Important Warnings - Impacts 1. Eye protection and hearing protection and safety gloves must always be worn when operating an impact wrench or impact
driver.
2. When using heavy impact sockets or sockets on impact wrenches with 3/4” drive anvils or larger, a socket retaining ring
and pin should be used to prevent the socket falling off and causing injury.
3. Use only impact sockets and accessories. Only use sockets designated “FOR USE WITH IMPACT WRENCHES”, hand tool
sockets can break, creating a hazard from flying pieces. Always check sockets, retainers and drives regularly for wear or
damage and replace when necessary.
Accessory Hazards
4. Disconnect the assembly power tool for threaded fasteners from the energy supply before changing the inserted tool or
accessory.
5. Do not touch sockets or accessories during impacting as this increases the risk of cuts, burns or vibration injuries.
6. Use only sizes and types of accessories and consumables that are recommended by the assembly power tool for threaded
fasteners manufacturer; do not use other types or sizes of accessories and consumables.
Specifications
Working
Working Max Torque Max Torque Speed
Model Torque (ft. lb.) Torque Nm (ft. lb.)
(Nm)
(RPM)
Anvil
Noise Level (dBA): 96
Vibration Level (m/sec2): 15
Socket
Weight Weight Length Length
Retainer
Exhaust (lb.)
(kg)
(in.)
(mm)
FP-797 300-1500 406-2000
1,900
2572
4000 1" Square
Ring &
Handle
Through Hole
21.1
9.6
11.80
300
Rec
Pressure 90 psi-6.2 bar
Air Inlet Hose Air Cons Average
(NPT) (I.D. in.) (cfm)
(cfm)
3/8"
1/2"
44
11.8
FLORIDA-PNEUMATIC.COM
Please contact 1-800-356-3392 for further assistance.
Installation
1 Cleaning the air hose
□□ A 3/8" air hose is required, with a maximum length of 25 ft.
□□ Clean the air hose of accumulated dust and moisture
before connecting it to the air supply.
NOTE: If a longer air hose is required, connect a 1/2" air
hose to the 3/8" air hose to ensure the impact wrench has
the necessary air supply.
Recommended Air Line Set-Up
Part
Description
A
Air Tool
B
Quick Plug
C
Quick Coupler
D
Air Hose
E
In-line Regulator
F
In-line Lubricator
G
In-line Filter
H
Air Compressor
Maintenance
Ensure the air line is shut-off and drained of air before removing this tool for service or changing sockets. This will prevent the tool from
operating if the throttle is accidentally engaged.
LUBRICATION
□□ An in-line filter-regulator-lubricator is recommended as it increases tool life and keeps the tool in sustained operation.
□□ Regularly check and fill the in-line lubricator with air tool oil. Avoid using excessive amounts of oil.
□□ Adjust the in-line lubricator by placing a sheet of paper next to the tool’s exhaust ports and holding the throttle open approximately 30
seconds. The lubricator is properly set when a light stain of oil collects on the paper.
□□ If it is necessary to store the tool for an extended period of time (overnight, weekend, etc.), generously lubricate the tool through the air
inlet. Run the tool for approximately 30 seconds to ensure the oil is evenly distributed throughout the tool. Store the tool in a clean and
dry environment.
□□ Recommended lubricants: Air tool oil or any other high grade turbine oil containing moisture absorbent, rust inhibitors, metal wetting
agents, and an EP (extreme pressure) additive.
FP Air Tools - Florida-Pneumatic Manufacturing Corporation
851 Jupiter Park Lane, Jupiter FL 33458
Operation
1 Operating the impact wrench
□□ This Impact Wrench is designed to operate on 90 PSIG.
Lower pressure (below 90 PSIG) will reduce performance
of the tool. Higher air pressure (over 90 PSIG) raises the
performance of the tool beyond its rated capacity and
could cause serious damage to the tool and the user.
3
Changing the output torque level
□□ This tool features a power management switch. This tool
operates in the maximum power in the Reverse position
and has three steps in the Forward position.
□□ Turn the regulator until the desired output torque level is
achieved. The position with the smallest circle has the
least amount of power and the position with the largest
circle has the most amount of power. The settings on
the regulator are only for reference and do not denote a
specific power output.
2 Changing the output torque direction
□□ This tool features a reverse switch to change the
output torque direction to tighten (assemble) or loosen
(disassemble) the bolt or fastener.
□□ Control the output torque direction by pushing the reverse
switch button to the F (Forward) or R (Reverse) position to
change the direction.
4
Tightening/loosening the bolts or
fasteners
□□ Place the rotation push button located above the trigger of
the impact wrench to the correct direction. Push the button
forward for the Forward position and push the button back
for the Reverse position.
□□ To control power in either the forward direction or the
reverse direction, adjust the regulator knob located at the
foot of the handle of the impact wrench.
□□ Fit the correct size socket to the anvil of the impact
wrench.
□□ Hold the impact wrench with one hand and place the
socket onto the nut/bolt to be tightened or removed. Press
the trigger and stop the operation once the nut/bolt is
removed or tightened.
WARNING: Once a bolt or fastener is seated, impacting for
longer than five (5) seconds will cause excessive wear and
possible damage to the impact mechanism. If it takes longer
to tighten or loosen your bolt or fastener, we recommend the
use of a larger sized impact wrench.
FLORIDA-PNEUMATIC.COM
Please contact 1-800-356-3392 for further assistance.
Troubleshooting
Problem
Possible Cause
Solution
The tool runs slowly or will not
operate.
There is grit or gum in the tool.
Flush the tool with air tool oil or gum solvent.
The tool is out of oil.
Lubricate the tool according to the lubrication
instructions in this manual.
The air pressure is low.
□□ Adjust the regulator on the tool to the
maximum setting.
□□ Adjust the compressor regulator to the tool’s
maximum setting of 90 psi.
The air hose leaks.
Tighten and seal the hose fittings with pipe thread
tape if leaks are found.
The air pressure drops.
□□ Ensure the hose is the proper size. Long
hoses or tools using large volumes of air may
require a hose with an I.D. of ½" or larger
depending on the total length of the hose.
□□ Do not use a multiple number of hoses
connected together with a quick connect
fitting. This causes additional pressure drops
and reduces the tool power. Directly connect
the hoses together.
There is a worn rotor blade in the motor.
Replace the rotor blade.
There is a worn ball bearing in the motor.
Remove and inspect the bearing for rust, dirt, and
grit. Replace or clean and grease the bearing with
bearing grease.
There is moisture blowing out
of the tool’s exhaust.
There is water in the tank.
Drain the tank. (See the air compressor manual
for instructions.) Lubricate the tool and run it until
water is not evident. Lubricate the tool again and
run for 1-2 seconds.
The tool impacts slowly or not
at all.
The tool needs lubricating.
Lubricate the air motor and the impact mechanism
according to the lubrication instructions in this
manual.
The tool regulator setting is in the wrong position.
Adjust the regulator on the tool to the maximum
setting.
The tool impacts rapidly, but
will not remove bolts.
The tool has a worn impact mechanism.
Replace the worn impact mechanism components.
The tool does not impact.
The impact mechanism is broken.
Replace the broken impact mechanism
components.
Warranty
Florida Pneumatic Manufacturing Corporation warrants its tools to be free from defects in materials and workmanship. Tools thought
to be defective should be returned to the factory, or an authorized service center, transportation charges prepaid, for examination and
consequent repair or replacement. This warranty does not cover damage to tools arising from alteration, abuse, or use for other than their
intended purpose and does not cover any repairs or replacement made by anyone other than Florida Pneumatic Manufacturing Corporation
or its authorized repair stations.
The duration of the Warranty and any other Warranty including, but not limited to, any implied Warranty of merchantability is expressly
limited to two years, beginning from the date of the delivery to the original user. The obligation of Florida Pneumatic Manufacturing
Corporation under any Warranty, express or implied, is limited solely to the repair or replacement at its factory or authorized repair station of
any part which shall prove defective.
FP Air Tools - Florida-Pneumatic Manufacturing Corporation
851 Jupiter Park Lane, Jupiter FL 33458
Service Parts / Exploded View Drawing
FLORIDA-PNEUMATIC.COM
Please contact 1-800-356-3392 for further assistance.
Questions, problems, missing parts?
Call Customer Service
8 a.m.-5 p.m., EST, Monday-Friday
1-800-356-3392
FLORIDA-PNEUMATIC.COM
Retain this manual for future use.
FP Air Tools - Florida-Pneumatic Manufacturing Corporation
851 Jupiter Park Lane, Jupiter FL 33458