Transcript
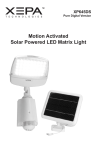
XEPA XP-PSD3E Solar Powered LED Security Camera
LED Light Quick Start Guide
Step 1: Open Packaging & Identify Parts
•
•
•
•
•
PSD3E solar light with built-in camera and battery
Solar charging panel with 15’ Cable
User manual including installation sheet
Quick Start Guide
Screws and anchors
Step 2: Install Light
1. Find a location within 15’ of where the solar panel will
be installed.
2. Drill holes in the wall through the installation template
sticker, and insert plastic anchors to be flush with
mounting surface.
3. Secure the screws, leaving 3/16” of each screw
exposed for mounting the light.
4. Adjust the lamp head & motion sensor towards the
desired coverage area
5. Illuminate in TEST mode, and switch to AUTO mode
once you achieve the proper setting
Step 3: Install Solar Panel
1. Find a location within 15’ of where the light is installed.
2. Use provided install template sticker, anchors, and
screws to install the panel where it can receive direct
sunlight for at least 6-8 hours per day
3. Plug the solar panel cord into the INPUT jack at the
bottom of the light
Product Warranty & Support Information
For customer support call 800.284.8828 (between 8:30am and 5:30pm, Monday to Friday, Pacific Time) or visit
www.xepatech.com.
This product comes with a limited warranty of 1 year from the day of purchase. (Proof of the date of purchase must be
provided if the product is returned.) If the product is found to be defective in material or workmanship, APEX will replace the
defective part(s). If any of the product parts are found to be missing, please contact APEX within ten (10) days of purchase.
XEPA TECHNOLOGIES by
APEX DIGITAL INC.
4401 Eucalyptus Avenue, Suite 100
Chino, California 91710