1
Model #121-079
Model #1000021980
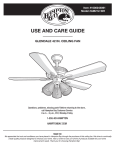
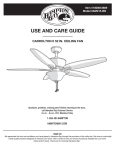
Use and Care Guide
Middleton 42 in. Ceiling Fan
Questions, problems, missing parts? Before returning to the store,
call Hampton Bay Customer Service
8 a.m. - 6 p.m., EST, Monday - Friday
1-877-527-0313
Hamptonbay.com
THANK YOU
We appreciate the trust and confidence you have placed in Hampton Bay through the purchase of this ceiling fan. We strive to continually
create quality products designed to enhance your home. Visit us online to see our full line of products available for your home improvement
needs. Thank you for choosing Hampton Bay!
THD_HamptonBay_UE42V-SHB_HD195.indd 1
12年11月21日 下午11:33
Table of Contents
Table of Contents. . . . . . . . . . . . . . . . . . . . . . . . . . . . . . . . . . . . . 2
Safety Information. . . . . . . . . . . . . . . . . . . . . . . . . . . . . . . . . . . . 2
Warranty . . . . . . . . . . . . . . . . . . . . . . . . . . . . . . . . . . . . . . . . . . . 3
Pre-Installation . . . . . . . . . . . . . . . . . . . . . . . . . . . . . . . . . . . . . . 4
Operation. . . . . . . . . . . . . . . . . . . . . . . . . . . . . . . . . . . . . . . . . . 10
Care and Cleaning. . . . . . . . . . . . . . . . . . . . . . . . . . . . . . . . . . . 11
Troubleshooting. . . . . . . . . . . . . . . . . . . . . . . . . . . . . . . . . . . . . 11
Safety Information
Please READ AND SAVE THESE INSTRUCTIONS.
1. To reduce the risk of electric shock, ensure electricity has been
turned off at the circuit breaker or fuse box before beginning.
2. All wiring must be in accordance with the National Electrical
Code, ANSI/NFPA 70, and local electrical codes. Electrical
installation should be performed by a qualified licensed
electrician.
3. The outlet box and support structure must be securely mounted
and capable of reliably supporting a minimum of 35 pounds. Use
only UL Listed outlet boxes marked “FOR FAN SUPPORT.”
4. Do not operate the reversing switch while the fan blades are in
motion. The fan must be turned off and blades stopped before
reversing blade direction
5. Avoid placing objects in the path of the blades. To avoid personal
injury or damage to the fan and other items, be cautious when
working around or cleaning the fan
6. Do not use water or detergents when cleaning the fan or fan
blades. A dry dust cloth or lightly dampened cloth will be
suitable for most cleaning.
7. After making electrical connections, spliced conductors should
be turned upward and pushed carefully up into the outlet box.
The wire should be spread apart with the grounded conductor
and the equipment-grounding conductor on one side of the
outlet box. Splices after being made should be turned upward
and pushed carefully up into the outlet box.
WARNING: Before servicing or cleaning unit, switch power
off at service panel, and lock service disconnecting means to
prevent power from being switched on accidentally. When the
service disconnecting means cannot be locked, securely fasten
a prominent warning.
WARNING: To reduce the risk of fire, electric shock or
personal injury, mount to an outlet box acceptable for fan
support of 15.9 Kg (35 lbs) or less. Use mounting screws
provided with the outlet box. Most outlet boxes commonly
used for the support of lighting fixtures are not acceptable for
fan support and may need to be replaced. Consult a qualified
electrician if in doubt.
WARNING: To reduce the risk of personal injury, do not bend
the blade brackets when installing the brackets, balancing the
blades, or cleaning the fan. Do not insert foreign objects in
between rotating fan blades.
WARNING: To reduce the risk of fire or electric shock, do not
use this fan with any solid-state speed control device.
CAUTION: To reduce the risk of injury to person, the fan
must be mounted with a minimum of 7 feet clearance from the
trailing edge of the blades to the floor.
8. Electrical diagrams are for reference only. Light kits that are not
packed with the fan must be UL Listed and marked suitable for
use with the model fan you are installing. Switches must be UL
General Use Switches. Refer to the instructions packaged with
the light kits and switches for proper assembly.
121-0792
HD195 -YD
THD_HamptonBay_UE42V-SHB_HD195.indd 2
12年11月21日 下午11:33
Warranty
Limited WARRANTY
WHAT IS COVERED
The Hampton Bay warrants the fan motor to be free from defects in workmanship and material present at time of shipment from the
factory for a period of lifetime after the date of purchase by the original purchaser. Hampton Bay also warrants that all other fan parts,
excluding any glass or acrylic blades, to be free from defects in workmanship and material at the time of shipment from the factory for a
period of one year after the date of purchase by the original purchaser. We agree to correct such defects without charge or at our option
replace with a comparable or superior model if the product is returned to Hampton Bay. To obtain warranty service, you must present a
copy of the receipt as proof of purchase. All costs of removing and reinstalling the product are your responsibility. Damage to any part
such as by accident or misuse or improper installation or by affixing any accessories, is not covered by this warranty. Because of varying
climatic conditions this warranty does not cover any changes in brass finish, including rusting, pitting, corroding, tarnishing or peeling.
Brass finishes of this type give their longest useful life when protected from varying weather conditions. A certain amount of “wobble” is
normal and should not be considered a defect. Servicing performed by unauthorized persons shall render the warranty invalid. There is no
other express warranty. Hampton Bay hereby disclaims any and all warranties, including but not limited to. Those of merchantability and
fitness for a particular purpose to the extent permitted by law. The duration of any implied warranty which cannot be disclaimed is limited
to the time period as specified in the express warranty. Some states do not allow limitation on how long an implied warranty lasts, so the
above limitation may not apply to you. The retailer shall not be liable for incidental, consequential, or special damages arising out of or
in connection with product use or performance except as may otherwise be accorded by law. Some states do not allow the exclusion of
incidental or consequential damages, so the above exclusion or limitation may not apply to you. This warranty gives specific legal rights,
and you may also have other rights which vary from state to state. This warranty supersedes all prior warranties. Shipping costs for any
return of product as part of a claim on the warranty must be paid by the customer.
Specifications
Fan Size
Speed
Volts
Amps
Watts
RPM
CFM
N.W.
G.W.
C.F.
42 in.
Low
Med
High
120
120
120
0.19
0.30
0.42
10
27
48
85
150
200
1215
2256
3129
4.5
kg
4.2 kg
5.2
5 kgkg
1.0
Pre-Installation
Tools Required
Claw
hammer
Safety
goggles
Phillips
screwdriver
Hardware included
AA
BB
Part
Description
AA
Machine Screws
16
BB
Wire Nuts
3
Quantity
3Hamptonbay.com
Please contact 1-877-527-03123 for further assistance.
THD_HamptonBay_UE42V-SHB_HD195.indd 3
12年11月21日 下午11:33
Pre-Installation (continued)
Package Contents
NOTE: Unpack your fan and check the contents. You should have the
following items listed below
A
B
D
C
E
F
G
Part
Description
Quantity
A
Supporting bar
1
B
Motor housing
1
C
Fan motor with switch housing
1
D
Set of blade holders (with blade holder screws pre-installed)
5
E
Set of blades
5
F
Glass shade
1
G
Pull chain pendant
2
121-0794
THD_HamptonBay_UE42V-SHB_HD195.indd 4
12年11月21日 下午11:33
Installation
1 Determining mounting method
WARNING: To reduce the risk of fire, electric shock, or
personal injury, mount to outlet box marked acceptable for
fan support of 15.9 Kg (35 lbs) or less and use mounting
screws provided with the outlet box.
□□ If there is not an existing UL Listed metal mounting box,
then read the following instructions. Disconnect the power
by removing fuses or turning off circuit breakers.
□□ Secure the outlet box directly to the building structure. Use
appropriate fasteners and building materials. The outlet
box and itssupport must be able to fully support the moving
weight of the fan (at least 35 lbs.). Do not use plastic outlet
boxes. Figures 1 and 2 are examples of different ways to
mount the outlet box.
□□ To hang your fan where there is an existing fixture but no
ceiling joist, you may need an installation hanger bar as
shown in Figure 3 (available at your Hampton Bay Retailer).
2 Installing the support bar
NOTE: You may need a longer downrod to maintain proper
blade clearance when installing on a steep, sloped ceiling.
The maximum angle allowable is 18° away from horizontal. If
the canopy touches the downrod, then remove the decorative
canopy bottom cover (C) and turn the canopy (B) 180° before
attaching the canopy (B) to the mounting bracket (A).
REMEMBER to turn off the power. Follow the steps below to hang
your fan properly.
□□ Secure the supporting bar to the ceiling outlet box as
shown in Figure 4 by using two screws and washers (not
provided). Make sure the supporting bar is level. You may
need to insert additional washers (not provided) between
the outlet box and the supporting bar to make it level.
Outer Box
Outer Box
Figure 4
Outer Box
Figure 2
Figure 1
□□ Before making the electrical connections, use the square
hole at one end of the supporting bar (A) to hang the fan
motor (Figure 5).
A
Outer Box
Figure 3
Figure 5
5Hamptonbay.com
Please contact 1-877-527-03123 for further assistance.
THD_HamptonBay_UE42V-SHB_HD195.indd 5
12年11月21日 下午11:33
Installation (continued)
□□ If you choose to install another light kit, it must be a UL
Listed light kit accessory marked suitable for use with this
fan. Follow the instruction packed with the light kit.
sUPPLY cIRCUIT
Black
White
WARNING: Each wire nut (wire connector) supplied with
this fan is designed to accept up to one 12 gauge house
wire and two wires from the fan. If you have larger than 12
gauge house wiring or more than one house wire to connect
to the fan wiring, consult an electrician for the proper size
wire nuts to use.
Ground
Conductor
Blue
Black
White
Green
Outlet Box
WARNING: Check to see that all connections are tight,
including ground, and that no bare wire is visible at the wire
nuts, except for the ground wire.
Green
Ground Lead
Figure 6
Diagram indicates light kit wiring.
If you feel that you do not have enough electrical wiring knowledge
or experience, have your fan installed by a licensed electrician.
Follow the steps below to connect the fan to your household
wiring. Use the plastic wire splice connectors (BB) supplied with
your fan. Secure the connectors with electrical tape. Make sure
there are no loose strands or connections.
Black
□□ Connect the fan supply (black) wire and light supply (blue)
wire to the black household wire as shown in Figure 5. Do
not connect the blue wire if the light kit is not used.
Light
Switch
Black
White
WARNING: To avoid possible electrical shock, be sure
electricity is turned off at the main fuse box before wiring.
If you are not sure the electrical box and fan are grounded,
contact a licensed electrician for advice. They must be
grounded for safe operation.
Ground
Conductor
Outlet Box
Blue
Black
White
Green
3 Making the electrical connections
White
□□ Connect the fan ground wires (green) on the supporting bar
and the hanger, to the household ground wire.
Figure 7
Diagram indicates optional wiring.
□□ Turn the wire connectors (BB) upward and push the wiring
into the outlet box.
If you wish to control the light from a wall switch and the fan from
the pull chain switch or if you wish to control both fan and light
from wall switches, refer to the wiring diagrams in Figures 6 and 7.
Black
Green
Ground Lead
Ground
Conductor
Outlet Box
Light
Fan
Red
White
Blue
Black
White
Green
□□ After connecting the wires, secure the wire connectors (BB)
with black electrical tape and spread them apart so that
the green and white wires are on one side of the outlet box
and the black and blue wires are on the other side. (i.e.,
grounded conductor on one side and hot wires on the other
side.)
Black
White
□□ Connect the neutral fan (white) wire to the white neutral
household wire.
Green
Ground Lead
Figure 8
Diagram indicates optional wiring.
121-0796
THD_HamptonBay_UE42V-SHB_HD195.indd 6
12年11月21日 下午11:33
Installation (continued)
4 Finishing the installation
1
□□ Match the three holes at two ends of the supporting bar (A)
with three screws of the hanger. Secure the fan assembly
onto the supporting bar (A) using the preassembled screws
(1) and washers (2) (Figure 9 and 10).
A
2
□□ Fix the motor housing (B) onto the supporting bar (A) by
tightening the four screws (3) preassembled to the motor
housing (B) (Figure 11).
Figure 10
□□ Attach the fan pull chain pendant to the pull chain on the
switch assembly.
A
3
1
2
B
Figure 11
Figure 9
7Hamptonbay.com
Please contact 1-877-527-03123 for further assistance.
THD_HamptonBay_UE42V-SHB_HD195.indd 7
12年11月21日 下午11:33
Installation (continued)
5 Attaching the fan blades
NOTE: Your fan blades are reversible. Select the blade side
finish which best accentuates your decor. Failure to follow
above procedure could result in fan wobble.
□□ Mount the blade holders (D) to the fan blades (E) using the
screws (1) provided – 3 per blade (Figure 12). Please note
the rubber washers are pre-attached to the blade holder
(D).
The fan blade assemblies attach to the motor using the blade
holder screws (2) that are pre-installed into the blade holder (D).
The procedure to attach blade assemblies is as follows:
□□ Position the blade holder (D) under the motor such that the
alignment post on the blade holder fits into the slot (3) in
the motor (Figure 13).
□□ Tighten the pre-installed blade holder screws (2).
□□ Repeat these steps to install the remaining blade
assemblies.
1
E
3
D
2
D
Figure 12
Figure 13
121-0798
THD_HamptonBay_UE42V-SHB_HD195.indd 8
12年11月21日 下午11:34
Installation (continued)
6 Balancing the blades
All blades are grouped by weight. Because natural woods vary in
density, the fan may wobble even though the blades are weight
matched.
The following procedure should correct most fan wobble. Check for
wobble after each step.
□□ Check that all blade and blade holder screws are secure.
□□ Most fan wobble problems are caused when blade levels
are unequal. Check this level by selecting a point on the
ceiling above the tip of one of the blades. Measure this
distance as shown in Figure 14. Rotate the fan until the
next blade is positioned for measurement. Repeat for each
blade. Measurements should be within 1/8 in.
7 Installing the light kit
Warning: To reduce the risk of electric shock,
disconnect the electrical supply circuit to the fan before
installing light kit.
Caution: Do not use pliers or screwdrivers to tighten
the thumb screws. Overtightening of the thumb screws may
crack the lamp shades
□□ Install a light bulb (max. 60W, medium screw base) to the
lampholder (Figure 15).
□□ Install the lamp shade into the lamp-fitter by tightening the
thumb screws (Figure 16).
□□ If blade wobble is still noticeable, interchanging two
adjacent (side by side) blades can redistribute the weight
and possibly result in smoother operation.
Touch Ceiling
1
Light Bulb
Lamp Holder
Figure 15
Figure 14
F
Figure 16
9Hamptonbay.com
Please contact 1-877-527-03123 for further assistance.
THD_HamptonBay_UE42V-SHB_HD195.indd 9
12年11月21日 下午11:34
Operation
Operating
NOTE: Wait for the fan to stop before changing the setting
of the slide switch.
The pull chain controls the fan speed as follows: 1 pull – High, 2
pulls – Medium, 3 pulls – Low, and 4 pulls – Off.
The slide switch controls direction: forward (switch down) or
reverse (switch up).*
Speed settings for warm or cool weather depend on factors such
as the room size, ceiling height, number of fans, and so on.
Warm weather – (Forward) A downward air flow creates a cooling
effect as shown in Figure 17. This allows you to set your air
conditioner on a higher setting without affecting your comfort.
Cool weather – (Reverse) An upward airflow moves warm air off
the ceiling area as shown in Figure 18. This allows you to set your
heating unit on a lower setting without affecting your comfort.
Figure 17
Figure 18
121-07910
THD_HamptonBay_UE42V-SHB_HD195.indd 10
12年11月21日 下午11:34
Care and Cleaning
Warning: Make sure the power is off at the electrical panel box before you attempt any repairs. Refer to the section Making Electrical
Connections Section.
Here are some suggestions to help you maintain your fan.
□□ Because of the fan’s natural movement, some connections may become loose. Check the support connections, brackets, and blade
attachments twice a year. Make sure they are secure. (It is not necessary to remove the fan from the ceiling.)
□□ Clean your fan periodically to help maintain its new appearance over the years. Use only a soft brush or lint-free cloth to avoid
scratching the finish. The plating is sealed with a lacquer to minimize discoloration or tarnishing. Do not use water when cleaning. This
could damage the motor, or the wood, or possibly cause an electrical shock.
□□ You can apply a light coat of furniture polish to the wood blades for additional protection and enhanced beauty. Cover small scratches
with a light application of shoe polish.
□□ There is no need to oil your fan. The motor has permanently lubricated bearings.
Troubleshooting
Warning: Make sure the power is off at the electrical panel box before you attempt any repairs. Refer to the section Making Electrical
Connections Section.
Problem
The fan will not start.
Solution
□□ Check circuit fuses or breakers.
□□ Check the line wire connections to the fan and switch wire connections in the switch housing.
The fan sounds noisy.
□□ Make sure all motor housing screws are snug.
□□ Make sure the screws that attach the fan blade bracket to the motor hub are tight.
□□ Make sure wire nut connections are not rubbing against each other or the interior wall of the switch
housing.
□□ Allow a 24-hour “breaking-in” period. Most noises associated with a new fan disappear during this time.
□□ Some fan motors are sensitive to signals from solid-state variable speed controls. If you have installed
this type of control, choose and install another type of control.
□□ Make sure the motor housing is a short distance from the ceiling. It should not touch the ceiling.
11Hamptonbay.com
Please contact 1-877-527-03123 for further assistance.
THD_HamptonBay_UE42V-SHB_HD195.indd 11
12年11月21日 下午11:34
Questions, problems, missing parts? Before returning to the store,
call Hampton Bay Customer Service
8 a.m.-6 p.m., EST, Monday-Friday
1-877-527-0313
Hamptonbay.com
Retain this manual for future use.
THD_HamptonBay_UE42V-SHB_HD195.indd 12
12年11月21日 下午11:34