1
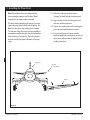
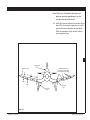
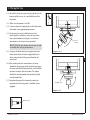
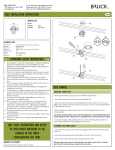
3-15. Turn each wing over and mark the
approximate dimensions on the back side of
the decal.
12”
Disk
Mark Ceiling in These
Locations For Each Wing
(Hide Marks Under Wing)
Canopy/Tail
Decal
Wing Decal (2)
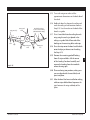
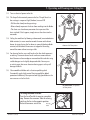
3-17. Drive 2 metal disk into the ceiling for each
wing using the marks just placed in the
ceiling as a guide. Peel off one side of the
backing on the remaining disks and strips.
11”
Strip
Step 3-15
3-16. Hold each decal in place on the ceiling and
mark the ceiling at each location shown in
Step 3-15. Use the marks on the back of the
decals as a guide.
Landing Gear
Decal
Wing Joint
Line
3-18. Press the strips onto the decal and the disks
onto the clips just driven into the ceiling.
See Step 3-15.
3-19. Remove the remaining peel-off backing
from all strips and disks. Lift the corner
of the Landing Gear decal carefully and
remove the backing from the two disks
where the wings join.
3-20. Place each wing into position, making sure
you are aligned with the metal disk, and
press into place.
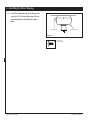
3-21. After the decal has been installed on ceiling,
add two strips of black decal tape over the
joint between the wing and body of the
plane.
42813-01 • 11/27/13
Hunter Fan Company
9