1
Finishing the
Installation
Attaching the Fan
Blades
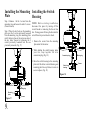
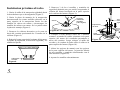
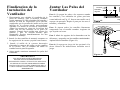
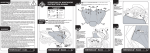
1. Carefully unhook the fan from the mounting
plate, for Standard Mounting; you can keep the
cable around the hook and seat the hanger ball
in canopy, make sure the tab in the ring at the
bottom of the canopy is properly seated in the
groove in the hanger ball. Align the locking
slots of the ceiling canopy with the two screws
in the mounting plate. Push up to engage the
slots and turn clockwise to lock in place.
Immediately tighten the two mounting screws
firmly.
NOTE: Your fan blades are reversible. Select
the blade side finish which best accentuates
'
'
your decor.
2. Install the remaining two mounting screws
into the holes in the canopy and tighten firmly.
Step 2 Tighten each screw securely starting
with the center screw. Make sure the blade is
straight.
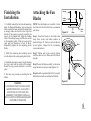
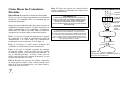
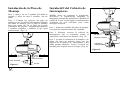
Rubber
washer
Figure 15
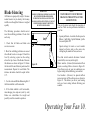
Step 1 Attach the blades to the blade arms
using three screws and rubber washers as
shown in Figure 15. Start a screw into the arm,
do not tighten. Repeat for the 2 remaining
screws and washers.
3. Install the decorative canopy ring by aligning
the ring's slots with the screws in the canopy.
Rotate the ring counter-clockwise to lock in
place.
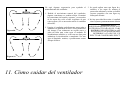
Step 3 Fasten the blade assembly to the motor
using the motor screws provided. (Figure 16)
4. You may now proceed to attaching the fan
blades.
Step 4 Install an optional light kit if you wish.
Follow the instructions included with the kit.
WARNING
LOCKING SLOTS OF CEILING CANOPY
ARE PROVIDED ONLY AS AN AID TO
MOUNTING. DO NOT LEAVE FAN
ASSEMBLY UNATTENDED UNTIL ALL
FOUR CANOPY SCREWS ARE ENGAGED
AND FIRMLY TIGHTENED.
Screws
Blade
arm
Blade
Motor
Blade arm
Figure 16
8.