Transcript
!
WARNING
Risk of electric shock
-
Do not use in wet locations.
Use indoors only.
Turn power off before servicing -- see instructions.
Properly ground fixture.
Ensure that no bare wires are exposed outside the
electrical connections.
Bulb may shatter and cause injury when broken
- Do not use excessive force when installing bulb.
Risk of burn
- Allow bulb to cool before handling.
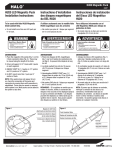
INSTALLATION PROCEDURES
1) Consult a local licensed electrician or electrical contractor if you
are not sure about the installation.
2) Ensure that electricity is TURNED OFF at the main circuit breaker
or fuse box. DO NOT ATTEMPT TO INSTALL FIXTURE WITH THE
POWER ON.
3) Select a suitable dry mounting location (for indoor use only).
Make sure the mounting surface is capable of supporting the fixture.
4) Remove the lens/diffuser by lightly pressing the front edge while
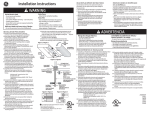
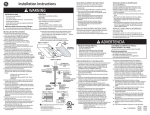
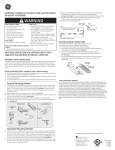
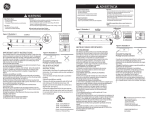
lifting upwards. The lens/diffuser should pop out easily. See Figure 1.
5) Remove the bulb by grasping the ends of the bulb and rotating until
the bulb becomes loose. Pull straight out from the lamp holder and
remove any cardboard inserts present. Be careful not to drop the bulb.
See Figure 1.
6) Remove the cover/housing by unscrewing the two (2) nuts located
behind the bulb. Some models have screws located on the top and
bottom of the fixture that hold the cover/housing together.
7) Choose a suitable knock-out location from those provided on the
fixture. Remove the knock-out with a screw driver.
8) Insert the threaded end of the strain relief (provided in the
installation kit) into the selected opening on the fixture. Secure
the strain relief by tightening the lock nut. The lock nut should be
tightened with a tool such as a pair of pliers to ensure the strain
relief is properly grounded to the fixture.
9) Install the conduit or armored cable to meet electrical codes.
Tighten the two screws on the strain relief connector to secure the wires.
10) Connect the hot (black) AC supply wire(s) to the hot (black) wire(s) of the
fixture. Secure the connection with the wire nuts provided. See Figure 2.
11) Connect the white (neutral) AC supply wire(s) to the neutral (white)
wire(s) of the fixture. Secure the connection with the wire nuts
provided. See Figure 2.
12) Connect the ground (green or copper) AC supply wire to the
green or copper ground wire of the fixture. Secure the connection
with the wire nuts provided. If your electrical system contains no
grounding wire, you should consult a qualified electrician before
proceeding with the installation. See Figure 2.
13) Ensure that no bare wires are exposed after making the electrical connections.
14) Arrange the wires inside the fixture and reattach the cover/housing. Tighten
the screws or nuts to ensure that all the wires and connections are sealed
properly inside the fixture without "pinching" any wires.
15) Place the fixture in the location where it is to be mounted and
mark the position of the keyholes with a pencil.
16) It is recommended that a pilot hole (1/16” for soft wood, 3/32” for hard woods)
be drilled in the mounting surface. If the mounting surface requires the use of
wall anchors, drill a 1/8" pilot hole. Install the plastic anchors provided in the
installation kit.
17) Drive the screws provided in the mounting hardware into the mounting
surface until approximately 1/8" of space remains under the head of the
screw. See Figure 3.
18) Align the keyholes in the fixture with the two screws and slide into
place. See Figure 4.
19) Tighten the screws and install bulb and reinsert lens.
20) Turn on the electricity at the circuit breaker or fuse box.
BULB REPLACEMENT INSTRUCTIONS
See the label on the fixture for replacement bulb type information. Do not
replace with any other wattage of fluorescent bulb.
1) Turn the fixture off and allow sufficient for bulb to cool before handling.
2) Remove the lens/diffuser by lightly pressing the front edge while lifting
upwards. The lens/diffuser should pop out easily. See Figure 1.
3) Remove the bulb by grasping the ends of the bulb and rotating until the
bulb becomes loose. Pull straight out from the lamp holder. Be
careful not to drop the bulb. See Figure 1.
4) Grasp the replacement bulb in the same manner and reinsert into
the lamp socket, and turn tube until it is securely held in place.
Do not use excessive force when installing bulb.
3 YEAR LIMITED FIXTURE WARRANTY
Jasco Products warrants that the fixture will be free of defects in material and workmanship for three
years from date of purchase. This warranty does not apply to the bulb. This fixture warranty is limited
to repair or replacement at Jasco’s option. Damage caused by modification, abuse , or misuse is not
covered. Jasco makes no other warranty express or implied of merchantability or fitness for a
particular purpose. In no event shall Jasco be liable for special, incidental or consequential damages.
Some states do not allow limitations on how long an implied warranty lasts and/or do not allow the
exclusion of consequential damages, so the above limitations may not apply to you. This warranty
gives you specific legal rights and you may also have other rights which vary based on your place of
residence. To obtain repair or replacement information under the terms of this warranty, return the
fixture and proof of purchase along with owner's name and address, postage prepaid to: Jasco
Products Company LLC, 10 E. Memorial Road, Oklahoma City, OK 73114
Figure 1
Lens/Diffuser
(front edge)
c
Cover/
Housing
®
LISTED
Figure 2
Strain Relief
Hot (Black)
Supply Wire
Neutral (White)
Supply Wire
Hot (Black)
Fixture Wire
Figure 3
Fluorescent Undercabinet Fixtures
Direct Wire (UCF003)
AC
Supply Wires
Ground (Green or
Copper) Wires
Neutral (White)
Fixture Wire
Figure 4
us