1
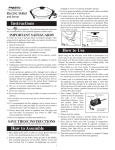
Important Cord and Plug Information A short power supply cord is provided to reduce the risk resulting from becoming entangled in or tripping over a longer cord. DO NOT USE WITH AN EXTENSION CORD. As a safety feature, this appliance has a polarized plug (one blade is wider than the other). This plug will fit in a polarized outlet only one way. If the plug does not fit fully in the outlet, reverse the plug. If it still does not fit, contact a qualified electrician. Do not attempt to defeat this safety feature. Getting Acquainted Your Pizzazz pizza oven will cook 7to 12-inch pizzas fast and easy without preheating. Use it to make frozen, takeand-bake, deli, or homemade pizza. The selectable heating elements (LOWER– DUAL–UPPER) let you make pizza the way you like best. Begin by using the recommended settings in the cooking chart on page 4. For your convenience, the chart is also on the back of the pizza oven. At the end of the recommended cooking time if you want your toppings more done, select UPPER. If you want a crispier crust, select LOWER. Then reset the timer by turning it beyond the “4” minute mark and then back to 1 or 2 minutes and cook until pizza is done to your satisfaction. To avoid overcooking, do not leave unit unattended. Whenever the unit is plugged in and the baking pan is correctly positioned, the motor will turn on and the pan will rotate. Once the timer is set, the heating elements will turn on. When the time has expired, the timer will ring and the heating elements will shut off. The pan will continue to rotate until either it is removed or the unit is unplugged. Heat Element Selector Switch (LOWER–DUAL–UPPER) Removable Baking Pan Timer Upper Heating Element “Curl” Fig. A Drive Shaft Lower Heating Element Lower Element Tray Unit Assembled “Curl” Cooking Chart How To Use Before using for the first time, become familiar with the Pizzazz pizza oven (Fig. A). Wash the baking pan in warm, soapy water; rinse and dry thoroughly. 1. Set pizza oven on a flat, dry countertop away from countertop edge. 2. Locate the two “curls” on the lower element tray (see Fig. A). Position the baking pan over the lower heating element at an angle so the back inside rim of the pan rests against the back of the “curls”. Now center the pan so the pan hub is over the drive shaft (Fig. B). The pan must be pulled forward against the “curls” for the hub to align with the drive shaft. Lower the pan so that the drive shaft is seated into the hub. The pan may rotate slightly while it drops into position, when the hub and drive shaft engage. 2 Baking Pan Pan Hub “Curl” Drive Shaft Fig. B Element Tray “Curl”