1
Installing The Light
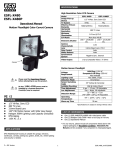
SPECIFICATIONS
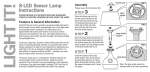
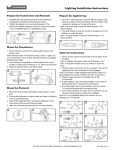
1 Slide the mounting plate off the back of the Porch Light (see illustration below).
Batteries: 4 C cell alkaline or Ni-mh
Voltage: 6V DC
Light Duration: 30 +/- 4 seconds
Detection Angle: 100˚ cone
Max Detection Distance: 25 feet
ATTENTION
To avoid damage to the electrical components, please observe the following
precautions:
2 Making sure that the
arrows on the mounting plate are pointed upwards,
securely fasten it to the wall or other stable surface using 2 wood screws (included).
Do not aim the sensor directly towards the sun.
3 Please note that it is generally recommended to drill pilot holes prior to fastening
the screws. In some cases, special fasteners for surfaces such as drywall, cement,
or brick may be required.
Do not expose the light to static electricity.
4 Slide the knob on the back of the Porch Light into the slot on the mounting plate.
5 Adjust the light and sensor as needed by swiveling it on the mounting plate
and/or rotating the light head.
Do not shake or drop the light.
Please note that circuit requires 90 seconds to stabilize after the
batteries are inserted.