Transcript
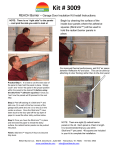
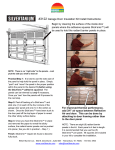
Installation Instructions
THOROUGHLY READ THIS INSTRUCTION SHEET BEFORE STARTING.
Required tools: felt tip marker, tape measure or
ruler, scissors or utility knife.
IMPORTANT WARNINGS:
1. Never Restrict Airflow into the Burner Area on a
gas water heater, (located at the tank bottom).
2. Do not cover or restrict the top venting hood,
the pressure relief valve, (located on top or side of
the tank), or the burner access cover.
3. Do not put material over access cover or the
wiring connection box on electric tanks.
4. DO NOT BLOCK any vent holes.
5. BEGIN Installation BY WRAPPING THE WATER
HEATER, STARTING AT THE TOP OF THE TANK.
Extend the material above the top of the tank and
“slice” the material like a pizza, folding down the
flaps to cover the top of the tank. Cut as many
strips as needed to cover the tank. Tape these
strips together to make a “jacket” for the tank.
Face the foil side of material away from the tank.
Do not tape to the tank at this time.
FINISH: CUT OPENING IN THE JACKET TO ALLOW
EXPOSURE OF THE POP OFF VALVE AND PIPE. Cut
out holes for burner cover, controls, drain, etc.
Make a hole about (2) inches larger than access
opening to allow plenty of airflow around burner
area.
Optional: You may want to tape the jacket to the
tank around the access hold. This will keep the
edges secure.
REACH Barrier LLC. 860 N. Dorothy Dr., Suite 608 - Richardson, TX 75081 - 972-331-3933
www.reachbarrier.com - [email protected]