1
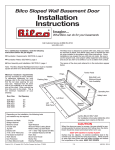
Classic Series Bilco Basement Door
Installation
Instructions
Imagine...
What Bilco can do for your basement
Bilco Customer Service (800) 854-9724
www.bilco.com
About These Instructions
It may be helpful to you to look through this entire folder before proceeding with the detailed assembly and
installation instructions. The names of the various parts referred to in the instructions are indicated below.
IMPORTANT: Door must be painted within forty-five (45) days of installation. See paint label on interior of door leaf or go to www.bilco.com for complete painting instructions.
Slide Bolt Lock
Header
Hinge
Right Door
Gas
Spring
Left Door
Right
Side piece
(optional Keyed Lock
Kit available)
Upper
Spring
Bracket
Lower Spring
Bracket
Left
Side piece
Sill
Patent # 6,799,395
Depending upon the type of installation,
some or all of the following will be required:
• Hammer and Nails
• Circular Saw
• Masonry Chisel
• Shovel and Trowel
• Level
• Tape Measure
• Electric Drill
• Flat blade Screwdriver
• Wrenches or sockets:
5/16”, 7/16”, 1/2”
• 5/16” Carbide Masonry Drill Bit
• Exterior grade
polyurethane caulk (opaque)
• Work Gloves
• Safety Goggles
CAUTION
When the doors are open for access, the area should be personally guarded to prevent
anyone from falling down the stairs. Doors should be closed and locked when not in use.
KEEP OFF DOORS TO AVOID INJURY
Surface may be slippery. In extreme conditions steel in the summer sun can become hot
and cause injury. White enamel or light color oil based alkyd enamel will reflect sunlight
and reduce the temperature of the metal. KEEP OFF DOORS
Printed in U.S.A. © Copyright, 2011, The Bilco Company, New Haven, CT 06505
04/11
ABC155B REV 8.0
Installing the door on an areaway that is smooth and level and
properly sized to fit the door
The Bilco basement door will shed water in all normal conditions only when installed and caulked in accordance with these instructions. If there
are no rain gutters above, a diverter must be installed to prevent roof water from flowing directly onto the door. If the foundation areaway that
you are installing the door on is not smooth and level, or does not fit the door properly, see the bottom of page 3 of these instructions.
Before installing the door, verify that
you have all the parts shown above
and that you have the tools required for
installation that are listed on page 1 of
these instructions. If you are replacing
an existing door, mix a small batch of
concrete and patch any holes in the
present concrete caused by the anchors
that held the old door in place.
STEP 1: Frame Assembly: The Bilco
basement door consists of six parts (the
names of the parts are on page 1) plus
a set of gas spring operators, and the
hardware* packed with this instruction
sheet. Start frame assembly by attaching
header to side pieces with four round
head bolts as shown in Figure #1A.
The header must rest on top of the side
pieces, with heads of bolts outside and
nuts below . Tighten bolts with wrench
to complete header installation.
Next, attach sill to side pieces using two
flat head bolts as shown in Figure #1B.
It is essential that the heads of bolts are
on the outside and the nuts are inside
as shown.
STEP 2: Anchoring the Door Frame to
the house and areaway Foundation:
Move assembled door frame into place
on foundation areaway. Make sure that
vertical edge of side pieces are flush
against the house. For replacement
applications, siding may need to be
removed and replaced to position door
frame properly. Place a level against
each side piece and check plumb as
shown in Figure 2A. Square door by
measuring diagonal dimensions as
shown in Figure 1. Shift frame as required until measurements A and B
are equal.
With the door plumb and square, mark
all anchor hole locations on foundation
areaway and wall with pencil or marker.
Remove frame from areaway and drill
all masonry anchor holes using 5/16”
carbide tip masonry bit. Once all anchor
holes are drilled, insert plastic anchors
into all holes flush with concrete as
shown in Figure 2A. Reposition frame
on areaway and anchor side pieces to
areaway foundation using #12 x 1-1/2”
slotted hex head screws. Anchor Sill to
areaway foundation using (3) #12 x 2”
pan head screws.
#1B
Round heads of
bolts outside
Left
side piece
Header
IMPORTANT:
Caulk vertical seam
between header
and side piece on
both sides
Flat heads
of bolts
outside
Nuts
inside
Nuts under
Sill
Right
side piece
A
#1A
#1
B
#2B
Drill anchor holes and
tap plastic anchors into
place. Secure side piece
flange to concrete with
hex head screws
Shingle or
Clapboard
Header
Sheathing
FRAME CONSTRUCTION
#2A
Flashing
(by others)
Header
Level
MASONRY CONSTRUCTION
Sill
Finish anchoring vertical flange and header to wall using the
appropriate fasteners for the wall construction as shown in
Figure 2B. (Note: these fasteners are not included in the
hardware package).
When anchoring is complete, replace shingles as required
and caulk all around the exterior of the frame where it meets
the masonry with polyurethane caulk (opaque) (Do not caulk
using mortar).
Caulk
Header
Drill anchor holes and tap plastic
anchors into place. Secure side
piece flange to concrete with three
slotted round head screws
*Hardware
(4)
(2)
(4)
(6)
(4)
(3)
1/4” x 1/2” round head bolts & nuts 1/4” x 1/2” flat head bolts & nuts
5/16” x 1-1/4” hinge & cotter pins
#12 x 1-1/2” slotted hex head screws
5/16” x 3/4” bolts & nuts
#12 x 2” slotted pan head screws
(9)
(2)
(1)
(4)
Plastic shields
Lower Spring Brackets
Pair of Gas Springs & fasteners
Rubber bumpers
IMPORTANT: Caulk vertical seams between header and side pieces as shown in Figure #1A.
Page 2
STEP 3: Door Installation: CAUTION: Doors are
heavy until gas spring operators are installed. Two
people may be required for door assembly. Install
right door by holding it vertically over the right side piece
as shown in Figure #3. Position the door so that the
door hinges fit into the hinge brackets that are welded
onto the side piece as shown. Line up the holes in the
hinges with the hinge pivot holes in the brackets and
insert the 5/16” x 1-1/4” hinge pins and cotter pins as
shown. Install the left door in the same manner.
Hinge Pin
#3
STEP 4: Gas Spring Installation: With the Bilco
basement door frame solidly anchored, the gas spring
operators can now be installed. Attach lower spring
bracket to side piece stiffener (on side of stiffener facing
top step) using (2) 5/16” x 1/2” bolts and lock nuts as
shown in Figure 4B. Attach ball fasteners supplied in
bag with gas springs to lower spring bracket and upper spring bracket as shown in Figure #4A & B. Note:
Make sure the that ball portion of the fastener is
facing towards the house on both brackets. With
fasteners securely tightened and door in the open
position, push gas spring onto lower ball fastener as
shown in Figure 4B until you hear it snap into place.
Position and snap other end of gas spring onto upper
spring bracket shown in Figure 4A to complete spring
installation. Repeat process on other door leaf.
Cotter Pin
Install hinge pin so that head of pin is facing towards the
house as shown (Left door and side piece shown)
IMPORTANT! An interior door at the bottom of the steps is
required to prevent heat loss and reduce condensation.
STEP 5: Painting the Bilco basement door:
A
A
IMPORTANT: Door must be painted within
forty-five (45) days of installation.
Push
The Bilco Basement Door and optional extension
panels are supplied with a uniform baked-on
Sherwin-Williams primer finish. See paint label on
the interior of the door leaf or go to www.bilco.com
for complete painting instructions.
Optional stair stringers and foundation plates are
galvanized steel but can be painted for aesthetic
purposes. If painted, a metal primer must be used
prior to applying the finish coat of paint.
B
B
Push
Figure #4
A:Upper Spring Bracket
Side piece
stiffener
Lower
spring
bracket
STEP 6: Rubber Bumper Installation: After the
finish paint has dried, install two rubber bumpers
in the holes on the outside edge of each door.
Bumpers are installed by twisting the small end
into the hole until it is fully seated. Bumpers
cushion the doors in the open position and protect
the finish paint.
B: Lower Spring Bracket
IMPORTANT: Install Gas Springs as shown with
larger diameter portion of spring on top.
Replacing a door where concrete
areaway is in need of major repair
If the surface of your concrete areaway is in need of major repair, you will need to
recap it or install Bilco foundation plates before installing your basement door.
Foundation Plates
Optional Foundation plates are the
fastest and easiest way to improve the
surface of an areaway with minor damage. They easily cover rough masonry
to improve the areaway’s appearance
and can be used to reduce the width of an odd size areaway to allow installation of a standard size door.
Foundation plates are constructed of galvanized steel for long-life and durability. Contact Bilco or your
local dealer for more information.
Capping your Concrete Areaway
If the surface of your foundation areaway is in need of major repair, the top of the areaway should be
recapped with concrete before installing a Bilco basement door. Contact Bilco for guidelines on recapping
your areaway or log-on to www.bilco.com to find a certified Bilco basement door installer in your area.
Bilco Foundation Plates
Page 3
Installation on sloped masonry side walls
Side walls in poor condition
If the slopped masonry side walls of your areaway have loose or crumbling masonry
and are not structurally sound, they can be removed and a door can be installed on
the new flat areaway after a concrete cap is poured. Contact Bilco for guidelines
on recapping your areaway or log-on to www.bilco.com to find a certified Bilco
basement door installer in your area.
Side walls in good condition
Doors can be installed on side walls if they are structurally solid, have no loose or
crumbling masonry, and have a uniformly flat and level surface on which to anchor
a door. If your side walls meet these conditions, it is best to return your door and
use a Bilco Sloped Wall Basement Door (see photo on far right).
How to correct installation errors or repair minor damage*
Door not shedding water. If your Bilco basement
door does not shed water, look for and correct
these installation errors.
5.Blocked header channel. Make certain channel
is clear. Any blockage in this channel will cause
water to overflow the header.
below. Pull door down on it to a point where you
feel pressure of the screw driver relieving binding condition.
1.Header not properly caulked at side pieces.
Run a bead of silicone caulk along the small
vertical seams between the header and side
pieces (see instruction 2 on page 2).
Doors Out of Alignment. This is caused by
failure to align the doors and square the frame as
instructed. With doors closed, sight across bottom.
Remove door that is higher than the other. Hold
vertically with top edge on the ground as shown
in Figure 1 below. Strike each hinge three or four
solid blows with a hammer. This bends hinges
in the direction of top of door, thus lowering it to
line up with other door. If additional adjustment
is necessary, remove lower door, place lower
end on ground and strike each hinge with a
hammer. This bends the hinges in the direction
of the bottom of the door, thus raising it to line
up with other door.
Hinge Damaged. A hinge can be bent downward
by mishandling during shipment or by someone
trying to force the door closed without releasing
the hold-open safety latch, and as a result the
door does not fit properly on the frame. Such
damage to a hinge can be identified by a bump
on the top of the door. To correct, remove the
door from the frame, place it on the ground with
the hinge side up and step downward on the
hinge to bend the pivot point back to its correct
location (see Figure 3 below). The other hinge
on that door, which has not been damaged, can
be used as a guide in bending the hinge back to
the proper place.
Doors Not Seated Properly. If doors do not seat
themselves properly or bounce slightly when in
closed position, and bottom flanges of doors are
not obstructed by concrete in front of sill, apply
lubricant such as WD-40 to hinges, then refer to
STEP 2 on page 2 and check frame for plum
and square. Hinge can also be adjusted to get
the door to seat properly. From below with door
open three-quarters of the way, insert a screwdriver along side of hinge as shown in Figure 2
Door Warped or Bent. Place the end of door
on a block or bottom step of a nearby stairway,
and step down on it with your foot. Door can be
bent back to the original shape very easily, but
when it’s installed on the frame and supported
all around it’s extremely strong and will not bend
during everyday use (see Figure 4 below).
2.Doors do not fully close. Stand on steps and
slowly close each door to see if the bottom
flange of one or both is binding on the concrete.
Chip away or rub down excess concrete with
mason’s stone so flange is not obstructed.
Refer to instructions at right for adjustments if
required.
3.Masonry not high enough. The masonry under
the Bilco basement door should be 4” higher
than the surrounding grade and concrete should
be level so water cannot accumulate in front
of the sill.
4.Water seeping between steel and masonry. Door
should be caulked all around the exterior where
the steel and masonry meet, as well as where
the unit joins the building wall. If side pieces
have been buried in concrete, the unit should
be removed and stairwell recapped so that the
assembly rests on top of the areaway.
Bilco Basement Door
Warranty
Figure 1
Figure 2
Bilco Basement Doors are designed
to operate to the customer’s
satisfaction and to provide years
of trouble-free service. Should a
part fail to function in normal use
within a period of five (5) years
from the date of purchase, a new
part will be furnished at no charge.
Finish warranty voided if doors
are not painted inside and out per
instructions in STEP 5 on page 3
within (45) days of installation.
Figure 3
Figure 4
Bilco Customer Service
(800) 854-9724
*The Bilco basement door is carefully and adequately packed to withstand all normal shipping abuse.
This information is provided to show how easily minor repairs can be made, thus saving the builder or
homeowner much unnecessary inconvenience. For additional information or assistance, please contact
our customer service department .
Page 4
(Mon- Fri)
www.bilco.com