Transcript
SCAPEWEL
®
Deep Well Installation Instructions
READ ALL INSTRUCTIONS BEFORE INSTALLATION
Window Well
Side Panel
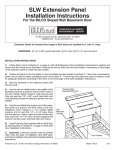
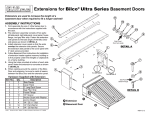
STEP 2: Once the window well is installed, align each extension side panel
with the window well sides as shown in
Figure 1 and attach them to the foundation using masonry anchors. Use (2)
masonry anchors at the very top of each
extension side panel and (1) at the very
bottom. (Note: extension side panel
mounting flanges may be repositioned
to the inside if required, refer to STEP 2
of the installation instructions provided
with the window well).
Extension
Side Panel
Extension
Step Panel
Figure 1
Window Well
Side Panel
Panels Attached
Using 1/4” Screws
STEP 1: Excavate the area to the adequate depth for the window well and
extension. Once the areaway has been
excavated, install the standard window
well on the foundation per the instructions in the window well carton. The extension panels will be added after the
standard window well is installed.
Connector
Plate
Attach extension side panels to window
well side panels using the 1/4-20 x 1”
screws provided, see Figure 2.
STEP 3: Attach connector plates to the
side panels as shown in Figure 2 using
the 1/4-20 x 1” screws provided.
Attach to
Side Panels
Using 1/4”
Screws
Extension Side Panel
Figure 2
STEP 4: Position the extension step
panel as shown in Figure 1, snapping it
into place. Cross-pin the step panel to
each of the extension side panels at the
pre-marked location using nails per
STEP 4 and FIGURE 4 of the installation instructions provided with the window well.
STEP 5: Backfill the area per STEP 6 of
the of the installation instructions provided with the window well.
Installation Questions ?
Call 1-800-854-9724
Building on Our Tradition
TM
Monday - Friday
8:15 A.M. - 5:00 P.M. E.S.T.
or log on to www.bilco.com
The Bilco Company, P.O. Box 1203, New Haven, CT 06505
MSC308 Rev-2