Transcript
Shutter-Lok
Installation Instructions
For use on any surface including: wood, aluminum, vinyl, stucco, hardboard, brick, or masonry.
Required for Installation:
Electric drill, 1/4" drill bit, hammer, and Shutter-Loks
Step 1
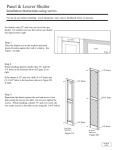
Place the shutter next to the window and mark
desired location against the wall or window. See
Figure 1 at right.
top of shutter
window
Fig. 1
Step 2
For smaller sizes use four Shutter-Loks per
shutter. For large sizes 55" and over, use six
Shutter-Loks per shutter.
Step 3
To help ensure proper alignment mark or pre-drill
holes using a 1/4" drill bit into the shutter before
attaching it to the wall.
Step 4
With the shutter in location against the wall, drill
through the shutter into the wall surface 3 1/4"
deep. Make sure you drill holes deep enough so
the Shutter-Lok doesn't bottom out.
Step 5
Grasp the Shutter-Lok supporting shank and push
it through the shutter hole and into the wall
surface. Tap the Shutter-Lok gently with a
hammer to snug the shutter against the siding. Do
not over tighten , or this will cause the shutter to
dimple.
Four Shutter-Lok
Application
Six Shutter-Lok
Application
Note:
To remove shutters do not attempt to pull out the
Shutter-Loks. Simply use a pair of snips and slide
them behind the shutter to cut the Shutter-Lok off
at the shank.