Transcript
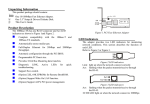
Streaming XRay Vision Upgrade
Important! Use of the Video to USB Converter
requires Windows 95 OSR2.1 with USB support or
Windows 98/XP/2000. Do not plug in the Video
Converter until the X10 software is installed.
Installing the XRay Vision Software
Before you connect the Video to USB
Converter (model VA10A) you must first
install the drivers and XRay Vision
Software. Download the software using
the link in the e-mail you received.
Next, run the installation application. Select the
directory where XRay Vision will be installed and
decide how you want XRay Vision listed on your
Windows Start menu. After that, the XRay Vision
installation program will automatically finish. You
are now ready to set up the Video to USB Adapter.
Installing XRay Vision Remote
Viewer
After you have installed the XRay Vision
server, you can use the XRay Vision
remote viewer look at your images from
any PC connected to the Internet. The remote
viewer is automatically installed with the server.
You can send the installer applications to family
and friends for their use in installing the remote
viewer.
For more help, see:
http://www.x10.com/support
Installation Notes:
Connecting the USB Video Capture
Adapter
When the installation
program instructs you to,
plug the Video to USB
Converter connector into a USB port
on your computer. The computer will
recognize that new hardware has
been installed and complete the
installation.
Connecting the Video Receiver to the
Video Capture Adapter
1. Plug the yellow video
plug on the supplied cable
into the Video Out jack on the
VR30A.
2. Connect the other end of the cable
to the yellow Video In jack on the
Video Capture Adapter.
3. Plug the PR30A power supply
into any 120V AC outlet.
4. Plug the power output of the
PR30A into the DC 12V plug on the
VR30A.
5. Make sure the switch on the
underside of the VR30A is set to the
same letter as that on the VT30A
video transmitter.
MODEL
NUMBER:
IN42A
©Copyright 2000 X10 Wireless Technology, Inc.