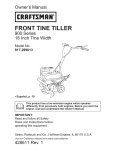
1
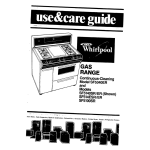
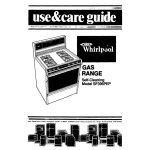
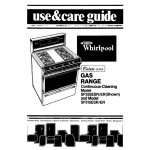
AS
’ Self-Cleaning
Models
SF375BEP (Shown)
SF365BEP
wave Ovens.
TrashComPaCtOrs.
Room Air Condltlonerr.
Dehumldlllers.
Automatic
Washers,
Clothes
Dryers.
Freezers,
Relrlgentor-Fl
1 Contents
Page
Pcme
BdoreYoulheYour
Pallgo , . . . . . . . . .
.......
Important Safely Insbuctlons
Parts and Peahwes.
..
..
Using Your Range
2
3
5
6
Using the Surface Burners
Setttng the Clock
Using the Mlnute Timer,
Uslng the Oven Controls
Baklng
.
. .
Brolllng .
. .. ...
Using the Automatic
MEALTIMER’ Clock
....
OvenVent
................
Storage Drawer
6
7
8
8
8
9
10
11
12
Caring for Your Range
.
...... ...
Control Panel
Surface Burner, Grates and
Reflector Pans.
Surtace Burners
.
..
Removable
Cooktop
Using the Self-Cleaning
Cycle
.
Cleaning Chart
Cooktop Ltght . . .
..
Oven Llght . . . .
.. .
If You Need Sewloe or
Assistance. . . .
.
I
01984 Whlrlpool
Corpomtion
..
..
13
13
,.
14
14
.
15
16
19
;;
22
‘Trl
Before you use your range
Read and carefully follow the g~INSTAUAllON INSTRUCTIONS”
packed wtlh your mqge.
Read thlr Use 6 Care Guide and The Cooklng Guide for Important
Information.
safety
Youare personally
l
l
l
l
l
l
l
l
responsible
for:
Reading and following all safety precautions
in this Use & Care Guide and the
Cooking Guide.
Having your range installed by a qualified
installer.
Installing the range where it is protected
horn the elements, and on a level floor
strong enough to hold its weight.
Having your range properly connected
to electrical
supply and grounded.
[See “lnstallatton
Instructtons:‘)
Having your range properly connected
to the proper gas supply and
checked for leaks. (See “lnstallattoh Instructtons:‘)
Making sure the range is not used by children or anyone unable to operate it
properly
Properly maintaining
your range.
Using the range only for jobs expected
of a home range.
See “Cooking
Guide” for Important
safety and use Informalion.
IMPORTANT
SAFETY INSTRUCTIONS
1. DO NOT allow
6. KEEP pan handles turned in, but
not over another surface burner
to prevent burns, injury and to
help prevent the utensil from
being pushed off the cooktop.
2. DO NOT store things children
might want above the range.
Children could be burned or
injured while climbing on it.
7. DO NOT use water on grease
3. DO NOT allow anyone to touch a
hot surface burner, oven burner
or areas around them They
could be hot enough to burn
severely.
8. DO MOT wear loose or hanging
garments when using the range.
They could ignite if they touch a
hot burner or surrounding area
and you could be burned.
4. KEEP children away tram me
range when it is on. The cooktop,
oven walls, racks and door can
be hot enough to cause burns.
9.DONOlheatunopenedcon-
children to use or
play with any part of the range,
or leave them unattended
near
it. They could be burned or
injured.
5. DO NOT use a range to heat a
room. Persons in the room could
be burned or injured, or a tire
could start
fires. The fire will spread. Cover
tire with large lid or SmottIer wtlh
baking soda or salt.
10.
tainers. They could explode. The
hot contents could burn and
container particles could cause
injury.
When adding or removing
food, MAKE SURE to open the
oven door all the way to
prevent bums.
continued
on next page
11. DO NOT use
a wet pot holder.
Steam burns can result. DO MOT
use a towel or bulky cloth as a
pot holder. They could catch fire
and burn you.
u.
to collect around range or
In vem Wipe spilloven
M. MAKE SURE the utensils you use
are large enough to contain
food and avoid boil overs and
spilloven. This will help prevent
hazardous build-ups of food.
Heavy splattering
or spilloven
left on a range can ignite and
burn you. Pan size is especially
important in deep fat frying.
GREASE is flammable
and
should be handled carefully. Let
fat cool before attempting
to
handle it. Do not allow grease
immediately.
15. NEVERuse
a match or other
flame to look for a gas leak.
Explosion and injury could result.
16.
13. DO NOT leave surface burners
on high heat settings. Boil overs
and greasy spillovers could
cause steam, smoke and could
ignite and burn you.
Do NOT repair or replace any
parts unless specifically
recommended in this manual. All other
servicing should be referred to a
qualified service technician.
.FORYCUPSARn.
DO NOT STORE OR USE GASOLINE OR OTHER FIAMMABLE VAPORS AND LIQUIDS
IN THE VICINITY OF THIS OR ANY OTHER APPLIANCE. THEY COULD IGNITE
CAUSING EXPLOSION AND/OR FIRE.
- SAW THESE INSTRUCTIONS
Copy your Model and Serial Numbers here...
If you need service, or call with a
question,
have this information
ready:
1. Complete
Model
and Serial
Numbers (from the plate located
as shown].
2. Purchase date from sales slip.
Copy this lnformatian in these
spaces. Keep this book, your
warranty and sales slip together in
the Lttemture Pac.
There Is no warranty registration
to return. Proof-of-purchase
is all mat
Is required for It-bwarranty service.
Mod.1
Number
Sorlal
Number
PUICMSU
Sorvke
Date
CompanYPhono
Numbor
-
Parts and features
Models
SF375BEP and SF365BEP
cLocw
START
STOP
CLEAN LIGHT
OVEN SIGNAL
LIGHT
TOP LIGHT
CHROME
REFLECTOR PAN
SURFACE BURNER
AND OVEN CONTROLS
OVEN RACK GUIDE
-
LOCK LEVER
BLANKET-O-FLAME6
BROILER
FIBERGLASS
HEAT SEAL
STORAGE DRAWER
LITERATURE PAC
(not shown)
SELF-CLEANING
OVEH
&EN
BURNER
5
Using your range
TOP LIGHT
SWITCH
LEFl FRONT ’
CONTROL KNOB
OVEN
SELECTOR
OVEN
TEMPERATURE
LEFI REAR
CONTROL KNOB
SURFACE
BURNER
INDICATORS
RIGHT REAR
CONTROL KNOB
RIGHT FRONT
CONlROl
KNOB
Using the Surface
Burners
Control knobs must be pushed In,
then turned to the LITE position. The
clicking sound is the ignition
sparking.
To stop the clicking sound after the
burner lights, turn the control knob
back to a desired setting. The control
knob has stops for HI, MED and LOW,
however it can be set anywhere
between HI and OFF Do not cook with
the control In the LllE posttton.
In Case of a Prolonged
Power Failure
Surface burners can be manually lighted. Hold a lighted match near a burner
and turn the control to the LITE position. After the burner lights, turn the control to
the desired sefflng.
6
See the “Cooking Guide” for important utensil information.
Until you get used to the sefflngs, use the tollowing as a guide:
Use LITE to light
the burner. After
the burner lights,
turn control
back to a desired setting to
stop the clicking
of me ignition.
Use HI to start
foods cooking
or to bring liquids to a boil.
Do not cook
with the control
In the LITE positton.
Use MED to continue cooking or
to fry chicken or
pancakes;
for
gravy, puddings
and icing or to
cook large
amounts of vegetables.
Use LOW to
keep foods
warm until
ready to serve.
Setting the Clock
Push In and turn the Minute Timer Knob to set the Clock.
1. Push In Minute Timer Knob and
turn clockwise
until clock
the right time of day,
shows
2. Let the Minute Timer Knob pop
out. Turn clockwise
until Minute
Timer hand points to OFF.The
clock setttng will change If you
push In the knob when turning.
7
Using the Minute Timer
The Minute Timer does not start or stop the oven. It works like a kitchen timer.
Set it in minutes up to an hour. You will hear a buzzer when the set time is up.
DO NOT PUSH IN THE KNOB when setting the Minute Timer.
1. Without pushing it in, turn
the
Minute Timer Knob until the hand
passes the setting you want.
2. Without pushing in, turn the knob
back to the setting you want.
When the ttme is up, a buzzer
will sound. To stop the buzzer, turn
the Minute Timer hand to OFF
PUSHING IN AND TURNING THE MINUTE TIMER KNOB CHANGES THE CLOCK
SEllING.
Using the Oven Controls
Baking
Rack(s) should be placed so the
top of the food will be centered
in the oven. Always leave at least
1Yzto 2 inches (4-5 cm] between
the sides of the pan and the oven
walls and other pans. For more
information, see the “Cooking
Guide:’
1.
Position the rack(s) property
betore turning on the oven. To
change mck posltton, pull rack
out to stop, raise front edge and
litt out.
I
2. Set the Oven Selector
on BAKE.
/
3. Set the Oven Temperature Control
to the baking temperature
you
want. The oven burner will automatically
light in 50-60 seconds.
5. During baking, the oven burner
will turn on and off to maintain the
temperature
setting.
When baking is done, turn both
the Oven Selector and the Oven
Temperature Control to OFF.
4. Preheat the oven. Put food in the
oven. Note: Oven racks, walls
and door will be hot. Do not
place food directly on oven
bottom.
Blloiling
The Blanket-C&Flame”
Broiler uses infra-red rays to cook the food. Infra-red rays
create fast, searing heat and consume most smoke and spatters. Always broil
WHII the oven door closed.
1.
Position the rack before turning
the oven on. See rack placement
chart and broiling chart in
the “Cooking Guide” for recommended rack positions.
2. Put the broiler pan and food on
the rack and Completely
Close
me oven door, DO NOT PREHEAT
THE BROILER BEFOREUSING.
I
3. Set the Oven Selector and the
Oven Temperature
Control to
BROIL. The broiler will automatitally light in 5040 seconds.
4. When broiling is done, turn both
the Oven Selector and the Oven
Temperature
Control to OFF
DO NOT PREHEATTHE BROILER BEFOREUSING. CLOSE OVEN DOOR
DURING BROILING.
Using the Automatic
MEALTIMER*
Clock
The automatic
MEALTIMER’ Clock is designed
to turn the oven on and off at times
you Set, even when you are not around.
Automatic
baking is ideal for foods which do not require a preheated
oven such
as meats and casseroles. Do not use the automatic cycle for cakes, cookies,
etc...undercooking
will result.
To start and stop baking automatically:
Position the oven rack(s) properly,
and place the food in the oven.
3. Push in and turn the Start Time
Knob clockwlre
to the time you
want baking to start.
10
‘Tmk.
2. Make sure the clock is set to the
correct time of day.
4. Push in and turn the Stop Time
Knob clockwise to the time you
want the oven to shut off
5. Set the Oven Selector
BAKE.
6.
on TIMED
Set the Oven Temperature Control on the baking temperature
you want. The oven will now start
and stop automatically.
After baking is done or to stop
the oven before preset time, turn
both the Oven Selector and the
Oven Temperature
Control to OFF.
To start baking
1. Position rack(s)
now and stop automatically:
properly,
2. Make sure the clock
and place
the food in the oven.
is set to the right time of day.
3. Push in and turn the Stop Time Knob clockwise
to shut off
4. Set the Oven Selector
to the time you want the oven
on TIMED BAKE.
5. Set the Oven Temperature
Control on the baking
temperature
you want.
6. Atter baking is done or to stop the oven betore the preset time,
the Oven Selector
and the Oven Temperature
The Oven Vent
Hot air and moisture escape from
the oven through a vent just under
the cooktop light. Do not block
vent. Poor baking will result.
OVEN VENT
Control to OFF.
turn both
The Storage Drawer
The storage
drawer
is for storing pots and pans.
Use care when handling
Removing
1.
the storage
drawer
Pull drawer straight out to the
first stop. Lift front and pull out to
the second stop.
Replacing
1.
the dmwer. The edges could be sharp.
the storage
2. Lift back sliqhtly
all the way-out:
and slide drawer
drawer
Fit ends of drawer slide rails into
the drawer guides on both sides
of opening.
2. Lift drawer front and push in until
white stops on drawer slide rails
clear white stops on drawer
guides, men slide drawer closed.
Use & Cae
Guide stomge
Store this booklet, along with your
“Cooking Guide:’ sales slip and warranty in the Literature Pat, inside the
storage drawer.
Caring for your range
Control Panel
1.
Pull knobs straight off.
3. Wash knobs in warm soapy water
or use baking soda and a damp,
soft cloth. Rinse well and dry
2. Use warm soapy water or baking
soda and a damp soft cloth to
wipe the control panels. Rinse
and wipe dry.
4. Push the knobs straight back on.
Make sure they point to OFF.
CAUTION: Do not use abrasive
cleansers. They could rub off the
marklngs.
13
Surface Burner Grates and Reflector Pans
2. Lift off the burner grates. For
Model SF375BER lift off the reflector pans.
3. Wash the grates and reflector
pans in warm soapy water. Rinse
and dry well.
4. Replace reflector pans (Model
SF375BEP). Replace burner
grates.
Surface Burners
I
TYPICAL TOP BURNER FLAME
To remove the cooktop, follow the instructions on page 15.
Wipe off surface burners with warm soapy water and a soft cloth after each use.
Occasionally
check surface burner flames for size and shape as shown. If
flames do not bum properly, you may need to remove the burners for cleanrng
(see page20). or call a qualified technician
for adjustment
14
Removable Cooktop
1.
Remove Surface Burner Grates.
For Model SF375BEFI remove
Reflector Pans.
2. Lift front of cooktop enough to
clear front of range. Grasp both
sides of the cooktop, lift and pull
forward to remove.
3. Wipe surface under the cooktop
with warm soapy water. Use
soapy Steel-WOOI pad on stubborn spots.
15
Using the Self-Cleaning
Cycle
The self-cleaning
cycle uses very high heat to burn away soil Before you start.
make sure you understand
exactly how to use the cycle safely,
Before You Start
1. Clean the shaded
areas by hand
They do not get hot enough during the Self-Cleaning
cycle for
soil to burn away. Use hot water
and detergent or a soapy steel
wool pad on...
l the frame
around the oven.
l the inside
of the door, especially
the part outside the oven seal.
DO NOT clean the fiberglass seal.
DO NOT move it or bend it. Poor
cleaning and poor baking will result.
2. Remove the racks, broiler pan
and any pots and pans you may
have stored in the oven. They
can’t stand the high heat.
3.
Wipe out any loose soil or grease.
This will help reduce smoke and
possible flare-ups during the
cleaning
cycle.
Oven racks and chrome reflector pans must not be cleaned in
the oven. They will warp and
discolor.
Clean Door
Turn on the vent hood or other kitchen vent during the cleaning
cycle.
This will help remove smoke, odor and heat that are normal during the cycle.
SPECIAL CAUTIONS:
DO NOT use commercial
oven
cleaners in your oven. Damage
the porcelain
finish may occur.
to
DO NOT force the Lock Lever, you
could bend or break it. The lever is
designed to stay locked until the
oven is cool enough to safely open.
Wait until it moves freely.
DO NOT use toil or other liners in the
oven. During the cleaning
cycle foil
can burn or melt and damage
the
oven sutface.
16
Sefting the Controls
for Self-Cleaning
Be sure the kitchen Is ventilated during the Self-Cleanlng cycle. lhls will
remove normal smoke and heat odors from the room as quickly as posslble.
1.
Make sure the Clock, Start and
Stop Times all have the right time
of day.
3. Set the Oven Selector to CLEAN
The Oven Temperature
Control
must be in the OFF position.
2. Push in the Stop Time Knob and
turn the hand clockwise 2-2Yz
hours.
l Use 2 hours for light soil.
l Use 2!‘2 hours for moderate
to
heavy soil.
4. Move the Lock Lever to the CLEAN
position. This will start the SelfCleaning Cycle. If the door is not
completely
closed or the lever
is not all me way to me right, the
cycle will not start.
When the oven temperature
exceeds normal baking temperatures, the oven door can’t
be opened and the Lock Lever
must not be moved.
t
5. After the Clean Cycle is
completed and the oven temperahrre has dropped below
500°F (260X), the Lock Lever can
be moved back to the COOk
Position. Do not force ft. Wait until
it will move easily, Turn the Oven
Selector to OFF
6. After the oven Is cool, wipe off
any residue or ash with a damp
If needed, touch up spots
with cleaner or plastic scouring
pad.
17
d0m.
Special
flps
Keep the kitchen well ventilated
during the cleaning
cycle to help
get rid of normal heat, odors and
smoke.
Clean the oven before it gets
heavily soiled. Cleaning
a very
soiled oven takes longer and
results in more smoke than usual
If the cleaning
cycle doesn’r get
the oven as clean as you expected, the cycle may not have
been set long enough or you
may not have prepared
the oven
time
properly. Set the cleaning
longer the next time and hand
clean areas noted on page 16.
To stop the cleaning
ttme:
1. Push
cycle at any
in and turn the Stop Time
Knob clockwIse
until it points to
the right time of day.
2. Turn the Oven Selector to OFF.
When the oven temperature
drops below 500°F (260°C) the
Lock Lever can be moved to the
COOK Position. Do not force it.
Wait until it moves easily.
How It Works
During the self-cleaning
cycle. the oven gets much hotter than it does for baking
or broiling...approximately
875’F (468°C). This heat breaks up grease and Soil and
burns it off.
The graph shows approximate
temperatures
and times during a self-cleaning
cycle for 2Yz hours.
SELF-CLEANING
(Approximate
CYCLE - 2Y2 HOUR SEI’TING
Temperatures
and
TimesJ
1000-F
538’C
800-F
A27’C
6Oo’F
316’C
400°F
200°F
SIART
V? hr.
1 hr
1K hrs.
2 hrs.
2Vz hn.
3 hrs. STOP
Notice that the heating stops when the 2Y2 hour setting is up, but that it ta kes
longer for the oven to coal down enough to unlock.
Cleaning Chart
PART
WHAT TO USE
EXld0r
Sort cloth and warm soapy
water or baking soda.
Nylon or plastic scrubbing
pad for stubborn spots.
surfacer
Surtace
0-m
bumer
Automatic
dlshwasher
or
warm soapy water and
plastic scrubbing
pad.
HOW TO CLEAN
l
Do not allow toad contalnlng
acids (such as vinegar, tomato,
lemon Juloe or milk) to remain on
surlace. Adds wll remove the
glossy flnlsh.
l Donotuseabrasiveorharsh
cleansers.
l
l
l
l
Automatic
dlshwasher
or
warm soapy water and
plastlc scrubbing
pod.
Wipe off regularly when cooktop and lower oven are cool.
Wash with other cooklng
utensils.
Dry completely.
Do not place In Se&Cleaning
OVUL
Wash wlm other cooklng
utensils.
.DonotplacelnSelt-Cm
oven.
l
continued
on next
page
19
PART
Surlace
HOW TO CLEAN
WHAT TO USE
mrs
Bmller pan
and grid
Warm soapy water, a
plasttc scrubbing
pad,
dishwashing
detergent
or a solution of 1 quart
of bolling hot water
and 2 tablespoons
of DIP IT?
Warm soapy water and
plastic scrubbing
pad.
Remove cooktop, see page 15.
Wipe off spills immedlately
atter burner has cooled.
In case ot stubborn stains:
l Remove
burner trom manltold
with philllps screwdrlver.
l Soak in warm
soapy water and
wipe with plastic scrubbing
pad
and dlshwashlng
detergent.
If
stain Is sltll there, soak 20 mlnutes In bolllng water and DIP IT@
solution. Be sure the solulton
covers the whole burner.
l Rinse and dry well.
l If ports are clogged,
clean with
a straight pin. Do not enlarge or
dlstorl portr. Do not use a
wooden toothplck.
9 Do not clean surtace burner In
dlshwasher.
l
l
l
l
and
l Wash, rinse and dry well.
9 Do not soak.
Control
knobs
Warm soapy
soft cloth.
Control
panels
Warm soapy water or
baking soda, soft cloth
and spray glass cleaner.
l
Warm soapy water and
plastic scrubbing
pad.
l
Oven mcks
water
l
l
Oven door
gla$s
Spray glass cleaner;
warm
soapy water and sott cloth.
l
l
l
Setl-Cleaning
Oven
50
For areas outside SelfCleaning
area use warm
soapy water or plastic
scrubbing
pad.
Wash with other cooking
utensils.
Do not place In Self-Cleaning
Oven.
Wash, rinse and dry well.
Follow directions
provided
cleaner.
with
Wash, rinse and dry well. Use
plastic scrubbing
pad tor stubborn areas.
Do not place In Selt-Cleaning
Oven. The Intense heat could
warp them.
sure oven Is cool.
Follow directions
provided
cleaner.
Wash, rinse and dry well.
Make
with
* Follow directions
starting on
page 16. ‘Using the SelfCleaning
Cycle:’
9 Do not use commercial
oven
cleaners.
l Do not use toll to Ilne the bottom of your Selt-Cleaning
Oven.
The Cooktop Light (Model SF37f;BEP only)
The Top Light switch Is on the left side of ttit
1. Pull
range
away
*>nf c xltrol
panel.
from back wall
2. Remove the screw from the console access panel
3. Wtth both hands, remove the access panel.
4. Grasp the fluorescent tube at both ends. Roll tube until both ends come
the receptacles.
Replace with a 20-watt cool-white fluorescent tube.
5. Replace
the access
6. Turn the power
back
panel
and the screws, then push range
on at the main power
back
out of
into place.
supply.
The Oven Light
The Oven Light will come on when you open the oven door.
2. Push up bulb cover, retainer and
seal to clear bottom screws, then
remove.
Remove the top screws from the
bulb cover and loosen the bottom
screws.
21
3. Remove the light bulb from its
socket. Replace with a IO-watt
appliance
bulb.
I
I
CAUTION: The bulb cover must be In
protects the bulb from breaking.
4. Replace bulb cover, retainer, seal
and top screws. Tighten screws.
Turn the power back on at the
main power supply.
place
1
when using the oven The cover
NOTE: The Oven light will not work during the self-cleaning
cycle.
If you need service or assistance,
we suggest you follow these four steps:
1. Before calling for
assistance...
l
if burner flames are uneven:
Performance
problems often result
from littte things you can tix yourself
wlthout tools of any kind.
l
. Is the range properly connected
to gas and electrical
supplies?
(See “Installation
Instructions?)
l Have you checked
the main fuse or
circuit breaker box?
l Is the How of combustion
and/or
venttlatton air to the range
blocked?
Do not block the alr
l
l
If burner falls to ilght:
l
l
Is the
trlcal
Have
circuft
22
range connected
to elecpowen
you checked
the main fuse or
breaker box?
The air/gas mixture may be incorrect. (Call for service.)
if burner makes a popplng
when ON:
l
nolse
Is the burner wet from washing?
Let dry.
If control knob(s) wlil not turn:
ffow to and around the mnge.
If the oven will not operate:
Is the Oven Selector turned to a
setting [BAKE or BROIL, but not TIMED
BAKE)?
Is the Oven Temperature
Control
turned to a temperature
setting?
Are burner ports clogged?
(See page20.)
If burner flames lift off ports, are
yellow, or are noisy when turned off:
If nothlng operates:
l
Are burner ports clogged?
(See page20.)
l
Did you push in before
turn?
If the SeWCleanIng
operate:
l
l
l
trying to
Cycle will not
Is the Oven Selector set on CLEAN
and the Oven Temperature Control
set on OFF?
Does the Start lime Dial show the
correct time of day?
Is the Stop Time Dial set ahead
to the time you want the cleaning
cycle to stop?
Is the Lock Lever all the way to the
right?
l
If cooking muffs am7
expected:
3.
Whirlpool
has
a nationwide
network of franchised
TECHCARE * Service
Companies.
TECU-CAPE
TECH-CARE servF”APdCHISLcl
SEIVICE
ice technicians
are trained
to fulfill the product warranty
and provide
after-warranty
service, anywhere
in the United StOteS.
To locate TECH-CARE service in your
area, call our COOL-LINE service assistance telephone
number (See Step
2) or look in your telephone
directory
Yellow Pages under:
whaf you
0 Is the range level?
l Are you uflng
pans recommended
in the Cooklng Guide?
l Does the flame size fit the cooking
utensil being used? (See the Cook-
Ing Gulde.)
If baking, have you allowed Wzto 2
inches (4-5 cm) on all sides of the
pans for air circulation?
l Have you preheated
the oven
before cooking?
l Are the pans the size called
for in
the recipe?
l Are you following
a tested recipe
from a reliable source?
l If broiling,
have you completely
closed the oven door? Blanket-OFlame” Broiler provides best cooking results with the oven door
closed.
l Do the cooking
utensils have
smooth, flat bottoms?
See the Cooking Guide for more
information on cooking problems
and how to solve them.
l
2. If you need assistance?.
Call Whirlpool COOL-LINE’ service
assistance telephone number. Dial
free trom:
Continental U.S. . . (800) 253-1301
Michigan . . . . . . . . (800) 632-2243
Alaska 6 Hawaii . (800) 253-1121
and talk with one of our trained Consultants. The Consultants
can instruct
you in how to obtain satisfactory operation from your appliance
or, if service is necessary,
recommend
a
qualified
service company
in your
area
FSPISa regstered trademark
of Whlrlpco Corporation
for
quahty parts Lcok for this
symbol of quality whenever
FSP
you need a replacement
part
@ f0( your Whirlpool appliance
FSP replacement
parts
WIII fit nghl and wti nghl, because they are
made to the same exacting specrflcatlons
used to build every new Whtrlpool appliance
0
lf you. need service?..
4.
I.
lf you have a
problem%.
Call our COOL-LINE service assistance
telephone
number [see Step 2) and
talk with one of our Consultants, or if
you prefer, write to:
Mr. Robert F Gunts. Vice President
Whirlpool Corporation
Administrative
Center
2000 US-33 North
Benton Harbor, Ml 49022
*If you must call or write, please provide. model number, serial number,
date of purchase, and a complete
description
of the problem.
This
information
is needed
in order lo
better respond
to your request for
assistance.
23
Making
your world a little easier
Part No. 36062040-03-O/786295
01984 Whirlpool Corporation
Mashers,
Clothes
Oryers.
Freezers.
Relrlgeralor-Freelerr.
Prlnted in U.S.A
Ice Mahers.
DIshwashers.
Built-In
Ovens
and Surface
Un~ls.
Ranges.
MICI