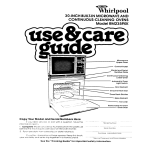
Download Whirlpool RM778PXT User's Manual
Transcript
Number Plate
Selt-Cleaning
Lower Oven
flbeigloss
Copy
Heat Seal -
Your Model
and Serial Numbers
If you need service,
information
ready:
or call with a question,
Here
have
this
Model
Number
1. Complete
Model and Serial Numbers (from the plate
behind the microwave
oven door on the oven frame).
2. Purchase date from sales slip (or date installed],
just
Serial
Number
Copy this information
in these spaces. Keep this book.
your warranty and sales slip together in a handy place.
See Cooking Guide for important
Purchase/Installation
Service
Company
safety information.
Date
and Phone
Number
Year responstWties...
Proper lnstallatlon and safe use of the oven are your personal
responslbllltles. Read thls “Use and Care Gulde”and the “Cooking
Gulde”carefully
for Important use and safety Informatlon.
You must be sure your oven Is...
l Installed
and leveled in a wall or
cablnet that will hold the weight;
l installed
In a well-ventilated
area protected
from the
weather;
l
properly
connected
to the correct electric supply and
groundlng.
(See “lnstallatlon
Instructlons.“)
Properuse
You must b@ sure your oven Is...
l used only for jobs expected
of home ovens;
l used only by people
who can
operate It properly;
0 properly
maintained.
Contents
Page
Page
Your Responsibilities
lnstallotron
Proper Use
Safety
Precautrons
to Avord Posstble
Exposure
to
Excessive
Mrcrowave
Energy
Using the Microwave
Upper Oven
Setting the Clock
Using the Minute nmer
Cookrng
In One Cycle
Hugh Cook Power
Lower Cook Powers
Defrosting
Faster or Slower Defrostrng
Cookrng
tn Two Cycles
Cookrng
Automatrcally
After Defrostrng
Cooking
to a Serving
Time
Serve fime and the Temperature
Probe
Cooking
wrth the Temperature
Probe
Changing
or Concelling
InstructIons
OtherOperatIng
Hunts
Cleaning
the Mrcrowove
Oven
Important
lnlormotron
How Mrcrowove
Ovens Work
B-Level
Oven Rack
2
2
2
3
4
4
5
6
7
7
7
9
9
10
12
14
15
16
18
18
18
19
21
21
Using Your Lower Oven
The Lower Oven Controls
Boking or Roasting
Adfusting
the Oven Tem’peroture
Control
Usrng the Automatic
MEALTIMERClock
Brotltng
Broiling
Chart
”
:
TheOven
Lights
The Oven Vents
Cleaning
and Caring
for Your &en
Control
Panel and Knobs
The Lower Oven Self-Cleaning
Cycle
Cleaning
Chart
The Optional
Rotisserfe
If You Need Service
or Help
I. Before You Call for Service
2 If You Need Service
3 If You Have a Problem
22
22
23
23
24
25
25
26
26
26
26
27
30
30
31
31
31
32
3
Using the microwave upper oven
Microwave
Oven Controls
The top part of the C,orltrol Furnei
has the microwave
ovt?~ cc~nlrols
There are four klncls of ;-:c;ntrols
-The Dtgital Display
00, :I
-Signal
Lights
-Command
Pads
- Number Pads
What each of these cl02h ~111 UE
covered
on the following
pages One
note: The Command
ana Number
Pads are not buttons. You don t have
to push them
lust touch them
When you first plug In the range the
Clock
Display WIII show 88 88 If.
after you set the clock (page 5) the
Clock again shows all 8 s It means
your electricity
was off for a while Reset the clock.
Read the followirig
+~gee i:aref~llly
DIGITAL
COMMAND
DISPLAY/CLOCK
- It shows you what number
pods YOU
Touched
NUMBER
SETTING
tells the oven you ore going to cook at less
than full power.
- START tells the oven to start
-DEFROST tells the oven to run at 30% of full
power.
SIGNAL
PADS
PADS
LIGHTS
THE CLOCK
injtler the oven IS first plugged
in, the Clock sD~sploy shows 88:88. If the electric
+: ~\/t:; t-:t?r goes off the Clock, Display WIII also show all 8’s when the power comes
t>t2( h L-HI
i’oll i .-I,, c;i?ok or tise the Minute Timer without setting the clock, but the display will be
t,i(jrlh
;;Yc<; cooklng
The oven door must be closed before setting the clock.
DO THIS...
THIS HAPPENS...
The word “ser’will
touching number
within 5 seconds.
1.
Touch
CLOCK.
+-
m
2.
glow on fhe display. Start
pods for the desired time
The Display WIII show what numbers you
touched in the order You touched them.
This example
shows 3.25
Touch number
pads for
the correct
time of day.
The START Signal Light wtll come on to show
that you hove touched START It will go off
in about 5 seconds. The clock is set.
3.
Vouch
START
5
USING THE MINUTE
TIMER
The Minute Tamer does not start or stop cooking, it works like a kitchen
minutes or seconds and a buzzer sounds when the set time IS up
timer. Set in
THIS HAPPENS...
DO THIS...
The MINUTE TIMER Signal Light will come on
and the Display will show o “0.” Within 5
seconds start touching number pods for
the desired time.
1.
Touch MINUTE TIMER.
The D~sploy WIII show what numbers you
touched in the order you touched them.
This example
shows 1 minute. 45 seconds
2.
Touch number pads for
minutes and seconds.
The START and MINUTE TIMER Signal Lights
wail come on to show that
l you have
touched START;
l the Minute
Timer IS running
The START Light will go off in about 5
seconds
The Dtspioy counts down the seconds to
show how much time IS left on the Minute
Timer
count
down
When the set time IS up, a buzzer will sound
and the Display will show the time of day
1.
The Minute
2.
Opening
3.
If you open oven door and reset the Minute
Minute Timer and to restart the oven.
Timer can be used when the oven is cooking.
the microwave
oven door does not stop the Minute
To change
or cancel
1 Touch MINUTE
2 Touch number
or
2 Touch desired
Then:
3 Touch START if
Timer.
Timer touch
START twice
the Minute
Timer:
TIMER.
0 to cancel.
new number
pads to change
you want the new time to start,
to start the
COOKING
IN ONE CYCLE
Follow these steps to cook at one power
level.
HIGH COOK POWER
THIS HAPPENS...
DO THIS...
1.
Put food in the oven and
close the door.
El
The COOK CYCLE 1 Signal Light will come
on and the Display will show 4 0’s.
..
2.
Touch COOK CYCLE 1.
The Display will show the numbers You
touched in the order you touched them.
This example
shows 4 minutes. 30 seconds
3.
4.
Touch number pads for
the cooking time You
want.
q
The oven will automatically
cook
at high Cook
Power.
The START and COOK CYCLE 1 Signal Lights
will come on to show what you have told
the oven to do. The START Light will go off in
about 5 seconds.
Touch START.
count
down
The Drsplay counts down the time to show
how much cooking time IS left
When the cooking time ends, a buzzer WIII
sound 4 times. (You can stop the buzzer
y opening the oven door or touchrng
CANCEL.) When the buzzer stops, the DISplay will show the time of day
LOWER COOK POWERS
For best results, some recipes call for lower Cook Powers. Lowering the Cook Power
slows the cooking. The lower the Cook Power, the slower the cooking. Each number
pad on Your microwave
oven stands for a different percentage
of Cook Power. Many
recipes In your MICRO MENUS- Cookbook
tell you, by number, which Cook Power to
use Recipes in other books and magazines
may tell You by name (HI, MED, LO, etc ] or
by percentage
(IO%, 50%, 80%, etc.).
The following chart gives you the percentage
of Cook Power each number pad
stands for, and the Cook Power name usually used.
automatrc
9
a
-Tmk
7
6
5
4
3
2
1
100% of full
90% of full
80% of full
70% of full
60% of full
50% of full
40% of full
30% of full
20% of full
10% of full
power
power
power
power
power
power
power
power
power
power
HIGH
MED-HI
MED
MED-LO
LOW
C!Z!“dTIT\jUtD IJEXT PAGE
7
jB\“,,
n .‘,-:l&i
Ii’
(~
.,.lI”
DO THIS...
1.
I:.
THIS HAPPENS...
Put food in the oven and
close the door.
The COOK CYCLE 1 Signal Light will come
on and the Display will show 4 0’s.
..
2.
ill
Touch COOK CYCLE 1.
The Display will show the numbers you
touched in the order you touched them.
This example
shows 7 minutes, 30 seconds
3.
Touch number pads for
the cooking time you
want.
The COOK POWER Slgnal Light will come
and the Display will show 2 O’s
4.
Touch COOK POWER.
5.
Touch a number pad for
the Cook Power you
want.
on
The START, COOK CYCLE 1 and COOK
POWER Signal Lights will come on to show
what you hove told the oven to do The
START Light will go off in about 5 seconds.
6.
Touch START.
count
down
The Display counts down the time to show
how much cooking time IS left
For 2 of every IO seconds, the Display
show the Cook Power you selected
WIII
‘When the cooking time ends, o buzzer WIII
sound 4 times. [You con stop the buzzer
by opening the door or by touching
CANCEL.) When the buzzer stops, the
D~sploy WIII show the time of day
DEFROSTING
Use the defrost setilflg to !how frozen fOGd before cooking
For suggested
defrost
times. check the gurde on the inside of the oven door or in your MICRO MENUS
Cookbook
Tmk
THIS HAPPENS...
DO THIS...
1.
Put frozen food in the
oven and close the
door.
q
The DEFROST Srgnal Light WIII come
the Display will show 4 O’s
.
2.
on and
Touch DEFROST.
The Display will show the numbers you
touched in the order you touched them.
Thus example
shows 2 minutes 30 seconds
3.
4.
Touch number
the defrosting
want.
pads for
time you
q
Touch START.
Tne START and DEFROST Signal Lights will
come on to show what you hove told the
oven to do The START Light WIII go off In
about 5 seconds
count
down
The Display counts down the time to show
how much defrosting time IS left
When the defrost time ends a buzzer will
sound 4 times (You con stop the buzzer by
opening the oven door or touching
CANCEL) When the buzzer stops, the
Display will show the time of day
FASTER OR SLOWER DEFROSTING
When you touch DEFROST, the microwave
oven automatically
uses 30% of full Cook
Power For slower or faster defrosttng. see lower Cook Powers on page 7
l
Use 20% of full power for slower defrosting
l
Use 40% of full power for foster defrosting
Defrosting at Cook Powers higher than
30% can cause some cooking on the outside of the food.
STANDING TIME:
For best results allow the food to stand for awhile after defrosting.
the temperature
of the food and provide more even defrosting.
This will equalize
COOKING
IN TWO CYCLES
For best results, some recrpes call for one Cook Power for a certain length of time.
and another Cook Power for another length of trme Your oven can be set to change
from one to the other automatlcally
DO THIS...
1.
Put food in the oven
and close the door.
Iif
..
2.
THIS HAPPENS...
The COOK CYCLE 1 Signal Light WIII come
on and the Display will show 4 O’s
Touch COOK CYCLE 1.
The Display will show the numbers You
touched in the order you touched them.
Thus example
shows 3 minutes, 25 seconds
3.
4.
Touch number pads for
the cooking time you
want in the first cycle.
‘.*.
E#
The COOK Power Signal Light will come
and the Display will show 2 O’s
Touch COOK POWER. If
you want the high Cook
Power, skip to step 6.
The Display will show what You touched
This example
shows 60% of full power
5.
Touch a number pad for
the Cook Power you
want in the first cycle.
Eli
.a
6.
Touch COOK CYCLE 2.
7.
Touch number pads for
the cooking time you
want in the second
cycle.
10
The COOK CYCLE 2 Signal Light will come
on and the Display will show 4 0’s.
on
The COOK POWER Signal Light will come
and the Display will show 2 O's
8.
on
Touch COOK POWER. If
you want the high Cook
Power, skip to step 10.
The Display WIII show what you touched
This example
shows 40% of full power
9.
Touch a number pad for
the Cook Power you
want in the second
cycle.
The START Signal Light will come on for
about 5 seconds.
The COOK CYCLE 1 Light will come on and
stay on while the oven is cooking in the first
cycle. The COOK POWER Light will be on if
you are using a Cook Power other
than high.
count
down
mm
The Drsplay counts down the cookrng time
to show how much time IS left in the first
cycle
For 2 of every 10 seconds, the Display WIII
show the Cook Power you selected,
if you
are using a Cook Power other than high.
A buzzer will sound at the end of the first
cycle You can either open the door to
checkthefood,oryoucanlettheoven
start the second cycle If you do open the
door just close it and push START to restart
the oven
The
the
The
are
count
d0lJJf-I
COOK CYCLE 2 Light will come on when
oven starts cooktng in the second cycle
COOK POWER Light will come on if you
using a Cook Power other than high
The Display counts down the cooking time
to show how much time IS left In the second
cycle
For 2 of every 10 seconds, the Display will
show the Cook Power you selected,
if you
are using a Cook Power other than high.
When the second cycle IS over, a buzzer
~111sound 4 times [You can stop the buzzer
by opening the door or touching CANCEL )
When the buzzer stops, the Display will
show the time of day
11
COOKING AUTOMATICALLY
AFTER DEFROSTING
The controls can be set so the mrcrowave
Cook Cycle 1 and even Cook Cycle 2
DO THIS...
1.
from defrosting
to
THIS HAPPENS...
Put frozen food in the
oven and close the door.
q
I
2.
oven goes automatically
‘a
The DEFROST Signal Light will come
the Display will show 4 O’s
on and
Touch DEFROST.
The Display will show the numbers you
touched in the order you touched them.
This example
shows 2 minutes, 30 seconds
3.
Touch number pads for
defrosting time you
want.
IEI
.*
4.
The COOK CYCLE 1 Signal Light will come
and the Display will show 4 O’s
on
Touch COOK CYCLE 1.
The Display will show the numbers you
touched in the order you touched them.
This example
shows 3 minutes, 25 seconds.
5.
Touch number pads for
the cooking time you
want in the first cycle.
The COOK POWER Signal Light will come
and the Display will show 2 O’s
6.
Touch COOK POWER.
Options: Skip to step 8 if
you want the first cycle
to cook at high power.
Skip to step 12 if you
want only one cycle at
high power.
7.
Touch a number pad for
the Cook Power you
want in the first cooking
cycle.
12
on
The COOK CYCLE 2 Signal Light will come
on and the Display will show 4 0’s.
8.
Touch COOK CYCLE 2.
Optlon: Touch START
It cooklng In only one
cycle after defrostlng.
9.
Touch number pads for
the cooking time you
want in the second
cooking
cycle.
The COOK POWER Signal Light will come
and the Display will show 2 0’s.
El!
‘8
..
.
on
1 O.Touch COOK POWER.
Option: Touch START if
you want the high
Cook Power.
The Display will show what you touched
This example
shows 40% of full power.
11 .Touch
a number pad
for the Cook Power
you want in the
second cooking
cycle.
The START and DEFROST Signal Lights will
come on. DEFROST will stay on during the
defrost cycle. START will go off in about
5 seconds.
12.Touch
START.
count
down
The Display counts down the time to show
how much time is left in the defrost cycle.
When the defrost cycle is over, the
microwave
oven automatically
holds the
food for the same amount of time used for
defrosting.
The Display counts down the
hold time and the HOLD Signal Light will
be on.
When the hold time is over, a buzzer will
sound and the first cooking cycle will start
The COOK CYCLE 1 Signal Light will come
on and stay on during the first cooking
cycle. The COOK POWER Light will also
come on If you are using a Cook Power
other than high.
13
count
down
The Display counts down the time to show
how much time IS left In the first cooking
cycle
For 2 of every 10 seconds, the Display ~111
show the Cook Power you selected
if you
are using a Cook Power other than high
0
When the first cooking cycle IS over. a
buzzer WIII sound and the second cooking
cycle WIII start (If only one cooking cycle
IS used, 4 buzzes will sound, and the oven
Will stop ]
9
tP
The COOK CYCLE 2 Signal Light will come
on and stay on during the second cooking
cycle. The COOK POWER Light will also
come on If you are using a Cook Power
other than high.
The Display counts down the time to show
how much cooking time IS left in the
second cycle
count
down
For 2 of every 10 seconds, the Display WIII
show the Cook Power you selected
tf you
are using a Cook Powerotherthan
high
When the cooking
Display
The holding time allows food
temperature
to even out all the way
through the food.
To sklp the holdlng tlme:
l
Instruct the microwave
oven to DEFROST
and to cook in COOK CYCLE 2
COOKING
will show the time of day
To check or stir foods
during cycles:
1
2
3
4
Open
Check.
Close
Touch
where
time IS over. a buzzer
between
or
the door The oven will shut off
stir or rotate the food
the door
START The oven will go on from
it stopped
TO A SERVING TIME
The microwave
oven controls car> be set to start and stop the oven automatlcally
even when you are not home The Serve Time feature allows you to set the time you
want the food to be fintshed cooklng
DO THIS...
THIS HAPPENS...
m
1.
14
Touch SERVE TIME.
The SERVE TIME Signal Light will come on
and the Display WIII show 4 O’s Decide
what time you want the food to be done
cooklng
will
The Display will show the numbers you
touched in the order you touched them.
This example
shows a Serve Bme of 6:00
2.
Touch number pads for
the tlme you want the
food to be ready to
serve.
3.
Touch in the cooking
instructions needed for
the food to be cooked.
4.
w
Touch START.
Cook in Defrost, Cook Cycle 1, Cook Cycle
2, or a combination
of them. Use high Cook
Power or lower Cook Powers.
’ I
’
\
If the Display begins flashing, there isn’t
enough time left before the Serve Bme for
the oven to do what vou told it to do. Touch
CANCEL and start over with a later Serve
Time.
The START and
stay on. All the
cooking starts,
Display will go
happening
Extra information:
Make sure the Clock is set to the right
time of day.
l you can’t
set the Serve Bme for more than
12 hours afterthe
correct time of day.
l
If you open the door before the oven
begins to cook, be sure to retouch START.
l
If you want the microwave
oven to start
cooking when you are not home:
Use foods that will not go bad or spoil
while waiting for cooking to start Avoid
l
1. Follow instructions on page 16 -17 for plugging in the Temperature
Pro je.
2. Touch SERVE TIME.
3. Touch the number pads forthe time you
want the food finished.
4. Follow instructions on pagesl6-17for
touching in temperature
and cook power
Instructions.
SERVE TIME Signal Lights will
other lights will go off. When
the Signal Lights and
on to show what is
using dishes with milk or eggs, cream
soups, cooked meats, poultry or fish, or any
item with baking powder or yeast.
Smoked or frozen meats may be used; so
can vegetables,
fruits and casserole-type
foods.
Any food that has to wait for cooking to
start should be very cold or frozen before it
is put in the oven. MOST UNFROZEN FOODS
SHOULD NEVER STAND MORE THAN TWO
HOURS BEFORE COOKING STARTS.
5. Touch START.
NOTE. When cooking toward a Serve Time
while using the Temperature
Probe, the
microwave
oven will start cooking
90 minutes before the Serve Time you set. If
cooking time will be less than 90 minutes,
set a later Serve Time.
15
COOKING WITH THE TEMPEMTURE
PROBE
The MEAL SENSOR’ Temperature
Probe takes guesswork out of cooking roasts and
larger casseroles. The probe is designed
to turn off the oven when it senses the
temperature
you want For suggested
temperatures
for different foods, see your
MICRO MENUS’ Cookbook.
Number Pads are used to touch in the final food temperature
you want.
Touch...
1
2
3
4
To 6et Approximately...
145 F (63 C)
150 F(66 C]
160 F(71 C]
165 F(74 C)
185 F(85 C]
Touch...
5
6
7
8
9
To Get Approximately...
90 F(32 C)
110 F(43 C)
120 F(49 C]
130 F(54 C)
DO THIS...
p I ug
,-:‘--yr,
/
4
‘a
Cable
‘: \‘\-
1.
or Sensor
c
I
Insert at least ’ 3 of the
temperature
probe into
the food
DO THIS...
I
Socket
2.
Place food in the oven
and plug the probe into
the socket on the oven
wall
Make sure the probe
does not touch any part
of the oven interior. Close
the door.
THIS HAPPENS...
lim
The COOK TEMP Signal Light will cc ne on
and the Display will show 2 O’s
..
4.
3.
Touch COOK TEMP.
The Display will show the number you
touched. This example
uses 6. or a final
cooked temperature
of about 150 F (66 C).
The 0 means the food is still cold
5.
Touch a number pad for
the deslred flnal
temperature.
iliil
‘.
6.
..
.*
.
Touch COOK POWER.
Option: Touch START if
ydu want to use full
power.
The COOK POWER Signal Light will come
and the Drsplay will show 2 O’s
on
P
The Display WIII show what you touched.
This example
shows 60% of full power
7.
16
Touch the number pad
for the Cook Power you
want.
Tmk
The COOK POWER, COOK TEMP and START
Lights will come on. The START Light will go
ofi in about 5 seconds, the others will
stay on.
8.
Touch START.
The left number on the display shows what
temperature
(number) you selected. The
right number shows you how the temperature is rising in the food.
E!m
For 2 of every 10 seconds, the Display will
show the Cook Power you selected
if you
are using a Cook Power other than high.
When the probe senses the temperature
you selected, the oven shuts off and 4
buzzes sound. (You can stop the buzzer
opening the oven door or touching
CANCEL.) When the buzzes stop, the
will show the time of day.
by
HINTS FOR USING THE TEMPERATURE PROBE
DON’T...
DO...
l
l
l
l
l
use hot pads when removing
probe from
food or food from oven.
unplug probe from socket to turn off oven
light.
stir foods during cooking when
recommended.
stir soups, casseroles
and drinks before
serving.
cover roasts with foil and let stand a few
minutes after cooking.
Remove foil if you decide to cook it
longer.
For casseroles, the tip of
the probe should be in the
center of the food. Stir
foods when recommended. Replace the
probe.
l
l
l
l
l
l
let probe or probe cable touch any part
of the oven interior.
let probe touch foil [if used). Foil can be
kept away from probe with wooden
toothpicks,
Remove foil if arcing occurs.
use paper, plastic wrap or or plastic containers. They will be in the oven too long.
use probe in regular oven.
force probe into frozen food.
use probe for foods that need to simmer.
For liquids, balance
the
probe on a wooden spoon
or spatula so the tip of the
probe is in the center of
the liquid.
For roasts, the tip of the
probe should be in the
center of the largest muscle, but not touching fat or
bone.
17
CHANGING OR CANCELLING INSTRUCTIONS
To change or cancel any instructions you have touched, simply touch CANCEL. All
instructions will be cancelled.
The Display will show the time of day and you can start
over.
If you want to change or cancel instructions before you have touched START, simply
touch in the new instructions. They will cancel the old ones.
OTHER OPERAnNG HINTS
These are a number of things you can do with your microwave
oven. Some will be
reminders. Others will be mentioned
for the first time.
1. To double check settings while the oven is running, touch the command
pad for the
setting you want to check. The instruction programmed
for that pad will show on
the Display for 5 seconds. Then the Display returns to show what the oven is doing.
2. To stop the oven while It Is runnlng:
l Open
the door. The oven will stop. You can restart it by closing the door and
touching START.
l Touch CANCEL.
All instructions will be erased. You must touch in new instructions.
3. If you touch two instructions into the same cycle, the second instructions will erase
the first.
4. When using a Cook Power other than high, the Display will show the Cook Power for
2 seconds of every 10 during cooking.
5. When Cook Cycle 1 follows Defrost, a holding time equal to the Defrost time will
occur before Cook Cycle 1. Cook Cycle 1 will begin after this automatic
hold time.
CLEANING THE MICROWAVE OVEN
Wipe often with warm sudsy
water and a soft cloth or
sponge.
For stubborn soil, boil a cup
of water in the oven for 2 or 3
minutes. Steam will soften
the soil.
Do not use abrasive
18
cleaners
Be sure to clean the areas
where the door and oven
frame touch when closed.
Rinse well.
or steel wool pads.
IMPORTANT
INFORMAIION
Before you start using your microwave
oven, read this section
information will help you ovoid damoge to your oven.
Metallic
Metallic
Glaze
Test dinnerware
This
Trim
Cooking in metal containers
can damage
the oven. So
can containers
with hldden
metal (twist-ties, foil-lining,
staples, metallic glaze or
trim).
carefully.
or cook-
ware before using.
Paper can char or burn,
and some plastics can
melt if used when heating
foods for more than 4
minutes.
To rest o dish for safe use, put it
into the oven with a cup of
water beslde it. Cook on high
Cook Power for one minute.
It the dish gets hot and the
water stays cool, do not
use It.
NEVER COOK OR REHEAT A
WHOLE EGG. Slice hard
boiled eggs before
heating. Steam build-up in
whole eggs may cause
them to burst and possibly
damage
the oven.
NEVER start a microwave
oven when it’s empty. The
oven can be damaged.
If
you experiment,
put a
container
of water in the
oven.
Don’t let anythrng touch
the top of the oven CCIVity
Continued next page
19
Rough or harsh cleaners
can scratch or dull the
oven finish. DO NOT USE THI
DO NOT store things in the
Overcooking
some foods
can cause them to scorch
or flame...especially
foods
like potatoes, popcorn,
snacks, etc. See the
MICRO MENUS’
Cookbook.
Make popcorn
only in
poppers designed
for use
in microwave
ovens.
Follow popper directions.
Results are the popper
manufacturer’s
responsibrlity
Liquids heated in certain
containers
may overheat.
The lrquid may then splash
out with a loud noise. This
does not harm the oven,
but you should not use
such containers
to heat
liquids again.
Do NOT OVERCOOK
POTATOES. At the end of the
recommended
cooking
time they should be
slightly firm. Wrap in foil
and set aside for 5 minutes.
They will finish cooking
while standing.
USE HOT PADS. Microwave
energy does not heat
containers,
but the hot
food does.
Follow MICRO MENUS’
Cookbook
directions
carefully. If using a
different cookbook,
you
may need to experiment
with times and Cook
Powers.
It is normal for the inside of
the oven door to look wavy
after the oven has been run-
voIxA
’
k3@
If your electric power line
voltage is less than the
normal 240 volts, cooking
times may be longer.
l
l
Double-check
settings.
all
Use the oven only for
defrosting, cooking
or
reheating.
It is normal for the signal
lights to flicker while the
microwave
oven is on.
‘Tmk
HOWMICROWWEOVENSWORK
Microwave
ovens are safe. Microwave
energy is not hot. It causes
make its own heat, and it’s this heat that cooks the food.
Stirrer
Microwaves
are like TV
waves or light waves. You
can’t see them, but you can
see what they do.
Microwaves
pass through
glass, paper and plastic
without heating them so food
absorbs the energy. Microwaves bounce off metal pans
so food does not absorb the
energy.
Maanetron
food to
Glass Shelf
Oven-Cavity
Metal
A magnetron
produces
microwaves.
The microwaves
move into the oven where
they are scattered
around by
a stirrer (like a fan).
Microwaves
bounce off
metal oven walls and are
absorbed
by food.
The glass bottom of your
microwave
oven lets microwaves through. Then they
bounce off a metal floor,
back through the glass bottom and are absorbed
by the
food.
Microwaves
may not reach
the center of a roast. The heat
around the outside is what
cooks the roast all the way
through. This is one of the
reasons for letting some
foods (roasts, baked potatoes] stand for a while after
cooking, or for stirring some
foods during the cooking
time.
Bottom
The microwaves
disturb
water molecules
in the food.
As the molecules
bounce
around bumping
into each
other, heat is made, like rubbing your hands together.
This is the heat that cooks.
B&LEVEL OVEN RACK
Use the Bi-Level Oven Rack to stack foods when cooking in more than one Container.
The rack can be turned upside-down
to help fit taller containers
on the bottom of the oven.
First Posltlon: Use the rack only when heating
more than one container
of food.
Do not let a container
touch the top of the
oven.
SPECIAL CAUTIONS
Second Position: Turn rack upside-down
when using a taller container
on the bottom
of the oven.
l
CLEANING
l
l
l
l
THE RACK
Wash by hand with a mild detergent.
Wash on the top rack of a dishwasher.
Do not use abrasive scrubbers or cleansers
l
l
l
Do not use with browning
dish.
Use only when cooking foods in more than
one container.
Do not use in conventional
ovens or under
broiler.
Do not let food or container touch the top of
the oven.
Do not store rack in the oven.
21
Using your lower oven
Lawer
Oven
’ -Start
Controls
Time Knob
Stop Time Knob
Lock Light
-Lower
Oven
Lower
I
,
Lower
Clean
Light
Slgnal
Light
Oven Selector
Oven
Manual
Light Switch
THE LOWER OVEN CONTROLS
The lower
Temperature
oven is controlled
by two knobs. the Oven Selector and the Oven
Control Both must be on o setting for the oven to heot.
THE OVEN SELECTOR
With the Oven Selector on
BROIL. only the top element
heats. (Broiling, pg 25)
With the Oven Selector on
BAKE, the bottom element
does most of the work. The
top element heats, but does
not turn red. (Baking, pg 23)
With the Oven Selector on
TIMED BAKE, the MEALTIMERClock can be used to turn the
oven on and off automatically.
(MEALTIMER Clock, pg.241.
THE OVEN TEMPERATURE CONTROL
Use the Oven Temperature
Control to set baking or roasting temperature
when the
Oven Selector is on BAKE or
TIMED BAKE.
22
When both the Oven Selector and Temperature
Control
are on BROIL, the broil element heats all the time. The
Oven Temperature
Control
can be set on a temperature
for slower broiling (see Broiling, page25).
1
ll
!ld!
Lift rack at front and pull out.
2
Put the rack(s) where YOU
want them befdre turning on
the oven.
Rack(s) should be placed
so food can be centered
in
the oven. Always leave at
least 1 I 2 to 2 inches (4-5 cm)
between the sides of the Dan
and the oven walls and pbns.
For more information,
see the
“Cooking
Guide.”
4
3
Set the Oven Selector
BAKE.
on
Set the Oven Temperature
Control to the baking
temperature
you want
Let the oven preheat until the
Signal light goes oft
6
Put food in the oven. Oven
rock walls ond door will be hot
ADJUSTING
During baking, the elements
will turn on and off to help
keep the oven temperature
at the setting. The Signal Light
will turn on and off with the
elements..
The top element helps heat
during baking, but does not
turn red.
THE OVEN TEMPERATURE CONTROL
Does your new oven seem to be hotter or colder at the same
old oven? The temperature
setting in your old oven may have
ally over the years. The accurate
setting of your new oven can
If you think the oven temperature
needs adjusting,
follow these
OFF
OFF
1.
When baking is done, turn
both knobs to OFF.
Pull out the center
of the Oven Temperature Control.
2.
Lockin$ Screw
Loosen the locking screw.
Tlghten
the locking
settings than your
changed
graduseem different.
steps:
Tooth.
N‘otches
3. To lower the temperature, move
black ring so tooth
is closer to LO. Each
notch equals
about 10°F (5°C).
screw. Replace
the knob.
OFF
Ndtches
Tooth4. To raise the temperature, move
black ring so
tooth is closer to
HI. Each notch
equals about 10°F
(5-c).
23
USING THE AUTOMATIC
MEALTIMER
CLOCK
The Automatic
MEALTIMER Clock is designed
to turn the lower
at times you set...even when you are not around.
oven on and off
To st&f and stop baking automatically:
1.
Put the lower oven rack(s)
where you want them
and place the food in the
oven.
4.
Push in and turn the Stop
lime Knob ClOCkwISe
to the time you want the
oven to shut off.
7.
After baking is done,
both knobs to OFF.
To stop baklng
1.
2.
3.
turn
2. Push in and turn the Set
Time Knob until the Start
and Stop Time Dials show
the right time of day.
5.
8.
Set the Oven Selector
TIMED BAKE.
on
3.
Push in and turn the Start
fime Knob lclockwlse
to the time you want baking to start
6.
Set the Oven Temperature
Control on the baking
temperature
you want.
To stop the oven before
the preset time, turn both
knobs to OFF.
automatlcally:
Put the oven rack(s) where you want
them and place the food in the oven.
Push in and turn the Set Time Knob until the Start
and Stop Time Dials show the right time of day.
Push in and turn the Stop Time Knob clockwlse to the time you want the oven to shut off.
4.
5.
6.
Set the Oven Selector on TIMED BAKE.
Set the Oven Temperature
Control on the
baking temperature
you want.
After baking is done, turn both knobs to OFF
To stop the oven before the preset time,
turn both knobs to OFF.
SPECIAL CAUTION:
Use foods that will not go bad or spoil
while waiting
for cooking
to start. Avoid
using dishes with milk or eggs, cream
soups, cooked
meats or fish, or any item
with baking powder or yeast.
Smoked or frozen meats may be used;
so can vegetables,
fruits and casseroletype foods. Vegetables
can be cooked
in
24
a covered
baking dish with about a halfcup (118 ml) of water for 1 to I’/2 hours.
Any food that has to wait for cooking
to
start should be very cold or frozen before
it is put in the oven. MOST UNFROZEN
FOODS SHOULD NEVER STAND MORE THAN
TWO HOURS BEFORE COOKING STARTS.
Tmk
BROILING
1.
Place the rack where
want it for broiling.
you
2.
Put the broiler pan and
food on the rack.
3.
Set the Oven Selector
BROIL.
4.
Set the Oven Temperature
Control on BROIL (or on a
lower temperature
for
slower broiling).
5.
During broiling, the oven
door must be partly
open. A built-in stop will
hold it there.
6.
When broiling is done,
turn both knobs to OFF.
For slower brolllng, set the Oven Temperature
Control on a temperature
instead of BROIL. The broil element will then turn on and off instead of staying
The lower the temperature
setting, the slower the broiling.
The Oven Selector
must be on BROIL and the door partly
Suggested
oven-rack
Food
Beef Steaks
Rare
Medium
Well done
Beef Steaks
Rare
Medium
Well Done
Hamburgers
Lamb Chops
Medium
Ham slice, precooked
or tendered
Canadian
Bacon
Pork Rib or Loin Chop
Well done
Chicken
Fish
Liver
positions
and broiling
on.
temperatures.
times
Approximate
Temperature
1st side
Minutesset to BROIL
2nd side
Description
inches (cm) from top
of food to Broil Element
l”(2.5 cm]
1” (2.5 cm]
1” (2.5 cm)
3" (8 cm]
3" (8 cm)
3" (8 cm]
7-9
9-11
11-13
3-5
4-7
5-7
1 9” (4 cm)
1 “2” (4 cm]
1 112”[4 cm)
9” (1 cm)
cm]
4"-5"(10-13
4"-5" (IO-13 cm]
4"-5"(10-13
cm)
3" (8 cm)
13-15
17-19
19-21
6-8
6-8
8-10
14-16
4-5
l”(2.5 cm]
9”-1”
(I-2.5 cm]
3" (8 cm)
6-8
4-5
3" (8 cm]
3" [ 8 cm)
6-8
6
4-5
4
112”(1 cm)
314“-1 ”
(2-2.5 cm)
2-3 lb.
(l-l.5 kg)
cut in half
whole
fillets
12”-3 4”
(l-2 cm]
Frankfurters
open for all brolllng
on
4"-5"(10-13
cm]
15
10
7"-9"(18-23
3"(8 cm)
3"(8 cm]
cm)
25-30
11-16
7-8
IO-12
9-14
5-7
3
6-7
3
4-5
3"(8 cm]
- 4"-5"(10-13
cm)
25
THE MICROWWE
WEN
LIGHT
The light in the microwave
oven comes on when the oven door is open, when
you set the cooking time, when the oven is on, and when the temperature
probe
is plugged
into the socket.
THE LOWER OVEN LIGHT
The lower oven light will come on when you open the oven door or when you
push the Oven light switch at the bottom of the control panel. Close the oven
door or push the switch again to shut it off.
To replace
the light bulb:
1.
Turn off the electric
at the motn power
power
supply
2.
Remove the bulb cover
by pulling out on the wire
holder and moving it to the
side
3.
Remove the light bulb from
Its socket.
4.
Replace the bulb with a
/IO-watt appliance
bulb
available
from most grocery, variety and
hardware
stores
5.
Replace the bulb cover
and snap the wire holder
in place. The bulb must
have this cover when the
oven is being used.
6.
Turn the power bock on
at the main power supply.
The
oven
vent
Hot air and moisture get out of
the lower oven through
a vent just CIbove
the oven door.
Do not block the vent.
Poor baking con result.
Cleaning and carhg for your oven
CONTROL
1. First make sure
knobs are on OFF
then pull knob
straight off.
26
2.
PANEL AND KNOBS
Use warm soapy
water and a soft
cloth to wipe the
panel. Rinse and
wipe dry.
3. Wash knobs in worm
soapy water. Rinse
well and dry.
4. Push knobs straight
bock on. Make sure
they ore on OFF.
THELOWEROVENSELF-CLEANINGCYCLE
The lower oven self-cleaning
cycle
uses very high heat to burn away
soil. Before you start, make sure you understand
exactly
how to use
the cycle safely.
BEFORE YOU START
x
.
1.
Clean areas that may not be cleaned
during the cycle. Use hot water and detergent or a soapy steel-wool pod on...
l the frame
around the oven
l the inside
of the door, especially
the
port outside the oven seal.
DO NOT try to clean the fiberglass
seal. DO
NOT move it or bend it.
2.
3.
4.
Remove any pots or pans you may hove
stored in the oven. They can’t stand the
high heat.
Wipe out any loose soil or grease. This will
help reduce smoke during the cleaning
LFtz’sure
the motor socket cover is
losed if your oven has a rotrsserie.
SPECIAL CAUTIONS
DO NOT block the vent
during the cleaning
cycle
Air must move freely for
best results
DO NOT use commercial
oven cleaners in your oven.
Domage to the porcelain
finish may occur.
DO NOT touch the oven
during the cleaning
cycle
It con burn you
DO NOT force the Lock
Lever. The lever is designed
to stay locked until the
oven is cool enough to
safely open.
DO NOT use foil or other
liners in the oven. During
the cleaning
cycle, foil
can burn or melt.
2
SEWNG
THE CONTROLS
1.
Set the Oven Selector
CLEAN.
4.
7.
to
2.
Set the Oven Temperature Control to CLEAN.
3.
Push in the Stop time
Knob and turn the hand
clockwise
about two
or three hours. (Two hours
for light soil; three or
more for heavier soil.)
5.
Lift the Lock Lever Cover
Panel and move the
Lock Lever o/l the way to
the right. The Clean Light
will come on only when
the lever is all the way
over.
6.
When the Lock Light
goes off, turn the Oven
Selector and Oven Temperature Control to OFF.
8.
Move the Lock Lever
back to the left Do not
force It. Wait until it will
move easily. This turns off
the Clean Light.
9.
Push in and turn the Set
Time Knob until the Start
and Stop Time Dials
show the right time of day.
The Lock Light
when the oven
above normal
temperatures.
Lever can’t be
when the Lock
comes on
gets
baking
The Lock
moved
Light is on
After the oven Is cool,
wipe off any residue
or ash with a damp
cloth. If needed, touch
up spots with cleanser or
soapy steel-wool pad.
DO NOT TOUCH THE OVEN DURING THE CLEANING CYCLE. IT CAN BURN YOU.
28
SPECIAL TIPS
1.
Keep the kitchen well
ventilated
durrng the
cleaning
cycle to help
get rid of normal heat
odors and smoke.
4.
Oven racks lose their shine, drscolor
and become harder to slide on their
guides when they are left in the oven
during the cleaning
cycle. To make
them slide easier, polish the edges of
the racks and rack guides with a soapy
steel-wool pad, rinse well, and wipe
on a thin coat of salad oil.
2.
3.
Clean the oven before
it gets heavily soiled.
Cleaning
a very soiled
oven takes longer and
results in more smoke
than usual.
5.
If the cleaning
Cycle
doesn’t get the oven as
clean as you
expected,
the cycle
may not have been set
long enough. Set the
cleaning
time longer
for heavier soil.
To stop the cleaning
cycle after it has
started :
l Turn the Stop Trme Knob clockwise
until the hand points to the right time
of day.
l Turn the Oven
Selector and Oven
Temperature
Control to OFF.
l
When the oven cools, move the Lock
Lever back to the left. DO NOT FORCE
IT. Wait until it moves easily.
During the self-cleaning
cycle, the oven gets much hotter than it does
for baking or broiling...approximately
875- F (468 C]. This heat breaks
up grease and soil, and burns it off.
The graph shows approximate
temperatures
and times during a selfcleaning
cycle set for two hours.
SELF-CLEANING
CYCLE -TWO
(Approximote Temperatures
1000
200
HOUR
SElTING
and Times)
F
538
c
427
C
316
c
204
C
F
START
% hr.
1 hr.
f’h hrs.
2
hrs.
Notice that the heating stops when the two-hour setting
while longer for the oven to cool down enough to unlock.
2%
hrs
is up, but that it takes a
29
CLEANING
PART
Porcelainenamel broiler
pan and grid
Control knobs
Control
panel
WHAT TO USE
Warm, soapy water or
soapy steel wool pads
Warm, sudsy water and
bristle brush
Warm, soapy water
Commercial
alass cleaner
Self-Cleaning
Oven cycle
Warm, soapy water or
soapy steel wool pads
Oven
racks
Lower oven
door glass and
outside onlv of
microwave
Warm, soapy water or
plastic scrubbing
pad
Commercial
glass cleaner
l
l
l
l
l
l
l
l
l
l
CHART
HOW TO CLEAN
Wash with other cooking utensils.
Do not place in Self-Cleaning
Oven.
Wash, rinse and dry well
Do not soak.
Wash, rinse and dry with soft cloth.
Follow directions
with cleaner.
Leave in oven during Self-Cleaning
cycle.
Wash, rinse and dry. Use soapy steel wool pads
for stubborn areas.
Make certain oven is cool. Wash, rinse and dry
well with soft cloth.
Follow directions
provided
with cleaner.
oven
Self-Cleaning
Oven
Clean before using Self-Cleaning
cycle to
prevent burn-on of soil.
l Follow directions
given on page 27. “The Lower
Oven Self-Cleaning
Cycle.”
l Do not use commerolal
oven cleaners.
Do not use foil to line the bottom of your Selt-Cleaning
Oven.
For areas outside SelfCleaning
area use warm,
soapy water or soapy steel
wool pads
l
THE OPTIONAL ROTISSERIE
If you would like a rotisserie for your lower oven, you can order a kit from your
dealer. The kit includes easy installation
instructions.
30
If you need service or help we
suggest you follow these three steps:
1
l
BEFORE YOU CALL
FOR SERVICE*:
If either oven does not seem to be operating properly, check the following
before
calling for service.
If nothlng operates:
. Is the oven correctly
wired to a live circuit
with the proper voltage? (See Installation
Instructlons.)
l
Have you checked
the main fuse or circuit
breaker box?
If the microwave
oven will not run:
l
Is the timer set?
l
Is the door firmly closed and latched?
l
Did you touch START?
l Did you follow
the directions
exactly?
If microwave
cooking times seem too long:
l
Is the electric supply to your home low or
lower than normal? Your electric company
can tell you if the line voltage is low.
l
Is the Cook Power at the recommended
setting?
l Are you allowing
for more time when cooking more food at one time?
If the display shows a time counting down
but the oven is not cooking...
l
Is the Hold indicator
light on?
l
Is the Minute Timer and no Cook Cycle indicator light on?
l
Is the oven door closed completely?
If the microwave
oven turns off too soon or
not soon enough when using the probe:
l
Is at least l/3 of the probe in the food?
l
Is the probe tip in the center of the food?
l
Is the probe touching
bone or fat?
l Have
you allowed
roasts to stand for a few
minutes after cooking?
l
Is the probe plugged
tightly into its socket?
l
Is the Cook Power set where it should be?
l
Is the Meal Sensor Probe Control set at the
end temperature
you want?
If the lower oven will not operate:
l
Is the Oven Selector turned to a setting
(BAKE or BROIL, but not TIMED BAKE]?
l
Is the Oven Temperature
Control turned to a
temperature
setting?
If the Self-Cleaning
cycle will not operate:
l Are the Oven
Selector and the Oven Temperature Control set to “CLEAN?”
l
Does the Start Time Dial show the correct
time of day?
l
Is the Stop Time Dial set ahead to the time
you want the cleaning
cycle to stop?
l
Is the Lock Lever all the way to the right?
[The Clean Light will come on.)
*Tmk
If cooking results aren’t what you expect:
l
Is the oven level?
l
Are you using pans recommended
in the
Cooking Guide?
l
If baking, have you allowed 1% to 2 inches
(4-5 cm) on all sides of the pans for air
circulation?
l Does the oven
temperature
seem too low or
too high? See page 23, “Adjusting the oven
temperature
control.”
l
Have you preheated
the oven as the recipe
calls for?
l Are the pans the size called
for in the
recipe?
l Are you following
a tested recipe from a
reliable source?
See the Cooking Guide for more information
on cooking problems and how to solve them.
2
l
IF YOU NEED SERVICE*:
If your WHIRLPOOL’ appliance
ever needs
service anywhere
in the United States, help is
just a phone
call away...to
your nearest
Whirlpool
franchised
TECH-CARE’
service
representative.
Whirlpool
maintains
a nationwide
network
of franchised
TECH-CARE service companies
to fulfill your warranty and provide
after-warranty service and maintenance
to keep your
WHIRLPOOL appliance
in peak condition.
You’ll find your nearest TECH-CARE service
company
listed in your local telephone
book
Yellow
Pages
under APPLIANCES - HOUSEHOLD - MAJOR -SERVICE AND REPAIR. Should
you not find a listing,
dial the Whirlpool
COOL-LINE ’ service assistance
toll-free telephone number:
Continental
U.S. . . . . Dial (800) 253-1301
In Michigan
. . . . . . . . . Dial (800) 632-2243
Alaska and Hawaii
. Dial (800) 253-l 121
31
If you move...To make sure that your appliance is correctly
installed
and to insure its
continued
satisfactory
operation,
please telephone your nearest TECH-CARE service company for installation
or to get the name of a
qualified
installer.
(Installation
cost will, of
course, be paid by you.)
Helpful hlnts...You can help your TECH-CARE
service representative
give you faster service
if you include the model and serial number of
your appliance
when requesting service. Also,
retain your sales slip and warranty
to verify
your warranty status.
appliances.
He can help you maintain
the
quality
originally
built Into your WHIRLPOOL
appliance.
So why not take the time, now, to
look up his telephone
number and jot it down
in the space provided
on the cover.
3 . IF YOU HAVE A PROBLEM*:
Call Whirlpool Corporation
in Benton Harbor
at the COOL-LINE service
assistance
teleohone number (see step 2) or write:
Mr. Guy Turner, Vice President
Whirlpool Corporation
Administrative
Center
2000 U.S. 33 North
Benton Harbor, Michigan
49022
Remember...Vour
TECH-CARE service
representative
is specially
trained in the expert
repairing
and servicing
of your WHIRLPOOL
*If you must call or write, please provide: your
name, address, telephone
number, type of ap
pliance,
brand, model, serial number, date of
purchase, the dealer’s name, and a complete
description
of the problem.
This information
is
needed
in order to better respond to your request for assistance.
FSP is a registered
trademark
of Whirlpool
Corporalion
for
quality parts. Look for this
FSP
symbol of quality whenever
x you need a replacement
part
for your Whirlpool
appliance.
FSP replacement
parts
will fit right and work right, because
they are
made to the some exacting
specifications
used to build every new Whirlpool
appliance
0
CORPORATION
Benlon Harbor, Michigan. Aulomalic Washers, Clothes Dryers,
Freezers, Relrigeralor-Freezers,
Ice Makers, Dishwashers.
Built.in Ovens and Surlace Unils, Ranges, Microwave Ovens,
Compaclors. Room Air Conditioners. Dehumidiliers,
Central
Healing and Air Conditioning Systems.
Quality. Our way of life.
Part No. 311422
Printed In U.S.A.


