1
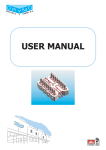
Using the Verifone 250 Receipt
Printer With MPI 2002
Revised: November 1, 2002
Using the Verifone 250 Receipt Printer with MPI 2002
Before You Begin
MPI 2002 v. 1.0.8.x has built-in support for Verifone 250 receipt printers. Support
for this printer was included to provide a cost-effective solution for receipt
printing. Supplies for the Verifone 250 are redily available through a number of
vendors and both new and used Verifone 250 printers can be purchased from a
number of outlets for far less than most other receipt printer models on the
market.
To use your Verifone 250 receipt printer with MPI 2002 you will need to purchase
a special serial (RS232) cable from Verifone or an authorized vendor. (Part
number: 10765-00) This cable can be ordered from Verifone directly for about
ten dollars. Before continuing with this guide, obtain this cable and check to
make sure you have the necessary ribbons, paper rolls, etc. You Verifone 250
receipt printer should have all of the parts shown in Figure 1.1 below.
Page 2 of 2
Using the Verifone 250 Receipt Printer with MPI 2002
Connecting The Verifone 250 Receipt Printer
With all of the parts listed in the previous section, we are now ready to connect
the receipt printer to your computer. First, lets assemble the various receipt
printer parts. (DO NOT INSTALL THE POWER PACK AT THIS TIME. ENSURE
THAT THE POWER PACK IS NOT PLUGGED INTO THE WALL.)
Setting DIP Switches
By default, the DIP Switches on your printer should already be correctly set.
However, it is a good idea to check these setting before proceeding. The DIP
Switches on your printer are located under the Ribbon Cartridge. Remove the
Ribbon Cover from the Printer Unit by simultaneously pressing-in and pulling-up
on the grooved thumb button on the front panel of your printer. (Below the printer
nameplate.) If the Ribbon Cartridge is already installed, gently remove it by
pulling up on each side evenly. To the right of the ribbon cartridge assembly (the
rectangular metal box that the Ribbon Cartridge sits over) are the DIP Switches.
Turn the entire Printer Unit clockwise until you are looking at the right-side of the
unit. Your DIP Switches should look like the diagram on the next page. If they
are not, move each DIP Switch using a ballpoint pen or pencil until they all match
the illustration.
Page 3 of 3
Using the Verifone 250 Receipt Printer with MPI 2002
Installing The Ribbon Cartridge
Remove the Ribbon Cover from the Printer Unit by simultaneously pressing-in
and pulling-up on the grooved thumb button on the front panel of your printer.
(Below the printer nameplate.) Check to determine if a printer Ribbon Cartridge
is installed. If a Ribbon Cartridge is installed, skip to the section entitled
“Installing Power Pack.”
Place the Ribbon Cartridge face up into the ribbon cartridge assembly. The
Ribbon Cartridge is face-up if you can read the manufacturer’s logo on the top of
the cartridge and the ribbon advance spindle (a small, round, toothed wheel on
the top right of the cartridge) is visible. Ensure the ribbon itself is in front of the
ribbon cartridge assembly. Refer to the Verifone 250 Receipt Printer Manual for
more information.
Turn the ribbon advance spindle clockwise until the ribbon is firmly seated in front
of the ribbon cartridge assembly. Lastly, replace the Ribbon Cover and proceed
to the next section.
Installing Power Pack
We are now ready to install the Power Pack. Before proceeding, ensure that the
Power Switch is in the OFF position. (From the front of the Printer Unit, the
Power Switch will be pushed “back” so that the “0” is down and the “I” is up.) In
the diagram on the next page, the Power Switch is in the ON position.
Page 4 of 4
Using the Verifone 250 Receipt Printer with MPI 2002
Locate the Power Pack and plug the small round cable into the back of the
Printer Unit. Refer to the diagram below to locate the correct port. Match the pins
on the power cable with the pins holes on the back of the printer. The power
cable will only fit in the correct port and only in the correct position. DO NOT
FORCE THE POWER CABLE INTO THE PORT. Instead, rotate the power cable
until the pins match the corresponding holes.
Next, plug the Power Pack into an approved wall socket or power strip. It is
strongly recommended that you use a power strip with surge protection when
installing your Verifone 250 Receipt Printer.
Page 5 of 5
Using the Verifone 250 Receipt Printer with MPI 2002
Finally, toggle the Power Switch to determine if the installation was successful.
The printer will make some noises and the Power Light will turn green or red.
Installing Paper Roll
Turn the power on before installing the Paper Roll. Remove the Roll Cover from
the Printer Unit, if attached. Put the Spindle through the Paper Roll. Refer to the
diagram below for the proper orientation of the paper roll before proceeding.
Insert the Paper Roll and Spindle into the slots on each side of the paper bin.
Push the end of the Paper Roll into the paper feed slot and press the Paper Feed
Button until the paper begins to be pulled through the Printer Unit. Tighten the
Paper Roll or use the Paper Feed Button to remove any slack in the Paper Roll,
and then replace the Roll Cover on the Printer Unit.
Installing Serial Cable
Using the special PC to Receipt Printer serial cable (Part number 10765-00) we
can now connect your printer to your computer. ENSURE THAT THE PRINTER
AND YOUR COMPUTER ARE OFF BEFORE PROCEEDING. NEVER INSTALL
ANY SERIAL DEVICE TO YOUR COMPUTER IF THE DEVICE OR YOUR
COMPUTER ARE POWERED-UP. THIS CAN CAUSE SERIOUS DAMAGE TO
THE DEVICE OR YOUR COMPUTER!
Page 6 of 6
Using the Verifone 250 Receipt Printer with MPI 2002
The special serial cable has two very different plugs. The small, round plug on
one end connects to the Printer Unit. Refer to the diagram below for the location
of the Serial Port on the Printer Unit and then plug the special serial cable into
the correct port. Rotate the serial cable until the pins line-up with the holes in the
serial port. DO NOT FORCE THE CABLE INTO THE PORT.
Next, attach the remaining end of the special serial cable to your computer’s
serial port. Refer to your computer’s manual for the location of the serial port.
Generally, the serial port is near where your printer or other parallel device
connects to your computer and just below where your keyboard and mouse
connect. DO NOT FORCE THE CABLE INTO A PORT IF IT DOES NOT FIT
EASILY. Ensure the thumbscrews on the special serial cable are securely
tightened before proceeding.
Page 7 of 7
Using the Verifone 250 Receipt Printer with MPI 2002
Installing The Printer Driver (Windows 9x)
We are now ready to install your Verifone
250 Receipt Printer on your computer.
Power-up the receipt printer and then powerup your computer. Once your computer has
completed loading, proceed.
From your START menu, select SETTINGS
> PRINTERS. This will open the PRINTERS
FOLDER in a new window.
From this new window, double-click the ADD
PRINTER item from the list of printers. This
will open the ADD PRINTER WIZARD. From
here, follow the diagrams of the ADD
PRINTER WIZARD below to successfully
install the Verifone 250 Receipt Printer.
Click the NEXT button to proceed.
Page 8 of 8
Using the Verifone 250 Receipt Printer with MPI 2002
Choose “Local Printer”. This choice should already be selected.
Click the NEXT button to proceed.
Choose “Generic” from the “Manufacturers” list on the left, and
choose “Generic / Text Only” from the “Printers” list on the left.
Click the NEXT button to proceed.
Page 9 of 9
Using the Verifone 250 Receipt Printer with MPI 2002
Ensure the “Keep existing driver” choice is highlighted and click
the NEXT button to proceed.
If not already selected, choose LPT 1: as the Printer Port and
click the NEXT button to proceed.
Page 10 of 10
Using the Verifone 250 Receipt Printer with MPI 2002
In the “Printer Name” box, delete the default name and type
“Verifone 250 Receipt Printer”. Choose NO for the remaining
option and click the NEXT button to continue.
Choose NO as we do not wish to print a test page.
Click the FINISH button to complete this portion of the setup.
You should now have a new printer named “Verifone 250
Receipt Printer” listed in the Printers window.
Page 11 of 11
Using the Verifone 250 Receipt Printer with MPI 2002
Now we need to tell Windows how to
communicate with this printer. Rightclick on the new printer in the Printers
window. From the menu that appears,
choose PROPERTIES and you should
see a dialog similar to the illustration to
the right.
Do not change any settings on this
page. From the dialog, click on the
DETAILS tab located near the top left
corner and proceed to the next section.
Setting Printer Defaults in Windows 98
Verify that all settings on this page
match the information on your screen
and then click the PORT SETTINGS
button in the lower right corner of the
dialog.
Page 12 of 12
Using the Verifone 250 Receipt Printer with MPI 2002
The “Bits per second” should be set to
“9600”. Change “Data Bits” to “7” and
“Parity” to “Even”. Finally, set “Stop Bits”
“1” and “Flow Control” to “Hardware”.
You do not need to click the ADVANCED
RESTORE DEFAULTS buttons. Click the
OK button when you have completed the
changes.
Now, click the SPOOL SETTINGS
button. Choose “Print directly to the
printer” and click the OK button to
proceed.
Next, click the PAPER tab at the top
of the dialog and choose “Custom”
from the list of paper sizes. When
you click on the “Custom” paper
size, enter “400” for “Width” and
“300” for “Length”. Click the OK
button to return to the PAPER tab.
Change the “Paper source” to
“Continuous – No Page Break”.
Click on the UNPRINTABLE AREA
button and ensure all values are set
to “0”. Click the OK button in the
Unprintable Area dialog and return to
the PAPER tab.
Now, choose the DEVICE OPTIONS
tab from the top of the dialog. Set
the “Character Mapping” option to
“TTY custom” if not already selected.
Ensure “!” appears in the “On
Printer” box. Finally, place your
cursor in the box to the right of the
“End Print Job” option. Hold down
the control button on your keyboard
and type a “J”. The text “^J” should
appear in the box. Refer to the
diagram to the right and ensure your
screen looks the same. Click the
APPLY button and then click the OK
button to complete setting-up your
printer in Windows 98.
Page 13 of 13
to
or
Using the Verifone 250 Receipt Printer with MPI 2002
Using The Verifone 250 Receipt Printer in MPI 2002
Congratulations, you are now ready to use the Verifone 250 Receipt Printer in
MPI 2002. Start MPI 2002 and proceed to MAINTENANCE > DEFAULT
VALUES menu item. Choose the CHECK CASHING tab.
In the “Chcek Cashing Receipt Printer” option open the drop-down list of printers
and find your new “Verifone 250 Receipt Printer on COM1:” Make sure you
check the “Use Built-In Receipt Printer Driver” option. You are ready to use your
new receipt printer in MPI 2002.
NOTE: Ensure your receipt printer is powered on before attempting to print a
receipt in MPI 2002. If your receipt printer is not on, or is out of paper, MPI 2002
will attempt to reprint the receipt several times. If this happens, don’t panic, the
computer has not locked-up, but it may take up to a minute or two for the
program to realize the printer is not available.
Page 14 of 14