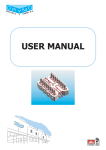
1
USER’S MANUAL
Price Computing Label Scale
CONTENT
1
Safety First .................................................................................................... 3
1.1
1.2
1.3
1.4
2
Summarize .................................................................................................... 5
2.1
2.2
2.3
2.4
2.5
2.6
2.7
2.8
3
Setting label and scale ............................................................................................ 17
Setting the network .................................................................................................. 21
Programming .............................................................................................. 22
6.1
6.2
6.3
6.4
6.5
6.6
7
8
Inspection before usage .......................................................................................... 10
Power up.................................................................................................................... 11
Weighing selling ....................................................................................................... 11
Reset price selling .................................................................................................... 12
Default weight and price selling .............................................................................. 14
Sale In Package ....................................................................................................... 15
Coupon selling .......................................................................................................... 15
Date and time............................................................................................................ 16
Preparation for programming ................................................................... 16
Programming Basic Data .......................................................................... 17
5.1
5.2
6
Outline drawing ........................................................................................................... 5
Display ......................................................................................................................... 6
Standard keyboard layout ......................................................................................... 7
Light.............................................................................................................................. 8
Name and function of the key ................................................................................... 8
Capability ..................................................................................................................... 9
Installing label paper roll ............................................................................................ 9
Main functions and features .................................................................................... 10
Sales Operation .......................................................................................... 10
3.1
3.2
3.3
3.4
3.5
3.6
3.7
3.8
4
5
About warning and cautionicons .......................................................................3
Warning ............................................................................................................3
Power plug and AC outlet .................................................................................4
Caution......................................................................................................................... 4
Setting PLUs ............................................................................................................. 22
Setting Hot-Key......................................................................................................... 24
Setting date and time ............................................................................................... 24
Editing explanation text ........................................................................................... 25
Editing letter string.................................................................................................... 25
Editing label code ..................................................................................................... 26
Sales and Label Report.............................................................................. 29
System Management.................................................................................. 30
8.1
8.2
8.3
8.4
8.5
8.6
Delete single PLU..................................................................................................... 30
Delete all PLUs ......................................................................................................... 30
Testing printer ........................................................................................................... 31
Getting information of Version ................................................................................ 31
Renewing default setting ......................................................................................... 32
Renewing factory setting ......................................................................................... 32
9 Entering Text .............................................................................................. 33
10 Trouble shooting and Technique Support............................................. 34
Annex A. Default label printing format ........................................................ 34
Annex B. Default system parameters.......................................................... 34
-2-
Thank for your choice of our Computing Label Scale, designed to
give you many years of service.
1 Safety First
1.1
To use this product safely and correctly, read this manual thoroughly and operate
as instructed.
After reading this guide, keep it close at hand for future reference.
Always observe the warnings and cautions indicated on the product.
About warning and caution icons
In this guide various icons are used to highlight safe operation of this product and to
prevent injury to the operator and other personnel and also to prevent damage to
property and this product. To bring attention to risks and possible damage, the following
types of icons are used.
:This symbol is indicated for attracting attention (including warning). In this
triangle, the actual type of precaution indicates potential danger (e.g. electric shock).
:This symbol is indicated for attracting attention (including warning). In this
triangle, the actual type of precaution indicates the susceptive of static electricity.
:This symbol indicated for attracting attention (including warning). In this
semicircle, the actual type of precaution indicates the needed protection operation of
static electricity.
1.2
Warning
During handling electronic label printing scale
1.
Should the scale malfunction, start to emit smoke or strange odor, or to occur other
abnormal behavior immediately shut down the power and unplug the AC plug from
the power outlet. Continued use creates the danger of fire and electric shock.
2.
Do not place containers of liquid near the scale and do not allow any foreign matter
to get into it. Should water or other foreign matter get into the scale, immediately
shut down the power and unplug the AC plug from the power outlet. Continued use
creates the danger of shot circuit, fire and electric shock.
3.
Should you drop the scale and damage it, immediately shut down the power and
unplug the AC plug from the power outlet. Continued use creates the danger of
shorting, fire and electric shock.
4.
Never try to open the scale apart or modify it in any way. High-voltage components
inside the scale create the danger of fire and electric shock.
-3-
1.3
1.
2.
3.
4.
1.4
1.
2.
3.
4.
5.
6.
7.
Power plug and AC outlet
Use only a proper AC electronic outlet: 190V ~ 250V; Temperature: -10°C~ +40°C;
Humidity: 40%~90%. Use beyond the indicated conditions creates the danger of
malfunction, fire and electric shock.
Make sure the power plug is inserted as far as it will go. Loose plugs create the
danger of electric shock, overheating and fire.
Note: Do not use an already damaged plug. Never connect to power outlet that is
loose.
Use a dry cloth to periodically wipe off any dust built up on the head of the plug.
Humidity can cause poor insulation and create the danger of electric shock and fire if
dust stays on it.
Do not allow the power outlet or plug to become damaged, and never try to modify
them in any way. Continued use of a damaged power outlet can cause deterioration
of the insulation, exposure of internal wiring, and the danger of short circuit, electric
shock and even fire.
Caution
During handling electronic label printing scale
Do not place the scale on an unstable or uneven surface. Doing so can cause the
scale to fall, and create the danger of malfunction, fire, and electric shock.
Do not place the scale in the following areas.
Areas where the scale will be subject to large amounts of humidity or dust, or
directly exposed to extreme hot or cold air.
Areas exposed to direct sunlight, in a close electronic motor, or any other area
subject to very high temperature.
Do not overlay bend the power cord, do not allow it to be caught between desks or
other furniture, and never place heavy objects on top of the power cord. Doing so
can cause short circuit or damage of the power cord, creating the danger of fire and
electric shock.
Be sure to grasp the plug when unplugging the power cord from the wall outlet.
Pulling on the cord can damage it, break the wiring, or cause short-circuit, creating
the danger of fire and electric shock.
Never touch the plug while your hands are wet. Doing so creates the danger of
electric shock.
Do not place electric object near the scale. Any electric object getting into the scale
maybe creates the danger of malfunction.
Make sure there is no sharp electric magnetic field around the scale; otherwise it will
cause a danger of capability reduction of scale.
-4-
2 Summarize
2.1
Outline drawing
LP-15
-5-
LP-80
2.2
Display
Weight (Kg)
MC
C
Unit Price
III
Zero
Stable
Tare
PLU
PCS
Setting
Shift
Comm.
-%
Auto
Total Price
-6-
+%
Error
Add
Standard keyboard layout
2.3
HOT
KEY
HOT
KEY
HOT
KEY
HOT
KEY
HOT
KEY
HOT
KEY
HOT
KEY
HOT
KEY
HOT
KEY
HOT
KEY
HOT
KEY
HOT
KEY
HOT
KEY
HOT
KEY
HOT
KEY
HOT
KEY
HOT
KEY
HOT
KEY
HOT
KEY
HOT
KEY
HOT
KEY
HOT
KEY
HOT
KEY
HOT
KEY
HOT
KEY
HOT
KEY
HOT
KEY
HOT
KEY
HOT
KEY
HOT
KEY
HOT
KEY
HOT
KEY
HOT
KEY
HOT
KEY
HOT
KEY
HOT
KEY
HOT
KEY
HOT
KEY
HOT
KEY
HOT
KEY
HOT
KEY
HOT
KEY
HOT
KEY
HOT
KEY
HOT
KEY
HOT
KEY
HOT
KEY
HOT
KEY
HOT
KEY
HOT
KEY
HOT
KEY
HOT
KEY
HOT
KEY
HOT
KEY
HOT
KEY
HOT
KEY
HOT
KEY
HOT
KEY
HOT
KEY
HOT
KEY
HOT
KEY
HOT
KEY
HOT
KEY
HOT
KEY
HOT
KEY
HOT
KEY
HOT
KEY
HOT
KEY
HOT
KEY
HOT
KEY
HOT
KEY
HOT
KEY
HOT
KEY
HOT
KEY
HOT
KEY
HOT
KEY
HOT
KEY
HOT
KEY
HOT
KEY
HOT
KEY
HOT
KEY
HOT
KEY
HOT
KEY
HOT
KEY
HOT
KEY
HOT
KEY
HOT
KEY
BACK
SPACE
7
pqrs
4
ghi
1
PLU
+%/
EXTRA
←
MENU
0
8
tuv
5
jkl
2
abc
PRICE
↓
↑
●
9
wxyz
6
mno
3
def
LOCK
VOID
→
SHIFT
CASH
CASH
TARE
RE-ZERO
PACKAGE
AUTO
PRINT
FEED
CLR
-%/
DISC
HOT
KEY
-7-
2.4
Light
Light
Zero
Stable
TARE
PLU
PCS
Shift
Lock
-%
+%
Add
SET
COM
AUTO
ERORR
2.5
Light status
On
On
On
On
On
On
On
On
On
On
On
On
On
On
Scale current status
No weighing or weight=0
Label scale operating stably
TARE key is pressed
Programming PLUs
Sales in package
SHIFT key is pressed
The current product is locked
Discount at percentage
Additional charge at percentage
Accumulating sales quantity of certain goods
Under programming status
Communication between scales and computer
Under Auto-print status
Error status
Name and function of the key
Key
NUMERIC
HOT KEY
MENU
↑
↓
←
→
SHIFT
CLR
PAPER
+% /
EXTRA
-%/
DISC
VOID
AUTO PRINT
PLU
PRICE
LOCK
PACKAGE
RE-ZERO
TARE
CASH
Function
Number and letter entering
Key for direct sales
Enter and quit menu
Select function on the upper
Select function on the next
Select function on the upper
Select function on the next
nd
Select 2 function
Clear entering
Feed label paper
Additional at percent
Charge function.
Discount at percent
Coupon function
Cancel current sales operation
Auto-print and manual-print shift key
PLU code key to get product information
Price entry key
Lock a certain key for one PLU
Sales in packet
Zero comeback key
Tare key
Total cash key
-8-
2.6
Capability
Parameter
Specification
Singular division
Maximum division of
weighing-detection:
MAX-MIN-e
Double division
Precision
LED Display
Weight
Price
Cash amount
Power supply
Power consumption
Operating
temperature
Humidity
Normal mode:
Printing mode:
Storage
Working
3Kg—20g—1g
6Kg—40g—2g
5Kg—100g—5g
6/15Kg—40g—2/5g (scale with 15 Kg
maximal weighing)
15/30Kg—80g—5/10g (scale with 30 Kg
maximal weighing)
1/3000 F. S
5 digits
7 digits
8 digits
AC110V/230V, 50/60Hz
20W
50W
-10℃~50℃
0℃~40℃
40%~90% RH
Thermal print
8 dot/mm
60 mm/sec
Type
Resolution
Printer feature
Speed
Reliability
30km without malfunction
distance
Width
30-60mm
Length
25-200mm
Printer paper
Outside diameter
≤φ100mm
Inside diameter
≥φ25mm
Space
2-3mm
Print font
character set
30×30 dot, 3.75 (W) mm x 3.75 (H) mm
Note: this instruction manual is suitable for the price computing label scale with maximal
weighing of 15 Kg and 30 Kg.
2.7
1.
2.
3.
4.
5.
6.
7.
8.
9.
Installing label paper roll
Make sure that the power plug is unplugged from AC power
Open the printer side cover
Push release lever to lift up the printer head
Insert label roll into the Label Roll Shore
Separate the label from back-paper for 30cm
Load the label through paper chute and wind the back-paper two or three times
around the spool shaft, and then use U-pin to lock it
Put down the printer head and lock it
Close the printer side cover
Turn on the power, press [feed key] to feed the label to correct print position
-9-
Release Lever
U-Pin
Printer Head
Label Roll Shore
Note:Load the label through
the paper chute correctlySpool
and Shaft
adjust the width of paper
Paper Chute
chute to the label.
2.8
1.
2.
3.
4.
5.
6.
7.
8.
Main functions and features
10000 pieces of PLUs and PLUs data can be modified easily.
PLU hot-keys can be edited and makes sales operation more quickly.
Printing parameters and label code setting can be easily edited.
Label code format designation is convenient.
Label printing quantity and sales amount can be sorted by PLU code.
Multiple discount modes available. Amount before and after discount shown.
Easy communication in two network ways: RS-232 and TCP/IP.
Programming and setting can be done in computer and then uploaded to scale via
RS-232 port.
3 Sales Operation
3.1
1.
2.
3.
4.
Inspection before usage
Switch on the scale
Make sure that the gradienter hole is clean
Anything on the scale pan should be cleared up.
Adjust the scale feet until the gradienter bubble showing adjustment to the horizontal.
It is shown below:
Correct
5.
Wrong
Make sure that printer paper sufficient and has been correctly installed.
-10-
3.2
Power up
Procedure
1. Clean scale pan
Key operation and display
2. Power switch ―ON‖
ON
3. Zero indicator lighting up
0.000
0.00
Zero Indicator
4. If Zero Indicator not lighting up,
press RE-ZERO key
[RE-ZERO]
5. Stability indicator lighting up
0.000
0.00
Stable
Zero
Indicator Indicator
3.3
Weighing selling
Procedure
1. Scale pan clear
Key operation and display
2. Zero indicator lighting up
0.000
0.00
Zero Indicator
3. If Zero Indicator not lighting up,
press RE-ZERO key.
[RE-ZERO]
4. Tare
Put the weighing pan on the scale
pan, then press TARE key, then the
―Tare‖ indicator will light up.
0.000
Tare indicator
-11-
0.00
5. Enter PLU Number
To get product information, enter
PLU number, and then press PLU
key, then PLU indicator is lighting
up.
e.g.: PLU number: 1
Unit price =USD 12.30/Kg
[PLU]
[1]
0.000
12.30
0.00
PLU
Or use Hotkey:
Pressing the PLU hotkey, to sale
the goods directly, e.g. for
COD1, press HOTKEY directly; for
COD 89, press SHIFT+HOTKEY.
e.g.: COD: 1
PLU/COD: 1
PLU/COD: 89
e.g.: COD: 89
PLU/COD: 1
[SHIFT]
PLU/COD: 89
6. To weigh goods.
Put the goods on the scale pan.
e.g.: Gross weight=300g
0.300
12.30
3.69
7. Please refer to coupon operation
(3.7), if coupon is needed.
8. Label printing
Press CASH to print label.
3.4
[CASH]
Reset price selling
Procedure
1. Scale pan clear
Key operation and Display
2. Zero indicator lighting up
0.000
0.00
Zero Indicator
3. If Zero Indicator not lighting up,
press RE-ZERO key.
[RE-ZERO]
-12-
4. Tare
Put the weighing pan on the scale
pan, then press TARE key, then the
―Tare‖ indicator will light up.
0.000
0.00
Tare indicator
5. Enter PLU Number
To get product information, enter
PLU number, and then press PLU
key, then PLU indicator is lighting
up.
e.g.: PLU number: 1
Unit price =USD 12.30/Kg
[PLU]
[1]
0.000
12.30
0.00
PLU
Or use Hotkey:
Pressing the PLU hotkey, to sale the
goods directly, e.g. for
COD1, press HOTKEY directly; for
COD 89, press SHIFT+HOTKEY.
e.g.: COD: 1
PLU/COD: 1
PLU/COD: 89
e.g.: COD: 89
PLU/COD: 1
[SHIFT]
PLU/COD: 89
6. Reset price
Attn: Open PLU must be set as
―Reset Price selling‖ during
programming.
To change the price to 10.00
[10]
0.000
10.00
Enter the new price, e.g. New
price=10, press PRICE key.
7. To weigh goods.
Put the goods on the scale pan.
[PRICE]
0.00
e.g.: Gross weight=300g
0.300
10.00
3.00
8. If coupon sales, refer to coupon
operation (3.7).
9. Label printing
Press CASH to print label.
[CASH]
-13-
3.5
Default weight and price selling
Procedure
1. Scale pan clear
Key operation and display
2. Zero indicator lighting up
0.000
0.00
Zero Indicator
3. If Zero Indicator not lighting up,
press RE-ZERO key.
[RE-ZERO]
4. Tare
Put the weighing pan on the scale
pan, then press TARE key, then the
―Tare‖ indicator will light up.
0.000
0.00
Tare indicator
5. Enter PLU Number
To get product information, enter
PLU number, and then press PLU
key, then PLU indicator is lighting
up.
e.g.: PLU number: 1
Unit price =USD 12.30/Kg
[PLU]
[1]
0.000
12.30
0.00
PLU
Or use Hotkey:
Pressing the PLU hotkey, to sale the
goods directly, e.g. for
COD1, press HOTKEY directly; for
COD 89, press SHIFT+HOTKEY.
e.g.: COD: 1
PLU/COD: 1
PLU/COD: 89
e.g.: COD: 89
PLU/COD: 1
[SHIFT]
PLU/COD: 89
6. Enter package quantity
e.g. Package quantity = [10]
Press PACKAGE key
Quantity: 10
[10]
[PACKAGE]
10
Note:When quantity is―1―, direct
key sales.
100.00
1000.00
7. Label printing
Press CASH to print label.
[CASH]
-14-
3.6
Sale In Package
Procedure
1. To enter PLU code of packaged goods.
―PCS‖ indicator will light up.
(Attn: This function can work only when
―bagged selling" is set during
programming.)
Or use Hotkey:
Pressing the PLU hotkey on keyboard
to sale the goods directly. E.g. for
COD1, press HOTKEY directly; for
COD 89, press SHIFT+HOTKEY.
Key operation and Display
1
100.00
100.00
PCS indicator
e.g.: COD: 1
PLU/COD: 1
PLU/COD: 89
e.g.: COD: 89
PLU/COD: 1
[SHIFT]
PLU/COD: 89
2. Enter package quantity
e.g. Package quantity = [10]
Press PACKAGE key.
Quantity: 10
[PACKAGE]
[10]
10
Note:When quantity is‖1‖, direct key
sales.
100.00
1000.00
3. Please refer to coupon programming
(3.7), if coupon is needed.
4. Label printing
Press CASH to print label
3.7
[CASH]
Coupon selling
Procedure
1. Enter coupon rate
During on billing operation,
enter discount amount, press -% /DISC
(Attn: coupon rate has been entered in the
product information, in general, press
-%/DISC, then press CASH key. Only
when change the coupon rate, refer to this
introduction.)
e.g. coupon rate = [85%]
Press -%/DISC key.
2. Label Printing
Press CASH to print label
Key operation and Display
10
100.00
e.g.: Coupon1000.00
-%
amount: 85%
10
85.00
850.00
[CASH]
-15-
3.8
Date and time
Procedure
Under this interface.
Key operation and Display
0.000
0.00
Press PACKAGE key
0.00
Then you can see the date and time. It
displays current day of 2007-07-06
(year-month-date), current time of
13-20-57 (hour-minute-second)
[PACKET]
2007- 07 -06
13-20-57
4 Preparation for programming
Procedure
Turn on the scale.
Initial data in the display
Key operation and Display
0.000
0.00
Note:Press MENU key quit Programming
Interface and back to Sales mode.
Press CLR to go back to upper level
submenu within the programming menu.
Under the condition without sales
operation, enter[9999]
Press MENU Key, enter programming
interface. The ―Setting― Indicator is
lighting up.。
0.00
9999
0.000
0.00
9999
[MENU]
1.
Setting Indicator
Programming menu
(General menu level)
[2]: Parameter setting
[1]: System setting
[3]: PLUs
[1]: System setting
[4]: Sales and label setting
Programming menu
(Sub- menu level)
[1]: Setting label and scale parameters
[2]: Setting network communication
[1]: PLUs setting
[3]: Setting Hot-Key
[1]: Setting date and time
[5]: Setting explanation text
[4]: Setting letter string
[6]: Setting label
[1]: Date and time
-16-
[3]: PLUs setting
[6]: System testing
[7]: About Version
[2]: Daily sales amount
[3]: Daily label quantity
[4]: Delete daily sales data
[1]: Setting single PLU
[2]: Delete single PLU
[3]: Delete all PLUs
[2]: Printing testing
[1]: Scale check out
[2]: Turn on automatic back to
Zero
[1]: Scale
[6]: System testing
chcek out
[3]: Turn off automatic back to
Zero
[4]: Turn on data check out
[5]: Pre-setting
[1]: Back to default-setting
[2]: Back to factory-setting
Note: For the concrete programming and setting procedures see next chapters
5 Programming Basic Data
5.1 Setting label and scale
Procedure
In the Programming interface,
Key operation and Display
2.-1
Enter [2], It displays label and scale setting
interface.
Enter the Scale Number (0 -99).
e.g.: Scale No. = [1]
Press CASH key
[2]
2.-1
Id
1
[1]
Enter label width (Unit:0.125 mm)
Id
[CASH]
2.-2 WIDT
e.g.: Label width = [400]
Press CASH key
[400]
Enter label Length (Unit 0.125 mm)
2.-3
e.g.: Label length = [500]
Press CASH key
[500]
-17-
400 [CASH]
HEIG
500 [CASH]
Enter label interval space (Unit 0.125 mm)
e.g.: Label interval = [20]
Press CASH key
2.-4
[20]
Enter printing greyness (1 – 10)
SPAN
20
2.-5
e.g.: Printing darkness = [5]
Press CASH key
Enter printer paper peel check (0: Not to
check; 1: check)
e.g.: Not to check = [0]
Press CASH key
Setting PLU printing position (0: not in the
center; 1: in the center)
e.g.: In the center = [1]
Press CASH key
Enter type of label code (0 – 11)
GRAY
5
[5]
2.-6
2.-7
2.-8
e.g.: Label code type = [0]
Press CASH key
[0]
Note: Type of label code
0:POS code + Sales amount(not round
Kopeck)
1:POS code + Weight
2:POS code + Price
3:POS Code
4: POS Code + Weight (5 Digits) + Sales
amount (round Kopeck) (18 digits)
5:POS code + Sales amount(round
Kopeck)
6:POS code + Weight (5 digits) + Cash
amount (not round Kopeck) (18 digits)
7:POS code + Sales amount (round
Kopeck+ Weight(5 digits) ) (18 digits)
8:POS code + Sales amount(not round
Kopeck) + Weight (5 digits)(18 digits)
9:1 + Weight + POS Code
10:POS Code + Price + Weight(5 digits) (18
digits)
11:POS Code + Weight (5 digits) + Price (18
-18-
[CASH]
CENT
1
[1]
[CASH]
PEEL
0
[0]
[CASH]
[CASH]
BART
0
[CASH]
digits)
Note:
Not round Kopeck = last digit is Kopeck,
e.g. 2,22 USD
Round Kopeck = last digits is 10 Kopeck ,e.g.
2.2 USD (rounding)
Enter POS code length (maximal 8 )
2.-9
e.g. POS code length =[7]
Press CASH key
[7]
Enter POS code type (0:prefix+interner code
1:only interner code)
e.g. POS code type =[0]
Press CASH key
7
2.-10
[0]
Enter POS Prefix
PLEN
PSTY
0
2.-11
e.g. POS Prefix=[29]
Press CASH key
[29]
Enter Default Weight Quantity (0:three digits
1: one digit)
e.g. Default Weight Quantity=[0]
Press CASH key
Enter the type of Rounding
(0:round at the third digit; 1:ignore the third
digit; 2:round at the second digit; 3:ignore
the second digit);
e.g. The type of Rounding =[0]
Press CASH key
Enter the unit of Weight (0:kg 1: g);
29
[CASH]
QT
0
2.-13
[0]
[CASH]
PRIF
2.-12
[29]
[CASH]
[CASH]
ROUN
0
[CASH]
2.-14 WU
e.g. Unit of Weight =[0]
Press CASH key
[0]
-19-
0
[CASH]
Enter the Unit of Default price (0:kg 1:100g
2:500g);
e.g. Unit of default price =[0]
Press CASH key
2.-15
[0]
Enter whether allow to change the price
manually (0:Not allow to change price
manually; 1:allow to change price manually)
e.g. Not allow to change price manually=[0]
Press CASH key
Enter whether allow to discount (0:Not allow
to discount; 1:allow to discount)
e.g. Not allow to discount=[0]
Press CASH key
0
2.-16
[0]
0
[0]
Enter the number of day before expiry
e.g. The number of day before expiry=[5]
Press CASH key
0
Enter whether to do Statics (0:Not Statistics
1: Statistics)
E.g. Not Statics=[0]
Press CASH key
Enter label format index (0 or 1);
0
5
[0]
Press CASH key
Sound of ―Bee‖ hints finishing of parameter
setting.
[CASH]
BSTA
0
2.-21
e.g. Label format index=[0]
Press CASH key
[CASH]
VDAT
2.-20
[0]
[CASH]
DATE
2.-19
[0]
[CASH]
BDIS
2.-18
e.g. Format of data=[0]
Press CASH key
[CASH]
BPRI
2.-17
[0]
Enter Format of date (0:No date;
1:Packaging date 2:Expiry date
3:Packaging date and Expiry date);
PU
[CASH]
LIDX
0
[CASH]
2.
[CASH]
-20-
5.2
Setting the network
Procedure
In the programming interface,
Enter [12], It displays Network setting
interface.
Key operation and Display
1.2. 1.
IP
[12]
Setting IP address
Enter [1] directly, then press CASH key
1.2. 1. - 1
IP
92.168.0.87
The preset IP address appears in the display:
192.168.0.87
Press CLR key to delete preset IP address.
[CLR]
1.2. 1. - 1
Enter new IP address
IP
192.168.0.100
e.g. New IP address =192.168.0.100
Press CASH key
[CASH]
1.2. 1.
Setting MAC address
Under network programming interface, enter
[2],
the preset MAC address is show: 12345678
Note: L.AC is MAC.
Press CLR key to clean current MAC
address.
IP
[2]
1.2 .2 -1
L. AC
12345678
[CLR]
1.2.2.- 1
MAC
Enter new MAC address
[CASH]
55555555
e.g. new MAC address = 55555555
Press CASH key
1.2.2.
Press CLR key to return to basic data setting
interface as shown on the right.
-21-
1
MAC
[CLR]
1.2.
6 Programming
6.1
Setting PLUs
Procedure
Under the programming interface ,
Key operation and Display
3.1.-1
NO
Enter [3], press CASH key.
[3]
Enter PLU
3.1.-1
[CASH]
NO
1
e.g. PLU = 1
press CASH key
[1]
Enter internal code
[CASH]
3.1.-2 CODE
e.g. Internal code = 1
Press CASH key
1
[1]
Enter product name
3.1.-3
Using ↑ and ↑ to shift the input method
0 for numeric; 1 for small letter; 2 for
capital letter
Enter letter, Press CASH key .
Enter price (according to weight unit)
[CASH]
NA
1
[CASH]
3.1.-4
PRI
1
e.g. Price = [50]
Press CASH key
50.00
[50.00]
Enter sales mode (0: Weighing selling,
1: default price selling, 2: default weight
and price selling)
e.g. Sales mode = [0] (Weighing selling)
Press CASH key
Enter default weight (only effective for
default weight and price selling. Unit: g)
[CASH]
3.1.- 5 TYPE
1
0
[0]
3.1.- 6
[CASH]
WT
1
e.g. Default weight = [20]
[20]
-22-
[CASH]
Enter Tare (Only effective for weighting
selling)
3.1.-7
TARE
1
10
e.g. Tare = [10]
Press CASH key
[10]
Enter date type (0: Void, 1: no date, 2:
Package date, 3: expiry date, 4: Package
and expiry date)
e.g. Date type =[0]
Press CASH key
3.1.-8
[CASH]
DATE
0
[0]
Enter expiry days
1
3.1.-9
[CASH]
VDAT
e.g. Expiry days = [100]
Press CASH key
1
100
[100]
Reset price selling or not (0: Void, 1: not
allow, 2: allow)
3.1.-10
[CASH]
PRIM
1
1
e.g. not allow reset price selling = [1]
Press CASH Key
[1]
Enter Type of discount {0: not discount,
1: special price 2: discount, 3: Coupon}
3.1.-11
[CASH]
DISM
1
1
e.g. Type of discount = [1]
PressCASH key
[1]
Enter discount type of discount
(package)
[CASH]
3.1.-12 DIS
1
9
e.g. Discount type of package discount =
[9]
Press CASH key
Enter index of explanation
e.g. Explanation index. = [100]
Press CASH Key
[9]
Note: For explanation text index,, see
Explanation text editing
Setting is finished with a ―BEE‖ sound.
[100]
-23-
[CASH]
3.1.-13 MSG
1
100
3.1.
[CASH]
6.2
Setting Hot-Key
Procedure
Under the programming interface ,
Key operation and Display
1.3.-1
Enter [13], It displays Hot-Key setting
interface.
[13]
You can assign a PLU to one of HOT key.
1.3.-1
e.g. assign one PLU/product to Hot-key 5.
Enter [5].
Press CASH key.
Press the Hot-Key 5 (when necessary,
combine with ―SHIFT‖ key).
Setting is finished with a ―BEE‖ sound
HT
HT
5
[5]
[CASH]
1.3.- 1
HT
5
[Hotkey 5]
Repeat above steps to set more PLUs
Hot-Key.
1.3.
Or press CLR key to return to
programming menu interface.
6.3
Setting date and time
Procedure
Under the programming interface ,
Key operation and Display
1.1.-1
DATE
Enter [1], Press CASH key.
[1]
It shows current date (year-month-date):
20070605.
1.1.-1
[CASH]
DTAE
20070605
Enter new date:20070705
Press CASH key.
[20070705]
It shows current time
(hour-minute-second): 160614.
1.1.-1
[CASH]
TIME
160614
Enter new date:170000
Press CASH key
[170000]
-24-
[CASH]
It shows date and time just set. The
setting is finish.
2007 — 07 — 05
17—00—00
Press CLR key to return to programming
menu interface.
6.4
1.
Editing explanation text
Procedure
Under the programming interface ,
Key operation and Display
1.5.-1
Enter [15]
IDX
[15]
Enter index of explanation (1-255)
1.5.-1
IDX
1
e.g. Explanation text index.= 1
Press CASH key.
[1]
Enter explanation text (maximal 96
letters) When finish, press CASH key.
1.5.-2
[CASH]
MSG
[CASH]
Setting is finished with a ―BEE‖ sound.
6.5
1.5.
Editing letter string
Procedure
Under the programming interface ,
Key operation and Display
1.4.-1
Enter [14],
[14]
-25-
IDX
Enter number letter string (1-8)
1.4.-1
IDX
e.g. Letter string NO.= 1
Press CASH key.
1
[1]
Enter letter string (maximal 24 letters).
When finish, press CASH key.
1.4.-2
[CASH]
STRI
1
[CASH]
Setting is finished with a ―BEE‖ sound.
6.6
1.4.
Editing label code
Procedure
Under the programming interface ,
Key operation and Display
1.6.-1
Enter [16],
IDX
[16]
Enter number of label editing
(1-32)
1 Internal code
2 Product name
3 PLU code
4 Price
5 Weight
6 Amount after discount
7 Label code
8 Date
9 Effective days
10 Frame
11 Time
12 Amount before discount
13 Expiry date
14 Discount rate
15 Title 1
16 Title 2
17 Title 3
18 Title 4
19 Title 5
20 Title 6
1.6.-1
IDX
1
[1]
-26-
[CASH]
21 Title 7
22 Title 8
23 Title 9
24 Letter string 1
25 Letter string 2
26 Letter string 3
27 Letter string 4
28 Letter string 5
29 Letter string 6
30 Letter string 7
31 Letter string 8
32 Explanation text
e.g. Letter editing NO.= 1
Press CASH key.
Setting whether to print (0=: not to print,
Others: pint)
e.g. Whether to print= [0]
Press CASH key to enter next printing
setting
Setting font (0: normal, 1: double width,
2: double height, 3; double width and
height).
After enter one choice, press CASH key
to enter next printing setting.
Note: In Setting Frame, no this setting.
Setting rotation degree of printing font (0:
0 degree, 1: 90 degree, 2: 180 degree, 3:
270 degree).
After enter one choice, press CASH key
to enter next printing setting.
Note: The function only on Version 1.08
or the above versions.
Setting letter width (Unit: 0,125mm).
After enter one choice, press CASH key
to enter next printing setting.
Note: Only when setting frame and label
code, this function exits. When setting
label code, width is code width (2-4).
Setting letter height (Unit: 0,125mm).
After enter one choice, press CASH key
to enter next printing setting.
Note: Only when setting frame and label
code, this function exits.
-27-
1.6.1-1
ENA
0
[0]
1.6.1-2
[CASH]
FONT
[CASH]
1.6.1.-3
ORI
[CASH]
1.6.1.-4
W
[CASH]
1.6.1.-5
H
[CASH]
Setting title text index (1-23)
1:Product name
2:Weight (g)
3:Price (USD/100g)
4:Sales amount
5:Packaging date
6:Complement
7:Storage duration
8:Net weight
9:Production date
10:Usage way
11:Storage way
12: PLU code
13: Sales amount (USD)
14: PLU
15: g
16: Weight
17: Price
18: USD
19: USD/100g
20: USD/500g
21: USD/Kg
22: Kg
23: Effective days
After enter one choice, press CASH key
to enter next printing setting.
Note: this function only exists in setting
title.
Setting frame width (Unit: 0,125mm).
After enter the width, press CASH key to
enter next printing setting.
Note: This function only exists on
Software Version 1.08 or above version
in setting frame.
Setting X-axis (Unit: 0,125mm).
After enter the number, press CASH key
to enter next printing setting.
1.6.1-6
T
[CASH]
1.6.1-7
PW
CASH
1.6.1-8
X
[CASH]
Setting Y-axis (Unit: 0,125mm).
After enter the number, press CASH key.
Label code programming finishes.
1.6.1-9
Y
[CASH]
-28-
7 Sales and Label Report
Procedure
Under the programming interface ,
Key operation and Display
4.-1
20070705
Enter [4], It shows current date
(year-month-date): 20070705.
[4]
It shows current date (year-month-date):
20070705.
Press CASH key, to show total sales
amount
Note: The scale shows the date when the
last sales report was deleted.
It shows current sales amount 120.50.
4.-1
20070705
[CASH]
4.-2
Press CASH key to display total quantity
of label.
120.50
[CASH]
It shows current label quantity: 50.
4.-3
Press CASH key to enter next setting.
50
[CASH]
Setting whether to delete the current
reporting data. You can use [←][→]key to
chose.(1. Yes;2. No)
Press CASH key. The setting is finished
with a sound of ―BEE‖.
Note: The current reporting data are
shown in above operation, but can not be
changed.
-29-
4.-4
1.YES
[CASH]
8
8.1
System Management
Delete single PLU
Procedure
Under the programming interface ,
Key operation and Display
3.1.
Enter [3],
Enter [2].
3.2.-1
CODE
Enter PLU to be deleted.
e.g. PLU= [90]
Press CASH key.
3.2. -1
CODE
90
[90]
Interface asks whether to confirm the
above setting.
3.2.-2
You can use [↑][↓]key to chose .(1.OK;2.
CANCEL)
Press CASH key
Setting is finished with a ―BEE‖ sound.
8.2
[CASH]
Y-N
1 .OK
[CASH]
3.2.
Delete all PLUs
Procedure
Under the programming interface ,
Enter [3],
Key operation and Display
3.1.
Enter [3].
Then interface ask whether to delete all
PLUs.
You can use [↑][↓]key to
chose .(1.OK;2. CANCEL)
Press CASH key
Setting is finished with a ―BEE‖ sound.
Note: The setting will delete all PLUs. Be
cautious!
-30-
3.3.-1
Y-N
1.OK
[CASH]
3.3.
8.3
Testing printer
Procedure
Under the programming interface ,
Enter [6],
Key operation and Display
6.1.
[6
It shows the printer testing interface,
Enter [1].
to do a testing printing.
Print a black-and-white pattern.
8.4
6.1.
[1]
Getting information of Version
Procedure
Under the programming interface ,
Enter [7],
Key operation and Display
1.
It shows current software version:
[1.110-090416].
1.110-090416
Press CASH key to return to upper level
submenu.
If need to return to programming
interface,
Press CLR Key.
[CASH]
7.
[CLR]
Return to programming menu interface.
-31-
1.
8.5
Renewing default setting
Procedure
Under the programming interface ,
Enter [5] to system setting interface
Key operation and Display
5.1.
[5]
Enter [1]
5.1.-1
PAS
[1]
Enter confirmation code: 12345678.
The scale will restart. The setting is
finished.
Note: 1. setting Explanation Text as
―MESSEGE+Index‖
2. setting Text String as ―STRING+Index‖
3. Setting Label format as Default format
(see Annex A)
4. Setting System Parameters as Default
System Parameter‖. (see Annex B)
8.6
5.1.-1
PAS
12345678
[CASH]
Renewing factory setting
Procedure
Under the programming interface ,
Enter [5] to system setting interface
Key operation and Display
5.1.
.
[5]
Enter [2]
5.2.-1
PAS
[2]
Enter confirmation code: 12345678.
The scale will restart. The setting is
finished.
Note: The setting will delete all PLUs
setting, then setting 10 PLUs and back to
the default setting. (refer to 5.5 setting)
-32-
5.2.-1
PAS
12345678
[CASH]
9 Entering Text
Procedure
Entering text is required mainly during editing
PLUs, letter string, and explanation text.
Key operation and Display
3.1.-3
2
09
e.g. In the text entering interface, editing PLU
name.(0:number; 1:Capital; 2:Lowercases
letter)
―09‖ is the number of input characters.
―k‖ is the input character.
Note: PLU name, Letter string are maximal 12
letters. Explanation text maximal 48 letters.
For letter inputting code, please refer to Annex
C.
When input English letter, e.g. apple,
NA
3.1.-3
Enter directly and press CASH key.
NA
k
2
05
[CASH]
Use ↑ or ↓
to choose one of input method
3.1.-3
NA
1
[CASH]
When inputting is wrong, press [BACKSPACE]
key to delete current inputting.
3.1.-3
NA
2
Press [CLR] to delete all inputting.
To use [←][→] to navigate the editing position.
-33-
[CASH]
10
Trouble shooting and Technique Support
Before you inform the technique representative, you may refer the error to the following
list. Many questions occur do not because of the quality of the product rather a simple
incorrect operation.
Eorrors
ERR-01
ERR-02
ERR-03
ERR-04
ERR-05
ERR-06
ERR-07
ERR-08
ERR-09
ERR-10
ERR-11
ERR-12
ERR-13
ERR-14
ERR-15
ERR-16
ERR-17
ERR-18
ERR-19
ERR-20
ERR-21
Discription
Invalid PLU code
Invalid PLU No.
Difference price when resale
No print paper
Forbid change price
PLU not found
Wrong IP format
Wrong date or time
Invalid key input
Quantity or weight error
Money error
Memory full
Data input error
Data in memory error
Label Paper haven’t peeled
PLU can't be Discount
PLU can't be add
Manual discount forbidden
Wrong MAC address format
Amount of money overflow
USB ERR
Addiontional common trouble shooting:
1. The display blinking over 3 seconds during Start operation.
> Switch the scale off.
2. The displaying is dark or not normal.
> Please check the cable connection.
3. The scale can’t be started.
> Check the power connection.
4. The communication is not good when using networking function.
> Check the connection between two machines.
5. Scale is not accurate and precision becomes weaker.
> Check whether it is clean under the scale pan, the calibration of gradienter and the
support pillar stands for the housing.
-34-
Annex A.
Label editing No.
1 Internal code
2 Product Name
3 PLU Code
4 Price
5 Weight
6 Amount
after discount
7 Label code
8 Date
9 Effective days
10 Frame
11 Time
12 Amount
before discount
13 Expiry date
14 Discount rate
15 Title 1
16 Title 2
17 Title 3
18 Title 4
19 Title 5
20 Title 6
21 Title 7
22 Title 8
23 Title 9
24 Letter string 1
25 Letter string 2
26 Letter string 3
27 Letter string 4
28 Letter string 5
29 Letter string 6
30 Letter string 7
31 Letter string 8
32 Explanation
text
Default label printing format
Whether Letter Directi
Width Height Title
to print font
on
0
1
0
1
1
1
1
1
0
0
0
3
0
1
1
Space
at
X-axis Y-axis
edge
0
0
10
10
52
105
74
106
106
138
1
0
355
106
0
0
0
10
345
0
138
0
0
265
154
1
1
1
3
1
0
0
0
0
0
0
0
0
0
10
110
10
170
224
224
224
106
106
138
138
106
138
154
3
0
60
190
3
50
0
1
0
1
1
1
1
1
1
1
0
0
1
0
0
0
0
0
0
0
17
21
8
22
13
5
23
0
Note:Function No.10 Frame only on Software Version 1.08 or above
-35-
Annex B.
Default system parameters
Setting parameters
Sacle No.
Label width
Label height
Label internval space
Printing greyness
Label paper peel check
PLUS printed in the centre
Label code type
POS code length
POS code type
POS code prefix
Sales amount roudning type
Weight unit
Price unit
Whether to manually change
price
Whether to manually
discount
Whether to fix the PLU
Whether to antomaticly print
Default date format
Whether to do statistics
Volume
1
448
243
35
10
1
1
0
7
0
29
0
0
0
0
Discription
448 x 0.125mm = 56mm
Check label paper peel
Plu in the center
Code + Sales amount (Not rounding
Kopeck)
Prefix+Internal code
0
Rounding at the 3rd. digits
kg
/kg
VOID: not able to manually change
price
Not to manually discount
0
0
3
0
Not tp fix PLU
Not automaticly print
Packaging date and effective date
Not to do statistics
-36-