1
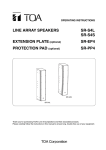
OPERATING INSTRUCTIONS
LINE ARRAY SPEAKER
SR-A12L, SR-A12S, SR-A18B,
SR-A12LWP, SR-A12SWP
RIGGING FRAME
SR-RF12, SR-RF12WP
TILT JOINT PLATE
SR-TP12
Note that casters must be prepared separately.
Thank you for purchasing TOA’s Line Array speaker system, Rigging Frame and Tilt Joint Frame.
Please carefully follow the instructions in this manual to ensure long, trouble-free use of your equipment.
TABLE OF CONTENTS
1. SAFETY PRECAUTIONS ............................................................................... 3
2. GENERAL DESCRIPTION ............................................................................. 5
3. FEATURES .......................................................................................................... 5
4. DIMENSIONS ...................................................................................................... 5
5. INPUT CONNECTORS .................................................................................... 9
6. INTERNAL WIRING DIAGRAM ................................................................... 10
7. CONNECTIONS ................................................................................................ 10
8. DIGITAL PROCESSOR SETTINGS ........................................................... 11
9. FLYING
9.1. General Description ......................................................................................... 12
9.2. SR-RF12(WP) Rigging Frame Assembly ......................................................... 13
9.3. Joining the Enclosure to the Rigging Frame .................................................... 14
9.4. Joining Enclosures ........................................................................................... 15
9.5. Notes on Flying ................................................................................................ 16
10. STACKING
10.1. General Description ...................................................................................... 18
10.2. SR-RF12 Rigging Frame Assembly .............................................................. 18
10.3. Mounting the Enclosure to the Rigging Frame ............................................. 19
10.4. Joining Enclosures......................................................................................... 20
10.5. Notes on Stacking ......................................................................................... 20
10.6. Tilting the Enclosure Downward .................................................................... 21
11. SPECIFICATIONS
2
..................................................................................... 23
1. SAFETY PRECAUTIONS
• Before installation or use, be sure to carefully read all the instructions in this section for correct and safe
operation.
• Be sure to follow all the precautionary instructions in this section, which contain important warnings and/or
cautions regarding safety.
• After reading, keep this manual handy for future reference.
Safety Symbol and Message Conventions
Safety symbols and messages described below are used in this manual to prevent bodily injury and property
damage which could result from mishandling. Before operating your product, read this manual first and
understand the safety symbols and messages so you are thoroughly aware of the potential safety hazards.
WARNING
Indicates a potentially hazardous situation which, if mishandled, could
result in death or serious personal injury.
CAUTION
Indicates a potentially hazardous situation which, if mishandled, could
result in moderate or minor personal injury, and/or property damage.
WARNING
• Avoid installing or mounting the unit in unstable
locations, such as on a rickety table or a slanted
surface. Doing so may result in the unit falling
down and causing personal injury and/or property
damage.
• Refer all installation work to the dealer from whom
the speaker was purchased. Installation for flying
requires extensive technical knowledge and
experience. The speaker may fall off if incorrectly
installed, resulting in possible personal injury.
• Flying Precautions
Be sure to follow the instructions below. Otherwise,
the suspension wires or belts may be off or snap
and the speaker may fall off, causing personal
injury.
· Check to confirm that the suspension wires and
belts are strong enough to withstand the speaker
load.
· The connectors of the suspension wires and belts
must be securely linked with those of the
speaker.
· All parts and components (such as enclosures,
metal pieces, and screws) must be free from any
deformation, crack, and corrosion.
· Be sure to use screws supplied with the optional
flying hardware when installing the speaker using
such hardware.
• (SR-A12LWP, SR-A12SWP, SR-RF12WP only)
When installing the unit in a snowy area, take
appropriate measures to prevent snow from lying
on the unit. If the snow lies on the unit, the unit may
fall, causing personal injuries.
• Owing to the unit's size and weight, be sure that at
least two persons are available to install the unit.
Failure to do so could result in personal injury.
• Do not use other methods than specified to mount
the bracket. Extreme force is applied to the unit
and the unit could fall off, possibly resulting in
personal injuries.
• Use nuts and bolts that are appropriate for the
ceiling's or wall's structure and composition. Failure
to do so may cause the speaker to fall, resulting in
material damage and possible personal injury.
• Tighten each nut and bolt securely. Ensure that the
bracket has no loose joints after installation to
prevent accidents that could result in personal
injury.
• Use only the specified mounting brackets. Doing
otherwise may cause the unit or component to fall
off, resulting in personal injury.
• Do not mount the unit in locations exposed to
constant vibration. The mounting bracket can be
damaged by excessive vibration, potentially
causing the unit to fall, which could result in
personal injury.
• Install the unit only in a location that can
structurally support the weight of the unit and the
mounting bracket. Doing otherwise may result in
the unit falling down and causing personal injury
and/or property damage.
3
CAUTION
• When unpacking or moving the unit, be sure to
handle it with two or more persons. Falling or
dropping the unit may cause personal injury and/or
property damage.
• Avoid placing the unit in a doorway or other high
traffic area as people may trip on the equipment
and cords, or be injured by falling objects.
• Avoid touching the unit's sharp metal edge to
prevent injury.
4
• Do not operate the unit for an extended period of
time with the sound distorting. This is an indication
of a malfunction, which in turn can cause heat to
generate and result in a fire.
• Do not stand or sit on, nor hang down from the unit
as this may cause it to fall down or drop, resulting
in personal injury and/or property damage.
• Have the unit checked periodically by the shop
from where it was purchased. Failure to do so may
result in corrosion or damage to the speaker or its
mounting bracket that could cause the speaker to
fall, possibly causing personal injury.
2. GENERAL DESCRIPTION
TOA’s SR-A series Line Array speaker employ unique wave front control technology to create a sound field
with high sound clarity and uniform sound pressure. The lineup features types with vertical directivity angles of
5 degrees and 15 degrees, as well as subwoofers. Optional components include the Rigging Frame required
for installation and the Tilt Joint Plates that allow stacked speakers to be tilted downward, permitting speaker
systems to be customized for a wide variety of permanent installation applications.
3. FEATURES
• TOA’s unique wave front control technology permits the linearly arranged speakers to produce a uniform,
interference-free high-frequency sound field offering high sound clarity and excellent long distance sound
transmission capability.
• The SR-A12L(WP) Line Array speaker is a 2-way multi-amplifier driven speaker system featuring a 30 cm
high power output woofer and 2 compression drivers. It features 5 degrees of vertical directivity and 90
degrees of horizontal directivity, and is best suited to long-distance sound transmission applications.
• The SR-A12S(WP) Line Array speaker is a 2-way multi-amplifier driven speaker system featuring a 30 cm
high power output woofer and 2 compression drivers. It features 15 degrees of vertical directivity and 90
degrees of horizontal directivity, and is best suited to short-distance sound transmission applications.
• Combining the long-distance SR-A12L(WP) with the short-distance SR-A12S(WP) permits construction of
Line Array speaker systems to meet a wide range of applications.
• The SR-A18B Subwoofer employs a large-diameter 46 cm woofer unit for high power handling capability,
and is designed to be used in conjunction with the SR-A12L or SR-A12S Line Array speakers.
• Maintenance can be performed from the rear of the enclosure.
• Line Array speakers and sub-woofers can be joined vertically using the supplied Joint Plates. When joined,
directivity can be freely adjusted, with overlapping angles between speakers set to between 0 and 5
degrees, in 1-degree units.
• The SR-RF12 Rigging Frame permits the Line Array speakers to be arranged in flying or stacked
configurations. The SR-A12LWP and SR-A12SWP Line Array speakers can also be installed outdoors in
flying configurations using the SR-RF12WP frame.
• When stacking Line Array speakers with the Rigging Frame, the downward angle can be increased by up to
10 degrees if the SR-TP12 Tilt Joint Plate is additionally used, allowing more appropriate coverage areas to
be set.
• The SR-A12LWP and SR-A12SWP are in full conformity with IPX4 Standards, and can be installed
outdoors. For outdoor installation conditions, refer to page 17; “Notes on Outdoor Installation” of this manual.
4. DIMENSIONS
SR-A12L
Input panel
Unit: mm
(Rear)
Joint plate (accessory)
469
(Left Side)
Flying plate (Front)
400
433
5˚
360
740
716
Flying plate (Rear)
(Front)
(Right side)
5
SR-A12S
Unit: mm
Input panel
(Rear)
Joint plate (accessory)
Flying plate (Front)
399
433
15˚
282
740
716
467
Flying plate (Rear)
(Left Side)
(Right side)
(Front)
SR-A18B
Unit: mm
Input panel
Joint plate (accessory)
(Rear)
740
698
(Left Side)
6
Flying plate (Front)
540
573
716
Flying plate (Rear)
(Front)
(Right side)
SR-A12LWP
Input panel
Unit: mm
Joint plate (accessory)
(Rear)
740
400
Flying plate (Front)
433
5˚
360
716
469
Flying plate (Rear)
(Left Side)
(Front)
(Right side)
Green LOW (+)
Black LOW (-)
Red HIGH (+)
White HIGH (-)
Air Hole (Bottom only)
(Bottom)
SR-A12SWP
Input panel
Unit: mm
Joint plate (accessory)
(Rear)
740
716
399
433
15˚
282
Flying plate (Front)
467
(Left Side)
Flying plate (Rear)
(Front)
(Right side)
Green LOW (+)
Black LOW (-)
Red HIGH (+)
White HIGH (-)
Air Hole (Bottom only)
(Bottom)
7
SR-RF12, SR-RF12WP
Caster Mounting Plate
16-M10
164
35
595
Unit: mm
105
71
95
180
71
95
140
(Left side)
(Top)
716
4.5
6
(Right side)
50
15
695
36
21-ø20
(Front)
800
50
6
728
(Bottom)
SR-TP12
Unit: mm
6
484
15˚
teps)
(1˚x15s
8
5. INPUT CONNECTORS
SR-A12L, SR-A12S and SR-A18B (for Indoor use)
Figures below show the input connector arrangements of each speaker system. Since connector and screw
terminal are internally connected in parallel, either connector can be used for connection.
SR-A12L, SR-A12S
SR-A18B
The NEUTRIK NL4MP connector’s pins are wired as shown below.
Pin No.
1+
12+
2-
SR-A12L, SR-A12S
LOW +
LOW HIGH +
HIGH -
SR-A18B
INPUT +
INPUT THROUGH
THROUGH
The connector (connection cable side) suited to the NEUTRIK NL4MP is the NEUTRIK NL4FC.
SR-A12LWP and SR-A12SWP (for outdoor use)
Figure below shows the speaker cable arrangement of each speaker system.
Green LOW (+)
Black LOW (-)
Red HIGH (+)
White HIGH (-)
9
6. INTERNAL WIRING DIAGRAM
Figures below show the internal wirings of each speaker system.
SR-A12L, SR-A12S
LOW +
1+
LOW -
1+
2-
1-
2-
1-
HIGH +
2+
HIGH -
2+
SR-A12LWP, SR-A12SWP
LOW +
Green
LOW -
Black
HIGH +
Red
HIGH -
White
Speaker cable
SR-A18B
INPUT +
INPUT -
1+
2-
1+
2-
1-
1-
THROUGH
THROUGH
2+
2+
7. CONNECTIONS
System using the SR-A12L, SR-A12S, SR-A12LWP or SR-A12SWP
SR-A12L, SR-A12S,
SR-A12LWP, SR-A12SWP
Mixer/Pre-amplifier
Digital Processor
LOW
Power Amplifier
LOW
HIGH
HIGH
System which combines the SR-A12L or SR-A12S with the SR-A18B
SR-A12L, SR-A12S
Mixer/Pre-amplifier
Digital Processor
LOW
HIGH
Power Amplifier
LOW
HIGH
S-LOW
SR-A18B
10
8. DIGITAL PROCESSOR SETTINGS
Recommended setting parameters are as follows.
System using the SR-A12L, SR-A12S, SR-A12LWP or SR-A12SWP
Channel
Gain
(dB)
Polarity
LOW
0
Normal
HIGH
0
Inverse
Filter
Q
Delay
(msec)
40
0.900
0.708
TYPE
Freq.. (Hz)
HPF (12 dB)
Gain (dB)
LPF (12 dB)
1.0k
0.707
LPF (12 dB)
1.0k
0.707
PEQ
300
-5.0
2.549
PEQ
530
-4.5
2.549
HPF (12 dB)
1.2k
0.707
PEQ
2.5k
-10.0
1.011
PEQ
5.0k
-2.0
1.414
PEQ
14.0k
9.0
1.160
0
System which combines the SR-A12L or SR-A12S with the SR-A18B
Channel
Gain
(dB)
Polarity
S-LOW
3.0*
Inverse
LOW
HIGH
0
0
Normal
Inverse
Filter
Q
Delay
(msec)
90
0.707
0.708
LPF (12 dB)
200
1.000
HPF (12 dB)
20
0.707
TYPE
Freq. (Hz)
LPF (12 dB)
Gain (dB)
HPF (12 dB)
35
PEQ
34.5
1.505
HPF (12 dB)
77.5
0.900
LPF (12 dB)
1.0k
0.707
LPF (12 dB)
1.0k
PEQ
300
-5.0
2.549
PEQ
530
-4.5
2.549
HPF (12 dB)
1.2k
6.0
1.800
0.708
0.707
0.707
PEQ
2.5k
-10.0
1.011
PEQ
5.0k
-2.0
1.414
PEQ
14.0k
9.0
1.160
0
* The Gain on the S-LOW channel needs to be adjusted depending on the system configuration.
11
9. FLYING
9.1. General Description
Use the SR-RF12(WP) Rigging Frame for flying the Line Array speaker. With the use of the SR-RF12(WP), up
to 8 Line Array speakers can be arranged in flying configuration. The SR-A18B Subwoofer system is counted
as 1.5 pieces. When joining two or more speakers, or joining the rigging frame and the speaker, use the Joint
Plate supplied with the speaker. Basic flying system is shown below.
Rigging frame
Joint plate
(supplied with the SR-A18B)
Joint plate
(supplied with the SR-A12L)
SR-A18B
SR-A12L
Joint plate
(supplied with the SR-A12S)
SR-A12S
The vertical directivity angle of the Line Array speaker is 5 degrees for the SR-A12L(WP) and 15 degrees for
the SR-A12S(WP).
SR-A12S(WP)
SR-A12L(WP)
5 degrees
12
15 degrees
This flying system is made up of four SR-A12L speakers, two SR-A12S speakers, and one SR-A18B speaker.
To transmit sound over long distances, the four SR-A12Ls are given overlapping angles of 4, 2, and 1 degree,
resulting in a total vertical directivity angle of 43 degrees. The overlapping angle can be adjusted by means of
the Joint Plates used to join the speakers. The horizontal directivity angle is fixed at 90 degrees.
SR-A18B
SR-A12L
Overlapping angle:
4 degrees 5 degrees
SR-A12L
Overlapping angle:
2 degrees
5 degrees
SR-A12L
Overlapping angle:
1 degree
5 degrees
SR-A12L
Enclosure opening angle:
4 degrees
Enclosure opening angle:
2 degrees
Enclosure opening angle:
1 degree
SR-A12S
SR-A12S
5 degrees
15 degrees
43 degrees
15 degrees
As can be seen in the accompanying figure, the overlapping angle equals the rear-opening angle between
enclosures.
[Example] To adjust the sound radiation-overlapping angle to 5 degrees, set the rear-opening angle between
enclosures to 5 degrees.
No sound overlapping angle is created if speakers are joined without space provided between enclosures.
9.2. SR-RF12(WP) Rigging Frame assembly
For assembling, refer to the figure below. Tighten 3 supplied bolts with plain washers and spring washers
securely to fix each Mounting Plate to the rigging frame.
Mounting Plate, Front A
Mounting Plate, Rear A
Rigging frame
Mounting Plate, Front B
Finished
assembly diagram
Mounting Plate, Rear B
13
9.3. Joining the Enclosure to the Rigging Frame
Flying Plates are mounted at both the front and rear of the enclosure’s sides. Follow the procedure below to
mount the enclosure to the Rigging Frame, as shown in the assembly diagrams.
Fix a supplied Joint Plate securely to the left side of the Rigging Frame and another to the right side of the
enclosure, each using 4 supplied bolts with plain washers and spring washers.
Before securing the Joint Plate, determine whether the enclosure’s horn will face right or left. (This is not
required for the SR-A18B Subwoofer.) When suspending the subwoofer, install the system so that the
subwoofer is positioned at the top (directly below the Rigging Frame).
High box assembly diagram
Subwoofer assembly diagram
Joint plate
Joint plate
Joint plate
Joint plate
Flying plate
Flying plate
Join the enclosure to the Rigging Frame securely, using 4 supplied bolts with plain washers and spring
washers on each side. For Joint Plate mounting holes, use the hole that creates an overlapping angle of 0
degree. Refer to the assembly diagrams below.
High box finished assembly diagram
(Left side)
(Right side)
Subwoofer finished assembly diagram
(Left side)
14
(Right side)
9.4. Joining Enclosures
Use the supplied Joint Plate to join the enclosures by way of the enclosure's flying plate. As shown in the
figure, mount a Joint Plate securely to the upper enclosure's lower left side, using 4 supplied bolts with plain
washers and spring washers. Similarly, attach another Joint Plate to the lower enclosure's upper right side.
Joint Plate
Joint Plate
Join the enclosures securely, using 4 supplied bolts with plain washers and spring washers on each side.
Because the Joint Plate has holes to be used for setting the overlapping angle, use the holes that provide the
desired overlapping angle. The overlapping angle can be set to between 0 and 5 degrees in 1-degree units.
Joint Plate
Enclosure
opening angle:
5 degrees
Enclosure
opening angle:
0 degree
Overlapping angle:
5 degrees
Overlapping angle: 0 degree
15
9.5. Notes on Flying
WARNING
• Check to confirm that the suspension wires, belts, construction of the
ceiling, etc are strong enough to withstand the speaker load.
• Tighten each joint bolt to 300-350 kg·cm of torque securely.Be sure to
use the joint bolts supplied with the speaker and the Rigging Frame.
• Up to 8 Line Array speakers can be arranged in flying configuration
per one Rigging Frame. The Subwoofer is counted as 1.5 pieces. No
more than 8 speakers can be arranged in flying configuration.
• Fly the assembled system vertically from at least at
two points on the left and right sides.
• Use a suspension point that provides the desired
downward angle. The downward angle increases
as the suspension point is moved backward.
Center of
gravity position
• Add anti-swing guy wires as needed. Take care not
to apply the enclosure’s weight on the guy wires.
Anti-swing guy wires
16
Notes on Outdoor Installation
WARNING
• In case of outdoor installation, follow the notes mentioned below.
• Only the SR-A12SWP or SR-A12LWP Line Array speaker can be installed outdoors. There is no Subwoofer
available to be installed outdoors.
• WP type speaker features the water protection construction (IPX4), however install it under roofs, eaves, or
other locations not directly exposed to rain or snow.
• Install the speaker so that its air hole is positioned downward, causing the horn face to the right as shown
below.
Air Hole
• The installation angle of the speaker’s top panel must be between 0 degree from the horizontal axis and up
to 50 degrees downward.
Horizontal axis:
0 degree
50 degrees
• Use the SR-RF12WP Rigging Frame.
• Never suspend the SR-RF12WP Rigging Frame with wires. Be sure to fix it securely to the constructions
with mounting hardware.
• When permanently installing the speaker outdoors, inspect it periodically.
17
10. STACKING
10.1. General Description
Line Array speakers can be stacked using the SR-RF12 Rigging Frame. Up to 5.5 speakers can be stacked,
counting each Line Array speaker as 1 piece and each SR-A18B Subwoofer as 1.5 pieces. Shown below is a
basic stacked system. Note that casters must be prepared separately.
SR-A12L
Joint Plate
SR-A18B
Rigging Frame
Caster (required by the user)
This stacking system is made up of four SR-A12L speakers, and one SR-A18B speaker. The directivity
characteristic is 20 degrees vertically and 90 degrees horizontally. The overlapping angles are all set at 0 degree.
10.2. SR-RF12 Rigging Frame assembly
Select the positions of the mounting plates and assemble keeping the stacked system’s center of gravity in
mind. Tighten 3 supplied bolts with plain washers and spring washers securely to fix each Mounting Plate to
the rigging frame.
Assembly diagram
Mounting Plate, Rear B
Mounting Plate,
Front B
Rigging frame
Mounting Plate, Rear A
When attaching the Mounting Plates
to the center positions
Mounting Plate attaching position
Mounting Plate, Front A
When attaching the Mounting
Plates forward positions
Mounting Plate attaching position
Attach the casters, of which specifications are as follows, as the Rigging Frame’s leg. Casters and caster
mounting bolts are required by users.
Caster Specification
Wheel size:
100 mm or more
Bolt hole spacing: 71 mm x 71 mm
Top plate overall size: 95 mm x 95 mm
Attaching bolt size: M10
Loaded mass:
Total mass (mass of rigging frame + mass of speaker) x 50% or more per caster
With stopper
18
10.3. Mounting the Enclosure to the Rigging Frame
Flying Plates are mounted to the front and rear of the enclosure’s sides. Follow the procedures below to
mount the enclosure to the Rigging Frame, as shown in the assembly diagrams.
Fix a supplied Joint Plate securely to the right side of the Rigging Frame, and another Joint Plate to the left
side of the enclosure, each using 4 supplied bolts with plain washers and spring washers. Before securing the
Joint Plate, determine whether the enclosure’s horn will face right or left. (This is not required for the SR-A18B
Subwoofer). When stacking the subwoofer, install the system so that the subwoofer is positioned at the
bottom (directly above the Rigging Frame).
High box assembly diagram
Subwoofer assembly diagram
Join the enclosure to the Rigging Frame securely, using 4 supplied bolts with plain washers and spring
washers on each side (see the assembly diagrams below). For selecting holes in the Joint Plate to be used,
refer to the section “10-6 Tilting the enclosure downward” described later .
High box finished assembly diagram
(Left side)
Subwooter finished assembly diagram
(Left side)
(Right side)
(Right side)
19
10.4. Joining Enclosures
For joining enclosures, refer to “9 Flying, 9-4. Joining Enclosures”.
10.5. Notes on Stacking
• Prepare casters and caster mounting bolts separately, as the Rigging Frame’s leg.
• When stacked, the Line Array speaker’s front or rear deviation from the Rigging Frame must be within 10cm.
Also, whenever possible, select mounting plate positions that allow the system’s center of gravity to be
situated near the center of the Rigging Frame.
WARNING
• Tighten each joint bolt to 300-350 kg·cm of torque securely.Be sure to
use the bolts supplied with the speaker and the Rigging Frame.
• Up to 5.5 speakers can be stacked, counting each Line Array speaker
as 1 piece and each SR-A18B Subwoofer as 1.5 pieces. No more
than 5.5 pieces can be stacked.
Typical stacking example
The Line Array speaker's front or rear deviation
from the Rigging Frame must be within 10cm.
Forbidden stacking example
10cm or more
20
10.6. Tilting the Enclosure Downward
The lower Line Array speaker, excluding the subwoofer, can be tilted downward with the addition of SR-TP12
Tilt Joint Plates. SR-TP12 Tilt Joint Plates make it possible to set wider angles than can be achieved using the
supplied Joint Plates. Replace the lowermost Line Array speaker’s Joint Plates with the Tilt Joint Plates, then
assemble the system.
Joined view with rigging frame
Tilt angle (Vertical facing angle) can be adjusted
in the range of 10 degrees to 15 degrees.
Joined view with sub-woofer
Tilt angle (Vertical facing angle) can be adjusted
in the range of 0 degree to 15 degrees.
Tilt joint plate
Tilt joint plate
For assembling, refer to the previous “10-3. Mounting the Enclosure to the Rigging Frame” when joining to the
rigging frame, and “9 Flying, 9-4. Joining Enclosures” when joining to the sub-woofer.
For precautions when stacking, refer to the previous “10-5, Notes on Stacking”.
SR-TP12 Tilt Joint Plate
Tilt angle (Vertical facing angle) table
When using the supplied When using the optional tilt
joint plate
joint plate
When joining the joint plate
with rigging frame
0 – 5 degrees
in 1 degree units
10 degrees – 15 degrees
in 1 degree units
When joining the joint plate
with sub-woofer
Same as above
0 degree – 15 degrees
in 1 degree units
21
Typical stacking example using the tilt joint plate
SR-A18B x1, SR-A12S x1, SR-A12L x3
SR-A12L
Vertical facing angle:
0 degree - 15 degrees
SR-A12S
SR-A18
Vertical facing angle:
0 degree - 15 degrees
(Left side)
(Right side)
SR-A12S x1, SR-A12L x4
SR-A12L
Vertical facing angle:
10 degrees - 15 degrees
(Left side)
WARNING
22
SR-A12S
Vertical facing angle:
10 degrees - 15 degrees
(Right side)
Do not use the Tilt Joint Plate for joining Line Array speakers
(excluding the sub-woofer), for joining the subwoofer to the Rigging
Frame, or in flying systems.
11. SPECIFICATIONS
SR-A12L, SR-A12S
Model
Enclosure
Power Handling
Capacity
Rated Impedance
Sensitivity
Frequency Response
Crossover Frequency
Coverage Angle
Speaker
Component (low)
Speaker
Component (high)
Input Connector
Finish
Dimensions
Weight
Accessories
SR-A12L
SR-A12S
Bass-reflex type
Continuous program, Low frequency: 450 W, High frequency: 180 W
Low frequency: 8 Ω, High frequency: 16 Ω
Low frequency: 98 dB (1 W, 1 m)
Low frequency: 98 dB (1 W, 1 m)
High frequency: 110 dB (1 W, 1 m)
High frequency: 109 dB (1 W, 1 m)
50 – 20,000 Hz (when using the optional DP-0206)
1,000 Hz (when using the optional DP-0206)
Horizontal: 90˚, Vertical: 5˚
Horizontal: 90˚, Vertical: 15˚
30 cm Cone type
Wave front control horn 90˚
Wave front control horn 90˚
(horizontal) x 5˚ (vertical)
(horizontal) x 15˚ (vertical)
+ Compression driver x 2
+ Compression driver x 2
M5 Screw terminal, distance between barriers: 12.2 mm
and NEUTRIK NL4MP x 2 (Suitable connector: NEUTRIK NL4FC)
Enclosure: Plywood, black, Urethane paint
Front grille: Punched steel plate, Black, Acrylic paint
740 (w) x 433 (h) x 469 (d) mm
740 (w) x 433 (h) x 467(d) mm
49 kg (including accessories)
47 kg (including accessories)
Joint plate ...... 2, Joint plate mounting bolt (M10) ...... 16
*The design and specifications are subject to change without notice for improvement.
SR-A12LWP, SR-A12SWP
Model
Enclosure
Power Handling
Capacity
Rated Impedance
Sensitivity
Frequency Response
Crossover Frequency
Coverage Angle
Speaker
Component (low)
Speaker
Component (high)
Speaker cable
Water Protection
Finish
Dimensions
Weight
Accessories
SR-A12LWP
SR-A12SWP
Bass-reflex type
Continuous program Low frequency: 450 W, High frequency: 180 W
Low frequency: 8 Ω, High frequency: 16 Ω
Low frequency: 98 dB (1 W, 1 m)
Low frequency: 98 dB (1 W, 1 m)
High frequency: 110 dB (1 W, 1 m)
High frequency: 109 dB (1 W, 1 m)
50 – 20,000 Hz (when using the optional DP-0206)
1,000 Hz (when using the optional DP-0206)
Horizontal: 90˚, Vertical: 5˚
Horizontal: 90˚, Vertical: 15˚
30 cm Cone type
Wave front control horn 90˚
Wave front control horn 90˚
(horizontal) x 5˚ (vertical)
(horizontal) x 15˚ (vertical)
+ Compression driver x 2
+ Compression driver x 2
Direct cable withdrawal from internal speaker: 8.6 mm,
2
conductor cross section: 1.25 mm , 4-core cable, 3 m
IPX4
Enclosure: Plywood, black, Urethane paint
Front grille: Punched stainless steel (SUS304), Black, Paint
740 (w) x 433 (h) x 469 (d) mm
740(w) x 433 (h) x 467 (d) mm
(excluding speaker cable)
(excluding speaker cable)
51 kg (including accessories)
48 kg (including accessories)
Joint plate ...... 2, Joint plate mounting bolt (M10) ...... 16
*The design and specifications are subject to change without notice for improvement.
23
SR-A18B
Model
Enclosure
Power Handling
Capacity
Rated Impedance
Sensitivity
Frequency
Response
Crossover
Frequency
Speaker
Component (low)
Input connectors
Finish
Dimensions
Weight
Accessories
SR-A18B
Bass-reflex type
Continuous program: 720 W
8Ω
95 dB (1 W, 1 m)
40 – 400 Hz (when using the optional DP-0206)
80 Hz (when using the optional DP-0206)
46 cm Cone type
M5 Screw terminal, distance between barriers: 12.2 mm
and NEUTRIK NL4MP x 2 (Suitable connector: NEUTRIK NL4FC)
Enclosure: Plywood, black, Urethane paint
Front grille: Punched steel plate, Black, Acrylic paint
740 (w) x 573 (h) x 698 (d) mm
66 kg (including accessories)
Joint plate ...... 2, Joint plate mounting bolt (M10) ..... 16
*The design and specifications are subject to change without notice for improvement.
SR-RF12, SR-RF12WP
Model
Number of
Speakers to be
Mounted
Finish
Dimensions
Weight
Accessories
SR-RF12
SR-RF12WP
Flying: up to 8
Stacking: up to 5.5
Flying: up to 8
(The SR-A18B (optional) is counted as
1.5 pieces)
Steel plate, Black, Paint
Stainless steel (SUS304)
728 (w) x 164 (h) x 800(d) mm (excluding the bolt section)
22 kg (including accessories)
22 kg (including accessories)
Plate mounting bolt (M10) ...... 12
*The design and specifications are subject to change without notice for improvement.
SR-TP12
Model
Variable Angle Range
to be Mounted
Finish
Weight
SR-TP12
When mounted the SR-A18B: 0˚ – 15˚
When mounted the SR-RF12: 10˚ – 15˚
Steel plate, black, paint
3.2 kg
*The design and specifications are subject to change without notice for improvement.
133-05-383-8A