1
DPL590
EN
12/16/04
3:58 PM
Page 2
THOMSON
46, quai Alphonse Le Gallo
92648 Boulogne
Cedex FRANCE
55987200
www.thomson.net
DPL590
EN
12/16/04
3:58 PM
Page 3
u s e r
m a n u a l
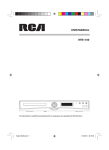
DPL590HT
It is important to read this instruction book prior to using your new product for the first time.
DPL590
EN
12/16/04
3:58 PM
Page 4
Safety Information
Rating Information: At bottom / back of the unit
this unit comply with the existing requirements
CAUTION
RISK OF ELECTRIC SHOCK
DO NOT OPEN
In accordance with the rating plate of the
unit, this unit complies with current
standards concerning electrical safety and
electromagnetic compatibility.
THE LIGHTNING
FLASH AND ARROWHEAD WITHIN THE
TRIANGLE IS A
WA R N I N G S I G N
ALERTING YOU OF
"DANGEROUS
VOLTAGE" INSIDE
THE PRODUCT.
Please respect the environment Before
throwing any batteries away, consult your
distributor who may be able to take them
back for specific recycling.
CONNECT THE MAIN LEAD INTO A MAINS POWER
SOCKET
POWER SUPPLY 230V. It must not be connected to D.C.
mains.
Note; The mains lead of the set is fitted with a molded
plug. If the mains socket are not compatible or if for
any reason the plug is removed please follow the
directions below. The molded plug cannot be rewired
and if removed must be disposed of safely.
DO NOT under any circumstances plug the severed plug
into any mains socket as this could result in electric
shock.
WARNING: TO PREVENT FIRE OR ELECTRICAL
SHOCK HAZARD, DO NOT EXPOSE THIS PRODUCT
TO RAIN OR MOISTURE.
BLUE = NEUTRAL/BROWN = LIVE
If the colours of the wires in the mains lead of this
apparatus may not correspond with the coloured
markings identifying the terminals in your plug,
proceed as follows:
BLUE wire to the terminal coded N (Neutral) or coloured
black.
BROWN wire to the terminal coded L (Live) or coloured
red.
DO NOT make any connection to the
terminal in the plug which is marked by
the letter E or by the earth symbol or
coloured green or green and yellow.
1
Important: If the plug is removed, rewire the new plug
as follow:
The wires in the mains plug are coloured in accordance
to the following code:
THE EXCLAMATION
POINT WITHIN THE
TRIANGLE IS A
WARNING
SIGN
ALERTING YOU OF
I M P O R TA N T
INSTRUCTIONS
A C C O M PA N Y I N G
T H E P R O D U C T.
SEE MARKING ON BOTTOM / BACK OF PRODUCT
Have a Blast- Just Not in Your Eardrums
Make sure you turn down the volume on
the unit before you put on headphones.
Increase the volume to the desired level
only after headphone are in place.
For UK Only
CAUTION: TO REDUCE THE
RISK OF ELECTRIC SHOCK,
DO NOT REMOVE COVER
(OR BACK). NO USERS E RV I C E A B L E PA R T S I N S I D E . R E F E R S E RV I C I N G
TO QUALIFIED SERVICE
PERSONNEL.
1
1
A fused plug must be fitted with a 3A
fuse approved by ASTA or BS1362 and
fuse covers must be always be securely
replaced. If you set does not work, the
fuse may be blown.
GEFAHR EINES
ELEKTRISCHEN SCHLAGS
The descriptions and characteristics given in this document are given as a general indication and not as a guarantee. In order to provide
the highest quality product possible, we reserve the right to make any improvement or modification without prior notice. The English
version serves as the final reference on all products and operational details should any discrepancies arise in other languages.
DPL590
EN
12/16/04
3:58 PM
Page 5
Table of Content
Safety Information
Getting Started
Unpacking the Receiver . . . . . . . . . . . . .2
Unpacking the Speakers . . . . . . . . . . . . .2
Inserting Batteries into Remote Control .3
Set Up and Maintenance of the
Receiver . . . . . . . . . . . . . . . . . . . . . . . . . .3
Protect your Components from
Overheating . . . . . . . . . . . . . . . . . . . . . . .3
Connecting to Audio Components . . . . .4
Digital Connection . . . . . . . . . . . . . . . . .5
TV Connections . . . . . . . . . . . . . . . . . . . .5
Connecting Antennas . . . . . . . . . . . . . . .5
Connecting the Speakers . . . . . . . . . . . . .6
Connecting the Subwoofer . . . . . . . . . . .6
Positioning your Speaker . . . . . . . . . . . . .7
Front Speaker Placement . . . . . . . . . . . . .7
Preferred Surround Placement . . . . . . . .8
Advanced Setting . . . . . . . . . . . . . . . . . .8
Test Tone / Channel Balance . . . . . . . . . .9
Connecting for Power . . . . . . . . . . . . . . .9
Using Headphones . . . . . . . . . . . . . . . . . .9
Factory Setting . . . . . . . . . . . . . . . . . . . . .9
Advanced Sound Control
EN
Sound Enhancement Systems
Fine Setting of Components .
Fine Setting of the Speakers .
Advanced Setting . . . . . . . . .
.
.
.
.
.
.
.
.
.
.
.
.
.
.
.
.
.
.
.
.
.
.
.
.
.
.
.
.
.19
.21
.22
.22
.
.
.
.
.
.
.
.
.
.
.
.
.
.
.
.
.
.
.
.
.
.
.
.
.
.
.
.
.
.
.
.
.
.
.
.24
.24
.24
.24
.24
Cleaning . . . . . . . . . . . . . . . . . .
Important battery information
Safety precautions . . . . . . . . . .
Headset safety . . . . . . . . . . . . .
Don’t infringe . . . . . . . . . . . . .
Equipment Specifications . . . .
.
.
.
.
.
.
.
.
.
.
.
.
.
.
.
.
.
.
.
.
.
.
.
.
.
.
.
.
.
.
.
.
.
.
.
.
.25
.25
.25
.25
.25
.25
Troubleshooting Tips
Troubleshooting Tips . . . . . .
Receiver/Tuner Operation .
Remote Control Operation
General . . . . . . . . . . . . . . .
Cleaning the Exterior . . . .
.
.
.
.
.
Care and Maintenance
Operating your Receiver
Receiver Controls . . . . . . . . . . . . . . . . . .10
Your Remote Control . . . . . . . . . . . . . . .11
Display . . . . . . . . . . . . . . . . . . . . . . . . . .12
Switching On/Off . . . . . . . . . . . . . . . . . .13
Selection of Source . . . . . . . . . . . . . . . .13
Using the Remote to Control Additional
Components . . . . . . . . . . . . . . . . . . . . . .14
Using the receiver to play a Source . . . .15
Operating the Radio . . . . . . . . . . . . . . .16
1
DPL590
EN
12/16/04
3:58 PM
Page 6
Getting Started
Unpacking the Receiver
You should receive the following items:
+
-
ON/ECO
+
One pair of “AAA”
batteries
One receiver unit
One pig-tail
antenna wire
Thomson
Warranty
C a rd
-
One external AM loop
antenna
• one instruction book;
• Thomson Warranty Card;
• one Quick Connection Guide
One Remote Control
Unpacking The Speakers
• 6 speaker wires including:
• one set of speakers including 1 set of left and right
front speakers, 1 centre speaker, 1 subwoofer and 1 set
of left and right rear speakers.
Front Speakers
Center Speaker
Rear Speakers
(Surround Sound)
2
Subwoofer
1 X green/grey striped
wire for center speaker
1 X red/grey striped wire
for front right speaker
1 X white/grey striped
wire for front left
speaker
1 X purple/grey striped
wire for subwoofer
1 X blue/grey striped
wire for rear left speaker
1 X gray/grey striped
wire for rear right
speaker
DPL590
EN
12/16/04
3:58 PM
Page 7
Getting Started
Inserting Batteries into Remote Control
Insert two “AAA” (R03) batteries according to the + and
- signs in the battery compartment. To use the remote
control, point it directly at your receiver.
Install batteries as follows:
1. Remove battery compartment door by applying
thumb pressure on battery door and then lift the
door out and off the cabinet.
2. Insert 2 AAA batteries in the compartment and
replace the compartment door.
• Do not connect to the AC power cords until all
connections are completed.
EN
• Do not use your set immediately after transferring it
from a cold place to a warm place: there is risk of
condensation.
• Do not expose your set to water and excessively high
temperatures.
• After having disconnected your set, clean the case
with a soft cloth, or with a slightly damp leather
chamois. Never use strong solvents.
Set up and Maintenance of the Receiver
Provide spaces for sufficient ventilation as indicated:
• Do not block ventilation holes in any component.
Arrange the components so that air can circulate
freely.
10 cm/4"
10 cm/
4"
Front View
Protect your Components from
Overheating
10 cm/
4"
• Do not stack components directly on top of each
other.
• Do not place the unit near other components that
generate heat such as heating vents.
10 cm/4"
5 cm/
2"
• Allow adequate ventilation when placing your
components in a stand.
Side View
• Place an amplifier near the top shelf of the stand so
heated air rising from it will not affect other
components. If you have a satellite receiver, you
should place it on the top shelf.
3
EN
12/16/04
3:58 PM
Page 8
Getting Started
Connecting to Audio Components
TV
If your CD player is equipped with digital optical
jacks, use of optical cable is preferred. What you
need is just one more optical digital connecting
cable (not supplied). Plug it in the digital input jack
of the receiver and select OPTICAL on the receiver
setting (see details under "Input Signal Setting").
You can enjoy better sound quality brought to you by
the optical cable. When optical cable is used, analog
cables are still needed for recording to tape output.
CD Player
DVD
to AUDIO OUT (CD)
to AUDIO OUT (TV)
DIGITAL INPUT
Connect components capable of
outputing Dolby Digital (e.g. DVD or
SAT) or standard PCM (CD) format
digital signals. Read section on
"Input Signal Setting" under
"Advanced Sound Control" carefully
to adjust the matching input
settings.
to AUDIO OUT
(DVD)
AUDIO INPUT
L
R
IN
SAT
TV
to AUDIO OUT (SAT)
COAXIAL OPTICAL
VCR
SAT
CD
TAPE
to LINE OUT (Tape Deck)
DVD
to AUDIO OUT (VCR)
DPL590
DIGITAL AUDIO
Tape Deck
VCR
DIGITAL CONNECTION
If you have a SAT receiver DVD player or CD player with a digital output, you can make use of an optical digital cable (not
supplied) or coaxial digital cable (not supplied) to carry the audio portion of the signal and enjoy Dolby Digital sound quality.
One optical or coaxial cable is needed for each SAT receiver, DVD player or CD player. When optical or coaxial cable is used,
the analog audio cables are still needed if recording through a tape or VCR is desired. This receiver provides one optical and
one coaxial digital input for the connection of your components. Please connect your components (e.g. DVD, SAT or CD) to the
appropriate digital inputs and press DIGITAL INPUT to select the corresponding digital input source.
Note: Optical and coax cables carry only the audio portion of the signal. A video connection must also be established for a SAT
receiver and DVD player.
4
EN
12/16/04
3:58 PM
Page 9
Getting Started
Digital Connections
Connecting the Antennas
Read instructions carefully when connecting
components to the receiver.
Digital In Jacks can accept Dolby Digital (AC-3) or PCM
signals when compatible components are
connected.
The AM and FM antennas connect to the AM and FM
terminals on the system’s back panel.
EN
They must be hooked up in order to receive clear
reception.
AM Loop Antenna and FM Indoor Antenna
1. Uncoil the Antenna wire and locate the base end of
the AM antenna.
2. Press down on the Antenna tab to open the terminal.
OPTICAL DIGITAL IN (AUDIO)
Optical Fiber Cable
Connect to optical digital output of
DVD, CD, SAT or other compatible
devices.
3. Inert the antenna wires into the terminal and release
the tabs to secure the wires in place.
SAT / DVD / CD Player / TV
COAXIAL DIGITAL IN (AUDIO)
Connect to coaxial digital output of
DVD, CD, SAT or other compatible
devices.
DVD / CD / SAT
COAXIAL OPTICAL
DIGITAL AUDIO
FM 75‰
GND AM LOOP
3‰
SUB CEN
6‰
SR
SL
FR
FL
AUDIO INPUT
SPEAKERS
DPL590
L
R
SUBWOOFER
AUDIO OUT
IN
DVD
SAT
TV
COAXIAL OPTICAL
VCR
CD
TAPE
DIGITAL AUDIO
TV Connections
TVs with RF input may need a RF modulator (not
included) for inputting audio signals.
TV
RF cable
RF in
HINT
• For FM reception, extend antenna to its full
length.
• For AM reception, rotate the antenna
horizontally to get better reception.
RF out
RF modulator
Audio in
Audio cable
Audio out
The diagram shown above may varies from your actual RF
modulator, please refer to your RF modulator manual.
5
DPL590
EN
12/16/04
3:58 PM
Page 10
Getting Started
Connecting the Speakers
Speaker wires
1 for each speaker, is needed for connection. Twist the
stripped ends of speaker cord about 2/3 inch (15 mm).
Press down on the tab to open the terminal and insert
the wire. Release tab to lock wire in the
terminal.
Antenna and Speaker Wire Connection
Push terminal tab down to
insert wire.
Release tab to lock wire in
the terminal.
NOTE: Make sure the insulation is completely removed from the
ends of the Antenna and speaker wires at all connection
points.
To ease speaker connections, the speaker wires and the
terminals are color-coded.
• White/Grey Striped (Front Left Speaker),
• Red/Grey Striped (Front Right Speaker),
• Green/Grey Striped (Center Speaker)
• Blue/Grey Striped (Rear Left Speaker).
• Grey/Grey Striped (Rear Right Speaker).
• Purple/Grey Striped (Subwoofer)
Speakers
There are 6 speakers equipped with the unit (2 front, 1
center, 2 rear, 1 subwoofer). In order to enjoy good
surround effects, all six speakers need to be
connected to the receiver.
Connect the L, R speakers at the back of the speakers to
the corresponding color on the receiver. Do the same for
center (with green/black terminal), rear speaker and the
subwoofer (with purple/black terminal).
Speaker Polarity
At least two front speakers (left and right) are required.
For better sound quality, Center speaker, rear speakers
and Subwoofer should also be connected. Adding center
and rear speakers will enhance surround effects. Adding
a Subwoofer will increase bass response.
When connecting the speakers, make sure the polarities
(“+” speaker wire to “+” on the receiver) of speaker
wires and terminals are matched. If the wires are
reversed, the sound will be distorted and will lack bass
(“out of phase” effect).
If you want to enjoy the full sound range, use the
subwoofer with the speakers to maintain adequate bass
signal.
Connecting the Subwoofer
Connect the subwoofer with the speaker wire (purple/
black) provided.
This receiver offers a high flexibility for user to use a
large variety of speakers and subwoofer. For more
information please refer to section “Fine Setting of the
Speakers” in “Advanced Sound Control” on page 22.
6
DPL590
EN
12/16/04
3:58 PM
Page 11
Getting Started
Positioning your speaker
Alignment
1 Left, Right (Front Speakers)
They carry primarily music and sound effects
Align the center speaker evenly with (A), or slightly
behind (B), the left and right speakers, but not ahead of
them.
2 Center
In surround mode, the center speaker carries much of
the dialogue as well as music and effects. It should be
set between the left and right speakers.
3 Surround (Rear Speakers)
Their overall sound balance should be as close as
possible to the front speakers. Proper placement is vital
to establish an evenly distributed sound field.
4 Subwoofer
A subwoofer is designed to reproduce powerful low
bass effects (explosions, the rumble of spaceships, etc.)
which dramatically heightens involvement with the
action on the screen. It is therefore recommended to
connect subwoofers when small speakers are used.
Courtesy Dolby Laboratories
Advanced Setting
Angle
Magnetic shielding
Speakers placed less than two feet from the TV set must
be magnetically shielded in order to prevent picture
distortion. Front and center speakers provided with this
unit are magnetically shielded to protect your TV set.
Placing the left and right speakers to form a 45-degree
angle with your favorite viewing position will duplicate
the soundtrack mixer's perspective.
It is not recommended to place the rear speakers near
the TV set.
3
1
2
Courtesy Dolby Laboratories
Height
1
3
4
The three speakers should be as close as possible to the
same height. This often requires placing the center
speaker directly atop (A) or beneath (B) the TV set.
Courtesy Dolby Laboratories
A
Front Speaker Placement
Even if you can't duplicate this ideal home theater setup
exactly, the suggestions for speaker placement that
follow will help you get good results.
B
Courtesy Dolby Laboratories
7
EN
DPL590
EN
12/16/04
3:58 PM
Page 12
Getting Started
Preferred surround placement
Location
If possible, place surround speakers to either side of the
listening area, not behind it.
Advanced Setting
Alternative Surround Placement
Rear wall
If rear wall mounting is the only choice, aim the
speakers at each other (A), towards the front (B) or even
towards the sidewalls (C, D). Experiment with placement
until surround sounds seem to envelop you, rather than
coming from behind you.
Courtesy Dolby Laboratories
Height
If space permits, install surrounds 2-3 feet above
viewers. This helps to minimize localization effects.
Courtesy Dolby Laboratories
No adjacent walls
Surrounds can go on stands facing each other to
approximate the preferred sidewall mounting (A), or to
the sides or rear of the viewing area aimed upwards. In
the latter case, they can go right on the floor, or
preferably, a few feet off the floor such as on end tables
(B).
Courtesy Dolby Laboratories
Aiming
Aiming surrounds straight across the room, not down at
viewers, helps create a more open, spacious surround
sound field.
Courtesy Dolby Laboratories
Courtesy Dolby Laboratories
8
DPL590
EN
12/16/04
3:58 PM
Page 13
Getting Started
Test Tone / Channel balance
Channel balance
Your receiver is equipped with a test signal generator
for balancing the channels. As the signal "travels" from
channel to channel, adjust the level controls until each
channel plays at the same loudness level.
Using Headphones
To listen privately through your
audio system, use the PHONES jack
on the receiver. However, make sure
you turn down the volume before
you put on the headphones. Increase
the volume to the desired level after
headphones are in place.
EN
Once headphones are connected, “HEADPHONE DOWN
MIX 2 CHANNEL” will scroll on display. This feature
automatically converts multi-channel speaker outputs to
2 channel stereo for your listening pleasure.
Hearing Comfort & Well-Being
• Do not play your headset at a high volume. Hearing
experts advise against continuous extended play.
• If you experience a ringing in your ears, reduce
volume or discontinue use.
Factory Setting
Courtesy Dolby Laboratories
Level adjustment & surround channel
level expectation
Even though you adjust the surround channel to be as
loud as the others on the test signal, you'll find that on
actual program material the surround channel is usually
much lower than the front. Don't be tempted to
readjust the surround level; program producers use
surround mostly for subtle atmospheric and ambience,
and only rarely for special effects. A good surround mix
doesn't call attention to itself; if it did, it would soon
become distracting.
NOTE
The system is equipped with Dolby Digital,
and manufactured under License from Dolby
Laboratories.
The unit is preset to the following settings when you
first power the receiver up right out of the box:
Function = TUNER
Volume setting = 25
Bass & treble = 0 dB
EQ = FLAT
Speaker settings: Center, surr = YES
Subwoofer = STRONG
DRC = OFF
NOTE
STRONG SUBWOOFER setting makes the
output level of subwoofer speaker to be
stronger than normal Dolby setting. Adjust
the SUBWOOFER setting by pressing the
SUBWOOFER key to achieve the best bass
performance.
Reset to Factory Settings
Manufactured under license from
Dolby Laboratories. “Dolby”, “Pro
Logic” and the double-D symbol are
trademarks of Dolby Laboratories. Confidential
Unpublished Works. © 1992-1997 Dolby Laboratories,
Inc. All rights reserved.
Manufactured under license from
Digital Theater Systems, Inc. US Pat. No.
5,451,942, 5,956,674, 5,974,380,
5,978,762 and other world-wide patents
issued and pending. "DTS" and "DTS Digital Surround"
are registered trademarks of Digital Theater Systems,
Inc. Copyright 1996, 2000 Digital Theater Systems, Inc.
All Rights Reserved.
WARNING
All preset radio stations and surround
sound setting will be lost after factory
setting is restored.
You may restore factory setting with the following
procedures:
1. Enter SAT mode.
2. Press PRESET UP, PRESET DOWN, SOURCE UP to
reset the unit.
All preset stations will reset to FM87.5MHz and all
receiver settings restore to default settings as described
above.
9
DPL590
EN
12/16/04
3:58 PM
Page 14
Operating Your Receiver
Receiver Controls
2
1
3
4
5
6
7
8
ON/ECO
1. ON/ECO
Turns the unit on and off. When the system is turned
on, the unit will go to the mode it was in before
powered off.
2. Display
Displays current status of the receiver.
3. SUBWOOFER
Selects among subwoofer sound level. (SOFT
SUBWOOFER, BALANCED SUBWOOFER, STRONG
SUBWOOFER, POWERFUL SUBWOOFER)
4. SOURCE Buttons
Selects sound source. (DVD, Tuner, Tape, VCR, CD, TV
and SAT)
5. SURROUND Buttons
Selects digital sound processor. (DOLBY PL II MOVIE,
STEREO, DISCO, STADIUM, THEATER, JAZZ CLUB,
ARENA, 3 STEREO, DOLBY PL EMULATION, DOLBY PL
II MUSIC)
10
6. PRESET Buttons
Selects preset station in Tuner mode.
7. VOLUME
Increases and decreases volume level
8. PHONES
Plug your headphones (not supplied) into it for your
private enjoyment. Speakers will be off when phones
are inserted.
DPL590
EN
12/16/04
3:58 PM
Page 15
Operating Your Receiver
Remote Control
Please be sure you have inserted the batteries into the
remote control (see relevant section on page 3.) You can
test it by pressing any button.
2
1
3
4
5
6
7
8
10
9
11
12
13
2
1. ON•OFF
Turns the receiver and other auxiliary components on and off.
(see page 14 “Using the Remote to Control Additional
Components”).
4. CH+ / CH- (Channel Buttons)
Selects programmed stations in TUNER mode.
5. MUTE
Mutes all audio output.
7. Adjustment Buttons
• Press the Left or Right buttons to select among setting
items in setup mode: SLEEP, DIMMER, SPEAKER DISTANCE,
SPEAKER SETUP, and audio input source (ANALOG,
OPTICAL / COAXIAL).
• Press the Up or Down buttons to adjust the values when
the display shows the setup you want to change.
• Left / RDS - In Tuner mode, press the Left arrow button to
show Radio Data System (RDS) information if available.
(Frequency station, Station name, program type, clock
and radio text)
• Right / PTY - In Tuner mode, press the Right arrow button to
activate search by program type (PTY).
8. SURROUND
Selects among surround sound settings: DOLBY PL II
EMULATION, DOLBY PL II MUSIC, DOLBY PL II MOVIE, STEREO,
DISCO, STADIUM, THEATER, JAZZ CLUB, ARENA, 3 STEREO.
9. EQUALIZER
Selects among preset equalizer modes.
(only available in stereo mode)
10. NIGHT
Selects among Night mode options (DRC OFF, SOFT and ON)
which compresses the volume difference between normal
voices and sounds such as explosions. (Available only during
Dolby digital signal playback)
12. SUBWOOFER
Selects among subwoofer output level (SOFT SUBWOOFER,
BALANCED SUBWOOFER, STRONG SUBWOOFER, POWERFUL
SUBWOOFER).
15
3.
+ / - (Volume Buttons)
Adjusts the volume level.
EN
11. LEVEL
Speaker LEVEL setting and Test tone. Refer to “Advanced
Sound Control” on pg. 22 for details.
14
2. Source Buttons
Selects various audio sources.
6. GO BACK / ST•MONO
• Selects between Stereo and Mono sound in Tuner
mode.
13. Number Buttons
Directly access a preset station in Tuner mode.
14. SETUP
Enters Setup mode. Use the Left and Right adjustment buttons
to select among setup options. (SLEEP, DIMMER,
FRONT SPK DISTANCE, CENTER SPK DISTANCE, SURROUND SPK
DISTANCE, CENTER SPK ON/OFF, SURROUND SPK ON/OFF,
DIGITAL INPUT).
15. Operation Buttons
In TUNER mode:
• Press the TUNER - and TUNER + keys to tune down or up the
radio frequency.
• Press SAVE to activate the preset station saving and press to
confirm preset station settings.
• PLAY, RECORD, STOP and PAUSE keys are only for easy
control of external devices that are connected to your receiver
such as CD, VCR, DVD, TAPE, etc.. The remote control currently
operates most Thomson, RCA and GE products, but it can be
programmed to operate devices from other manufacturers (For
details, refer to “Using the Remote to Control Additional
Components” on page 14.
NOTE
The remote control button CLEAR, MENU and
GUIDE do not function for this receiver but can
be used to control other RCA and Thomson
products.
11
DPL590
EN
12/16/04
3:58 PM
Page 16
Operating Your Receiver
Display
C
S
DVD / VCR / SAT / TUNER / TAPE / CD / TV
TUNED
• An arrow points to the current source mode.
• Tuner station detected.
• Dolby Digital audio input for signal format.
L
C
R
LS
LFE
RS
• Dolby Pro Logic II audio output format.
• Speaker Icons.
L - Front left speaker
C - Center speaker
R - Front right speaker
LS - Left surround (rear) speaker
RS - Right surround (rear) speaker
LFE - Subwoofer speaker
• DTS audio output format.
SLEEP
• Unit in Sleep mode.
FM / AM
MEMORY
• Radio band indicator in Tuner mode.
• Unit is in Tuner Preset Station mode.
ST
RDS
• Tuner stereo signal detected.
OPT 1 2
• Optical digital input detected.
COAX 1 2
• Coaxial digital input detected.
12
• Radio data system is activated.
KHz / MHz
• Tuner frequency unit.
R
RS
DPL590
EN
12/16/04
3:58 PM
Page 17
Operating Your Receiver
Switching the unit on and off
• To switch on the receiver, press the ON/ECO button
on the main unit once, or the
button on the
remote control.
Example 1:
If you have connected a DVD player to the DVD input
on the receiver, press the SOURCE buttons on the
main unit repeatedly until DVD is selected or press
DVD•6CH on the remote control to receive the sounds
and images transmitted by the DVD.
• Standby: when the receiver is in tuner mode, press
the ON/ECO button once to enter standby
mode.
On the remote control, press the
button twice
within 2 seconds if the receiver is not in Tuner source
mode to enter standby mode.
To avoid entering standby mode when powering up
the unit, do not press the
button twice within 2
seconds.
Example 2:
Based on the example 1, the DVD is playing , if a VCR
is connected to the VCR input of the receiver, press
the SOURCE buttons on the main unit repeatedly
until VCR is selected or press AUX 1 (VCR) on the
remote control. The sound from the VCR source will
replace the DVD.
• The receiver draws a small amount of electricity when
in standby mode. Unplugging the unit from the wall
socket will stop the draw.
Selection of source
When one of the source button is pressed, the input
corresponding to the name will be activated.
The receiver acts as a switching device between all the
sources that are plugged into it.
13
EN
DPL590
EN
12/16/04
3:58 PM
Page 18
Operating your Receiver
You can connect up to 6 audio sources to this amplifier:
Source button
(receiver front panel)
Corresponding connector
(receiver back panel)
-
DVD IN
SAT IN
TV IN
VCR IN
CD IN
TAPE IN
built-in
DVD
SAT
TV
VCR
CD
TAPE
FM/AM
An arrow points to the source name selected shown on
the display.
Example: Press DVD to select DVD as the source to the
amplifier.
NOTE
1. Your receiver has a built in tuner. Just
connect the appropriate antenna to the
back of the receiver and you will be able to
listen to radio stations. (See details in Tuner
section)
2. Other sources can be connected to the
above standard source. Example: you can
connect a LD into the DVD inputs.
3. Refer to the "Connecting To Audio-Visual
Components" section for details on
connection.
Using the Remote to Control Additional
Components
You can use your remote to control most of Thomson
branded VCRs, satellites, cable boxes or TVs.
Press the corresponding source button on the remote
control to operate options on other components.
14
NOTE
The remote control can only operate Thomson
brand products.
Volume Punchthrough
NOTE
Volume punchthrough can be done in all
non-Tuner modes.
By default, the
+ / - and MUTE
buttons will
only control the receiver, regardless which mode (TV,
VCR, etc) the receiver is in.
By programming the volume punchthrough function,
you can also control the volume of the TV.
NOTE
Controlling the TV volume can only be done
in non-Tuner modes.
To activate the volume punchthrough function, follow
the procedures below:
1. Press and hold the
- button.
2. While holding down the
- button, press one of
the source buttons to select the source where you
want to control TV volume at. (DVD, TV, VCR or
SAT•CABLE)
3. Continue holding down the
- button and press
the TV button once.
4. Release all buttons.
You should now be able to control TV volume and mute
at the selected device.
DPL590
EN
12/16/04
3:58 PM
Page 19
Operating your Receiver
HINT
To return to controlling receiver volume and
mute again, follow the steps above but press
TUNER instead of TV in step 3.
HINT
If batteries are removed from the battery
compartment of the remote control, the
volume and mute control in all source modes
will be the receiver volume and mute conrol
except in TV mode.
Using the receiver to play a source
After having properly connected a source (DVD, CD,
VCR) to the receiver, you can partly control them
through the receiver.
Playing a DVD with the receiver
2. Press ON/ECO on the main unit or press
remote control to switch on the receiver.
on the
3. Press the SOURCE buttons on the main unit or
DVD•6 CH on the remote control to select the DVD
source.
4. Switch ON the DVD player and start playback.
5. Switch ON your TV.
6. Select the appropriate A/V channel on the TV (refer
to your TV manual for details) until the image from
the DVD player is displayed.
7. Set the sound Mode if needed (see "Advanced sound
control" for details).
Example 1:
To play Dolby Prologic II Movie sound
Press the SURROUND buttons until "Dolby PL II
MOVIE" appears on the Display and all of the
speaker'’ icons light up.
Example 2:
LD: You may need to select a different Audio Channel
on your LD (refer to your LD player manual).
8. Adjust the volume knob accordingly.
1. Connect a DVD player to the receiver (see connecting
your receiver for details).
NOTE
To play Dolby Digital sound, the source must be
connected to the receiver via the optical or
coaxial terminal
15
EN
DPL590
EN
12/16/04
3:59 PM
Page 20
Operating your Receiver
Operating the Radio
Automatic Tuning
The receiver has a built-in tuner that allows for AM/FM
radio function.
Press and hold TUNER - or
TUNER + for about one
second to activate the
automatic SEARCH function.
The receiver will
automatically tune
frequencies until it finds a
station.
Manual tuning
1. Connect the FM and AM antenna accordingly (see
"Connecting the Antenna" on page 5 section for
details)
2. Press ON/ECO on the main unit or
on
the remote control to switch on the receiver.
3. Press the SOURCE buttons on the main unit until the
tuner mode is selected or press TUNER on the remote
control.
NOTE
1. If there is interference, move the location of
the antenna until the optimal sound is heard.
TV and other electronic devices could be the
cause of interferences so try to position the
antenna away from them.
2. Weak signal can affect the "auto Search
function". Adjust the antenna for better
reception and for a more efficient search.
Select a sound effect if needed by pressing the
SURROUND button. (see "Advance sound section" for
details).
4. To select between FM
and AM band, press the
TUNER button
repeatedly.
Selecting Mono or Stereo Sound
5. Tune to a station by
pressing TUNER - or
TUNER + repeatedly
until the desired station
is found.
16
Press the ST•MONO button
on the remote control to
toggle between mono and
stereo sound in FM tuner
mode (when available).
DPL590
EN
12/16/04
3:59 PM
Page 21
Operating your Receiver
Storing radio stations
The receiver can store up to 40 radio stations in
memory. You can enter every single radio station
yourself or the receiver can store all available radio
stations automatically in an ascending order.
3. Press the SAVE button on
the remote control.
"MEMORY" will flash and
a preset number will be
shown on the display.
EN
Automatic preset storing : (FM only)
1. In Tuner mode, select the
FM band by pressing
TUNER on the remote
control.
2. Press and hold the TUNER button on the remote
control for 3 seconds. “MEMORY” will be displayed
in red and will blink during the automatic storing
process.
4. While MEMORY is still
flashing on the display,
press PR
or PR
on the remote control
to select the desired
preset memory location.
5. Press the SAVE button on the remote control to
store frequency in selected preset location.
6. Repeat steps 1-5 to store other frequencies.
Radio frequencies will be scanned and radio stations will
be stored automatically. When all available radio
stations are stored or if all 40 memory locations are full,
the auto preset will stop.
NOTE
Retrieving preset stations
1. Press TUNER on the remote control to select tuner
mode.
2. Press the PRESET buttons on the main unit or the PR
or PR
buttons on the remote control to
select the preset station.
A Weak signal can affect the "Automatic Preset
Storing function" efficiency. Adjust the antenna
for the best reception, and a more efficient
search.
Manual preset
1. Select FM or AM band by pressing TUNER repeatedly.
2. Tune to the radio station to be stored. (see "Manual
tuning" on page 16 above for details)
17
DPL590
EN
12/16/04
3:59 PM
Page 22
Operating your Receiver
RDS (Radio Data System) for FM Only
The RDS icon shows on display when RDS data are
received. The following information may be available
on certain stations:
• Frequency station,
• Station name,
• Program type,
• Clock,
• Radio text
NOTE
NO PTY will be displayed if selected kind of
program is not broadcasted
3. The search will stop when a station broadcasting the
program type you have selected is found.
Press RDS on the remote control repeatedly to select the
type of information you want to display.
Search Station by Program Type
1. Press PTY on the remote control repeatedly to display
the desired program type.
2. Press TUNER - or TUNER + on the remote control to
begin search.
18
You can search for stations using one of the following
program types:
NEWS = news
AFFAIRS = current affairs
INFO = information
SPORT = Sport
EDUCAT = education
DRAMA = series and plays
CULTURE = religion or national culture
SCIENCE = science and technology
VARIED = miscellaneous
POP M = pop music
ROCK M = rock music
MOR M = middle-of-the-road music, easy listening music
LIGHT M = classical music
CLASSICS = serious classical
OTHER M = not classed
WEATHER = weather, medical
FINANCE = stock market reports
CHILDREN = children’s programs
SOCIAL AFFAIR = sociology, history, geography,
psychology, society
RELIGION = any aspect of beliefs, faith & God or Gods
PHONE IN = public forum by phone
TRAVEL = feature and programs concerning travelling
HOBBY = recreational activities & leisure
JAZZ = jazz music
COUNTRY = country music
NATIONAL = national music
OLDIES = oldies music
FOLK = folk music
DOCUMENTARY = documentaries
DPL590
EN
12/16/04
3:59 PM
Page 23
Advanced Sound Control
Sound Enhancement Systems
Digital Theater Systems (DTS)
This receiver is equipped with several built-in sound
enhancement systems.
Dolby Digital
The Dolby Digital mode lets you enjoy full digital
surround from software processed in the Dolby
Digital format. Dolby Digital provides better sound
quality and more powerful presence than
conventional Dolby Surround.
This unit is equipped with Dolby Digital 5.1-channel
so that you can enjoy enhanced full digital surround
sound. Being different from Dolby Pro Logic in which
only four channels ( Front Left, Front Right, Centre
and Rear ) are used, the new system provides stereo
separation of the rear speakers (Rear-Right, Rear-Left
). These 5 channels, together with the subwoofer
channel for bass sounds (counted as 0.1 channel ),
constitute as 5.1-Channel ( or 6 Channels ) Input for
Dolby Digital that brings you the most sophisticated
sound enjoyment.
DTS is a digital surround system which delivers six
channels of master-quality, 20-bit audio. It offers five
full-range channels plus a special low frequency
effect (LFE) channel for subwoofer, resulting
commonly know 5.1 channels. It can be applied with
existing 5.1 speaker configurations.
DTS is available in DVD, SAT/CAB, TV and CD mode.
(When digital cable is connected)
Front Left Speaker
Center Speaker
Dolby Pro Logic II
Front Right Speaker
Subwoofer
The Pro Logic II mode uses the built-in circuit to steer
the Left, Center, Right and Surround left and right
channel audio signals and uses all five speakers to play
both stereo and Dolby Pro Logic program source, such
as TV and VCR. Dolby Pro Logic II includes Dolby Pro
Logic II Movie, Dolby Pro Logic II Music and Dolby Pro
Logic Emulation.
Listening
Zone
Rear Left Speaker
Rear Right Speaker
You can use this mode with any stereo program source
(such as VCR/SAT) to enjoy multi-channel sound
experience.
Front Left Speaker
Center Speaker
Front Right Speaker
Subwoofer
Listening
Zone
Rear Left Speaker
Rear Right Speaker
19
EN
DPL590
EN
12/16/04
3:59 PM
Page 24
Advanced Sound Control
Dolby 3 Stereo
Night Mode
The 3 Stereo mode will redirect the Surround signals to the
front left and right speakers when only the front and
center speakers are used.
By using Dynamic Range Control technology, you can
enjoy enhanced Dolby Digital sound quality at night
without interrupting your roommates or neighbors.
Night Mode will compress the difference between
normal voices and sounds such as explosions, while still
enjoying a Dolby Digital enable component (DVD, SAT).
Night Mode can be activated by pressing the NIGHT
button on the remote control. DRC OFF (Default)
appears on the display. While DRC OFF (Default) is still
on the display, continue to press the NIGHT button to
toggle and select the desired night mode. There are
three modes (DRC OFF, SOFT, ON) for you to choose the
extents of compression.
Front Left Speaker
Center Speaker
Front Right Speaker
Listening
Zone
NOTE
Night mode is available only with Dolby Digital
playback.
Stereo
Dynamic Bass Amplified System (dBas)
The Stereo mode uses the two main channel outputs
from the front speakers. Use this mode if you have
connected the front speakers only.
With “Dynamic Bass Amplified System” (dBas), the
discrete amplifier is located in the receiver so the
subwoofer keeps the power needed to reproduce
powerful effects.
4 settings are available: SOFT, BALANCED, STRONG and
POWERFUL.
Press the SUBWOOFER button to toggle the subwoofer
(dBas) effects level according to your needs.
DSP (Digital Sound Processor)
These digital sound effects resemble sounds in a real
environment such as (DISCO / STADIUM / THEATER / JAZZ
CLUB / ARENA). DSP automatically converts analog audio
signals to digital ones which enables you to adjust the
sound without degrading the sound quality. Different
modes will give you different feels of size and types of
listening environment.
20
DPL590
EN
12/16/04
3:59 PM
Page 25
Advanced Sound Control
Fine Setting of the Components
Digital Input
The receiver can be directly turned on by pressing the
DVD•6CH / SAT•CABLE / TV / CD•TAPE / VCR / TUNER
buttons on the remote control, which also selects the
best surround sound mode. The default surround modes
for different components are listed in the table below.
If you decide to change the surround mode, you can
press the SURROUND button repeatedly to toggle
among the different surround mode choices and select
the one you want.
DOLBY PL II MUSIC => DOLBY PL EMULATION => 3
STEREO => ARENA => JAZZ CLUB => THEATER =>
STADIUM => DISCO => STEREO => DOLBY PL II MOVIE
Select this setting to play digital signals from a DVD, CD,
LD player, SAT or TV.
Source/
Input
If Digital Input (optical
or coaxial) is selected
DVD
SAT
VCR
TV
CD
TAPE
TUNER
Dolby Digital
Dolby Digital
N/A
Dolby Digital
STEREO
N/A
N/A
If Analog Input
is selected
PRO LOGIC
PRO LOGIC
PRO LOGIC
PRO LOGIC
STEREO
STEREO
STEREO
SOURCE
SAT
DVD
CD
VCR
FM/AM
TAPE
TV
DEFAULT INPUT (as seen on display)
Analog (SAT/ ANL)
Analog (DVD/ ANL)
Analog (CD/ ANL)
Analog (VCR/ ANL)
Built-in Tuner
Analog (TAPE/ ANL)
Analog (TV / ANL)
NOTE
Digital input is only available for DVD, SAT, CD
and TV
Analog Input
Select this setting to play analog signals from a cassette
deck, VCR or turntable.
The receiver will keep the last selection in memory.
NOTE
If linear PCM source (CD), format will be Dolby
Prologic even with Digital Input.
SOURCE
SAT
DVD
CD
VCR
TAPE
TV
AVAILABLE INPUT
Analog
Analog
Analog
Analog
Analog
Analog
/
/
/
/
/
/
Optical
Optical
Optical
-/-/Optical
/ Coaxial
/ Coaxial
/ Coaxial
/ -
Input Signal Setting
The receiver defaults to the most convenient settings for
your easiest use (see table).
If your connection is different from the default setting,
1. Select the source
2. Press the SETUP button to show setup options.
3. Press the Left or Right adjustment buttons until
ANALOG is displayed.
4. Press the Up or Down arrow buttons to select among
optical/ coaxial/ analog to match your connection.
Your selection will be stored automatically.
The selected source and input source will be displayed
on the display as long as they are active, except for
some temporary change of display (e.g. adjusting
volume).
21
EN
DPL590
EN
12/16/04
3:59 PM
Page 26
Advanced Sound Control
Fine Setting of the Speakers
All the basic settings have already been pre-set for the
speakers included in the box.
Also, to make the surround sound more effective and
suit the acoustic conditions in your listening room, you
may need to delay the signal coming from some of the
speakers. Channel delay compensates for center or
surround speakers that are closer to the listening
position than the front speakers. You can make use of
the SETUP button to adjust the speakers’ relative
loudness.
Adjust Individual Speaker Volume
1. To adjust individual speaker volume level, press the
LEVEL key on the remote control.
2. Continue to press the LEVEL button on the remote
control to select the channel to be adjusted, then
press the Up or Down buttons to adjust
the level.
You can adjust the master volume level by turning the
VOLUME knob or press the
+ or - buttons on the
remote control.
Testing Speaker Loudness
You can listen to the loudness of the individual
speakers.
1. Press and hold LEVEL on
the remote control.
A short noise will be
heard in the speakers one
by one. The speaker
having the noise at that
moment will be shown in
the display.
Advanced Setting
Factory defaulted Advance setting
indication from VFD
The receiver has defaulted the following distances:
Front
Left
Front
Right
Center
Cch
2. To adjust the volume level of the test tone, turn the
VOLUME knob or press the
+ or buttons on the remote control to adjust the master
volume (if necessary).
Lch
L/S
Rear
Left
Front speakers (FRNT) 5m
Center speaker (CNTR) 5m
Rear speaker (SURR)
3m
Press LEVEL again and
press the Up or Down
buttons to adjust the
individual channel noise
level.
22
Rch
R/S
Rear
Right
DPL590
EN
12/16/04
3:59 PM
Page 27
Advance Sound Control
Speaker Configurations
You can also change the setup of the speakers.
Use a subwoofer to enjoy optimum sound.
• Speaker distance: For optimum surround experience
measure the distance between the speaker and your
favorite listening position.
NOTE
EN
By default, the Center and Surround Speakers
are set to YES. If you decide not to use them, set
the ones you do not intend to use to NO so the
sound performance is not affected.
1. Press the SETUP button to
show setup options.
Displaying Program Formats
2. Press the Left or Right
adjustment buttons until
the speaker you want to
change is displayed.
C
R
LS
LFE
RS
It is important to note, however, that not all Dolby
Digital sources are encoded with the full complement of
five channels plus LFE*. Speaker icons show how many
and which speaker you have enabled (See “Fine Setting
of the Speakers”) and the letters inside the speaker
icons show which channel is present in the source
information. For example, the diagram shown means
you have all five speakers and subwoofer enabled and
the digital sources you played have five channels plus
LFE complemented.
3. Press the Up or Down
arrow buttons to change
the speaker settings.
Your selection will be
stored automatically.
4. Repeat step 2 and 3 to set up the next speaker
Center Speaker selection (CTR)
Surround Speaker selection (SURR)
Front Speaker distance (FRNT)
Centre Speaker distance (CNTR)
Rear Speaker distance (SURR)
L
When a digital source starts playing, the
receiver automatically switches to the
proper surround mode and provides
setting information via the speaker icons
located on the right-hand side of the
display.
YES /
YES /
1 -10
0 -10
0 -10
NO
NO
m
m
m
* LFE stands for Low Frequency Effect. The indication
“LFE” appears if the digital source contains LFE
information. In this case, the bass signal will be
delivered to the subwoofer, offering more dynamic deep
bass sound effects. If the letter is flashing, the signal is
either too weak or just gone.
5. When set up is done, wait for 5 seconds to
automatically save your settings or press any key to
save your selection and set up mode.
23
DPL590
EN
12/16/04
3:59 PM
Page 28
Troubleshooting Tips
Troubleshooting Tips
General
Receiver/Tuner Operation
No audio.
ST indicator is off.
• Adjust the antenna.
• Press GO BACK/ST.MONO button to insure you
are not outputting in mono.
The signal is Mono. Severe hum or noise.
• The signal is too weak. Connect an external antenna.
• Adjust Antenna
• Reposition Antenna away from any electronics.
There is interference to FM reception.
•
•
•
•
•
Make sure the speakers are connected.
Check the input connections.
Check the power cord connections.
Make sure the MUTE signal on the front panel is off.
Make sure the digital setting (optical, coaxial or
analog) is correct.
• Check that the headphone is not inserted.
No audio from one channel.
• Check the speaker level setting.
• Check the speaker wire or external source cable
connections.
• Turn off other electrical units (e.g. DVD, CD player)
near the receiver.
Noise occurs when the TV is turned on.
Remote Control Operation
Specific instruments sound displaced.
The remote control does not operate the unit.
• Another source mode is selected on the remote. Press
the correct Source Button.
• No batteries installed. (included with your system)
Install the batteries before attempting to operate the
remote. Be sure to match the + and - ends of each
battery to the symbols shown in the remote battery
compartment.
• The batteries are weak. Replace all batteries.
• The remote is not pointed at the remote control
sensor on the main unit or there is an obstacle
between the remote and the main unit.
• The remote control is too far from the main unit,
move closer.
Remote loses Programmed codes.
• Weak batteries, replace batteries.
Remote forgets what source was selected.
• Weak batteries, replace batteries.
24
• The TV is too close to the audio system.
• Check the connections between the receiver and the
speakers if the sound does not match the video.
• Check if the video and audio cable are correctly
inserted.
Cleaning the Exterior
Disconnect the system from AC power before cleaning
the exterior of the system with a soft dust cloth, or
with a slightly damp leather chamois. Never use strong
solvents.
DPL590
EN
12/16/04
3:59 PM
Page 29
Care and Maintenance
Disconnect the audio system from the power source before
performing any maintenance.
Cleaning
Clean the exterior of the system using a soft dust cloth.
Important battery information
• Remove the batteries to avoid leakage if you do not
use your remote control for more than one month.
• Discard leaky batteries immediately as leaking
batteries may cause skin burns or other personal
injuries.
• Dispose of batteries in the proper manner, according
to provincial and local regulations.
• Any battery may leak electrolyte if mixed with a
different battery type, if inserted incorrectly, if all
batteries are not replaced at the same time, if
disposed of in fire, or if an attempt is made to charge
a battery not intended to be recharged.
Safety precautions
• Never open the cabinet under any circumstances.
Any repairs or internal adjustments should be made
only by a trained technician.
• Never operate this product with the cabinet removed.
• Do not touch the player with wet hands. If any liquid
enters the player cabinet, take the player to a trained
technician for inspection.
• The apparatus shall not be exposed to dripping and
splashing.
• No object filled with liquids, such as vases, shall be
placed on the apparatus.
• No naked frame sources such as lighted candles ,shall
be placed on the apparatus.
Equipment Specifications:
EN
AMPLIFIER SECTION:
RMS Output Power: Dolby Digital Mode with 10% Total
Harmonic Distortion
Rear Channels: 55 Watts each Channel (1KHz, 6 Ohm)
Front and Center Channel: 98 Watts (1KHz, 3 Ohm)
Subwoofer Channel: 98 Watts (100Hz, 3 Ohm)
Total RMS Output Power, Dolby Digital mode : 500 W
DIN Output Power: Dolby Digital Mode with 10% Total
Harmonic Distortion
Front Channels (L and R ): 50 Watts per Channel (1KHz,
3 Ohm)
Rear Channels (L and R): 44 Watts per Channel (1KHz, 6
Ohm)
Center Channel: 90 Watts (1KHz, 3 Ohm)
Subwoofer Channel: 90 Watts (100Hz, 3 Ohm)
DIN Output Power: Dolby Digital Mode with 1% Total
Harmonic Distortion
Front Channels (L and R ): 34.1 Watts per Channel
(1KHz, 6 Ohm)
Rear Channels (L and R): 34.1 Watts per Channel (1KHz,
6 Ohm)
Center Channel: 65 Watts (1KHz, 3 Ohm)
Subwoofer Channel: 65 Watts (100Hz, 3 Ohm)
Muting Attenuation: 65dB
Frequency Response: 20kHz /-3dB, 1kHz ref.
Subwoofer Frequency Response: 10 Hz / -3db, 80Hz ref.
DIN 1kHz FL / FR STEREO mode : 45W x2 @ 6ohm <10%
THD
Signal to Noise Ratio: 65dB (Dolby digital mode)
Video Signal to Noise Ratio from 40 dB to 60dB
AM TUNER SECTION:
Headset safety
• Do not play your headset at a high volume. Hearing
experts warn against extended high-volume play.
• If you experience a ringing in your ears, reduce
volume or discontinue use.
• You should use extreme caution or temporarily
discontinue use in potentially hazardous situations.
• Even if your headset is an open-air type designed to
let you hear outside sounds, don’t turn up the volume
so high that you are unable to hear what is around
you.
Don’t infringe
This product should only be used for the purposes for
which it is sold, that is, entertainment, violating no
copyright law. Any attempts to use this product for which it
is not intended is unlawful and therefore not condoned by
Thomson.
Frequency Response: 2kHz +/-6dB, 1kHz ref.
Usable Sensitivity: 800uV/m @ S/N 20dB
Signal to Noise: 38dB
IF Rejection: 35dB
FM TUNER SECTION:
Frequency Response: 15kHz +/-3dB, 1kHz ref.
Quieting: 24dBu
Signal to Noise: 60dB(stereo) / 65dB(mono)
IF Rejection: 50dB
Dimensions (H x W x D mm) :
Unit - 95 x 430 x 355
Front and Surround Speakers - 156 x 80 x 90
Center Speaker - 68 x 248 x 85
Subwoofer - 316 x 160 x 355
25