1
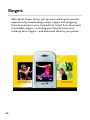
© 2007 Sprint Nextel. All rights reserved. SPRINT and other trademarks are the
property of Sprint Nextel. All other product or service names are the property of
their respective owners.
5/8/07
Table of Contents
Welcome . . . . . . . . . . . . . . . . . . . . . . . . . . . . . . . . . . . . . . . . . 1
Getting Started . . . . . . . . . . . . . . . . . . . . . . . . . . . . . . . . . . . 5
Your User Name . . . . . . . . . . . . . . . . . . . . . . . . . . . . . . . . . . . . . . . .
Launching a Data Connection . . . . . . . . . . . . . . . . . . . . . . . . . . .
Net Guard . . . . . . . . . . . . . . . . . . . . . . . . . . . . . . . . . . . . . . . . . . . . . .
Data Connection Status and Indicators . . . . . . . . . . . . . . . . . .
Navigating the Web . . . . . . . . . . . . . . . . . . . . . . . . . . . . . . . . . . . .
5
6
7
8
9
Sprint Picture Mail . . . . . . . . . . . . . . . . . . . . . . . . . . . . . . . . 11
Taking Pictures . . . . . . . . . . . . . . . . . . . . . . . . . . . . . . . . . . . . . . . . 12
Registering Your Sprint Picture Mail Account . . . . . . . . . . . 13
Recording Videos . . . . . . . . . . . . . . . . . . . . . . . . . . . . . . . . . . . . . . 14
Sharing Sprint Picture Mail . . . . . . . . . . . . . . . . . . . . . . . . . . . . 15
Messaging . . . . . . . . . . . . . . . . . . . . . . . . . . . . . . . . . . . . . . . 17
Message Types . . . . . . . . . . . . . . . . . . . . . . . . . . . . . . . . . . . . . . . . 17
Using Email . . . . . . . . . . . . . . . . . . . . . . . . . . . . . . . . . . . . . . . . . . . 18
Accessing Sprint Instant Messaging . . . . . . . . . . . . . . . . . . . . 21
Accessing Wireless Chat Rooms . . . . . . . . . . . . . . . . . . . . . . . . 22
Sprint TV . . . . . . . . . . . . . . . . . . . . . . . . . . . . . . . . . . . . . . . . 23
Your Sprint TV Channel Options . . . . . . . . . . . . . . . . . . . . . . . 24
Playing a Video or Audio Clip . . . . . . . . . . . . . . . . . . . . . . . . . . 25
Music . . . . . . . . . . . . . . . . . . . . . . . . . . . . . . . . . . . . . . . . . . . 26
The Sprint Music Store . . . . . . . . . . . . . . . . . . . . . . . . . . . . . . . . . 27
Purchasing and Downloading Music . . . . . . . . . . . . . . . . . . . 28
Playing Music From the Sprint Music Store . . . . . . . . . . . . . 29
Backing Up Your Downloaded Music Files . . . . . . . . . . . . . . 30
Sprint Music Manager . . . . . . . . . . . . . . . . . . . . . . . . . . . . . . . . . 31
Streaming Music . . . . . . . . . . . . . . . . . . . . . . . . . . . . . . . . . . . . . . 33
Downloading Content . . . . . . . . . . . . . . . . . . . . . . . . . . . . 34
Accessing the Download Menus . . . . . . . . . . . . . . . . . . . . . . . 35
Selecting an Item to Download . . . . . . . . . . . . . . . . . . . . . . . . 35
Downloading an Item . . . . . . . . . . . . . . . . . . . . . . . . . . . . . . . . . 36
Using My Content Manager . . . . . . . . . . . . . . . . . . . . . . . . . . . 37
Using Application Manager . . . . . . . . . . . . . . . . . . . . . . . . . . . . 39
Games . . . . . . . . . . . . . . . . . . . . . . . . . . . . . . . . . . . . . . . . . . 40
Purchasing and Downloading Games . . . . . . . . . . . . . . . . . . 41
Playing Games . . . . . . . . . . . . . . . . . . . . . . . . . . . . . . . . . . . . . . . . 41
Ringers . . . . . . . . . . . . . . . . . . . . . . . . . . . . . . . . . . . . . . . . . . 42
Purchasing and Downloading Ringers . . . . . . . . . . . . . . . . . . 43
Assigning Downloaded Ringers . . . . . . . . . . . . . . . . . . . . . . . . 43
Screen Savers . . . . . . . . . . . . . . . . . . . . . . . . . . . . . . . . . . . . 44
Purchasing and Downloading Screen Savers . . . . . . . . . . . . 45
Assigning Downloaded Screen Savers . . . . . . . . . . . . . . . . . 45
Web . . . . . . . . . . . . . . . . . . . . . . . . . . . . . . . . . . . . . . . . . . . . 46
Using the Browser Menu . . . . . . . . . . . . . . . . . . . . . . . . . . . . . . 47
On Demand . . . . . . . . . . . . . . . . . . . . . . . . . . . . . . . . . . . . . . 51
Initializing Your On Demand Service . . . . . . . . . . . . . . . . . . . 52
Accessing On Demand Information . . . . . . . . . . . . . . . . . . . . 52
Updating On Demand Information . . . . . . . . . . . . . . . . . . . . 54
Phone as Modem . . . . . . . . . . . . . . . . . . . . . . . . . . . . . . . . . 56
Setting Up a Data Connection With Your Computer . . . . 57
Themes . . . . . . . . . . . . . . . . . . . . . . . . . . . . . . . . . . . . . . . . . . 59
Downloading Themes . . . . . . . . . . . . . . . . . . . . . . . . . . . . . . . . . 60
Applying Themes . . . . . . . . . . . . . . . . . . . . . . . . . . . . . . . . . . . . . . 60
Index . . . . . . . . . . . . . . . . . . . . . . . . . . . . . . . . . . . . . . . . . . . . 61
Welcome to the next generation in wireless
service.
This guide introduces you to all the advantages of
SM
Sprint Power Vision .
Sprint Power Vision gives you
more choice and flexibility, so
you can make the most of
your wireless service. Enjoy
the network that gives you
the freedom to watch live
Mobile Digital TV (MDTV),
instantly download songs to
your phone, play multiplayer
games, and more, with always
on broadband-like speeds,
right in the palm of your
hand. Watch, listen, play, and
do at the speed of life.
Sprint Power Vision not only offers new and exciting
SM
SM
services such as Sprint TV , the Sprint Music Store ,
On Demand personalized data services, and Phone as
Modem capability, it also enhances your existing data
services with increased, broadband-like speed and
clearer, high-quality visuals and sound.
Thank you for choosing Sprint.
1
Here are some of the exciting features available with your
Sprint Power Vision service.
Sprint Picture Mail
Shoot and send high-quality pictures and video clips faster
than ever with your Sprint Power Vision phone.
Messaging
Send and receive IM or email in a flash. Converse without
talking by joining a Web-based chat room. Exchange
information on a chosen topic or read conversations that
others have posted. Even launch a one-on-one chat for a more
in-depth conversation.
Sprint TVSM
Watch live Mobile Digital TV (MDTV) on the go with fullmotion video and vivid sound. Use your phone to watch
news, sports, weather, movie trailers, and entertainment
channels. So now you can watch TV whenever you want
because it’s always with you on your wireless phone.
Music
SM
Sprint Music Store
Wirelessly download full stereo-quality, digital tracks directly
to your phone. Choose from hundreds of thousands of songs
from virtually every genre. Select songs directly from your
wireless phone and listen to them wherever you go.
Sprint Music Manager
The Sprint Music Manager application (included on CD) lets
you use your computer to organize all your music files and
copy them to your phone’s microSD card. You can even use it
to browse and make online purchases from the Sprint Digital
Lounge.
2
Streaming Music
Stream music to your phone with SIRIUS Music, VH1,
Music Choice®
, or a variety of music content providers.
Choose from rock, pop, hip-hop, R&B, and more. Plus,
get exclusive video clips, performances, and interviews
from your favorite artists.
Games
Download and play entertaining, interactive games
that you’ll want to play all the time. With hundreds of
games to choose from, you’ll find the games just right
for you.
Ringers
Personalize your phone by downloading and assigning
different ringers to numbers in your phone’s Contacts list.
Screen Savers
Add unique images to your phone screen or assign
specific images to numbers in your phone’s Contacts list.
Web Browsing
Browse Web sites or download applications at high
speeds, making it easier than ever to stay informed on
the go.
On Demand
Set and then receive customized, up-to-date
information on sports, weather, news, money, and
more, on demand – the way you want it. It’s easy and
convenient to set preferences for the information you
choose to receive.
3
Phone as Modem
Your phone can be a high-speed Internet connection for
your laptop computer anywhere on the Sprint National
Network. Simply connect your phone using a USB cable or
the built-in connection on Bluetooth-enabled phones.
Themes
Express your personal style and interests with downloadable
themes that transform your phone’s appearance and
features.
Note:
4
For the latest information about Sprint Power Vision
service and features, please visit us online at
www.sprint.com.
With your Sprint service, you are ready to start
enjoying the advantages of Sprint Power Vision.
This section will help you learn the basics of using
your data services, including managing your user
name, launching a Vision connection, and navigating
the Web with your phone.
Your User Name
When you buy your phone and sign up for service,
you’re automatically assigned a user name, which is
typically based on your name and a number, followed
by “@sprintpcs.com.” (For example, the third John
Smith to sign up for Sprint Power Vision service might
have [email protected] as his user name.)
Getting Started
Getting Started
When you use data services, your user name is
submitted to identify you to the Sprint National
Network. The user name is also useful as an address for
Sprint Mail, as a way to personalize Web services, and
as an online virtual identity.
Your user name will be automatically programmed into
your phone. You don’t have to enter it.
Finding Your User Name
If you aren’t sure what your user name is, you can easily
find it online or on your phone.
To find your user name:
䢇
At www.sprint.com. Sign on to My Sprint Wireless
using your phone number and password. To display
your user name, go to Account Management >
My Personal Information > Power Vision User Name.
5
䢇
On your phone. You can find your user name under the
Phone Information option in your phone’s Settings menu.
Press
> Settings > Phone Information > Version.)
Updating Your User Name
If you change your preprogrammed user name online at
www.sprint.com and select a new one, you can update your
phone to use the new user name.
To update your user name:
䊳
Press
> Settings > More > Data > Update Data Profile.
(To cancel, press
before completing the update
process.)
Launching a Data Connection
To launch a data connection:
䊳
Press
> Web. (Your data connection will start and
the Sprint Power Vision home page will be displayed.)
The Sprint Power Vision Home Page
Note:
6
If Net Guard is enabled and displayed (see page 7), press
OK (right softkey) to continue and launch the Web.
Tip:
The default opening page when you launch your
browser is the Power Vision home page. You can change
the default launch page to the last page viewed. From
the browser, press Menu (right softkey) > More... >
Preferences > Launch Page and select Last Page.
Net Guard
When you first connect to the Web, the Net Guard will
be displayed to confirm that you want to connect. This
feature helps you avoid accidental connections. You
can disable the Net Guard in the future by selecting
Always Auto-Connect when the Net Guard is displayed.
Getting Started
The first time you launch Vision, the following message
may be displayed on the screen: Connecting....
To change your Net Guard settings:
䊳
Note:
Press
> Settings > More > Data > Net Guard.
䡲 Select On to activate the Net Guard.
䡲 Select Off to deactivate the Net Guard.
When enabled, the Net Guard is displayed only once per
session. The Net Guard will not be displayed if the
phone is merely reconnecting because of a time-out.
7
Data Connection Status and Indicators
Your phone’s display lets you know the current status of
your data connection through indicators which are displayed
at the top of the screen. The following symbols are used:
A Sprint Power Vision (EVDO) connection is active (data
is being transferred); the transmit/receive symbol will
animate to indicate data transmission. Voice calls can
be made and received. When you make or receive a call,
the Sprint Power Vision connection will automatically
be interrupted.
A Sprint Power Vision connection is available, but no
data is currently being transferred.
Your Sprint Power Vision service is dormant. (No data is
being sent or received.)
A Sprint Vision (3G) connection is active (data is being
transferred); the transmit/receive symbol will blink to
indicate data transmission. Incoming voice calls go
directly to voicemail; outgoing voice calls can be made,
but the Sprint Vision connection will terminate.
A Sprint Vision connection is dormant. (No data is
being sent or received.) Though not currently active,
when dormant the phone can restart an active
connection quickly; voice calls can be made and
received.
If no indicator is displayed, your phone does not have a
current data connection. To launch a connection, see
“Launching a Data Connection” on page 6.
8
Navigating through menus and Web sites during a data
session is easy once you’ve learned a few basics. Here
are some tips for getting around:
Softkeys
During a data session, the bottom line of your phone’s
display contains one or more softkeys. These keys are
shortcut controls for navigating around the Web, and
they correspond to the softkey buttons directly below
the phone’s display screen.
Tip:
Depending on which Web sites you visit, the labels on
the softkeys may change to indicate their function.
Getting Started
Navigating the Web
To use softkeys:
䊳
Press the desired softkey button. (If an additional
pop-up menu is displayed when you press the
softkey button, select the menu items using your
keypad [if they’re numbered], or by highlighting
the option and pressing
.)
Scrolling
As with other parts of your phone’s menu, you’ll have
to scroll up and down to see everything on some Web
sites.
To scroll line by line through Web sites:
䊳
Press the navigation key up and down.
To scroll page by page through Web sites:
䊳
Press the volume buttons on the side of the
phone.
9
Selecting
Once you’ve learned how to use softkeys and scroll, you can
start navigating the Web.
To select onscreen items:
䊳
Tip:
Use the navigation key to highlight the desired
item, and then press the desired softkey button
(or press
).
You’ll find that the left softkey is used primarily for
selecting items. This softkey is often labeled “Go.”
If the items on a page are numbered, you can use your
keypad (number keys) to select an item.
Links, which are displayed as underlined text, allow you to jump
to Web pages, select special functions, or even place phone calls.
To select links:
䊳
Highlight the link and press the appropriate softkey.
Going Back
To go back one page:
䊳
Note:
Press the
key on your phone.
The
key is also used for deleting text (like a
BACKSPACE key) when you are entering text.
Going Home
To return to the home page from any other Web page:
䊳
10
Press and hold
.
– or –
Press Menu (right softkey) > Home.
With Sprint Picture Mail, you can instantly shoot, share,
and print sharp, high-resolution digital pictures and
take and send short video clips with your phone.
Use your phone to take full-color digital pictures or
video clips with sound. Then either store the pictures
and videos or send them from your phone to email
addresses or other compatible phones. It’s that easy.
At www.sprint.com/picturemail, you can archive your
pictures and videos and take advantage of the Web site’s
advanced features, which let you crop pictures, organize
your own albums, share your pictures and videos, order
prints, and more.
Note:
Your phone’s camera and camcorder settings and menu
options may differ from those outlined in this guide.
Please refer to your phone’s user guide for details.
Sprint Picture Mail
Sprint Picture Mail
11
Taking Pictures
Taking pictures with your phone is as simple as choosing a
subject, pointing the lens, and pressing a button. For details on
how to use all the camera features of your phone, please see
your phone’s user guide.
To take a picture:
1. Press
> Pictures > Camera to activate Camera mode.
2. Using the phone’s main display screen as a viewfinder,
aim the camera lens at your subject.
,
, or the side Camera
Key to take the picture. (You will see “Saving” and the
picture will be displayed.)
4. Press Options (right softkey) to display picture options,
or press
to return to Camera mode to take another
picture.
3. Press Capture (left softkey),
Note:
12
The instructions in this guide may not match your
phone’s operation. Please refer to your phone’s user
guide for complete phone operation instructions.
The first time you attempt to upload or share pictures
or use the Picture Mail Web site, you will be prompted
to register your Sprint Picture Mail account and
establish a Picture Mail password through your phone.
This password will also allow you to sign on to the
Picture Mail Web site at www.sprint.com/picturemail,
where you can access and manage your uploaded
pictures.
To register your Sprint Picture Mail account:
1. When prompted to register your Picture Mail
account, press Continue (left softkey).
2. From the Set Password screen, use your keypad to
enter your 4-32 digit or character password, press
, and press Continue (left softkey).
Tip:
Sprint Picture Mail
Registering Your Sprint Picture Mail Account
Write down your Picture Mail password in a secure
place.
3. Please wait while the system creates your
account.
Once you have received confirmation that your account
has been successfully registered, you may upload and
share pictures and access the Picture Mail Web site.
Note:
If you prefer to have a password assigned to
you, you can visit the Picture Mail Web site at
www.sprint.com/picturemail. Enter your Sprint Phone
Number in the sign on area, select No, send me a
password, and click Sign on. You’ll receive a text
message on your phone with a Picture Mail password.
Follow steps 1-3 above to sign in on your phone.
13
Recording Videos
Recording videos with your phone is as simple as taking a
picture. For details on how to use all the video features of
your phone, please see your phone’s user guide.
To record a video:
1. Press
> Pictures > Camcorder to activate Video mode.
2. If prompted, select a video length:
Video Mail to record a short video that can be sent
using Sprint Picture Mail.
䡲 Long Video to record a longer video. (Long videos
may be up to 120 minutes long and may be limited
by the available memory space on your phone’s
microSD memory card.)
Using the phone’s main display as a viewfinder, aim the
camera lens at your subject.
Press Record (left softkey),
,
, or the side Camera
Key to begin recording the video.
Press Done (left softkey),
,
, or the side Camera
Key to stop recording. (Recording will stop automatically
after a preset time, depending on your phone and its
mass storage options.)
Press Options (right softkey) for additional video options
(including Play, Send, Upload, Assign, Delete, Post to
Service, Review/Send Media, and Take New Video) or
press
to return to Video mode.
䡲
3.
4.
5.
6.
Tip:
14
For complete video option details, please refer to your
phone’s user guide.
Once you’ve taken a picture or a video, you can
instantly share it with family and friends. You can send
pictures and videos to their email addresses or to their
messaging-ready phones.
To share Sprint Picture Mail from your phone:
1. Press
> Pictures > My Albums > In Phone.
2. Select the pictures or videos you want to
send, and then press Options (right softkey) >
Send. (A message may be displayed.)
Note:
The first time you send a picture or video, you will be
prompted to register your Picture Mail account and set
up a password. (See “Registering Your Sprint Picture
Mail Account” on page 13.)
3. Select a recipient from your Contacts list or enter
Sprint Picture Mail
Sharing Sprint Picture Mail
a wireless phone number or email address.
4. Press Next (left softkey) when you have finished
selecting or entering recipients.
5. Select the desired options to include a subject,
text message, or voice recording, or to set the
message priority.
6. Confirm your recipients, message, voice
recording, and picture or video.
7. Press Send (left softkey) to send your picture mail.
Note:
See your phone’s user guide for additional details.
15
You can also send pictures and videos from your phone’s
Messaging menu.
To share Sprint Picture Mail from Messaging:
1. Press
> Messaging > Send Message > Picture Mail.
2. Select an option to enter or select recipients for your
picture mail.
3. Press Next (left softkey) when you have finished
selecting or entering recipients.
4. Select a location from which to select pictures or
videos to send (such as In Phone, Memory Card, or
Online Albums).
5. Select the pictures or videos you want to send, and then
press Next (left softkey).
6. Complete steps 5–7 under “To share Sprint Picture Mail
from your phone:” on page 15.
Tip:
To take and send a new picture or video, select
Take New Picture or Take New Video during step 4 above.
To learn more, visit www.sprint.com or go to the Sprint
Picture Mail Web site at www.sprint.com/picturemail.
16
You can send and receive emails and text messages
and participate in Web-based chat rooms right from
your phone. Messaging allows you to stay connected to
friends, family, and coworkers 24 hours a day anywhere
on the Sprint National Network.
Message Types
Messaging
Messaging
There are many types of text messaging available
on your phone. These include SMS Text Messaging,
Sprint Instant Messaging, Email, and Chat.
17
Using Email
Your phone’s Email application lets you access and manage
multiple email accounts simultaneously in one convenient
location.
Getting Started With Email
1. Press
> Messaging > Email. (The Email setup wizard
will start.)
2. Press the right softkey to continue.
3. Enter your wireless phone number and press the right
softkey. (If the phone number is already filled in, press
the right softkey to continue.)
4. Select an email provider (such as Windows® Live,
Yahoo!®, AOL® Mail, AIM® Mail, or Gmail®) and press
the right softkey.
– or –
Select More... to choose from additional options. There
are many available email options listed, or you may add
your own POP or IMAP email accounts.
5. Follow the setup wizard instructions to enter the
required sign-up information. Press Accept (right
softkey) if you are prompted to accept any license
agreements or disclaimers.
Note:
The information required to sign up will vary depending
on the email provider you are accessing.
6. Press Done (left softkey).
18
If you would like to enable Mail Push, press Yes
(right softkey). If another notice appears, review
it and press Yes (right softkey) again to enable
Mail Push.
Note:
Mail Push allows your phone to automatically retrieve
new email messages without having to select the
Send/Receive option. When Mail Push is enabled, you
will receive an onscreen notice of new email messages.
These notices may be charged as SMS Text Messages.
Please consult your service plan for details.
Messaging
7. If applicable, read the notice regarding Mail Push.
Accessing Email
Using Email on your phone is even easier than using
multiple email accounts on your computer. Just launch
the application and you’ll have instant access to all
your accounts.
1. Once you have set up your Email, press
>
Messaging > Email to launch the application.
(Your default account inbox will be displayed.)
– or –
From an Email New Message notice (if Mail Push
is enabled), select GO to go to your inbox.
Note:
The first time you access your Email, you will have the
option of completing a Help program. This series of
screens demonstates the application’s navigation and
available tools.
19
2. Use your keypad and navigation keys to read, manage,
and reply to your email messages.
䡲 Press Menu (right softkey) to select messaging
options, such as Delete, Compose, Reply, Receive
changes, Settings, etc.
䡲 Press Menu (right softkey) > Receive changes to
manually check for new messages.
䡲 To view a different email account, use your
navigation key to select the drop-down menu next
to the Inbox tab at the top of the screen, and then
select an account. You can also navigate to the
Home tab at the top of the screen and select an
available account from there.
䡲 To add a new account, use your navigation key to
select the Home tab at the top of the screen, and
then select Add Account. Follow the instructions in
“Getting Started With Email” on page 18 to set up a
new account.
Note:
20
You can also access certain email accounts, including
your Sprint Mail account, through the Power Vision
home page. Press
> Web to launch the Web, and
then select Messaging > Email > [PCS Mail, AOL & AIM
Mail, MSN Hotmail, or Yahoo! Mail]. Follow the onscreen
instructions to enter your account information and
access your email messages.
Sprint Power Vision also provides you with access to
popular instant messaging (IM) clients, including AOL®
TM
Instant Messenger , MSN® Messenger, and Yahoo!®
Messenger.
To access instant messaging clients from your phone:
1. Press
> Web. (The browser will start and
display the home page.)
Messaging
Accessing Sprint Instant Messaging
2. From the home page, select Messaging > Instant
Messaging.
3. Select an IM provider, such as AOL Instant
Messenger, MSN Messenger, or Yahoo! Messenger.
4. Use your keypad to enter the required sign-in
information for the selected provider, such as user
name or password, and select Sign In. (Your IM
screen for the selected provider will be displayed.)
Note:
The information required to sign in will vary depending
on the instant messaging provider you are using.
5. Follow the onscreen instructions to read, reply to,
compose, send, and manage messages in your IM
account.
Tip:
You can also access IM providers through the phone’s
Messaging menu. Press
> Messaging > IM >
[AOL, MSN, or Yahoo!] and then select the corresponding
instant messaging link.
21
Accessing Wireless Chat Rooms
Sprint Power Vision gives you the ability to join wireless
chat rooms from your phone. You can choose from a wide
variety of chat providers and services.
To access Wireless Chat from your phone:
1. Press
> Messaging > Chat & Dating. (The browser
will start and display the Chat & Dating menu.)
2. Select a chat service and follow the onscreen
instructions to sign up. You may be instructed to
provide profile information, after which you may
receive a text message with your login name and
password.
3. Return to the chat provider’s main page, enter your
login information, and press
.
4. Use your keypad and navigation keys to select chat
rooms, read messages, and post your own messages
and replies.
Note:
Navigating and posting within these chat rooms varies
by provider. Please follow the onscreen instructions.
The Chat & Dating options change frequently, so check
back often to see what’s available.
22
With Sprint Power Vision, you can watch live TV on
the go right on your wireless phone. Accessing your
Sprint TV channels is as easy as using the remote
control in your living room. Wherever you go on our
wireless high-speed multimedia network, you can
get more out of your Sprint TV service.
Sprint TV
Sprint TV
23
Your Sprint TV Channel Options
The Sprint TV application offers a wide variety of accessible
channels. Subscription options include comprehensive basic
packages as well as a full menu of “a la carte” channels. Visit
www.sprint.com for more information on channels and pricing.
Some of the available categories may include:
䢇 Sprint TV (the main grid listing of individual channels).
䢇 News & Weather.
䢇 Music.
䢇 Movies & Shorts.
䢇 Entertainment.
䢇 Sports.
䢇 Kids.
䢇 Mobile Previews.
Note:
24
Available categories and content are subject to change.
To play a video or audio clip:
1. Press
> Sprint TV. Depending on your settings,
you may be asked to accept a data connection.
2. Use your navigation key and press
to select a
channel from the Sprint TV listings or to select an
available category.
Note:
Sprint TV
Playing a Video or Audio Clip
The first time you access a channel, you will be
prompted to purchase access (unless the channel
doesn't have a monthly fee). Select Subscribe to
purchase access, or select Preview to view a preview of
the selected channel.
3. If applicable, select a clip and press
to view
the program. The clip will automatically load and
begin playing.
Tip:
While you are playing a clip, you can press the
navigation key up and down to surf to a different
channel. A small pop-up screen will be displayed that
tells you which channel you are watching as well as
other channels that you have access to. Use the
navigation key to scroll through the channels. Once you
find a channel that you want to watch or listen to, scroll
to it and press
(or simply wait approximately three
seconds), and the channel will begin loading.
25
Music
Sprint Power Vision lets you use your phone as a portable
personal jukebox. From the Sprint Music Store to a variety of
streaming music options, you’re bound to find the music you
want, when you want it.
26
The Sprint Music Store enables you to purchase and
download digital music files to play on your phone or
computer.
Music
The Sprint Music Store
Accessing the Sprint Music Store
You can access the Sprint Music Store right from your
phone’s main menu, anywhere on the Sprint National
Network. When you enter the store for the first time,
you will be prompted to set up your user identification
and password.
To access the Sprint Music Store:
1. Press
> Music.
2. Follow the onscreen instructions to establish your
User ID and password.
Tip:
Your User ID for the Sprint Music Store is your 10-digit
wireless phone number. The password may be any
4-digit number. The recommended password is the last
four digits of your Social Security number.
3. Once you’ve entered your password, select Create
New Account and press
.
4. Use your keypad and navigation key to explore
the store.
27
Purchasing and Downloading Music
Now that you’re in the store, you can shop for songs to
purchase and download to your phone’s microSD card.
To find and download music files from the Sprint Music Store:
1. From the Sprint Music Store opening page, select an
option to browse the store:
䡲 Featured Music offers a revolving selection of
highlighted songs and artists.
䡲 Categories allows you to choose from categories such
as Top 10s, New This Week, What’s Hot, Songs on the
Go, and specific musical genres.
䡲 Search gives you the option of searching for specific
songs or artists. Just use your keypad to enter your
search criteria in the available field.
2. Select a song and press
. (The song information
screen will be displayed.)
3. Select an option and press
䡲
䡲
28
:
Preview to play an audio clip of the selected song.
Buy Song to purchase the song and download it to
your phone’s microSD card.
⽧ When you select Buy Song, the file will download
to your phone’s microSD card. (If there is no
microSD card installed or if there is not enough
free memory space on the card, you will see
an alert.)
⽧ Once the song has been downloaded to your
microSD card, you will see options allowing you
to listen to the song, add it to a playlist, or
continue shopping.
The Sprint Music Store not only gives you access to
great music, it also gives you a place to listen to and
organize your music library.
Music
Playing Music From the Sprint Music Store
Accessing the Music Player
1. From the Sprint Music Store opening page, use
your right navigation key to select the Player tab.
2. From the Player display, select an option:
䡲
䡲
䡲
All My Music to browse through all of your
downloaded music, including music
purchased from the Sprint Music Store and
any additional songs you hav loaded onto
your microSD card from your computer.
<playlist> to select a customized playlist
you’ve created to organize your music.
Create Playlist... to set up a custom playlist of
songs you like to hear together. Follow the
onscreen instructions to create a name for the
playlist, select songs by artist, genre, and title,
and create an order for the playlist.
3. Once you’ve displayed a list of songs, you can
browse through your available titles by Song,
Artist, or Genre to select a specific song.
䡲 To play a song, select it and press Play.
䡲 To listen to a playlist, select it and press
to
open the playlist, then press
again to
begin playing from the selected song. (You
can also highlight the playlist and use the
softkey menu to begin listening.)
29
Backing Up Your Downloaded Music Files
When you purchase and download a music file from the
Sprint Music Store, you get two versions of the song: one to
download and play on your phone (file type: AAC+), and
another to download from http://musicstore.sprint.com and
play on your computer (file type: WMA). The AAC+ files
downloaded to your phone can only be played on your phone
and on your account, and once they have been downloaded,
they cannot be downloaded again without being
repurchased.
Sprint recommends you back up your AAC+ music files to your
computer so you can access the files in case your microSD
card is lost or damaged, or if you install a new microSD card.
To back up your downloaded music files:
1. Connect your phone using a USB cable or the built-in
connection on Bluetooth-enabled phones.
2. Use your computer to navigate to the microSD card’s
Music folder.
3. Select and copy the music files to a folder on your
computer’s hard drive.
Note:
Although you can store AAC+ files on your computer,
they will only be playable on your phone and on your
account.
If you copy the files to a new microSD card, you
will need to create a folder on the card called
“MUSIC” to be able to play the music files.
30
The Sprint Music Manager application (included on CD)
is a program you can install on your computer to help
you organize, manage, and play all your music. You can
also use the Sprint Music Manager to copy your
compatible music files right from your computer to
your phone’s microSD card (using the adapter or an
optional USB connection), including purchases you
make from the Sprint Digital Lounge.
Music
Sprint Music Manager
Getting Sprint Music Manager
1. Insert the CD that came with your phone into
your computer’s CD-ROM drive.
– or –
On your computer, go to www.sprint.com/downloads
and download the Sprint Music Manager
application.
2. Follow the onscreen instructions to install and
launch the application, including accepting the
license agreement and rebooting your computer,
if necessary.
Launching Sprint Music Manager
䊳
Tip:
Double-click the Sprint Music Manager icon on
your computer’s desktop (or select Start >
Programs > Sprint Music Manager > Sprint Music
Manager). The application will launch and display
the main menu.
The first time you use Sprint Music Manager, an
onscreen Quick Start Guide will offer a tour of the
application. Follow the instructions to learn more.
31
Overview of Sprint Music Manager
Sprint Music Manager makes it easy to organize music on
your computer, acquire new music from the Sprint Digital
Lounge, and transfer music to your phone’s microSD card.
The Sprint Music Manager application screen is divided into
three tabs:
䢇 Manage allows you to organize and manage all the music
on your computer. Click Search to look for compatible
music files on your computer (including MP3, WMA, MP4,
and WAV), and then use the window to organize your
songs and create playlists. The Manage tab also has a
built-in player to let you play your songs on your
computer.
䢇 Get lets you use Sprint Music Manager to sign on to the
Sprint Digital Lounge and purchase new music for your
phone and your computer.
䢇 Transfer makes it easy to transfer your music from your
computer to your phone’s microSD card, using an optional
USB connection. (See your phone user guide for more
information, or visit www.sprint.com.)
32
In addition to the Sprint Music Store, Sprint Power
Vision offers a variety of musical options through the
Music category in the Sprint TV menu, including SIRIUS
Music, Music Choice, VH1, and many others. Choose
from rock, pop, hip-hop, and R&B, and access exclusive
video clips, music industry news, performances, and
interviews with your favorite artists.
Music
Streaming Music
To access additional Music & Radio options on your phone:
1. Press
> Sprint TV > Music > [selection].
2. Select Preview to see and hear a preview of your
selected channel (if available).
– or –
Select Subscribe to purchase a monthly
subscription to your selected channel.
Once you have purchased access to a music or radio
channel, you can select from a variety of stations to
listen to your favorite music or get caught up on what’s
new in music.
33
Downloading Content
With Sprint Power Vision, you have access to a dynamic
variety of Premium Service content, such as downloadable
Games, Ringers, Screen Savers, and other applications.
(Additional charges may apply.) The basic steps required to
access and download Premium Service content are outlined
on the following pages.
34
To access the download menus:
1. Press
> My Contents.
2. Select the type of file you wish to download
(Games, Themes, Ringers, Screen Savers,
Applications, IM & Email, or Call Tones), and then
select Get New. (The browser will start and take
you to the corresponding download menu.)
To access the download menus from the Web browser:
1. From the home page, select Downloads.
2. Select Call Tones, Games, Ringers, Screen Savers,
Applications, Messaging, or Themes to go to the
corresponding download menu.
Selecting an Item to Download
You can search for available items to download in a
number of ways:
䢇 Featured displays a rotating selection of featured
items.
䢇 Categories allows you to narrow your search to a
general category, such as Country or Pop/Rock for
Ringers or For the Ladies for Screen Savers. (There
may be several pages of available content in a list.
Select Next 9 to view additional items.)
䢇 Search allows you to use your keypad to enter
search criteria to locate an item. You may enter an
entire word or title or perform a partial-word
search.
Downloading Content
Accessing the Download Menus
35
Downloading an Item
Once you’ve selected an item you wish to download,
highlight it and press Go (left softkey). You will see a
summary page for the item including its title, the vendor, the
download details, the file size, and the cost. Links allow you
to view the License Details page, which outlines the price,
license type, and length of license for the download; and the
Terms of Use page, which details the Premium Services Terms
of Use and your responsibility for payment.
To download a selected item:
1. From the information page, select Buy. (The item will
download automatically. When the New Download
screen is displayed, the item has been successfully
downloaded to your phone.)
Note:
If you have not previously purchased an item, you will
be prompted to create your purchasing profile.
2. Select an option to continue:
䡲
䡲
䡲
䡲
䡲
36
Select the appropriate option to assign the
downloaded item (or to start, in the case of a game
or an application). Your data session will end, and
you will be redirected to the appropriate phone
menu screen.
Select Set as to assign a ringer or screen saver to a
phone function.
Select Settings to configure downloaded games or
applications.
Select Shop to browse for other items.
Press
to quit the browser and return to standby
mode.
Whether you purchase your Premium Services content
from your phone or from your online account
management page at www.sprint.com, all of your
purchases are stored in My Content Manager and may
be downloaded to your phone from there.
My Content Manager is a storage area on the Sprint
National Network that is assigned specifically to your
account. It allows you to store all your Premium Service
downloadable files. The files remain in My Content
Manager until their license terms have expired – even
after you have downloaded the content to your phone.
This provides you with a convenient place to access
information about your downloaded files without
having to store the information in your phone’s
memory.
To access My Content Manager:
䊳
From the Power Vision home page, select
Downloads > My Content Manager. (A list of
your purchased items will be displayed.)
Downloading Content
Using My Content Manager
To download purchased content from My Content Manager:
1. From the My Content Manager display (see above),
highlight the item you wish to download, and
press
. (The information page for the selected
item will be displayed.)
2. Highlight Download and press
. (The item
will download automatically. When the New
Download screen is displayed, the item has been
successfully downloaded to your phone.)
37
3. Select an option to continue:
䡲
䡲
䡲
䡲
䡲
38
Select the appropriate option to assign the
downloaded item (or to start, in the case of a game
or an application). Your data session will end, and
you will be redirected to the appropriate phone
menu screen.
Select Set as to assign a ringer or screen saver to a
phone function.
Select Settings to configure downloaded games or
applications.
Select Shop to browse for other items to download.
Press
to quit the browser and return to standby
mode.
Tip:
You can also access My Content Manager through the
phone’s main menu. Press
> My Contents > [Games,
Themes, Ringers, Screen Savers, Applications, IM & Email or
Call Tones] > My Content Manager. The browser will open
and take you to the corresponding content.
Note:
For complete information and instructions on
downloading Games, Ringers, Screen Savers, Applications,
and IM & Email,visit www.sprint.com.
The Application Manager lets you run applications in
the background while accessing other items in your
phone’s menu.
To use the Application Manager
1. Press
> My Contents > Application Manager.
2. Select an application or an alert and press Options
(right softkey) to display the following options:
䡲 View Alert to display an alert screen.
䡲 Ignore Alert to ignore the alert.
䡲 Bring to Foreground to display the application
screen in the foreground.
䡲 Exit Application to close the application.
䡲 Launch New Application to launch a new
application.
Downloading Content
Using Application Manager
39
Games
Sprint has partnered with the most cutting-edge electronic
gaming providers to bring you a realistic and exciting gaming
experience. Advanced Sprint Power Vision phones with
full-color screens, vibration, multi-chord sound, and
sophisticated graphics make games from SEGA®, JAMDAT®,
NAMCO®, THQ®, and Mobliss® more vivid than ever.
40
Tip:
For complete instructions on downloading, see
“Downloading Content” on page 34.
To purchase and download games for your phone:
Games
Purchasing and Downloading Games
1. From the home page, select Downloads > Games.
2. Use your navigation key to select a game you wish
to download, or use the Categories or Search
options to locate a game. (Once you have selected
an item, the game detail page is displayed.)
3. From the game detail page, select Buy. (The game
will download automatically. When the New
Download screen appears, the game has been
successfully downloaded to your phone.)
Playing Games
To play a downloaded game on your phone:
1. Press
> My Content > Games.
2. Select the game you wish to play. (If applicable, a
prompt will display the days remaining on the game
license and ask if you want to continue. Select Yes.)
3. Follow the onscreen instructions to play the
game. (Instructions and game options can usually
be accessed using your phone’s softkey buttons.)
4. When you are finished, select Exit (or Quit) or
press
. (A prompt will be displayed: “Do you
want to exit?”)
5. Select Resume to continue playing or Exit to exit.
41
Ringers
With Sprint Power Vision, you can personalize your wireless
experience by downloading unique ringers and assigning
them to numbers in your Contacts list. Select from thousands
of available ringers – including your favorite tunes and
celebrity voice ringers – and download them to your phone.
42
Tip:
For complete instructions on downloading, see
“Downloading Content” on page 34.
To purchase and download ringers for your phone:
1. From the home page, select Downloads > Ringers.
2. Use your navigation key to highlight and select a
ringer you wish to download, or use the
Categories or Search options to locate a ringer.
(Once you have selected a ringer, the ringer detail
page is displayed.)
3. From the ringer detail page, select Buy. (The ringer
will automatically be downloaded to your phone.)
4. Select an option to continue:
䡲 Select Listen to play the ringer.
䡲 Select Set as to quit your data session and
assign the ringer to a phone task.
䡲 Select Shop to browse for other ringers to
purchase and download.
䡲 Press
to quit the browser and return to
standby mode.
Ringers
Purchasing and Downloading Ringers
Assigning Downloaded Ringers
To assign downloaded ringers to specific events, such
as incoming Caller ID calls or voicemail notifications, or
to associate downloaded ringers to specific callers in
your phone’s Contacts list, refer to your phone’s user
guide.
43
Screen Savers
Sprint Power Vision lets you personalize your wireless
experience by downloading and assigning unique images for
screen savers or to entries in your phone’s Contacts list.
44
Tip:
For complete instructions on downloading, see
“Downloading Content” on page 34.
To purchase and download screen savers for your phone:
1. From the Power Vision home page, select
Downloads > Screen Savers.
2. Use your navigation key to highlight and select a
screen saver you wish to download, or use the
Categories or Search options to locate a screen
saver. (Once you have selected a screen saver, the
screen saver detail page is displayed.)
3. From the screen saver detail page, select Buy.
(The screen saver will automatically be
downloaded to your phone.)
4. Select an option to continue:
䡲 Select View to see your screen saver.
䡲 Select Set as to quit your data session and
assign the screen saver to a phone task.
䡲 Select Shop to browse for other screen savers
to purchase and download.
䡲 Press
to quit the browser and return to
standby mode.
Screen Savers
Purchasing and Downloading Screen Savers
Assigning Downloaded Screen Savers
To assign downloaded screen savers to be displayed
for specific events, such as powering on or off, or to
assign downloaded screen savers to identify specific
callers in your phone’s Contacts list, refer to your
phone’s user guide.
45
Web
With Web access on your phone, you can browse full-color
graphic versions of your favorite Web sites, making it easier
than ever to stay informed while on the go. Follow sports
scores, breaking news, and weather, and shop on your phone
anywhere on the Sprint National Network.
In addition to the features already covered in this guide, the
home page offers access to colorful, graphically rich Web
categories, including News, Weather, Entertainment, Sports,
Money, Travel, Shopping, and Tools, as well as useful
management options including My Account and Search. Many
sites are available under more than one menu – choose the
one that’s most convenient for you.
46
Navigating the Web from your phone using the home
page is easy once you get the hang of it. For details on
how to navigate the Web, select menu items, and
more, see “Navigating the Web” on page 9.
Web
Using the Browser Menu
Although the home page offers a broad and convenient
array of sites and services for you to browse, not all
sites are represented, and certain functions, such as
going directly to specific Web sites, are not available.
For these and other functions, you will need to use the
browser menu. The browser menu offers additional
functionality to expand your use of the Web on your
phone.
Opening the Browser Menu
The browser menu may be opened anytime you have
an active data session, from any page you are viewing.
To open the browser menu:
䊳
Press the right softkey. (The browser menu will be
displayed in a drop-down list.)
Options available under the browser menu include:
䢇 Home. Returns the browser to the home page.
䢇 Forward. Returns you to a previously viewed page
(after having used the
key).
䢇 Mark this Page. Allows you to create new bookmarks.
䢇 View Bookmarks Allows you to bookmark the
current site, access bookmarked sites, and manage
your bookmarks.
䢇 Search. Launches a Web search.
䢇 Send page to.... Allows you to send a URL you’re
viewing through SMS Text Messaging.
47
䢇
䢇
䢇
䢇
Go to URL.... Allows you to navigate directly to a Web site
by entering its URL (Web site address).
History. Keeps a list of links to your most recently visited
sites. To navigate to a site, highlight it and press
, and
then select Connect.
Refresh this page. Reloads the current Web page.
More.... Displays additional options:
䡲 Show URL. Displays the URL (Web site address) of the
page you’re currently viewing.
䡲 Restart Browser. Refreshes the current browser
session.
䡲 Script Log. Allows you to display the script log.
䡲 About Browser. Allows you to display your browser’s
information.
䡲 Preferences. Allows you to configure and manage
your browser settings.
Creating a Bookmark
Bookmarks allow you to store the address of your favorite
Web sites for easy access at a later time.
To create a bookmark:
1. Go to the Web page you want to mark.
2. Press the right softkey to open the browser menu.
3. Select Mark this Page and press
twice to save the
bookmark.
Note:
Bookmarking a page does not store the page contents,
just its address.
Some pages cannot be bookmarked. Whether a
particular Web page may be marked is controlled by its
creator.
48
To access a bookmark:
1. Press the right softkey to open the browser menu.
2. Select View Bookmarks.
3. Scroll to highlight the bookmark you’d like to
Web
Accessing a Bookmark
access, and press
to go to the Web site (or
press the number corresponding to the bookmark
you wish to access).
Deleting a Bookmark
To delete a bookmark:
1. Press the right softkey to open the browser menu.
2. Select View Bookmarks.
3. Scroll to highlight the bookmark you’d like to
delete and select Options (right softkey).
4. Select Delete. (A confirmation will be displayed.)
5. Select OK to remove the bookmark.
Going to a Specific Web Site
To go to a particular Web site by entering a URL
(Web site address):
1.
2.
3.
4.
Press the right softkey to open the browser menu.
Select Go to URL....
Select the URL field and press
Use your keypad to enter the URL of the Web site
you wish to go to and press
.
5. Press
Note:
.
again to go to the Web site.
Not all Web sites are viewable on your phone.
49
Reloading a Web Page
To reload (refresh) a Web page:
1. Press the right softkey to open the browser menu.
2. Select Refresh this page. (The browser will reload the
current Web page.)
Restarting the Web Browser
If the Web browser seems to be malfunctioning or stops
responding, you can usually fix the problem by simply
restarting the browser.
To restart the Web browser:
1. Press the right softkey to open the browser menu.
2. Select More... > Restart Browser.
50
With Sprint Power Vision’s exclusive On Demand
feature, you can personalize your phone’s data services
to suit your needs. The On Demand feature makes it
easier than ever to retrieve the most popular Web
information and categories instantly. On Demand uses
the ZIP code you provide to customize the content you
receive, so you can get the information you want, when
you want it.
On Demand
On Demand
On Demand acts like a computer browser’s customized
home page, displaying a variety of top categories such
as News, Sports, Weather, Money, Movies, and more.
This information is updated throughout the day, so
you’ll always be up-to-date.
51
Initializing Your On Demand Service
To initialize your phone’s On Demand service:
1. Press
> On Demand.
2. Enter your preferred ZIP code and press Done
(left softkey). (The On Demand service will customize
itself to your selected location and the On Demand
menu screen will be displayed.)
Accessing On Demand Information
Finding the information you’re looking for with On Demand is as
easy as navigating a Web browser on your computer. (The
following examples will illustrate how to access News and
Movies information.)
To access News information using On Demand:
1. Press
> On Demand. (The On Demand menu screen
will be displayed.)
2. From the On Demand menu screen, highlight News and
press
. (You will be presented with a list of news
categories.)
3. Use your navigation key to scroll through the news
categories or stories. If applicable, the left and right
softkeys will offer additional options.
52
1. From the On Demand menu screen, select Movies.
2. From the Movies display, select an option and
follow the onscreen instructions. Options may
include:
䡲 Show Movies to view a list of current movie
titles.
䡲 Manage Theaters to manage the list of
available theaters presented when using On
Demand.
On Demand
To access Movies information using On Demand:
3. Select a movie title and press
.
4. From the Movie Title display, select an option and
follow the onscreen instructions. (Options may
vary depending on location and available
information.)
Select other categories, such as Weather, Sports, and
Money, from the On Demand main screen and enjoy
the feature-rich contents of On Demand.
Every category offers you the capability to customize
news and information based on your preference.
53
Updating On Demand Information
The On Demand news and information is automatically
delivered to your phone four times a day. You can also select
how your phone receives updates.
To manually retrieve On Demand updates:
䊳
From an On Demand category page (such as News),
press Options (right softkey) > Update. (Your phone will
retrieve updates for the selected category.)
To enable or disable automatic On Demand updates:
䊳
54
From the On Demand main screen, press Options >
Configure, and then select your desired setting.
You can preview the On Demand news and weather
information right on your phone’s standby screen using
a theme. Download and apply any theme, and then
select the On Demand icon in your theme’s standby
screen. An On Demand window will pop up and display
a snapshot of the On Demand news and weather
information. See “Themes” on page 59 for more
information on using and applying themes on your
phone.
On Demand
Previewing On Demand in Themes
55
Phone as Modem
Your phone’s data capabilities enable you to use its
high-speed data connection as a modem for your laptop
computer. You’ll be able to send and receive email, browse
the Internet, and access your company’s network anywhere
on the Sprint National Network.
56
To use this service, you are required to sign up on a
Sprint Power Vision with Phone as Modem plan. Go
to www.sprint.com or visit a Sprint Store for Phone as
Modem plan details and more information.
Setting Up a Data Connection With Your
Computer
In order to use your phone as a modem, you’ll first need
to load the Sprint PCS Connection ManagerSM software
on your computer. Then, use a compatible USB cable or
built-in Bluetooth connection to connect your phone to
your computer.
To set up your phone-to-computer data connection:
1. From your computer’s traditional Internet
Phone as Modem
Note:
connection, go to www.sprint.com/downloads and
download the Sprint PCS Connection Manager
software. (The software and drivers can be
downloaded free of charge.)
2. Double-click the downloaded file and follow the
onscreen instructions to install the Sprint PCS
Connection Manager software and drivers to
your computer.
3. Once the software has been fully installed,
connect your phone to your computer using a USB
cable or built-in Bluetooth connection. (Your
computer will detect the connection and a status
icon may appear in your system tray.)
4. Launch the Sprint PCS Connection Manager
software, select a profile, and click Connect.
57
5. Once the connection is established, launch an Internet
session, check your email, or do anything else you
would do using a traditional data connection.
6. When you’re ready to terminate the data connection,
double-click the Sprint PCS Connection Manager icon in
the system tray, and then click Disconnect to end the
session.
Note:
While your data connection is active, you will not be
able to receive incoming calls; all incoming calls will
be forwarded to your Sprint Voicemail. Placing an
outgoing call during a data session terminates the
data connection.
Sprint Vision services are available on the Sprint
National Network. Sprint Power Vision services work
anywhere on the Sprint National Network, but
broadband-like download speeds are only available in
areas covered by the Sprint Mobile Broadband
Network.
58
Express your style and interests by customizing the
appearance and features of your phone’s Standby
Screen, Main Menu, and My Favorites screens with your
choice of downloadable Themes. Select your favorite
and enjoy rich background images, ringers, and instant
access to information like sports updates from NFL
themes, entertainment news from hip-hop themes, or
weather updates from nature themes.
Themes
Themes
59
Downloading Themes
You can select and download available themes right from
your phone.
To download an available theme to your phone:
1. Press
> My Content > Themes > Get New.
(Your phone’s browser will launch and take you to the
Themes download menu.)
2. Select a theme and press
or Go to display its
information page.
3. Select Buy to purchase the theme. (The theme will
download automatically. When the “New Download”
screen appears, the theme has been successfully
downloaded to your phone.)
Tip:
For more information about downloading content to
your phone, please see “Downloading Content” on
page 34.
Applying Themes
Once you’ve downloaded a theme, you can apply it to your
phone from the Settings menu.
To apply a downloaded theme:
1. Press
> Settings > Display > Themes.
2. Select an available theme and press
.
Your new theme will populate your phone’s standby screen,
main menu, and will add a new, customizable My Favorites
screen, giving you easy access to your favorite menus and
phone applications.
60
B
Bookmarks
Accessing 49
Creating 48
Deleting 49
Browser Menu 47
C
Chat 22
D
Data Connection
Launching 6
Status and Indicators 8
Downloading Content
34–39
E
Email 18–20
G
Games 40–41
Getting Started 5
I
Instant Messaging 21
M
Messaging 17–22
Chat 22
Instant Messaging 21
Music 26–33
Sprint Music Manager
31
Streaming Music 33
My Content Manager 37
N
Net Guard 7
O
On Demand 51–55
P
Phone as Modem 56–58
Picture Mail 11–16
R
Ringers 42–43
S
Screen Savers 44–45
Sprint Music Manager 31
Sprint Music Store 27–30
Accessing 27
Backing Up Music 30
Downloading Music 28
Playing Music 29
Purchasing Music 28
Sprint Picture Mail 11–16
Password 13
Recording Videos 14
Sharing 15
Taking Pictures 12
Sprint Power Vision
Home Page 6
Navigating the Web 9
Sprint TV 23–25
T
Themes 59–60
U
User Name 5
W
Web 46–50
Navigating 9
Welcome 1
Index
Index
61
MSAB0018101
Printed in Korea