1
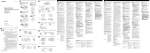
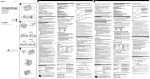
3-859-264-11 (1) Marine Pack Operating Instructions EN Mode d’emploi F MPK-TRV2 1997 by Sony Corporation Sony MPK-TRV2 (EN,F) 3-859-264-1X English Table of contents Features ........................................................................................ 2 Supplied accessories ................................................................... 3 Precautions .................................................................................. 4 Labeling the parts and controls ................................................ 5 Position of the adaptor and the remote control cable ........... 6 Notes on the O-ring .................................................................... 8 Attaching the video camera recorder to the marine pack .... 9 Recording ................................................................................... 13 When the LEAK lamp flashes ................................................. 14 Removing the video camera recorder ................................... 15 Underwater recording ............................................................. 16 Specifications ............................................................................. 17 Prerecording checklist .............................................................. 17 This mark indicates that this product is a genuine accessory for Sony video products. When purchasing Sony video products, Sony recommends that you purchase accessories with this “GENUINE VIDEO ACCESSORIES” mark. WARNING This equipment has been tested and found to comply with the limits for a Class B digital device, pursuant to Part 15 of the FCC Rules. These limits are designed to provide reasonable protection against harmful interference in a residential installation. This equipment generates, uses, and can radiate radio frequency energy and, if not installed and used in accordance with the instructions, may cause harmful interference to radio communications. However, there is no guarantee that interference will not occur in a particular installation. If this equipment does cause harmful interference to radio or television reception, which can be determined by turning the equipment off and on, the user is encouraged to try to correct the interference by one or more of the following measures: – Reorient or relocate the receiving antenna. – Increase the separation between the equipment and receiver. – Connect the equipment into an outlet on a circuit different from that to which the receiver is connected. – Consult the dealer or an experienced radio/TV technician for help. You are cautioned that any changes or modifications not expressly approved in this manual could void your authority to operate this equipment. Features The MPK-TRV2 marine pack allows the following 8 mm video camera recorders to be used underwater. CCD-TRV11 CCD-TRV12 CCD-TRV21 CCD-TRV22 CCD-TRV30 CCD-TRV32 CCD-TRV33 CCD-TRV40 CCD-TRV41* CCD-TRV52 CCD-TRV53 CCD-TRV62 CCD-TRV70 CCD-TRV72 CCD-TRV81* CCD-TRV82 CCD-TRV101 CCD-TRV112 CCD-TRV212 CCD-TRV312 CCD-TRV512 CCD-TR44 CCD-TR54 CCD-TR64 CCD-TR66 CCD-TR74 CCD-TR78 CCD-TR84 CCD-TR86 CCD-TR88 CCD-TR94 CCD-TR96 CCD-TR98 CCD-TR99 CCD-TR200 CCD-TR300 CCD-TR500 CCD-TR514 CCD-TR555 CCD-TR614 CCD-TR710* CCD-TR714 CCD-TR814 CCD-TR910* CCD-TR916 CCD-TR930 CCD-TR2300* CCD-TR3000* CCD-TR3300* CCD-TR3400 • Recording at a depth of 246 feet (75 meters) is possible. • The following operations can be performed underwater. Power on/off Auto focusing on/off (Only models marked with *) Recording start/stop Power zooming If there are specks or dust in focus on the front glass of the marine pack, move the power zoom lever towards the T (telephoto) side slightly so that the zoom indicator inside the viewfinder moves towards T. (See the illustration below.) T Zoom indicator in the viewfinder W We recommend you use a wide-conversion lens(not supplied) when using the marine pack. 2 Sony MPK-TRV2 (EN,F) 3-859-264-1X Supplied accessories Adaptor A (1) O-rings (2) EN F Adaptor B (1) Adaptor C (1) Mounting screw plate (1) E Grease (1) Accessory belt (1) Viewfinder adaptor (1) 3 Sony MPK-TRV2 (EN,F) 3-859-264-1X Precautions On the video camera recorder Take care not to expose the equipment to salty air. Do not drip water on the equipment. • Do not open the marine pack while at sea or at the seaside. Preparations such as installing and checking the equipment should be made in a place with low humidity and no salty air. • When a video camera recorder is to be used near the sea for a long time, we recommend that it be checked periodically by a Sony dealer. • If the equipment becomes wet, take it immediately to the nearest Sony dealer for preventive maintenance. On the video camera recorder power source We recommend you use battery packs with a large capacity. However, in some cases battery packs NP-99/4500/F930 cannot be attached to the video camera recorder. On maintenance After recording in the sea, submerge the marine pack with the buckles tightly fastened in fresh water for a while to remove the sea water. Then rinse it with fresh water and dry it with a soft cloth. • Every time you use the marine pack and the video camera recorder underwater, clean the video camera recorder and the inside of the marine pack with a dry soft cloth. Do not use any type of solvent, such as alcohol or benzine for cleaning, as this may damage the finish. • When you store the marine pack, grease the O-ring and put it in the groove correctly. Join the front and rear shells then put in a cool place without fastening the buckles. Avoid storing the marine pack in a hot or very cold place, in a place subject to direct sunlight or excessive dust, or together with naphthalene or camphor as. This will damage the marine pack. • If water comes between the rear shell and the rubber part, remove the rubber and clean it with a dry soft cloth. On the marine pack • If you open and join the front and rear shells in a place with high temperature and high humidity, moisture condensation may occur when you put the marine pack in the water, causing the front glass to fog. • The waterproof integrity of the marine pack is maintained by the O-ring, and the groove and surface where it touches. Be especially careful not to damage or deform that area. • Do not leave the marine pack under direct sunlight for a long period of time, otherwise the temperature in the marine pack may rise and the equipment inside may be damaged. • If you cannot avoid leaving the marine pack under direct sunlight, be sure to cover the marine pack with a towel or other protection. • Do not throw the marine pack into the water. Lower it gently into the water. On transportation • When transporting the marine pack, be sure to remove the video camera recorder from the marine pack. • When transporting the marine pack by air or by car, use a marine pack carrying case (not supplied). On recording underwater • Check that the equipment operates correctly and that there is no water leak at a depth of about 3 feet (one meter) before you dive deeper. • Be sure to follow the safety rules for diving, such as diving period and depth. • Remove the bubbles from the outside of the front glass. Sony does not accept liability for damage to the video camera recorder, battery, etc. in the marine pack or for the loss of prerecorded material if water leak caused by incorrect operation occurs. 4 Sony MPK-TRV2 (EN,F) 3-859-264-1X Labeling the parts and controls • For the use of each part or control, see the pages indicated in parenthesis. Eyecup Accessory shoes for underwater video lights (16) Accessory shoe Rear shell Front shell Power zoom lever T/W (13) Underwater microphone (monaural) Front glass Grip Video cable connector (14) START/STOP button (13) Lead weight Buckles (11, 12) O-ring (8) Video output jack AUTO FOCUS ON/OFF button (13) ON / OFF STA FOC TO US AU STANDBY/ LOCK switch (13) BY LOCK ND REC LEAK LEAK lamp (yellow) (14) Camera mount (10) Remote control cable (10) Microphone cable (10) REC (recording) lamp (red) (13) 5 Sony MPK-TRV2 (EN,F) 3-859-264-1X Position of the adaptor and the remote control cable The position of the adaptor and the mounting screwplace depend on the video camera model. See the following page when adjusting the adaptor and mounting screwplace position. Check the position for the video camera recorder you use. Mounting instructions are explained in “Attaching the video camera recorder to the marine pack” on page 9. Position of the mounting screw plate on the adaptor Put the mounting screw plate on the number of the adaptor depending upon the model of video camera recorder. adaptor A Mounting screw plate Adaptor A adaptor B Mounting screw plate Adaptor B Attach adaptor C to adaptor B. To disassemble after using. Adaptor C Adaptor B To detach adaptor C from adaptor B. 6 Sony MPK-TRV2 (EN,F) 3-859-264-1X Video camera recorder CCD- TRV30/TRV40/TRV70 Position of the mounting screw plate on the adaptor Video camera recorder CCD- Without a wideconversion lens Without a wideconversion lens With a wideconversion lens B1 B3 B2 B5 TRV62/TRV72/TRV82 B2 B9 TR3000 B3 B6 TR555 B3 B7 TRV101 B3 TR710/TR910 B4 B6 TR2300/TR3300/TR3400/ TRV41/TRV81 B4 B7 TR930 B5 B8 With a wideconversion lens A1 A2 TR200/TR300/TR500 TR86/TR96/TR916/ TRV11/TRV12/TRV21/ TRV22/TRV32/TRV33/ TRV52/TRV53/TRV112/ TRV212/TRV312/TRV512 TR44/TR54/TR64/TR66/ TR74/TR78/TR84/TR88/ TR94/TR98/TR99/TR514/ TR614/TR714/TR814 A, B 1, 2, 3... Position of the mounting screw plate on the adaptor A3 adaptor to be used. corresponding number on the adaptor. Notes • The CCD-TRV101 video camera recorder cannot be fitted with a wide conversion lens. • When you attach a wide conversion lens to the CCD-TRV11/TRV12/TRV21/TRV22/TRV33/TRV41/TRV81/TRV112/ TRV212 video camera recorders, you cannot attach the viewfinder adaptor. • When you attach a wide conversion lens to the CCD-TRV11/TRV12/TRV21/TRV22/TRV33/TRV112/TRV212 video camera recorders, you cannot attach Sony battery NP-99/4500. • When you attach a wide conversion lens to the CCD-TR2300/TR3300/TR3400 video camera recorders, you cannot attach Sony battery NP-F930. 7 Sony MPK-TRV2 (EN,F) 3-859-264-1X Notes on the O-ring The O-ring assures the waterproof function of the marine pack. To maintain waterproof integrity, use it correctly. Incorrect handling may cause water to leak in. O-ring Front shell Grease the O-ring The grease protects the O-ring from wear. Check that there are no cracks or dust on the O-ring, then grease it using your finger. While greasing, double check that there are no cracks or dust. Never use cloth or paper to apply grease because the fibers may cling. Do not use any type of grease other then the supplied one, or it may damage the O-ring. If you run out of silicone grease (2-115-921-01) you can purchase it from your nearest Sony Service Center. Rear shell Do not twist the O-ring. Check that there are no scratches or cracks. Scratches or cracks on the O-ring may cause water to leak in. If the O-ring is damaged in this way, replace it with a new one. Do not remove the O-ring from the groove with a metal tool or a tool with a sharp point. Crack Put the O-ring in the groove evenly. Never twist it. Not this way Scratches Do not pinch the O-ring with the marine pack. When joining the front and rear shells, take care not to pinch the O-ring between them. If this happens, not only will the O-ring be damaged, but water may leak in. Remove any dust, sand or hair from the O-ring. Make sure there is no dust, sand or hair on the O-ring, in the groove, or on the surface of the marine pack where the O-ring touches. If there is, clean them completely, or the O-ring and the surface of the marine pack may be damaged and water may leak in. Storage Put the supplied spare O-rings in the original carton and store it in a cool place. • Do not expose the O-ring to direct sunlight. • Do not place a heavy object on the O-ring. • Do not fold the O-ring. Useful life of the O-ring. Dust Surface of the marine pack where the O-ring touches Depending upon maintenance and the length of use, we recommend changing the O-ring every one or two years. The O-ring (3-952-928-01) can be replaced at your nearest Sony Service Center. O-ring groove Hair Sand O-ring 8 Sony MPK-TRV2 (EN,F) 3-859-264-1X Attaching the video camera recorder to the marine pack 1 Remove the lens cap, shoulder strap, filter, etc., from the video camera recorder. a charged battery pack and insert a video 2 Attach cassette. 3 Attach the wide conversion lens (not supplied). By attaching the wide conversion lens, the shooting coverage becomes wider, and the subject size becomes smaller. 4 5 When using adaptor A, attach it to the video camera recorder. Check that the position of the mounting screw plate is correct. (See pages 6 and 7.) When using adaptor B, skip this step. 6 Adjust the video camera recorder. Refer to the operation manual of your video camera recorder. Attach the Viewfinder adaptor. If the viewfinder adaptor is loose when it is attached, bend the eyecup of the camcorder and attach it again. 1 Set the POWER Set the STANDBY switch to STANDBY. L switch to CAMERA. 2 K OC CAMERA S TA ND BY The following adjustments are needed when your video camera recorder has the corresponding function. Refer to the operation manual of the video camera recorder for details. White balance Normally set to w (outdoor). Set to e (indoor) for night diving. Shutter speed Set where no indicator appears. Program AE Set where no indicator appears. Brightness Turn off the indicator. On some video camera recorder models, you cannot adjust the focus with the button on the marine pack. Set the focus to auto focus mode (see page 2). (continued) 9 Sony MPK-TRV2 (EN,F) 3-859-264-1X Attaching the video camera recorder to the marine pack 7 Attach the video camera recorder to the marine pack. Check the position of the adaptor. (See pages 6 and 7.) When using adaptor A 1 3 Connect the microphone cable to MIC. (The sound is recorded in monaural.) Connect the remote control cable to lREMOTE. 2 Slide the video camera recorder into the marine pack until the hooks of the camera mount catch the adaptor. 4 Fasten the screw. Screwdriver Camera mount When using adaptor B 1 Align the right side of the adaptor with the hooks of the camera mount, then push down the adaptor. Adaptor B 3 Connect the microphone cable to MIC jack of the video camera recorder. (The sound is recorded in monaural.) 4 2 Attach the video camera recorder to the adaptor. Fasten the screw. 5 Connect the remote control cable to the lREMOTE jack of the video camera recorder. 10 Sony MPK-TRV2 (EN,F) 3-859-264-1X 8 Raise the buckles until they stop. Buckles O-ring Check the O-ring and grease it slightly. 9 Fasten the video camera recorder with the accessory belt. When you fasten the video camera recorder with accessory belt, take care not to touch the zoom button. Accessory belt (continued) 11 Sony MPK-TRV2 (EN,F) 3-859-264-1X Attaching the video camera recorder to the marine pack 10 1 Attach the front shell to the rear shell. Put the front shell on the rear shell. 2 Press the top of both grips firmly. 3 Lower both buckles at the same time until they are locked. You will hear a click. Align here as shown in the illustration. Now you are ready for underwater recording. Set the STANDBY/LOCK switch of the marine pack to LOCK. If you set it to STANDBY, the battery may be used up before recording. Note When the viewfinder adaptor is attached to the viewfinder of your camcorder, you get a wide view of what appears in the viewfinder screen. However, when viewed from an angle, the screen may appear distorted. 12 Sony MPK-TRV2 (EN,F) 3-859-264-1X Recording Check that the equipment operates correctly and that there is no water leak at a depth of about 3 feet (one meter) before you dive deeper. Power zoom lever ON / OFF STA FOC TO US AU the STANDBY/LOCK switch to 1 Set STANDBY. BY LOCK ND REC LEAK The REC lamp (red) lights up during recording. AUTO FOCUS ON/OFF button To zoom 2 Press START/STOP button to start recording. To keep a subject in focus Slide the power zoom lever towards T for telephoto (subject appears closer) or W for wide-angle (subject appears farther away). The zooming speed can be changed on some video camera recorder models from a slow speed to faster by sliding the zooming lever a little more. W Wide-angle After you focus on a subject, press the AUTO FOCUS ON/ OFF button to set the video camera recorder to manual focus mode. Even if fish swim between the video camera recorder and the subject, you can still keep the subject in focus. Note On some video camera recorder models, the AUTO FOCUS ON/OFF button is not operative. Set the video camera recorder to auto focus mode (see page 2). T Telephoto When you set the power zoom lever to the full wideangle position (macro), specks or bubbles on the front glass may come into focus. In this case, slide the power zoom lever a little towards T and return towards W. To stop recording Press the START/STOP button. (continued) 13 Sony MPK-TRV2 (EN,F) 3-859-264-1X Recording To attach/detach the lid of the video cable connector A video cable connector is provided so that video equipment can be connected to the marine pack in the future. When you reattach the lid, grease the O-ring of the lid before inserting it into the connector. To detach To attach O-ring 2 pull out. 1 While 1 While pressing here, 2 press in. pressing here, Note Do not remove the lid underwater. When the LEAK lamp flashes ON / OFF STA FOC TO US In such a case, remove the marine pack from the water as soon as possible, keeping it horizontal. Be sure to surface following the safety rules for diving. Dry the marine pack with a soft cloth and then open it. To switch off the lamp, disconnect the remote control cable. Check the cause of the leak. AU If water happens to leak in, the LEAK lamp (yellow) flashes. BY LOCK ND REC LEAK If the video camera recorder is wet, take it to the nearest Sony dealer immediately. LEAK lamp (yellow) 14 Sony MPK-TRV2 (EN,F) 3-859-264-1X Removing the video camera recorder Before opening the marine pack, rinse it with fresh water and dry with a soft cloth. Note • Dry the marine pack well. • Wipe off any water between the front and rear shells with a towel. • Make sure you are dry. Take care that no water drips from your wet suit. When you open the marine pack, follow this procedure to prevent the video camera recorder from getting wet. 1 Remove the accessories. 2 Open the marine pack. 4 1 Before opening the marine pack, rinse it with fresh water and dry with a soft cloth. 2 Unfasten both buckles and remove the front shell. Insert the remote control plug and the microphone plug where they were. Microphone plug 5 Remote control plug Remove the adaptor. adaptor A 3 Take the video camera recorder out of the front shell. 1 Disconnect the remote control cable. 4 Disconnect the microphone cable. 5 Remove the viewfinder adaptor. adaptor B 2 Unfasten the screw. 3 Detach the video camera recorder. 15 Sony MPK-TRV2 (EN,F) 3-859-264-1X Underwater recording Recording underwater is different from recording on land because it is affected by the clarity and depth of the water and the light conditions. The following are hints for good recording underwater. Color characteristics underwater Water absorbs light, especially red light, so that objects in deep water are seen as bluish. The color of objects is affected by the clarity of the water. Underwater video light In deep water or under rocks where direct sunlight does not reach, recording with an underwater video light is recommended. To record at night, use a powerful underwater video light. Underwater video light such as Sony HVL-M20/ ML20/80DA (not supplied) Best time for recording The best recording time is from 10:00 a.m. to 2:00 p.m. When the sun its highest, optimum results can be obtained. Subject size underwater Since the refractive index underwater is higher than that in air, an object appears 1/4 more closer, and therefore larger. This phenomenon affects the lens on the video camera recorder as well as the human eye. Using a wideconversion lens(not supplied) is recommended. Camera work In slow and stable motion When recording, keep your body stable. An unstable shot will be magnified on the TV screen. Move the video camera recording as slowly as possible. As most of the object underwater move, you can record a good programme without moving the video camera recorder. Attachable to the left and right shoes 16 Sony MPK-TRV2 (EN,F) 3-859-264-1X Prerecording checklist Specifications To make sure that you do not miss shooting opportunities, go over the following checklist. 8 in. (201 mm) Compatible video camera recorder See page 2. Material Aluminum alloy, glass, plastic, lead Waterproofing O-ring, 2 buckles Usable depth Up to 246 feet (75 meters) Underwater microphone Condenser microphone (monaural) Controllable function Power on/off, recording start/stop, auto focus on/off, power zooming Dimensions 13 3/8 in. (337 mm) 12 7/8 in. (327 mm) Mass Approx. 17 lb 10 oz (8 kg) Supplied accessories Adaptor A(1)/B(1)/C(1) Mounting screw plate (1) O-rings (2) Grease (1) Accessory belt (1) Viewfinder adaptor (1) Recommended accessories Underwater video light HVL-M20, HVLML20, HVL-80DA Carrying case LCH-M40 Item Checkpoints Battery pack • Fully charged. Video cassette • A cassette is inserted. • Tape length will cover the planned recording time. • The tape is wound to the point where recording is to begin. • The safety tab on the cassette is in the correct position. (The window is not red.) Microphone cable, remote control cable • Firmly connected to the respective jacks of the video camera recorder (p. 10). Video camera recorder • Set POWER to CAMERA (p. 9). • Set STANDBY/LOCK to STANDBY (p. 9). O-ring • No scratches or cracks. • No dust, sand or hair around it. • Correctly set in the groove (p. 8). Buckles • Correctly fastened (p. 12). Design and specifications are subject to change without notice. 17 Sony MPK-TRV2 (EN,F) 3-859-264-1X Français Tables des matières Caractéristiques Caractéristiques .......................................................................... 2 Accessoires fournis ..................................................................... 3 Précautions .................................................................................. 4 Nomenclature .............................................................................. 5 Position de l’adaptateur et du câble de télécommande ........ 6 Remarques sur le joint torique .................................................. 8 Fixation du camescope dans le Marine Pack .......................... 9 Enregistrement .......................................................................... 13 Si le témoin LEAK clignote ..................................................... 14 Retrait du camescope ............................................................... 15 Enregistrement sous-marin ..................................................... 16 Spécifications ............................................................................. 17 Liste des vérifications avant enregistrement ........................ 17 Le Marine Pack MPK-TRV2 permet d’utiliser dans l’eau les camescopes 8 mm suivants. Ce logo indique qu’il s’agit d’un accessoire d’origine pour les produits vidéo Sony. Quand vous achetez des produits vidéo Sony, Sony vous recommande les accessoires portant le logo “GENUINE VIDEO ACCESSORIES”. CCD-TR44 CCD-TR54 CCD-TR64 CCD-TR66 CCD-TR74 CCD-TR78 CCD-TR84 CCD-TR86 CCD-TR88 CCD-TR94 CCD-TR96 CCD-TR98 CCD-TR99 CCD-TR200 CCD-TR300 CCD-TR500 CCD-TR514 CCD-TR555 CCD-TR614 CCD-TR710* CCD-TR714 CCD-TR814 CCD-TR910* CCD-TR916 CCD-TR930 CCD-TR2300* CCD-TR3000* CCD-TR3300* CCD-TR3400 CCD-TRV11 CCD-TRV12 CCD-TRV21 CCD-TRV22 CCD-TRV30 CCD-TRV32 CCD-TRV33 CCD-TRV40 CCD-TRV41* CCD-TRV52 CCD-TRV53 CCD-TRV62 CCD-TRV70 CCD-TRV72 CCD-TRV81* CCD-TRV82 CCD-TRV101 CCD-TRV112 CCD-TRV212 CCD-TRV312 CCD-TRV512 • Un enregistrement à une profondeur de 246 pieds (75 mètres) est possible. • Les fonctions suivantes sont utilisables sous l’eau. Mise sous/hors tension Mise en/hors service de l’autofocus (modèles signalés par un* seulement) Marche/arrêt d’enregistrement Zoom électrique Si de la poussière ou des taches apparaissent sur la vitre avant du Marine Pack, pousser légèrement le levier du zoom électrique vers “T” (téléphoto) pour que le témoin à l’intérieur du viseur se déplace vers “T”. (Voir l’illustration ci-dessous.) T Témoin de zoom dans le viseur. W Lorsque vous utilisez le Marine pack, nous vous conseillons d’utiliser un convertisseur grand angle (non fourni). 18 2 Sony MPK-TRV2 (EN,F) 3-859-264-1X Accessoires fournis Adaptateur A (1) Joints toriques (2) EN F Adaptateur B (1) Graisse (1) Adaptateur C (1) Sangle à accessoires (1) Plaque de montage (1) E Adaptateur de viseur (1) 3 19 Sony MPK-TRV2 (EN,F) 3-859-264-1X Précautions A propos du camescope Veiller à ne pas exposer le camescope aux embruns marins et à ne pas le mouiller. • Eviter d’ouvrir le Marine Pack en mer ou sur une plage. Les préparatifs, tels que la mise en place et la vérification de l’appareil, doivent être effectués dans un endroit sec et à l’abri de l’air marin. • Si le camescope doit être utilisé en mer pendant longtemps, il est conseillé de le faire vérifier régulièrement par un revendeur Sony. • Si le camescope a été mouillé, l’emporter immédiatement chez le revendeur Sony pour le faire contrôler. Source d’alimentation du camescope Nous vous conseillons d’utiliser des batteries rechargeables ayant une grande capacité. Cependant avec certains camescopes, les batteries rechargeables NP-99/4500/F930 ne peuvent pas être utilisées. A propos du Marine Pack • Si le Marine Pack est plongé dans l’eau après avoir été ouvert et scellé dans un endroit très chaud et très humide, une condensation d’eau risque de se produire qui peut embuer le verre. • L’étanchéité du Marine Pack dépend du joint torique ainsi que de la rainure et de la surface avec lesquels il est en contact. Veiller tout particulièrement à ne pas endommager ou déformer ces pièces. • Ne pas laisser le Marine Pack en plein soleil pendant une durée prelongée, car l’élévation de la température interne peut endommager le camescope qui se trouve à l’intérieur. • Si le Marine Pack doit être laissé en plein soleil, prendre soin de le recouvrir d’une serviette ou autre. • Ne pas jeter le Marine Pack dans l’eau, mais l’immerger avec précaution. Entretien Après avoir filmé sous l’eau, plonger le Marine Pack, toutes boucles fermées, pendant un certain temps dans de l’eau douce. Le rincer ensuite à l’eau douce, puis le sécher avec un chiffon sec. • Chaque fois que le Marine Pack est utilisé avec le camescope sous l’eau, nettoyer le camescope et l’intérieur du Marine Pack avec un chiffon doux et sec. Ne pas utiliser de solvants, tels que l’alcool ou la benzine, pour ne abîmer la finition. • Avant de ranger le Marine Pack, graisser les joints toriques puis les insérer comme il faut dans les rainures. Fermer le Marine Pack et le mettre dans un endroit frais sans serrer les boucles. Eviter d’entreposer le Marine Pack dans un endroit très chaud ou froid, en plein soleil, dans un endroit poussiéreux ou avec de la naphtaline ou du camphre, car il pourrait être endommagé. • Si de l’eau rentre entre la partie arrière et la partie en caoutchouc, enlever le caoutchouc et le nettoyer avec un chiffon doux. Transport • Avant de transporter le Marine Pack, en retirer le camescope. • Pour transporter le Marine Pack en avion ou en voiture, utiliser une valise de transport (non fournie). Enregistrement sous-marin • Avant la plongée, il est conseillé de vérifier que l’appareil fonctionne et que l’eau ne s’infiltre pas à l’intérieur à trois pieds de profondeur (un mètre). • Respecter strictement les règles de plongée, notamment en ce qui concerne la durée et la profondeur. • Avant un enregistrement, enlever les bulles sur l’extérieur du verre avant. Sony décline toute responsabilité pour les dégâts que le camescope, la batterie et les autres composants du Marine Pack ainsi que le matériel enregistré peuvent avoir subis suite à une infiltration d’eau provenant d’une utilisation inadéquate. 20 4 Sony MPK-TRV2 (EN,F) 3-859-264-1X Nomenclature • Pour l’utilisation de chaque élément ou commande, voir les pages indiquées entre parenthèses. Oeilleton Griffe porte-accessoires pour torche vidéo sousmarine (16) Griffe porte-accessoires Partie arrière Partie avant Levier de zoom électrique T/W (13) Microphone sous-marin (monophonique) Verre avant Poignée Connecteur de câble vidéo (14) Touche de marche/arrêt (START/STOP) (13) Plomb Boucles (11, 12) Joint torique (8) Prise de sortie vidéo ON / OFF STA FOC TO US AU Touche de mise en/hors service de l’autofocus (AUTO FOCUS ON/OFF) (13) Commutateur d’attente/verrouillage (STANDBY/LOCK) (13) BY LOCK ND REC LEAK Témoin d’infiltration (jaune) (LEAK) (14) Monture du camescope (10) Câble de télécommande (10) Câble de microphone (10) Témoin d’enregistrement (rouge) (REC) (13) 5 21 Sony MPK-TRV2 (EN,F) 3-859-264-1X Position de l’adaptateur et du câble de télécommande La position de l’adaptateur et de la plaque de montage dépend du camescope. Voir page suivante pour l’ajustement de l’adaprateur et la position de la plaque de montage. Vérifier leur position pour le camescope utilisé. Voir les explications “Fixation du camescope dans le Marine Pack” à la page 9. Position de la plaque de montage sur l’adaptateur Placez la plaque de montage sur le numéro d’adaptateur correspondant à votre modèle du camescope. Adaptateur A Adaptateur B Plaque de montage Plaque de montage Adaptateur A Adaptateur B Fixer l’adaptateur C sur l’adaptateur B. Pour le démonter après utilisation. Adaptateur C Adaptateur B Pour détacher l’adaptateur C de l’adaptateur B. 6 22 Sony MPK-TRV2 (EN,F) 3-859-264-1X Camescope CCD- TRV30/TRV40/TRV70 TR44/TR54/TR64/TR66/ TR74/TR78/TR84/TR88/ TR94/TR98/TR99/TR514/ TR614/TR714/TR814 A, B 1, 2, 3... Position de la plaque de montage sur l’adaptateur Sans convertisseur grand angle Avec convertisseur grand angle A1 A2 A3 Position de la plaque de montage sur l’adaptateur Camescope CCD- Sans convertisseur grand angle Avec convertisseur grand angle TR200/TR300/TR500 B1 B3 TR86/TR96/TR916/TRV11/ TRV12/TRV21/TRV22/ TRV32/TRV33/TRV52/ TRV53/TRV112/TRV212/ TRV312/TRV512 B2 B5 TRV62/TRV72/TRV82 B2 B9 TR3000 B3 B6 TR555 B3 B7 TRV101 B3 TR710/TR910 B4 B6 TR2300/TR3300/TR3400/ TRV41/TRV81 B4 B7 TR930 B5 B8 Adaptateur à utiliser Numéro correspondant sur l’adaptateur Remarques • Le camescope CCD-TRV101 ne peuvent pas être équipés d’objectif grand angle. • Si vous fixez un objectif grand angle sur les camescopes CCD-TRV11/TRV12/TRV21/TRV22/TRV33/TRV41/TRV81/ TRV112/TRV212, vous ne pourrez pas fixer l’adaptateur de viseur. • Si un objectif grand angle est fixé sur les camscopes CCD-TRV11/TRV12/TRV21/TRV22/TRV33/TRV112/TRV212, les batteries rechargeables Sony NP-99/4500 ne pourront pas être utilisées. • Si un objectif grand angle est fixé sur les camscopes CCD-TR2300/TR3300/TR3400, la batterie rechargeable Sony NP-F930 ne pourra pas être utilisée. 237 Sony MPK-TRV2 (EN,F) 3-859-264-1X Remarques sur le joint torique Le joint torique assure l’étanchéité du Marine Pack. Pour prévenir toute infiltration d’eau, ce joint doit être utilisé correctement. Une infiltration d’eau peut provenir d’une mauvaise manipulation. Joint torique Partie avant Partie arrière Présence de fissures ou de griffes Des fissures ou des griffes sur le joint torique peuvent entraîner une infiltration d’eau. Si le joint est endommagé, le remplacer par un neuf. Ne pas retirer le joint torique de la rainure à l’aide d’un outil métallique ou d’un objet pointu. Fissure Graissage du joint torique La graisse protège le joint torique de l’usure. Après avoir vérifié qu’il n’y a aucune fissure ni poussière sur le joint, le graisser avec le bout du doigt. En le graissant, s’assurer encore une fois qu’il n’y a pas de fissure ni de poussière. Ne jamais utiliser de tissu ou de papier soie pour le graissage, car des fibres pourraient rester collées. Utiliser uniquement le type de graisse fournie, afin d’éviter d’endommager le joint torique. Quand le tube de graisse au silicone (2-115-921-01) est épuisé, il est possible de s’en procurer auprès d’un service après-vente Sony. Ne pas tordre le joint torique Poser le joint bien à plat dans sa rainure sans le tordre. Pas de cette façon Griffes Ne pas pas coincer le joint torique Enlever la poussière, le sable et les cheveux sur le joint torique Vérifier qu’il n’y a pas de poussière, de sable ou de cheveux sur le joint torique ou dans la rainure et sur la surface du Marine Pack avec laquelle le joint torique est en contact. Le cas échéant, les enlever, sinon le joint torique et la surface du Marine Pack risquent d’être endommagés et une infiltration de se produire. Lors du scellage, prendre soin de ne pas coincer le joint torique entre les parties avant et arrière du Marine Pack, car non seulement il risque d’être endommagé mais de l’eau peut s’infiltrer. Entreposage Ranger les joints toriques fournis dans le carton original et entreposer celui-ci dans un endroit frais. • Ne pas exposer le joint torique à la lumière directe du soleil. • Ne pas placer d‘objet lourd sur le joint. • Ne pas tordre le joint. Durée d’utilisation du joint torique Poussière Surface du Marine Pack en contact avec le joint torique Elle dépend de l’entretien et de la fréquence d’utilisation, mais il est conseillé de le changer chaque année ou tous les deux ans. Il est possible de se procurer un nouveau joint torique (3952-928-01) auprès d’un service après-vente Sony. Rainure du joint Cheveux Sable Joint torique 8 24 Sony MPK-TRV2 (EN,F) 3-859-264-1X Fixation du camescope dans le Marine Pack 1 Enlever le capuchon d’objectif, la bandoulière, le filtre, etc, du camescope. 2 Fixer une batterie rechargée et insérer une cassette vidéo. 3 Fixer l’objectif grand angle (non fourni). Avec l’objectif grand angle, la plage de prise de vues devient plus large et le sujet plus petit. 4 Fixer l’adaptateur de viseur. Si l’adaptateur de viseur bouge quand il est fixé, rabattre l’oeilleton du camescope et insérer à nouveau l’adaptateur. 5 Si l’adaptateur A est utilisé, le fixer sur le camescope. S’assurer que la position de la plaque de montage est correcte. (Voir pages 6 et 7.) Si l’adaptateur B est utilisé, sauter cette étape. 6 Effectuer les réglages sur le camescope. Se reporter au mode d’emploi du camescope. 1 Mettre l’interrupteur 2 Mettre le commutateur STANDBY sur STANDBY. L POWER sur CAMERA. K OC CAMERA S TA ND BY Les réglages suivants sont indispensables si le camescope présente ces fonctions. Se reporter au mode d’emploi du camescope pour les détails. Balance du blanc Normalement, régler sur w (extérieur). Régler sur e (intérieur) pour la plongée nocturne. Vitesse d’obturation Régler sur la position sans témoin. Programme AE Régler sur la position sans témoin. Luminosité Eteindre le témoin. Sur certains modèles de camescope, vous ne pouvez pas régler la mise au point à l’aide de la touche du Marine pack. Dans ce cas, sélectionnez le mode de mise au point automatique (voir page 2). (voir page suivante) 259 Sony MPK-TRV2 (EN,F) 3-859-264-1X Fixation du camescope dans le Marine Pack 7 Fixer le camescope dans le Marine Pack. Vérifier la position de l’adaptateur. (Voir pages 6 et 7.) Quand l’adaptateur A est utilisé 1 3 Brancher le câble de microphone sur MIC. (Le son est enregistré en mono.) Brancher le câble de télécommande sur l REMOTE. 2 Faire glisser le camescope dans le Marine pack jusqu’à ce que les crochets du camescope se prennent dans l’adaptateur. 4 Visser la vis. Tournevis Monture du camescope Quand l’adaptateur B est utilisé 1 Aligner le côté droit de l’adaptateur sur les crochets de la monture de camescope, puis appuyer sur l’adaptateur. Adaptateur B 3 Raccorder le câble de microphone à la prise MIC du camescope. (le son est enregistré en monophonie) 4 2 Fixer le camescope sur l’adaptateur. Serrer la vis. 5 Raccorder le câble de télécommande à la prise l REMOTE du camescope. 26 10 Sony MPK-TRV2 (EN,F) 3-859-264-1X 8 Relever complètement les boucles. Boucles Joint torique Vérifier le joint torique et le graisser légèrement. 9 Maintenir le camescope à l’aide de la sangle à accessoires. Lorsque vous fixez le camescope à l’aide de la sangle à accessoires, veillez à ne pas toucher la touche de commande du zoom. Sangle à accessoires (voir page suivante) 11 27 Sony MPK-TRV2 (EN,F) 3-859-264-1X Fixation du camescope dans le Marine Pack 10 1 Fixer la partie avant sur la partie arrière. Mettre la partie avant sur la partie arrière. 2 Appuyer fermement sur le haut de chaque poignée. 3 Rabattre les boucles en même temps de manière qu’elles se bloquent. Un déclic est audible. Faire correspondre les parties comme sur l’illustration. L’appareil est prêt pour l’enregistrement sous-marin Mettre le commutateur STANDBY/LOCK du Marine Pack sur LOCK. S’il est sur STANDBY, la batterie risque d’être épuisée avant l’enregistrement. Remarque Quand l’adaptateur de viseur est intallé sur le viseur du camescope, l’image qui apparaît dans le viseur est grossie, mais vue de côté, elle peut paraître déformée. 12 28 Sony MPK-TRV2 (EN,F) 3-859-264-1X Enregistrement Avant la plongée en profondeur, s’assurer que l’appareil fonctionne correctement et qu’il n’y a pas d’infiltration d’eau à environ un mètre (3 pieds) de profondeur. Levier de zoom électrique ON / OFF STA FOC TO US AU le commutateur STANDBY/ 1 Mettre LOCK sur STANDBY. BY LOCK ND REC LEAK Le témoin rouge d’enregistrement (REC) s’allume pendant la prise de vues. Touche AUTO FOCUS ON/OFF Variation de focale Verrouillage de la mise au point Pousser le levier de zoom électrique vers T pour la téléphoto (sujet rapproché) et vers W pour le grand angle (sujet éloigné). On peut augmenter la vitesse du zoom sur certains modèles de camescope en appuyant un peu plus sur le levier. W Grand angle sur la touche START/STOP 2 Appuyer pour commencer l’enregistrement. T Après avoir effectué la mise au point, appuyer sur la touche AUTO FOCUS ON/OFF pour passer au mode de mise au point manuelle du camescope. La mise au point ne changera pas si un poisson nage devant le camescope. Remarque Sur certains modèles de camescope, la touche AUTO FOCUS ON/OFF est inopérante. Régler le camescope en mode de mise au point automatique (voir page 2). Téléphoto Arrêt de l’enregistrement Lorsque le levier du zoom électrique est à la position extrême du grand angle (macro), les taches ou des bulles sur le verre avant peuvent devenir visibles. Dans ce cas, pousser le levier un peu vers T puis revenir vers W. Appuyer sur la touche START/STOP. (voir page suivante) 29 13 Sony MPK-TRV2 (EN,F) 3-859-264-1X Enregistrement Insertion et retrait du cache-connecteur de câble vidéo Le connecteur de câble vidéo se trouvant sur le Marine Pack permet de raccorder celui-ci à un appareil vidéo. Avant d’insérer le cache dans le connecteur, graisser le joint torique. Retrait Insertion Joint torique 1 Tout en 1 Tout en 2 tirer. appuyant ici, appuyant ici, 2 enfoncer. Remarque Ne pas enlever le cache sous l’eau. Si le témoin LEAK clignote ON / OFF STA FOC TO US Dans ce cas, retirer le Marine Pack le plus vite possible de l’eau en le tenant à l’horizontal. Veiller à respecter les règles de plongée en refaisant surface. Après avoir séché le Marine Pack avec un chiffon doux, l’ouvrir. Débrancher le câble de télécommande pour éteindre le témoin et rechercher la cause de l’infiltration. AU Si de l’eau s’infiltre dans le Marine Pack, le témoin LEAK (jaune) clignote. BY LOCK ND REC LEAK Si le camescope est mouillé, le confier immédiatement à revendeur Sony. Témoin d’infiltration (jaune) (LEAK) 30 14 Sony MPK-TRV2 (EN,F) 3-859-264-1X Retrait du camescope Avant d’ouvrir le Marine Pack, le rincer à l’eau douce, puis le sécher avec un chiffon sec. Remarque • Bien sécher le Marine Pack. • Essuyer l’eau entre les parties avant et arrière du Marine Pack à l’aide d’une serviette. • Veiller à ne pas être mouillé et à ce qu’aucune goutte d’eau ne tombe du vêtement isothermique. Ouvrir en respectant les points suivants le Marine Pack afin d’éviter que le camescope ne soit mouillé. 1 Enlever les accessoires. 2 Ouvrir le Marine Pack. 4 1 Avant d’ouvrir le Marine Pack, le rincer à l’eau douce et l’essuyer avec un chiffon doux. 2 Desserrer les deux boucles et retirer la partie avant. Insérer la fiche de télécommande et celle du microphone dans leurs prises respectives. Fiche de microphone 5 Fiche de télécommande Retirer l’adaptateur. Adaptateur A 3 Sortir le camescope de la partie avant. 1 5 Débrancher le câble de télécommande. 4 Débrancher le câble de microphone. Retirer l’adaptateur de viseur. Adaptateur B 2 Desserrer 3 Enlever le camescope. la vis. 31 15 Sony MPK-TRV2 (EN,F) 3-859-264-1X Enregistrement sous-marin Un enregistrement sous-marin diffère d’un enregistrement ordinaire car il dépend de la clarté et de la profondeur de l’eau ainsi que des conditions d’éclairage. Le conseils suivants seront utiles pour réussir des enregistrements sous l’eau. Caractéristiques des couleurs sous l’eau Les couleurs absorbent la lumière, particulièrement la lumière rouge, ce qui explique que les objets dans l’eau apparaissent bleus. La couleur des objets est également affectée par la limpidité de l’eau. Torche vidéo sous-marine En profondeur et sous les rochers, où la lumière directe du soleil ne parvient pas, il est conseillé d’enregistrer avec une torche vidéo sous-marine. Pour enregistrer la nuit, utiliser une torche sous-marine puissante. Torche vidéo sousmarine telle que la Sony HVL-M20/ML20/ 80DA (non fournie) Moment de l’enregistrement Le meilleur moment pour effectuer un enregistrement est entre 10:00 du matin et 2:00 de l’après-midi. Les meilleurs résultats sont obtenus lorsque le soleil est au zénith. Taille des objets sous l’eau Etant donné que sous l’eau l’indice de réfraction est plus élevé que dans l’air, un objet se rapproche d’1/4 et paraît par conséquent plus grand. Ce phénomène affecte aussi bien l’objectif du camescope que l’oeil humain. C’est pourquoi l’utilisation d’un objectif de conversion grand angle (non fourni) est conseillé. Peut se fixer sur la griffe gauche ou droite. Tournage au ralenti et en position stable Comme les instabilités de la prise de vues seront renforcées sur le téléviseur, essayer de maintenir une position stable. Déplacer le camescope aussi lentement que possible. Comme la plupart des objets filmés sous l’eau sont en mouvement, un tournage réussi et intéressant est possible sans guère déplacer le camescope. 32 16 Sony MPK-TRV2 (EN,F) 3-859-264-1X Liste des vérifications avant enregistrement Spécifications Pour ne pas manquer des enregistrements intéressants, passer en revue cette liste avant d’effectuer un enregistrement. Poste Points à vérifier Batterie rechargeable • Est-elle rechargée à fond? Cassette vidéo • Une cassette est-elle insérée? • La longueur de la cassette est-elle suffisante pour l’enregistrement envisagé? • La bande est-elle rembobinée au point où l’enregistrement doit commencer? • Le taquet de sécurité de la cassette se trouve-t-il sur la position correcte? (Le voyant n’est pas rouge.) Câble de microphone, câble de télécommande • Sont-ils branchés sur les prises respectives du camescope? (p. 10) Camescope • POWER est-il réglé sur CAMERA? (p. 9) • Est-ce que STANDBY/LOCK est réglé sur STANDBY? (p. 9) Joint torique • Absence de fissures et de griffes. • Absence de poussière, sable ou cheveux. • Est-il correctement inséré dans la rainure? (p. 8) Boucles • Sont-elles correctement fixées? (p. 12) 8 po. (201 mm) Camescopes compatibles Voir page 2. Matériau Alliage d’aluminium, verre, plastique, plomb Etanchéité Joint torique, deux boucles Profondeur utilisable Jusqu’à 246 pieds (75 mètres) Microphone sous-marin Microphone électrostatique (monophonique) Fonctions utilisables Mise sous/hors tension, marche/arrêt d’enregistrement, marche/arrêt de l’autofocus, zoom électrique Dimensions 3 13 /8 po. (337 mm) 7 12 /8 po. (327 mm) Poids Environ 17 li. 10 on. (8 kg) Accessoires fournis Adaptateurs A(1)/B(1)/C(1) Plaque de montage (1) Joints toriques (2) Graisse (1) Sangle à accessoires (1) Adaptateur de viseur (1) Accessoires recommandés Torche vidéo sous-marine HVL-M20, HVLML20, HVL-80DA Valise de transport LCH-M40 La conception et les spécifications peuvent être modifiées sans préavis. 17 33 Sony MPK-TRV2 (EN,F) 3-859-264-1X 34 Sony MPK-TRV2 (EN,F) 3-859-264-1X 35 Sony MPK-TRV2 (EN,F) 3-859-264-1X 36 Sony Corporation Printed in Japan Sony MPK-TRV2 (EN,F) 3-859-264-1X