1
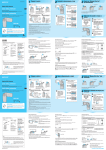
Shoot images easily (Auto adjustment mode)
5
Holding the camera
1
Enjoy images and movies
(Hybrid shooting/5SEC recording)
2
Set the mode to REC
with MODE.
Shoot images.
1
When shooting images during
displayed on the screen, those minimized copies of
the original images can be saved on Album t “User’s Guide/Troubleshooting” (page 30)
6
1
Set the mode to
REC with MODE.
2
Select an image with b/B or
Shuttle.
60min 101 3/9
REC mode
lamp
PHOTO
MOVIE
MODE
60min
Set the mode to
PLAY with MODE.
VGA
Still image:
Press and hold PHOTO AE/AF lock indicator
halfway down to focus
Flashing t lit/beeps
View/delete images
Press PHOTO fully down
The shutter sounds.
101-0003
5SEC switch
HYBRID switch
VOLUME
Still image:
is displayed.
Movie:
is displayed.
PLAY mode lamp (green) lights
up.
101
2005 1 1 10:30PM
BACK/NEXT
Movie :
Hybrid shooting:
Control button
VGA FINE
[
96]
In Hybrid shooting, you can record a
movie before and after shooting a still
image.
30 F2.8
AF range finder frame
• You can also use PHOTO on the side of the LCD screen, however, you cannot press
and hold PHOTO halfway down.
PHOTO
MOVIE
MODE
Zoom button
MOVIE
Hold the camera steadily, and position the
subject in the center of the focus frame.
2
Movie:
REC mode
lamp
PHOTO
Press MOVIE fully down
MODE
60min
5SEC recording:
Set the HYBRID switch to
HYBRID.
When playing back a Hybrid image, the image is
played back in the following order: pre movie t still
image t post movie.
button
60min
2
Set the 5SEC switch to
5SEC.
101_0010
STOP
button
appears.
Rewind/Fast forward:
Turn the Shuttle to the left/right.
(Return to normal playback: z)
Volume: v/V
Stop playback: z
5SEC
640 30f
VGA
[
95]
640 30f
[00:10:48]
640 30f
VGA
[
To stop recording, press MOVIE fully down again.
60min
101
Using the
self-timer
[
60min
96]
[00:10:48]
101
60min
101
Shooting close-up
(Macro)
Selecting the
metering mode
640 30f
VGA
[
96]
VGA FINE
[00:10:48]
[
60min
96]
640 30f
[00:10:48]
Using the flash for
still images
[
640 30f
96]
60min
101
[00:10:48]
96]
An approximately 5-second movie shot
before a still image and an approximately
3-second movie after the still image are
also recorded.
101
5.0
640 30f
[00:10:48]
VGA
[
60min
VGA
[
96]
640 30f
[00:10:48]
To cancel, press v again.
You can select the metering mode that sets which part or the subject to measure to determine the
exposure.
Spot metering (
)
Metering is performed for only a part of the subject. This is convenient when the subject is
backlit or when there is strong contrast between the subject and the background.
Self-timer lamp
This image is divided into multiple regions and metering is performed for each region. The
camera determines a well-balanced exposure.
Before step 2, set
• When you start recording a movie using the self-timer, the recording is not terminated automatically.
• Using a tripod (not supplied) is recommended.
Press B (
60min
(Camera) to other than [Auto] t “User’s Guide/Troubleshooting” (page 35)
) on the control button. To cancel spot metering, press B again.
Shooting close-up (Macro)
To cancel, press b again.
Spot metering cross hair /
Position the subject here
• Setting the zoom all the way to the W side is recommended.
• The in-focus range becomes narrow, and the complete subject may not entirely be in focus.
• The Auto Focus speed slows down.
• To shoot at even closer distances than close-up (Macro) recording, use
(Magnifying glass mode) in the
Scene mode.
Shortest shooting distance from the lens surface
Setting all the way to the W side: Approx. 8 cm (3 1/4 inches)
Setting all the way to the T side: Approx. 25 cm (9 7/8 inches)
VGA FINE
[
96]
640 30f
[00:10:48]
• When using spot metering, to focus on the metering position, setting 9 (Focus) to [Center AF] is
recommended t “User’s Guide/Troubleshooting” (page 38)
Before step 2, press V ( ) on the control button repeatedly until the desired mode is selected.
Strobes if it is dark (default setting)
Forced flash
SL
Slow synchro (Forced flash)
The shutter speed is slow in a dark place to clearly shoot the background that is
out of flash light.
No flash
• Shooting distance (when [ISO] is set to [Auto])
W side: Approx. 0.1 to 2.6 m (3 15/16 inches to 8 feet 6 3/8 inches)
T side: Approx. 0.5 to 2.1 m (1 feet 7 11/16 inches to 6 feet 10 11/16 inches)
• The flash strobes twice. The first time is to adjust the light quantity.
– Distant from the camera and dark
– The contrast between the subject and its
background is poor.
– Seen through glass
– Moving fast
– Reflective light or with a lustrous finish
– Flashing
– Backlit
BACK/NEXT
• When you delete a Hybrid still image, the pre/post movies that are recorded at the same time will also be
deleted.
• Even when you delete an image, the minimized image recorded on Album is still saved.
To view an enlarged image (playback zoom)
Press
(Setup) screen, you can only record an
approximately 5-second movie before shooting a still image.
• You cannot use the following functions in Hybrid shooting.
–
–
–
–
Speed Burst
Multi Burst
Exposure Bracket
Auto Review
• A pre/post movie may become shorter in the following cases.
– Shooting the next image continuously.
– Changing the mode with MODE or the HYBRID switch before or after shooting.
• Status of the LCD screen is directly recorded on a pre/post movie, and the following status can
also be recorded as well.
AE lock adjusting sound and its lock sound
The light of AF illuminator
The screen status when setting a function, such as picture effect, just before shooting a still image
Self-timer sound
Beep sound during an operation
to zoom in while displaying a still image.
To zoom out, press
.
Adjust the portion: v/V/b/B
Cancel playback zoom: z
To store enlarged images: [Trimming] t “User’s Guide/Troubleshooting” (page 49)
Viewing an index screen
Press
(Index) and select an image with v/V/b/B or with Shuttle.
To return to the single-image screen, press z.
To display the next (previous) index screen, move the yellow frame up/down/left/right with v/V/b/
B or with Shuttle.
60min 101 3/9
VGA
• SINGLE DISPLAY
• SINGLE DISPLAY
101-0003
BACK/NEXT
2005 1 1 10:30PM
VOLUME
If you press
again,
the sixteen-image index screen appears.
sound will be recorded even when [Beep] is set to [Off] on the Setup screen.
To delete images in index mode
Set the HYBRID switch to the left position.
• If the subject is closer than approx. 50 cm (19 3/4 inches), use the Macro mode (left column).
• When the camera cannot focus on the subject automatically, the AE/AF lock indicator changes to flashing
slowly and the beep does not sound. Recompose the shot and focus again.
Exit
• When [Hybrid Rec] is set to [Pre Rec] on the
To return to the normal recording from Hybrid shooting
If you shoot a still image of a subject that is difficult to focus on
Select [Exit], then press z.
Delete
• You cannot stop a recording in the midst of a
recording even if you press MOVIE.
• When you do not want to record a beep, set [Beep] to [Off] or [Shutter]. However, the shutter
Subjects difficult to focus on are:
Selecting a flash mode for still images
(Delete).
To cancel the deletion
60min 101 2/9
VGA
About Hybrid shooting
–
–
–
–
–
101
) on the control button.
To delete images
“zzzzz” appears on the LCD screen
and the z indicator disappears every
second.
• In Hybrid shooting, the battery quickly runs low as compared with a normal shooting.
Multi-pattern metering (No indicator)
No indicator
• Movie size is set to 320x240 (15fps). The
movie files are recorded in MPEG-4 (MP4)
format.
• When the zoom scale exceeds 3×, the camera uses the Digital Zoom function.
For details on the [Digital Zoom] settings and the image quality t “User’s Guide/Troubleshooting”
(page 51)
Selecting the metering mode
) on the control button.
Press PHOTO/MOVIE, the self-timer lamp flashes, and a beep sounds until the shutter operates
(approximately 10 seconds later).
Before step 2, press b (
Press MOVIE fully down.
• When playing back a Hybrid image, you cannot either rewind
or fast forward or Pause.
2 Select [Delete] with v, then press z.
Zoom button
1.3
Using the self-timer
Before step 2, press v (
3
[00:10:48]
1 Display the image you want to delete and press
101
VGA
Press PHOTO fully down.
96]
Using the zoom
640 30f
VGA
3
Playback bar
VOLUME
MODE
HYBRID
• When available recording time is low,
on the lower part of the LCD screen flashes.
• You can also use MOVIE on the side of the LCD screen.
2005 1 1 10:30PM
BACK/NEXT
MOVIE
60min 101
Using the control button
10/10
00:00:03
PHOTO
60min 101
00:00:02
101
640 30f
appears.
101
To play back a movie, press z.
PLAY mode lamp
You can record a 5-second movie by
pressing the button as if shooting a still
image, since the recording time of each
movie is limited to 5 seconds.
To return to the normal recording from 5SEC-recording
1 While an index screen is displayed, press
control button, then press z.
(Delete) and select [Select] with b/B on the
2 Select the image you want to delete with v/V/b/B or with Shuttle, then press z to display the
(Delete) indicator on the selected image.
Set the 5SEC switch to the left position.
To extend the recording time during 5SEC-recording
To cancel a selection
During recording, press MOVIE again. The recording time is extended by five seconds.
Select an image you have previously selected for deletion, then
press z to delete the
indicator from the image.
SELECT
TO NEXT
To identify items on the screen
3 Press
t “User’s Guide/Troubleshooting” (page 18)
(Delete).
4 Select [OK] with B, then press z.
Rotating the LCD screen (Mirror mode)
When shooting in Mirror mode, turn the LCD screen to the lens side. The LCD screen shows a
mirror-image of the actual image. However, the image can be normal when recorded.
• To delete all the images in the folder, select [All In This Folder] with b/B in step 1 instead of [Select], then
press z.
Viewing images with the LCD panel closed
You can start recording using the buttons on the side of the LCD screen.
In PLAY mode, if you close the LCD panel with the LCD
screen facing up, the camera does not turn off. You can view
images with the LCD panel closed.
MOVIE button
PHOTO button
Image on the LCD screen
Recorded image