1
Installation
Connection
Parts list
Connection example
Cautions
The numbers in the list are keyed to those in the instructions.
1
2
ø4 × 14 mm
×4
3
5.5m
4
Sony BUS Compatible
Car Audio*
XM Antenna*
5.5m
• This unit is designed for negative ground 12 V DC operation only.
• Before making connections, turn the car ignition off to avoid short circuits.
• Connect the yellow power input cord only after all other cords have been connected.
• Run all ground leads to a common ground point.
5.5m
XT-XM1
Precautions
• Choose the mounting location carefully, observing the following:
— The unit is not subject to temperatures exceeding 55°C (131°F) (such as in a car parked in direct
sunlight).
— The unit is not subject to direct sunlight.
— The unit is not near heat sources (such as heaters).
— The unit is not exposed to rain or moisture.
— The unit is not exposed to excessive dust or dirt.
— The unit is not subject to excessive vibration.
— The fuel tank should not be damaged by the tapping screws.
— There should be no wire harnesses or pipes under the place where you are going to install the
unit.
— The spare tire, tools or other equipment in or under the trunk should not be interfered with or
damaged by the screws or the unit itself.
• Be sure to use only the supplied mounting hardware for a safe and secure installation.
• Use only the supplied screws.
CD/MD changer*
* not supplied
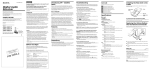
Connection diagram
Installing the unit
•Mount the unit either inside the trunk or under a seat.
•Choose the mounting location carefully so the unit will not interfere with the normal movements of
the driver and it will not be exposed to direct sunlight or hot air from the heater.
•Do not install the unit under the floor carpet, where the heat dissipation from the unit will be
considerably impaired.
First, place the unit where you plan to install it, and mark the positions of the four screw holes on
the mounting surface.
1
1
Connect with BUS cable to
the XM Satellite receiver,
aligning the v marks.
Note
When you use an optional BUS cable, note
that a BUS cable with an 8-pin plug (L-type)
cannot be used because of its shape.
SONY BUS CONTROL
POWER
OUT
IN
AUDIO
L
OUT
R
ANTENNA
L
IN
TER
R
SAT
Screw hole:
ø3.3 mm (5/32 in.)
Green
Notes
• Use only the supplied screws.
• Be sure not to damage the fuel tank or brake line with the tapping screws.
Yellow
(Curry)
2
XM antenna
(not supplied)
Connect as the connector
hook facing down
Fuse replacement
If the fuse blows, check the power connection and replace the fuse. If the fuse blows again after
replacement, there may be an internal malfunction.
Warning
Use a fuse with the specified amperage rating.
Use of a higher amperage fuse may cause serious damage.
To a +12 V power terminal which
is energized at all times
Be sure to connect the black ground
lead to it first.
RCA pin cord
(not supplied)
Fuse (3 A)
OUT
Yellow
CD/MD changer
(not supplied)
OUT
BUS cable
(not supplied)
4
To a metal point on the car
First connect the black ground lead,
then connect the yellow power input
leads.
IN
Sony BUS Compatible
Car Audio
(not supplied)
Black
3
IN