1
Off-camera Flash Basics
SETUP
mixing light
01
15ft
02
01
10ft
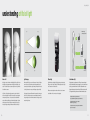
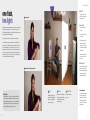
Key Light
The main light is placed 15 feet away
to light up the entire subject and
surrounding scene.
Freezing action in a photograph is simple when we
have a lot of available light. However, trying to capture
movement when there is minimal available light usually
results in the subject being blurry. Using wireless flash in
an environment with minimal ambient light will help us
capture our subject in motion while cutting back on the
amount of blur.
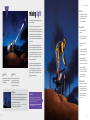
In this scenario, we want to illuminate the bicycle rider.
We are too far away (20ft) from the subject to illuminate
him with on-camera flash. Also, we want to increase the
light coverage by lighting him from the front and back.
Knowing that we will be adding flash to this image,
we work on our camera settings to properly capture
the clouds and sky behind him.
02
Rim Light
Once we are happy with the background we add two
wireless flashes. One is 10ft behind the subject and the
other is 15ft away directly in front of the subject. If we
wanted, we could change the power of each flash or
use wireless ratio control to customize the amount of
flash being added to the image.
A second flash is placed to the rear
of the subject to give a defining
highlight and help separate him from
the background and add depth.
Set the tone.
40
A new world of creative photography emerges when we
can turn night into day.
What is it?
Multiple flashes synced wirelessly
to allow for freedom of movement
and lighting techniques not
possible with wired flashes.
How to use it?
•Set your camera to Wireless
Flash Mode
•With your Flash in TTL, press the
Mode button to display WL
•Set the on-camera flash to
control (CTL)
•Set your Flash to RMT1 or RMT2
which are two unique channels
your flashes can operate on
•A red blinking light will be
displayed at the base of the flash
showing you it is in wireless mode
•Make sure the blinking red
light is in the direction of your
camera to ensure the camera
can see and operate the
wireless flash effectively
Where to use it?
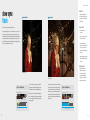
The night sky plays a key role in establishing the mood and drama in
this shot. The flash is used to light the subject after we have exposed
the scene for the night sky. This gives a beautiful background for a
properly lighted bicycle rider in action.
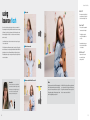
Final Shot
F7.1, 1/160 SEC, -0.3 EV, ISO 125 DAYLIGHT
F5.6, 1/15 SEC, ISO 400
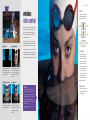
Exposing for the background creates a beautiful
contrast with the bicyclist’s yellow uniform and the
flash freezes the motion in place.
In this situation, a wireless flash
helped us capture motion in a
low ambient light environment.
However, wireless flash can be
used anytime you want to add
creative artificial lighting to
your image.
41