1
Wall Dimmer
Model WR-001
1. INTRODUCTION
3. PROGRAMMING TRANSMITTERS (TC SERIES) / SENSORS
TM
Thank you for your purchase of a SkylinkHome lighting receiver, Wall
Dimmer, Model WR-001. Simply replace your existing wall switch with this
Wall Dimmer, you can then wirelessly turn on and off, dim and brighten
lights with a SkylinkHomeTM transmitter.
In order to operate the Wall Dimmer remotely with a transmitter or sensor,
it must be programmed to the Wall Dimmer. Each module can be operated
by up to 8 different transmitters (or 8 different command signals).
There are 3 operating modes with the Wall Dimmer :
The Wall Dimmer WR-001 can communicate with up to 8 transmitters, so
user has the option to add more transmitters to the system, such as more
remote controls, or motion sensors etc.
All wireless signal communications within the SkylinkHomeTM System are
based on rolling code technology to ensure highest security is used.
1) Regular Mode - When a valid signal is received, it will turn on or off the
light, or change the brightness of the light.
2) Flashing Alert Mode - When a valid signal is received, the light will flash
for a specific period of time, which is the time defined in the timer duration.
This works as an alert indication.
The following items are included in this package:
3) Countdown Timer Mode - When a valid signal is received, the light will
be on for a specific period of time, 1 minute, 5 minutes, 15 minutes,
30 minutes, or 60 minutes. This is mainly for energy saving.
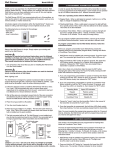
- Wall Dimmer
- Wire nuts
- User’s Instructions
You can program multiple buttons/transmitters / sensors to the module
and different button/transmitter / sensor can activate a different mode.
Wall Dimmer
WR-001
To program a TC series transmitter into the Wall Switch Dimmer
under regular mode, follow the instructions below:
Wire nuts
2. SETUP
Setup of the Wall Dimmer is simple. Simply replace your existing wall
switch by the Wall Dimmer.
CAUTION
Installation is required and enclosed instructions must be followed
carefully to all steps and notes. If you are uncertain or uncomfortable
performing this installation, please consult a qualified electrician.
This manual should also be retained for future reference.
1. Turn off power to the circuit that you plan on installing the Wall Dimmer
to at the circuit breaker.
1. Wall Dimmer must be installed and powered properly. Touch the touch
pad. The connected light should be on, and the 2 blue LEDs are off.
2. Press and hold the “SET” button for about 3 seconds, until the upper
blue LED flashes quickly.
3. You may now release the “SET” button. The blue LED will continue to
flash quickly for about 15 seconds.
Operating Mode
Upper LED Indication
Regular
Flashes quickly
Flashing Alert
Flashes slowly
Countdown Timer
Steadily On
“PROG” button
WARNING
Failure to turn off power at the circuit breaker can result in electrical
shock causing severe or fatal injury.
Note: Lighting Load
The Wall Dimmer is designed to operate incandescent light or dimmable
compact fluorescent light with a maximum load of 600W at 120VAC. Light
bulbs must be dimmable in order to achieve dimming function.
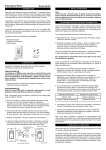
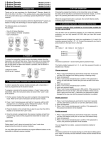
2. Follow the diagrams below to install the Wall Dimmer with the 2 wires:
Live, Load. Use the provided wire nuts to connect these wires
respectively to the existing wires from the wall : Load(Red) to load and
Live(Black) to live..
3. After all the wires are connected, ensure that all of the wire connectors
are attached securely and there should be no exposed copper wiring.
Secure the Wall Dimmer with the provided screws.
4. Place the air gap switch to off position.
5. Turn the circuit breaker back on.
6. Place the air gap switch to on position. The two blue LEDs will be on.
7. The light connected will be off. The Wall Dimmer is now installed and
you can tap the metal touch pad to turn ON/OFF the connected light or
to begin programming to learn transmitters into the Wall Dimmer.
Air Gap
Switch
Load
Red
Live
Black
Grey Antenna
Blue
LED
Touch
Pad
SET
Button
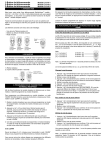
4. Within 15 seconds, follow steps A) to C).
A). Press the PROG button on the back of the
TC transmitter with a sharp object..
B). Press the button on the TC transmitter that
you would like to program.
C). Once the transmitter is programmed, the
two blue LEDs on the Wall Dimmer flash
quickly then stop flashing, indicating you
have successfully programmed the transmitter to the module. Now the programmed
transmitter button is ready to be used for
Regular Mode.
TC-318-3
Press the
desired
button
To program a TC series transmitter into the Wall Switch Dimmer under
Flashing Alert Mode, follow the instructions below:
1. Wall Dimmer must be installed and powered properly. Touch the touch
pad. The connected light should be on, and the 2 blue LEDs are off.
2. Press and hold the "SET" button for about 9 seconds, until the upper
blue LED flashes slowly.
3. You may now release the "SET" button. The blue LED will continue to
flash slowly for about 15 seconds.
4. Within 15 seconds, follow steps A to C.
A. Press the PROG button on the back of the TC transmitter with a
sharp object.
B. Press the button on the TC transmitter that you would like to program.
C. Once the transmitter is programmed, the two blue LEDs on the Wall
Dimmer flash quickly then stop flashing, indicating you have
successfully programmed the transmitter to the module. Now the
programmed transmitter button is ready to be used for Flashing Alert
Mode.
To program a TC series transmitter into the Wall Switch Dimmer under
Countdown Timer Mode, follow the instructions below:
Do not cut the antenna!
Note:
Antenna ( grey wire) -- Do not cut it, keep it as straight as possible.
Put the antenna directly into the dry wall or through a hole of the
metal box into the dry wall to get more control distance with a remote.
1. Wall Dimmer must be installed and powered properly. Touch the touch
pad The connected light should be on, and the 2 blue LEDs are off.
2. Press and hold the "SET" button for about 15 seconds, until the upper
blue LED will be steadily on.
3. You may now release the "SET" button. The blue LED will continue to
be on for about 15 seconds.
3. PROGRAMMING TRANSMITTERS (TC SERIES) / SENSORS (CONT)
4. Within 15 seconds, follow steps A) to C).
A). Press the PROG button on the back of the TC transmitter with a sharp
object.
B). Press the button on the TC transmitter that you would like to program.
C). Once the transmitter is programmed, the two blue LEDs on the Wall
Dimmer flash quickly then stop flashing, indicating you have
successfully programmed the transmitter to the module. Now the
programmed transmitter button is ready to be used for Countdown
Timer Mode.
To program other transmitters/sensors, please refer to the instructions
of those transmitters/sensors and above instructions.
Note: You must complete the programming sequence within the 15-second
interval, otherwise, the Wall Dimmer will quit from programming mode and
you need to start again from step 1.
4. SET TIMER DURATION
As mentioned, the timer can be set to the following durations, 1 minute,
5 minutes, 15 minutes, 30 minutes, or 60 minutes.
This timer duration is used for both under Flashing Alert Operating Mode
and Countdown Timer Operating Mode.
There is only one timer setting, so all transmitters that are programmed
for timer mode and flashing mode will have the same timer duration. To
set the timer duration, follow the instructions below:
1. Wall Dimmer must be installed and powered properly. The connected
light should be off, and the 2 blue LEDs are on. The light must
be off in order to set the timer duration.
2. Press and hold the SET button for 3 seconds, the lower blue LED
flashes once. The number of flashes indicates the timer duration:
Number of Flashes
Timer Duration
1
1 min.
2
5 min.
3
15 min.
4
30 min.
5
60 min.
3. Continue to hold the SET button until it reaches the desired setting. The
status will change every 6 seconds, i.e. hold the SET button for another
6 seconds, you will see the number of flashes changes from 1 to 2, 2 to
3, etc.
Note: Once the number of flashes reaches 5, it will stay at this setting. If
you would like to go back to other settings, such as 1 minute, release the
button and repeat from step 1 to start over.
Once a transmitter (button) is programmed for timer mode or flashing
mode, activating this programmed transmitter (button) will turn on the
light for the specified timer duration.
During a timer count down, if the Wall Dimmer receives another signal for
timer operation, the timer will start again and overrides the previous timer,
therefore, extending the On period by another timer interval.
To stop timer count down, press a programmed button for regular mode.
5. REGULAR OPERATING MODE
The Wall Dimmer can control the light in 2 different operating modes:
1) On / Off Mode - Allows operating the light either on or off, without
dimming function.
2) Dimming Mode - Allows operating the light in on, off or dimming
(dim / brighten). Light source must be either incandescent light
or dimmable compact fluorescent light.
The factory default operating mode is On/Off mode. However, if your
light is dimmable, you may change the operating mode to Dimming
Mode. To change the operating modes, please follow the instructions
below:
5. REGULAR OPERATING MODE (CONT)
1. Turn on the light by the programmed transmitter or touch pad.
2. Press and hold the button on the transmitter that is programmed to
the Wall Dimmer for 10 seconds or touch the touch pad for 10 seconds
with your finger..
3. The light will flash. If it flashes once, that means it is in On / Off Mode.
If it flashes twice, that means it is in Dimming Mode.
4. Repeating step 2 above will toggle the setting between On / Off Mode
and Dimming Mode.
5.1 ON / OFF operation:
Use the Wall Dimmer
To turn on / off the light, simply tap the touch pad of the wall dimmer
once with your finger, it will toggle the status of the light, i.e. from on to
off or from off to on.
Use a Transmitter
Wall Dimmer allows on / off operation, when the programmed button is
pressed, it will transmit a signal to toggle the status of the load.
For example, if a toggle signal is received when the light is off, that signal
will turn on the light.
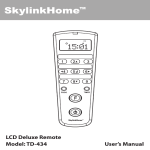
If you have a deluxe remote, you can make sure that you will actually turn
on a light by pressing [
] first, then the programmed button. Similarly,
you can make sure that you will turn off a light by pressing [
] first, then
the programmed button.
If you have a deluxe remote and you press [
], all those receivers to
which the remote is programmed will turn on their loads. If you press
[
], all those receivers to which the remote is programmed will turn
off their loads.
5.2 Brightness control operation:
Besides turning on and off the light, you may also control the brightness
of the light if the light bulb is either incandescent light or dimmable compact
fluorescent light.
Use the Wall Switch
Turn on the light first. Then keep touching the touch pad to change the
brightness. Remove your finger from the touch pad until the desired
brightness is reached. To change the brightness in the opposite way,
remove your finger from the touch pad and then keep touching again,
remove the finger from the touch pad until the desired brightness is reached.
Use a Transmitter
First turn on the light.
Then press and hold the programmed button on the transmitter to change
the brightness. Hold the button until the desired brightness is reached, then
release the button.
Press and hold the same button again on the transmitter to change the
brightness again in the opposite way. When the desired brightness is
reached, release the button.
Note: Press and hold for more than 10 seconds will toggle the mode
between ON/OFF and Dimming.
6. FLASHING ALERT OPERATING MODE
If a transmitter or a sensor is programmed to the Wall Dimmer under the
flashing alert mode, when that transmitter is activated, the light connected
will flash for the predetermined timer interval. The brightness of the light
can only be set under regular mode. After the timer interval, the light will
be off.
Pressing a programmed button for regular mode can override flashing
alert operation.
7. COUNTDOWN TIMER OPERATING MODE
If a transmitter or a sensor is programmed to the Wall Dimmer under the
countdown timer mode, when that transmitter is activated, the light connected will be on for the predetermined timer interval. The brightness of
the light can only be set under regular mode. After the timer interval, the
light will be off.
Pressing a programmed button for regular mode can override countdown
timer operation.
8. ZONE OPERATION
12. WARRANTY
An optional deluxe remote is needed for zone operation. A Zone Command
allows you to operate multiple lights altogether in the same zone.
A zone command must first be programmed to the receiver before zone
operation. To program a zone command, please refer to the user's
instructions of the deluxe remote.
If, within one year from date of purchase, this product should become defective
(except battery), due to faulty workmanship or materials, it will be repaired or
replaced, without charge. Proof of purchase and a Return Authorization are required.
Zone Operation - On / Off
If you would like to
- find out the up-to-date specifications
- know more about features and applications
- download documents, i.e. user’s instructions
- order Skylink products
To turn on or off a zone, hold [
] or [
] until the red LED flashes
three times and keeps on, then release the held button and press the
zone number.
For example:
Hold [
] until the red LED flashes three times and keeps on, then
release [
] and press [1], all lights in zone 1 will be turned on.
13. CUSTOMER SERVICE
or if you have difficulty getting products to work, please:
1. visit our FAQ section at www.skylinkhome.com, or
2. email us at [email protected], or
3. call our toll free at 1-800-304-1187 from Monday to Friday, 9 am to 5 pm EST.
Fax (800) 286-1320
Hold [
] until the red LED flashes three times and keeps on, then
release [
] and press [1], all lights in zone 1 will be turned off.
14. ACCESSORIES
TM
Zone Operation - Brightness Control
You can also change the brightness of lights in a zone altogether, if the
receiver modules and all lights connected are dimmable. If non-dimmable
lights or appliances are connected to a zone, do not operate Zone
Brightness Control.
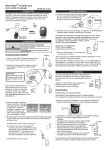
The SkylinkHome System consists of many other devices such as
SkylinkHomeTM Remotes, Motion Sensor, ON/OFF Wall Switch, Wall
Dimmer, Plug-In Dimmer with or without Repeater, Plug-In ON/OFF
Control (Outdoor/Indoor), Screw-In Dimmer, ON/OFF/Dimming Control,
ON/OFF Control, Smart ButtonTM Garage Door Control, etc. Please visit
Skylink website at www.skylinkhome.com for more information.
For example:
Hold [
] until the red LED flashes three times and keeps on, then
release [
] and hold [1] , all lights in zone 1 will be brightened, you
may release [1] at the desired brightness level.
Hold [
] until the red LED flashes three times and keeps on, then
release [
] and hold [1] , all lights in zone 1 will be dimmed, you
may release [1] at the desired brightness level.
9. ERASING TRANSMITTERS FROM THE MODULE
You may erase a transmitter or sensor from the wall dimmer, but you
cannot erase a specific device directly, you must erase all the wireless
devices, then program the ones you want to keep. Follow the instructions
below to erase programmed transmitters / sensors.
1. Power off the Wall Dimmer by placing the air gap switch to off position.
2. Press and hold the SET button, while holding the SET button, slide the
air gap switch to on position.
3. The blue LEDs will be on first, then flashes rapidly for 1 second.
4. You may release the SET button, now you have successfully erased all
the devices.
10. TECHNICAL SPECIFICATIONS
Input Voltage: 120V AC, 60Hz
Standby Current: 0.2mA
Minimum Load: 10W
Maximum Load: 600W at 120VAC
Operating Frequency: 318MHz
Operational Temperature: -4° F - 140° F (-20° C - 60° C)
Humidity: 5%-95%
Range: Up to 500 feet in open area
11. FCC
The Device is approved by the FCC and it complies with Part 15 of the FCC Rules.
Its operation is subject to the following two conditions :
1. This device may not cause harmful interference.
2. This device must accept any interference that may cause undesired operation.
WARNING:
Changes or modifications to this unit not expressly approved by the party responsible
of compliance could void the user’s authority to operate the equipment.
CUSTOMER SERVICE
17 Sheard Avenue, Brampton, Ontario, Canada L6Y 1J3
Email:[email protected]
http://www.skylinkhome.com
P/N. 101Z713
Patent Pending
©2010 SKYLINK GROUP
V2.0