1
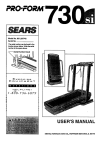
PRO.FORM
Model No. 831.287820
Serial No.
USER'S MANUAL
Write the serialnumber in the space
abovefor futurereference.
/_.
Sedal Number
Decal
EC)
1[o_ln
EXERCISE
U
l P
=l_.lBi
Ivl
I
E
Ee]lm
N
T
_. _F.1
HELPLINE!
1-800-736-6879
!::CAUTION
SEARS
Read _1 precautions ari<J]fi_u_:_
!_'i_'this
man'iJai before using
thls equ pment. Keep'thisi_a_q
al for future reference.
-
SEARS, ROEBUCK
AND CO., HOFFMAN
ESTATES, IL 60179
TABLE OF CONTENTS
FULL 90 DAY WARRANTY
...............................................................
2
IMPORTANT PRECAUTIONS
.....................................................
' ........
3
BEFORE YOU BEGIN ..................................................
.................
4
ASSEMBLY ................
...........................................................
5
HOW TO USE THE CARDIO PRO ..........................................................
8
MAINTENANCE ........................................
: ........
".....
.................
11
CONDITIONING GUIDEUNES .. ...........................................................
12
PART UST ............
"..........
. ..............................................
; ..... 14
EXPLODED DRAWING ....................................
.............................
15
ORDERING REPLACEMENT PARTS ................................................
Back Cover
[
FULL 90 DAY WARRANTY
For 90 days from the date of purchase, if failure occurs due to defect in material or workmanship in this
SEARS CARDIO FIT EXERCISER, contact the nearest SEARS Service Center throughout the United
States and SEARS will repair or replace the SEARS CARDIO FIT EXERCISER, free of charge.
This warranty does not apply when the SEARS CARDIO,FIT EXERCISER is used commercially or for
rental purposes.
This warranty gives you spe_.=c legal rights, and you may also have other rights which vary from state
to state.
SI=ARS, ROEBUCK AND CO., DEPT. 817WA, HOFFMAN ESTATES, IL 60179"
2
I
IMPORTANT PRECAUTIONS
?/.ARNING:_To reduce the riskof
1;
serious'lnjury;,read
PRO:i
ItlSihe!_esponslbllity:ofthe,bwnerto.ensure
th=i_a [ _e_:of_e_C6F.p._O
PRO_are_aa_
:quate y_Infb_e._l_.f._l
p_a._.!_
=:2, Readall_Jns_ctlona:_In.:th
the following important precautions_f_)_;
...........
7.
=
Never allow hi0re:than one Derson on the
CARDiO: PRO =:at_itlm_e_
_apprgpriata
Flotliing_!_en_exe_Islng
do not wear:!oose:cloth]ng_that:coulcl_'_-;_
s manual:;before!
3. iP a_e the!CARDIO PRO 0na level surface;
iCoVer thefi_or be_bath the CA_DIOPRo, t0
nrnt___ttl_ fi_r!Or _al'i_et -:_
P;_
9:.; After adjust[Eg the p0sitibn of the's_bt, pbsh _
o_ the seatlto _ake sure that the:seatiknob_
is bngaged in_one of tl_e holes Inill_ _eat :.
fr_;me. Do not use the CARDIO PRO unless _
! the seat Is b_eurely, locked: in _posit!on_
4;_:lnspectand bghten'all_ parts regularly;
Replace any worn parts immediately.
!0. Always keep your back straight when using
the C/_RDIO I_RO. Do not archlyour back.
5.,;: Keep Small (_hildren.and :pets awav from the
CARDi0 PR;d:_t ali _imes::
11. -If you feel pain or dizziness while exei'cislng, I
.i; stud immediatelv and beoin coolina clown.:;
6.::: _e:CARDIO
pRO'_hodidlnot be used by
Ders_>ns:weiclhinq moPe=tllan 250 I_unds,
WARNING:_Before begir_ning_thl_ or,an_ exerci_)gra_:'__nsuR:y_p@h:ys_i.an;_._.ls,i._:_._;al_,._
__,,_._._:_
,. ;_
_.-._,_t
w_, ,_:.,._-_;_=__
_.._._j____, _
e_l_._
_
_mportanz tor_persons over,me age ox._ or:persons _wgn:Pre-exmang nea=m proumms< _yap,_ :"::_,
instructionsbefore
using. SEARS assu_e_'no responsiblllty:for personal inju_,o[ prope_ _amag_
sustained by.or_hmugh _th_e.use:of _thiS_
3
BEFORE YOU BEGIN
Thank you Ior selecting the PROFORIVP CARDIC)
PRO. The CARDIO PRO offers a gnique form of lowimpact ex,_rcise that uses both th._ upper body and the
lower body for increased cardiovascular benefits and
greater tolling results. For a more 00replete workout,
the CARDIO PRO features an innovative resistance
mechanism that provides resistance In both directions
as you exqmise. And the adjustability of the CARDIO
PRO allow;=you to tailor the intensity of your exercise
to your personal fitness level.
tions, please call our toll-free HELPLINE at 1-800-7366879, Monday through Saturday, 7 a.m. until 7 P.m.
Central _me (excluding holidays). To help us assist
you, please note the product model number and serial
number when calling. The model number is
831.287820. The serial number can be found on a
decal attached to the CARDIO PRO (see the front
cover of this manual for the location of the decal).
Before reading further, please review the drawing
below and familiarize yourself with the parts that are
labeled.
For your honefit, read this manual carefully before
using tho CARDIO PRO. If you have additional ques-
Link Arms
.Handlebar
Padd,d
Push and Pull
Resistance Controls
=edals
Seat Knob
FRONT
BACK
RIGHT SIDE
4
ASSEMBLY
Before beginning assembly, carefully read the
following Information and instructions:
THE FOLLOWING TOOLS ARE REQUIRED
ASSEMBLY:
• Place all parts in a cleared area and remove the
packing materials; do not dispose of the packing
materials until assembly is completed.
FOR
• The included pedal tool
• Your own phillips screwdriver
• Read each assembly step before you begin.
• Your own rubber mallet
• Be sure that all pads are oriented as shown in
the drawings.
• A small amount of lubricant, such as grease
or petroleum jelly.
• "nghten all parts as you assemble them, unless
instructed to do otherwise.
4
Note: Before you attach the 1/2" Dome Caps
(29) in assembly steps I and 2, be sure that all
parts are in the correct positions. The Dome
Caps can be used only once; if a part is incorrectly assembled, it will be necessary to
remove the Dome Caps and order new ones.
29
21 -Lubricate
29
Be sure that there is a 1/2" Pivot Bushing (25) in
each side of the Frame (6).
Lubricate the Pedal Frame Axle (21). Align the
indicated holes in the Pedal Frame (7) with the
1/2" Pivot Bushings (25) in the Frame (6). Insert
the Pedal Frame Axle through the Pedal Frame
and the Frame. Center the Pedal Frame Axle and
tap a t/2" Dome Cap (29) onto each end of it.
2.
Holes
See the inset drawing. Make sure that there is a
1/2" Link Arm Bushing (26) in the left Link Arm
2
(4).
Slide the end of the left Unk Arm(4) onto the indicated pin on the Pedal Frame (7). Pivot the Pedal
Frame and tap a 1/2" Dome Cap (29) onto the
pin.
Attach the dght Link Arm (4) to the Pedal Frame
(7) in the same manner.
5_
.
Press the two H_ndlebar Endcaps (13) onto the
Pedal Frame (7).
3
Insert the Handlebar (2) into the Pedal Frame
(7). Be sure that the Handlebar is tumed as
shown. Attach the Handlebar to the Pedal
Frame with four #8 x 1/2" Screws (16).
2
,
7 J ,3
4.
Lubricate the indicated axles on the Pedal
Frame (7). Slide a Pedal (12) onto each axle.
Be sure that the Pedals are tamed so the
rounded ends face away from the Pedal Frame.
Using the included pedal tool, tap a 112" Push
Nut (30) onto each of the axles. Sea the inset
drawing. Make sure that the Push Nuts are
turned as shown, with the teeth pointing
away from the Pedal Frame (7).
---L
Attach two Pedals (12) to the other side of the
Pedal Frame (7) in the same manner.
P a,
TooY
"I _Teeth
5.
Turn the Seat Knob (35) to loosen it. Pull down
the Seat Knob and hold it, Slide the Seat (3)
onto the Seat Frame (5) and move the Seat to
the desired position. Release the Seat Knob.
Slide the Seat back and forth slightly until the
Seat Knob locks into place. Turn the Seat Knob
to tighten it. Push on the Seat to make sure
that the Seat Knob Is engaged in one of the
holes in the underside of the Seat Frame.
5
5
35
6_
6.
Plug the Wire Hamess (28) into the jack on the
back of the Console (1) (see the inset drawing).
6
""
Attach the Console (1) to the Frame (6) with
four #8 x 112"Screws (16).
=
Plug the Power Cord (42) into the Power Plug
(40) as shown.
42
7
HOW TO USE THE CARDIO PRO
PLUGGING IN THE POWER CORD
EXERCISING ON THE CARDIO PRO
Be sure that the Power Cord (42) is plugged into the
jack near the back of the CARDIO PRO (see assembly step 7 on page 7). Plug the transformer into a
120-volt outleL Keep the power cord away from walkways and heated surfaces.
Sit on the seat, place your feet on the lower pedals,
and hold the handlebar. Your hands can be positioned
on the top, sides, or bottom of the handlebar, close
together or far apart, or in an overhand or underhand
gdp. If necessary, adjust the position of the seat.
Transfon_er
142
Upper Pedal
Note: Always unplug the transformer when you
are not using the CARDIO PRO.
ADJUSTING THE SEAT
To begin exercising, pull the handlebar toward your
waist while pushing the pedals away with .your legs.
Return to the starting position. This completes one
repetition. Repeat, moving with a smooth, continuous
motion. For the best results, move through the full
range of motion and maintain a steady pace.
CAUTION: To avoid injury, keep your back
straight. Do not arch your back.
To adjust the position Of the Seat (3), first turn the
Seat Knob (35) to loosen it. Pull down the Seat Knob,
move the Seat to the desired position, and release
• the Seat Knob. Slide the Seat back and forth slightly
until the Seat Knob locks into place. Turn the Seat
Knob to tighten it. Push on the Seat to make sure
thatthe Seat Knob Is engaged in oneof the holes
in the underside of the Seat Frame.
the'seat is secure!y locked in position_ .....
To focus on thd muscles of the upper body, place your
feet on the upper pedals as you exercise.
Note: The console will automatically tum on when you
begin exercising on the CARDIO PRO. The operation
of the console is described in the following sections.
DESCRIPTION OF THE-CONSOLE
The console features a manual mode and four preset
workout prcgrams. In the manual mode, the push and
pull resistance levels can be adjusted with the PUSH
and PULL resistance controls. When one of the preset
programs is selected, the console will automatically
control the resistance levels as it guides you through
an effective workouL Whether you select :the manual
mode or a preset workout program, six rn_nitor modes
will provide continuous exercise feedback.
DIAGRAM OF THE CONSOLE
Follow the steps below to operate the console:
_
program
ress SELECT
or the PROGRAM
MANUAL mode.
to select a preset
When the console is turned on, the MANUAL
mode will be selected automatically, as shown
by the green MANUAL mode indicator. (The
MANUAL mode can also be selected by repeatedly pressing the SELECT PROGRAM button.)
select one of the
four preset programs, press the
SELECT PRO-
SELECT
PROGRAM
GRAM button. The red FAT BURN 1 program
indicator will light. To select the FAT BURN 2,
AEROBIC 1, or AEROBIC 2 program, repeatedly press the SELECT PROGRAM button.
O- MANUAL
_i_
2_o8 e 4 2 o
ResistanceProfiles
1. LCD display---Displays the six monitor modes.
2. Mode Indicators-Show which monitor mode
is currently displayed.
5. Program indicators--Show when the MANUAL mode is selected and when a preset program is selected.
Note: The FAT BURN 1 and FAT BURN 2 programs are thirty-minute programs; the AERO.BIC 1 and AEROBIC 2 programs are twentyminute programs. The profiles on the console
(see the drawing above), show how the resistance will change during each program. For
example, during the FAT BURN 1 program, the
resistance will gradually increase during the
first fifteen minutes, and then gradually
decrease during the last fifteen minutes. Each
program begins with a two-minute warm-up,
and er_dswith a two-minute cool-down.
6. PUSH Resistance Control--Adjusts the resistance you feel as you push the handlebar.
After you have selected the MANUAL mode or
a preset program, continue to step 2.
3. SELEC;I" PROGRAM button--Selects the four
preset programs and the MANUAL mode.
4. DISPLAY MODE/CLEAR button--Turns the
console on, selects the monitor modes, and
[esets the monitor modes.
7. PULL Resistance Control--Adjusts the resistance you feel as you pull the handlebar.
Set the push and pull resistance levels.
The unique resistance mechanism allows you
to change the push and pull resistance levels
independently with the PUSH and PULL resistance controls on the console.
STEP-BY-STEP CONSOLE OPERATION
To turn on the console, press the DISPLAY
MODE/CLEAR button, or simply begin exercising on
the CARDIO PRO. The word =SCAN" will appear
briefly in the LCD display to show that the scan mode
[[
MIN. _
MIN. _
I
is selected. (Step 3 on page 10 explains th'e operation
of the six monitor modes.)
t
9
I Ill I
I
I IPUS"
I
MAX.
MAX.
_
I
I PULL
If you selected the MANUAL mode, you can
adjust the pu._h and pull resistance levels at
any time by sliding the PUSH and PULL resistance controls.
• Calories--When this mode indicator appears,
the number of
Calodes you
have burned during your workout
will be displayed.
Note: If the resistance levels are
near the highest or lowest settings, the number
of Calodes you have burned may be sr_htly
higher or lower than the number displayed.
If you selected a preset program, the positions
of the PUSH and PULL resistance controls will
determine the maximum resistance levels for
the program. Once the program is started, the
resistance will change automatically, as shown
by the resistance profiles on the console. If the
resistance levels are too difficult or too easy,
you can adjust the maximum resistance levels
by moving the PUSH and PULL resistance
controls to new positions. Note: If necessary,
you can end the program before it is complete
by pressing the DISPLAY MODE button for two
seconds. After a few seconds, the MANUAL
mode will be selected automatically.
_
• Fat Calories---When this mode indicator
appears, the
number of Fat
Calodes you
have bumed durFAT-CALORIES I
ing your workout
will be displayed
(see BURNING
FAT on page 12). Note: If the resistance levels are near the highest or lowest settings,
the actual number of Fat Calodes you have
burned may be slightly higher or lower than
the number displayed.
with
monitor modes.
eginthe
exercising
and follow your progress
As you exercise, you can monitor your
progress with the six monitor modes. When the
power is tumed on, the scan mode will be
selected automatically. When the scan mode is
selected, the other five modes will all be displayed, for seven seconds each, in a repeating
cycle. The modes are described below.
• _me--lf the MANUAL mode is selected when
this mode indicator appears, the
• length of time
you have exercised will be displayed. If you
stop exercising,
the time mode will pause after ten seconds. If
one of the programs is selected, the time
remaining in the program will be displayed.
• Scan--When the scan mode is selected, the
word =SCAN"
appears bdefiy in
the display. The
other five modes
will then be dis-
L
Mode Indicator
IMIN.
TIME
IE
played, for seven
seconds each, in
a repeating cycle. The mode indicators will
show which mode is currently displayed.
If desired, you can
individually select
one of the modes
for continuous dis-
• Repetitions/minute--When this mode indicator appears (see
the drawing), the
number of repetitions you are performing per minute
TOTAL
REPS.
will be displayed.
_
DISPLAY
_.j_
MODEICI.EAR
play.•Press the
DISPLAY MODE/CLEAR button repeatedly
until the desired mode indicator is flashing. To
select the scan mode again, press the DISPLAY MODE/CLEAR button repeatedly until
the word "SCAN" appears bdefiy in the display.
To reset the monitor modes, press and hold
down the DISPLAY MODE button for two seconds. The scan mode will automatically be
selected after the monitor modes are reset.
• Total repetitions--When this mode indicator
appears, the
total number of
repetitions you
have performed
during your
workout will be
displayed.
The console features an "auto-off" function_f
the
pedals are not moved and the console controls are
not used for five minutes, the console will autombtically shut off. When you are finished exercising,
unplug the transformer from the wall outlet.
10
MAINTENANCE
Inspect and tighten all parts of the CARDIO PRO regulady. The CARDIO PRO.can be cleaned with a soft, damp
cloth. Keep liquids away from the console. Do not expose the console to direct sunlight or the display may be
damaged.
HOW TO LUBRICATE THE CARDIO PRO
Every three months, a small amount of light multi-purpose
oli should be applied to the CARDIO PRO. Apply a few
drops of oil between the dome cape and the link arms In
the locations shown at the dght.
11
CONDITIONING
GUIDELINES
The following guidelines will help you to plan your
exercise program. Remember that proper nutrition and
adequate rest are essential for successful results.
Burning Fat
To bum fat effectively, you must exercise at a relatively low intensity level for a sustained period of time.
During the first few minutes of exercise, your body
uses easily accessible carbohydrate calories for energy. Only after the first few minutes does your body
begin to use stored fat calories for energy. If your goal
is to bum fat, adjust the intensity of your exercise until
your heart rate is near the lower end of your training
zone. The FAT BURN 1 and FAT BURN 2 programs
can also help you to reach your goal.
WARNING: Before beginning this or any exercise
program, consult your physician. This is especially important for Individuals over the age of 35 or
Individuals with pre-existing health problems.
WHY EXERCISE?
Exercise has proven essential for good health and
well-being. Participation in a weU-rounded exercise
program helps to develop a stronger and more efficient heart, improved respiratory function, increas;_d
stamina, better weight management, increased ability
to handle stress, and greater self-esteem.
Aerobic Exercise
If your goal is to strengthen your cardiovascular system, your exercise must be =aerobic." Aerobic exercise
is activity that requires large amounts of Oxygen for
prolonged periods of time. This increases the demand
on the heart to pump blood to the muscles, and on the
lungs to oxygenate the blood. For aerobic exercise,
adjust the intensity of your exercise until your heart
rate is near the middle of your training zone. You may
also want to use the AEROBIC 1 and AEROBIC 2 programs.
EXERCISEINTENSITY
Whether your goal is to bum fat or to strengthen your
cardiovascular system, the key to achieving the
desired resultsis to exercise with the proper intensity
and for the appropriate duration. The proper intensity
level can be.found by using your heart rate as a guide.
For effective exercise, your heart rate should be mainrained at a level between 70% and 85% of your maximum heart rate as you exercise. This is known as
your training zone. You can find your training zone in
the table below. Training zones are fisted according to
age and physical condition.
HOW TO MEASURE YOUR HEART RATE
To measure
your heart rate,
stop exercising
and place two
fingers on your
wdst as shown.
Take a six-second heartbeat
count, and multiply the result
by ten to find
your heart rate. (A six-second count is used because
your heart rate drops quickly when you stop exercising.) If your heart rate is too high, decrease the intensity of your exercise. If your heart rate is too low,
increase the intensity of your exercise.
TRAINING ZONE (BEATS / MIN.)
AGE
UNCONDITIONED
CONDITIONED
20
138-167
133-162
25 -
136-166
132-160
30 "
135-164
130-158
35
134-162
129-156
40
132-161
127-155
45
131-159
125-153
50
129-156
124-150
55
127-155
122-149
60
126-153
121-147
65
125-151
119-145
70
123-150
118-144
75
122-147
117-142
80
120-146
115-140
85 •
118-144
114-139
WORKOUT GUIDELINES
An proper workout must include the following phases:
A warm-up phase, lasting 5 to 10 minutes. Begin with
slow, controlled stretches, and progress to more rhythmic stretches. (See page 13.) This will increase the
body temperature, heart rate, and circulation in preparation for strenuous exercise.
12
A csrdio';ascu_ar phase, including 20 to 30 minutes
of exercise with your heart rate in your training zone.
A cool-down phase consisting of 5 to 10 min.utes o7
stretching. Thorough stretching offsets muscle contr_.ctions and other problems caused when you stop exercising suddenly. Stretching for increased flexibility is
often most effective during this phase. This phase
should leave you relaxed and comfortably tired.
To maintain or improve your cond!::on, complete three
workouts each week, with at least one day of rest
between workouts. After a few months of regular exercise, you may complete u.pto five workouts .each
week, if desired. Find the best time of day for your
workouts, and then stick with it.
Remember, the key to success is to make exercise a
regular and enjoyable part of your everyday life.
SUGGESTED STRETCHES
The correct form for several basic stretches Is shown in the
drawings below. Move slowly as you stretch--never bounce.
1. Toe Touch Stretch
Stand with your knees bent slightly and slowly bend fonNard
from your hips. Allow your back and shoulders to relax as you
reach down toward your toes as far as possible. Hold for 15
counts, then relax. Repeat 3 times. Stretches: Hamstrings,
back of knees and back.
2. Hamstring Stretch
Sit with one leg extended. Bring the sole of the opposite foot
toward you and rest it against the inner thigh of your extended
leg. Reach toward your toes as far as possible. Hold for 15
counts, then relax. Repeat 3 times for both legs. Stretches:
Hamstrings, lower back and groin.
3. Calf/Achilles Stretch
With one leg in front of the other, reach forward and place
your hands against a wall. Keep your back leg straight and
your back foot flat on the floor. Bend your front leg, lean forward and move your hips toward the wall. Hold for 15 counts,
then relax. Repeat 3 times for both legs. To cause further
stretching of the achilles tendons, bend your back leg as well.
Stretches: Calves, achilles tendons, and ankles.
4
4. Quadriceps Stretch
With one hand against a wall for balance, reach back and
grasp one foot with your other hand. Bring your heel as close
to your buttocks as possible. Hold for 15 counts, then relax.
Repeat 3 times for both legs. Stretches: Quadriceps and hip
muscles.
5. Inner Thigh Stretch
Sit with the soles of your feet together and your knees outward. Pull your feet toward your groin area as far as possible.
Hold for 15 counts, then relax. Repeat 3 times. Stretches:
Quadriceps and hip muscles.
13
5
PART LIST--Model
Key.No. Qty. Part No.
1
2
3
4
5
6
7
6
9
10
11
12
13
14
15
16
17
18
19
20
21
22
23
24
25
26
1
1
1
2
1
• 1
1
4
1
2
1
4
2
1
1
*8
1
6
1
1
1
1
2
1
2
_4
124885
128564
127437
129678
129677
NSP
129676
127105
129680
115998
127113
126406
128794
129689
127898
102308
013294
127597
129682
129683
129523
117904
106876
129726
110576
103677 "
No. 831.287820
R0496A
Key No. Qty. PartN<_.
Description
Console
Handlebar
Seat
UnkArm,
Seat Frame
Frame
Pedal Frame
Round Endcap
Compression Reso Cyl.
Pedal Frame Endcap
Seat Frame Endcap
Pedal
"
Handlebar Endcap
Bumper
Reed Switch/Sensor Wire
#8 x 1/2" Screw
#8 x 1" Screw
Fastener
Left Side Shield
Right Side Shield
1/2" x 11" Axle
1/2" x 4 1/2" Axle
Cylinder Bushing Set
Reed Switch Spacer
1/2" Pivot Bushing
'1/2" UnkArm Bushing
27
28
29
30
31
32
33
34
35
36
37
38
39
40
41
42
43
• 44
#
#
1
1
"12
*4
2
5
6
4
1
1
2
2
4
1
2
1
1
2
1
1
113349
127594
128355
012155
129917
127804
013322
013244
127626
127438
127107
128500
119445
127598
013516
101067
129679
130324
128484
125453
Description
Magnet/Retainer
Wire Hamess
1/2" Dome Cap
112"Push Nut
Motor Mount Plate
Slide Bushing
#8 x 3/4" Screw
1/4" Tap Screw
Seat Knob
Seat Bracket
1/2" x 2 1/4" Bushing
Tension Motor
#8 x 1 1/4" Screw
Power Plug
#4 x 3/8" Screw
Power Cord
Extension Res. Cyl.
1/2" x 4" Axle
User's Manual
Pedal Tool
*Note: One extra #8 x 1/2" Screw, one extra 1/2"
Dome Cap, and extra 1/2" Push Nuts may have
been included.
Note: =#"indicates a non-illustrated parL Specifications are subject to change without notice. See the back cover
of this manual for information about ordering replacement parts,
14
EXPLODED DRAWING--Model
No. 831.287820
Ro496A
2
3
4
12
11
21
22
29
29
32
34
35
38.,
16
3c
8
24
o
29...._.
°o"°
20
4O
15
6E AR8
Model No. 831.287820
The model number and sedal number of your PROFORM" GARDIO
PRO are listed on a decal attached to the frame. See the front cover
of this manual to find the location of the decal.
All replacement pads are available for immediate purchase or
special order when you visit your nearest SEARS Service Center. To
request service or to order parts by telephone, call the toll-free numbers listed at the left.
QUESTIONS?
When requesting help or service, or ordering pads, please be prepared to provide the following information:
If you find that:
• The NAME OF THE PRODUCT (PROFORM ®CARDIO PRO)
• you need help assembling or
operating the CARDIO PRO
• a part is missing
• or you need to schedule repair
service
• The MODEL NUMBER OF THE PRODUCT (831.287820)
• The PART NUMBER OF THE PART (see page 10 of this manual)
• The DESCRIPTION OF THE PART (see page 10 of this manual)
call our toll-free HELPLINE
1-800-736-6879
Monday-Saturday, 7 am-7 pm
Central Time (excluding holidays)
REPLACEMENT
PARTS
if parts become worn and need to
be replaced, call the following
toll-free number
1-800-FON-PART
(1-800-366-7278)
SEARS, ROEBUCK AND CO,, HOFFMAN ESTATES, IL 60179
Part No. 128484 F00185-C R0296A
Printed in USA © 1996 Sears, Roebuck and Co,