1
Robic UV-419 Sun Intensity Monitor Instructions
Thank you for buying the Robic UV-419. Please read these instructions prior to using it
to ensure safe and correct use. Do not expose your monitor to rain, dust, severe shock,
humidity or immerse it in water. The UV-419 may cease to operate if dropped onto the
floor. The UV-419 is a simple detector meant to offer general guidance as to the strength
of the Suns UV rays. This is not a medical device and it should not be viewed as offering
any sort of protection from over exposure. Each person makes their own decisions about
the time spent in the Sun. Above all else, refer to your Doctor or Health Care
professional for guidance as to the exposure to sunlight which is safe for you and your
family. Always take precautions from excessive exposure to the suns rays.
The UV-419 has four modes of operation. Use the MODE pushbutton to move from one
function to the next. They are: Time of DayÆUV Measurement and displayÆStopwatch
ÆCountdown Timer and then back to Time of Day. Five (5) Pushbuttons are used to
activate all functions: TEMP (Temperature), DETECT, MODE, SET and EL.
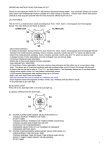
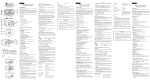
This illustration shows the location of the Pushbuttons and other components which
operate your UV-419 Monitor.
TIME OF DAY: Press MODE to locate Time of Day display. Then, press TEMP
(Temperature) button and the bottom row will change between Calendar (Month and
Date) and Temperature display. While Temperature is displayed, the reading will be
updated every 30 seconds.
To Set the Time of Day, press and hold SET for about three (3) seconds to begin the
process. Hours will begin to flash. Advance the hours by pressing TEMP to increase the
value or DETECT to decrease the value.
After setting the Hours, press SET again to choose from Minutes, 12/24 Hour Option,
Year, Month, Date and Celsius or Fahrenheit. Each successive function will appear
flashing at which time you can Increase by pressing TEMP or Decrease by pressing
DETECT. Press MODE at any time to exit the setting process.
ALARM SETTING: From Time of Day, press MODE once to display the Alarm Time.
The Alarm mode indicator is a Clock icon which appears in the lower right corner of the
display. To set the Alarm to sound at a certain time, press SET for three (3) seconds.
The Alarm and Chime each are activated and Alarm hours will appear flashing. Increase
Hours by pressing TEMP or decrease hours by pressing DETECT. Press SET again to
choose from Alarm Minutes, Hourly Chime and Daily Alarm. Each successive function
will appear flashing. Increase with TEMP or decrease with DETECT. Press SET at any
time to exit the setting process.
The Hourly Chime will announce the start of each hour with two beeps. The Daily
Alarm will beep for up to one minute to announce the preset time. You may silence the
Daily Alarm by pressing any pushbutton (except TEMP). The Chime is indicated by
sound waves above the colon and the Alarm is indicated by a bell below the colon. These
indicators will appear when active (set to go off) and disappear when not active.
UV MEASUREMENT: While in Time of Day mode, press DETECT. The current UV
Index level will be displayed numerically and the UV Index icon will fill in. UV Intensity
is divided into five levels:
• Level 1: Weak (UV Index 0-2)
• Level 2: Low (UV Index 3-4)
• Level 3: Moderate (UV Index 5-6)
• Level 4: High (UV Index 7-9)
• Level 5: Very High (UV Index 10 or above)
Learn more about UV intensity and the levels at which it is measured by visiting
www.who.int/uv/en. If the UV intensity is measured at Level 4, two beeps will sound.
The intensity is measured at Level 5 the beeps will sound for five (5) seconds. Returns to
Time by pressing DETECT or the UV-419 will do so automatically after 2 minutes.
While in UV Measurement, pressing SET will prompt the UV-419 to take a reading
every 10 minutes. You may return to Time of Day by pressing DETECT or the UV-419
will automatically return to Time of Day after 6 hours.
STOPWATCH: From Time of Day, press MODE twice to arrive at the Stopwatch. A
Runner icon will appear in the lower portion of the display. For a Single Event, press
TEMP to Start and time begins running. Press TEMP again to Stop. Press SET to reset
to all zeros.
To use as a Split Stopwatch, press TEMP to start timing. Take a Split reading by
pressing SET. The Split time reading will appear on the display. You can release to
running time by pressing SET or wait 15 seconds and the reading will be released
automatically. Take as many reading as you require by pressing SET. Press TEMP to
Stop and then press SET to reset to all zeros.
COUNTDOWN TIMER: Use this to view how much time remains in an event or
activity. From Time of Day, press MODE three times to arrive in the Countdown Timer
function. An Hourglass icon appears in the lower portion of the display. To set the
timer, press SET for three (3) seconds. Hours appear flashing. Press TEMP to increase
or DETECT to decrease Hours. Press SET again to choose from Minutes and Seconds
using TEMP to increase or DETECT to decrease each successive function. Press MODE
at any time to exit the setting process. The UV-419 will accommodate times from one
second to 24 hours.
Press TEMP and time will begin counting down. Press TEMP to stop and restart the
timers as needed. Upon reaching zero, the completion alarm will sound for one minute.
You may silence the alarm by pressing any pushbutton except EL. Pressing SET while
the timer is stopped or completed will reset to the previously set Countdown Time.
EL BACKLIGHT: The EL Backlight feature can be activated at any time by pressing
EL which will illuminate the display for three (3) seconds. The backlight consumes a
high level of power from the battery which powers the UV-419. Use this feature only as
absolutely needed to conserve the battery life.
LIMITED WARRANTY
OUR BASIC POLICY
Marshall –Browning International Corporation (MBI Corp.) warrants to the original
owner, this UV Monitor (excluding battery, less, band or strap) for the period of one year
from the original purchase date. This limited warranty is given by MBI Corp. and not by
the dealer from whom the timepiece was purchased.
______________________________________________________________________
THE WARRANTY PROCESS – WHAT IS COVERED BY THE WARRANTY
If the timepiece develops a manufacturing defect within the one year limited warranty
period, it will be either repaired or replaced (at MBI Corp.’s option) with a timepiece of
equal value, providing the original owner submits the following:
1. Proof of purchase, i.e. a validated store receipt showing date of purchase.
2. A check or money order (no cash, please) in the amount of $7.50 to cover the cost of
shipping and handling
WHAT IS NOT COVERED BY THE WARRANTY
A. MBI Corp. will not repair defects of damages caused by or showing evidence of:
1. Improper or unauthorized service.
2. Misuse, tampering, abuse or mistreatment of the timepiece.
3. Damage to the case or viable cracking of the lens.
4. Moisture damage, if the product is a non-water-resistant timepiece.
B. If we find that the battery is the cause of the defect, MBI Corp. reserves the right to
charge your ($7.50) for a new replacement.
MBI Corp. is not liable for incidental or consequential damages. Some states do not
allow the exclusion or limitation of incidental or consequential damages, so the above
limitation may not apply to you.
YOUR RIGHTS UNDER IMPLIED WARRANTIES AND STATE LAW.
MBI Corp. limits the duration of any warrant implied by state law, including the implied
warrant of merchantability, to one year from the date of original purchase. Some states
do not allow limitations on how long an implied warranty lasts, so the above limitation
my not apply to you. This warranty gives you specific legal rights, and you may also
have other rights which vary from state to state.
CARING FOR YOUR Timepiece
Proper care of your timepiece will provide many years of enjoyment. We recommend that:
1
The battery is replaced at once when it becomes depleted. Please ask your local
retailer to replace the battery for you using CR2032 (Lithium) or equivalent.
2. The lens is replaced immediately if it becomes damaged, as contamination from dust,
moisture, and other foreign substances will damage the module.
3. If the pedometer is not marked “water-resistant,” avoid immersing or exposing it to
water, steam, or other forms of moisture.
WHEN YOU REQUIRE SERVICE
If your timepiece ever requires factory servicing, you can send it directly to:
MBI CORP, 115 HURLEY RD, OXFORD, CT 06478
We strongly recommend that when sending it through the mail, you send the product
insured, return receipt requested, so that if a problem in shipping arises, you can trace it
through the originating post office. You will be billed for all services deemed out of
warranty; and since we reserve the right to substitute with a replacement product of equal
or greater value, NEVER include a personal item, such as a watchband, with the repair
request.
Robic…Timers & pedometers for champions at every level! Please call (203) 264-2702
for a free catalog.