1
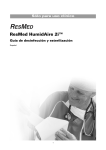
Clinical Use Only
HumidAire 2i™
HEATED HUMIDIFIER
Disinfection Guide
English
1
Clinical Use Only
ResMed HumidAire 2i – Disinfection Guide
This Disinfection Guide is intended for multipatient use of the HumidAire 2i in a sleep lab, clinic or hospital. If
you use the water chamber as a single user in the home, refer to the User Guide for cleaning instructions.
The following are the recommended and validated procedures for cleaning and disinfection of the water
chamber. We advise that each healthcare facility consult its own procedures before carrying out the following
instructions.
WARNINGS and CAUTIONS
• ResMed cannot give any assurance that deviations from the procedures listed in this guide, and their
effect on the performance of the product, will be acceptable.
• When using detergents or disinfectants always follow the manufacturer’s instructions.
Note: The HumidAire 2i is available in both a clear polycarbonate (PC) version as well as a smoky gray
polysulphone (UDEL) version. The following cleaning methods apply only to the clear polycarbonate (PC)
version.
Clear polycarbonate (PC) version
Smoky gray polysulphone (UDEL) version
2
Clinical Use Only
ResMed Validated Procedures
Table 1: Option 1 (Automatic Cleaning and High-Level Thermal Disinfection)
Option 1 (Automatic Cleaning and High-Level Thermal Disinfection)
Disassembly
Disassemble the humidifier water chamber according to the “Disassembling and Reassembling”
instructions on page 5.
Pre-cleaning
Rinse all water chamber components 10 times and brush thoroughly with a soft bristle brush in a
warm (113°F or 45°C) solution of Neodisher MediZym (2%).
Note: Pre-cleaning must occur immediately after use.
Cleaning
1.
Support the components in the standard racking of the automatic washer-disinfector so that
each will drain water.
2. Add the detergent solution1 and activate the automatic washer-disinfector for a standard cycle
of cleaning, followed by thorough rinsing.
Drying
Not applicable.
Pre-disinfection
Not applicable.
Drying
Not applicable.
Disinfection
(high-level
thermal
disinfection)
1.
Drying
Air dry out of direct sunlight.
Inspection
Perform a visual inspection of the water chamber. If any visible deterioration is apparent (cracking,
crazing, tears etc), the water chamber should be discarded and replaced. Slight discoloration of the
silicone components may occur and is acceptable.
Reassembly
Reassemble the humidifier water chamber according to the “Disassembling and Reassembling”
instructions on page 5.
Packaging &
Storage
Store in a dry, dust-free environment away from direct sunlight.
Storage temperature: -4°F to 140°F (-20°C to 60°C).
Activate the automatic washer-disinfector for a standard cycle of thermal disinfection2.
2. Ensure that the machine has thoroughly rinsed each component.
1 Cleaning: ResMed has tested the detergent Neodisher MediZym™ (diluted at 0.5%) using warm water (approximately 113°F or 45°C)
according to the manufacturer’s instructions.
2 Disinfection: Due to specific regional requirements, ResMed water chambers have been tested for disinfection for 20 cycles using hot
water (approximately 199°F or 93°C) for 10 minutes.
3
Clinical Use Only
Table 2: Option 2 (Manual Cleaning and High-Level Chemical Disinfection)
Option 2 (Manual Cleaning and High-Level Chemical Disinfection)
Disassembly
Disassemble the humidifier water chamber according to the “Disassembling and Reassembling”
instructions on page 5.
Pre-cleaning
Rinse all water chamber components 10 times and brush thoroughly with a soft bristle brush in a
warm (113°F or 45°C) solution of Alconox (1%).
Note: Pre-cleaning must occur immediately after use.
Cleaning
1.
Clean all components of the water chamber with a soft bristle brush for one minute while
soaking them in the detergent1 solution. Pay particular attention to all crevices and cavities.
2. Thoroughly rinse each component according to the manufacturer’s instructions.
Drying
Allow the water chamber to air dry out of direct sunlight.
Pre-disinfection
Not applicable.
Drying
Not applicable.
Disinfection
(high-level
chemical
disinfection)
1.
Drying
Air dry out of direct sunlight.
Inspection
Perform a visual inspection of the water chamber. If any visible deterioration is apparent (cracking,
crazing, tears etc), the water chamber should be discarded and replaced. Slight discoloration of the
silicone components may occur and is acceptable.
Reassembly
Reassemble the humidifier water chamber according to the “Disassembling and Reassembling”
instructions on page 5.
Packaging &
Storage
Store in a dry, dust-free environment away from direct sunlight.
Storage temperature: -4°F to 140°F (-20°C to 60°C).
Soak the disassembled water chamber components in a commercially available solution of
ortho-phthalaldehyde 0.55% (eg, CIDEX™ OPA)2. Take care that no air bubbles are trapped
against the components.
2. Thoroughly rinse3 each component according to the manufacturer’s instructions.
1 Cleaning: ResMed has tested the detergent Alconox (diluted at 1%) using hot water (approximately 140°F or 60°C) or warm water
(approximately 120°F or 50°C) according to the manufacturer’s instructions.
2 Disinfection: ResMed water chambers have been validated for 20 cycles using solutions of ortho-phthalaldehyde (0.55% CIDEX OPA
for 12 minutes) according to the manufacturer’s instructions.
3 Rinsing: Thoroughly rinse each component in drinking quality water (five litres per assembly) by immersing it completely for a
minimum of one minute in duration. Repeat the rinse procedure two additional times using fresh water for a total of three rinses.
4
Clinical Use Only
Disassembling and Reassembling the HumidAire 2i
WARNING
Beware of electrocution. Do not immerse the device or power cord in water. Always unplug the device before
cleaning and be sure that it is dry before plugging back in.
1
Turn the main power switch at the back of the device to OFF, and unplug the power cord from the power outlet.
2
Allow 10 minutes for the tub plate and any excess water to cool.
3
Remove the water chamber. To do this, lift the latch at the bottom of the water chamber and pull the water chamber
away from the docking station.
4
Discard any excess water by turning the water chamber upside down, allowing the water to drain out of the air outlet.
5
Disassembling the Water Chamber
1. To open the side catches pull out from the lower edge.
Side catch
2. Separate the water chamber by pulling the two halves apart. Use your thumb to pull down on the front tab.
Front tab
3. Inside the chamber lid is the seal. Remove the seal by peeling it away from the inside of the lid.
Lid
Seal
4. Remove the cross-member from the water chamber base.
Cross-member
Base
5
Clinical Use Only
6
1. Push down on the tub plate from inside the chamber to remove it from the chamber.
Tub plate
2. Remove the O-ring from the tub plate.
O-ring
3. Turn the water chamber base upside down. Firmly pull the latch up and away from the chamber until separated
from the base.
Underside view
4. Disengage the catches from the sides of the water chamber base. Then, separate the inner and outer moulding of
the catch, pull back the inner moulding and squeeze. The inner moulding will pop out.
7
Reassembling the Water Chamber
When all the water chamber parts are clean and dry, reassemble the water chamber:
1. Reassemble the catches by inserting one side of the inner moulding to the outer moulding and pushing
downwards.
6
Clinical Use Only
2. Take the assembled catches and fit them to the water chamber base.
3.
Turn the water chamber base upside down. Insert the latch’s feet into the locking tabs. Push firmly and click into
place.
4.
Refit the O-ring in the channel of the tub plate.
CAUTION
Ensure that you replace the O-ring if it is nicked or punctured.
5.
Push the tub plate into the water chamber with the open side facing down. Then firmly press the tub plate down
into the water chamber.
Tub plate
6. Place the cross-member on its supports inside the water chamber base.
7
Clinical Use Only
7. Fit the seal onto the rim of the water chamber base. Press along the edge to ensure that the seal is fitted properly.
Seal
Rim
8. Fit the lid onto the water chamber base. Press the lid and base firmly together to close.
Lid
9. Lock the catches on the side of the water chamber.
Troubleshooting
If the water chamber leaks after being reassembled, examine the unit for the following:
Possible cause
Solution
Water chamber may be damaged or cracked
Replace affected section of water chamber.
Water chamber seal may be twisted
Make sure the seal is seated properly inside the
water chamber.
Side catches are not engaged properly
Make sure two side catches are engaged
properly.
Tub plate is incorrectly fitted
Ensure tub plate is fitted correctly.
O-ring is punctured or nicked
Replace O-ring.
ResMed Ltd (Manufacturer) 1 Elizabeth Macarthur Drive Bella Vista NSW 2153 Australia, ResMed Corp (US Designated Agent) 14040 Danielson Street Poway CA 92064-6857 USA, ResMed
(UK) Ltd (EU Authorized Representative) 96 Milton Park Abingdon Oxfordshire OX14 4RY UK, ResMed Offices Australia, Austria, Brazil, China, Finland, France, Germany, Hong Kong, India, Japan,
Malaysia, Netherlands, New Zealand, Norway, Singapore, Spain, Sweden, Switzerland, UK, USA (see www.resmed.com for contact details).
Patents pending. Protected by design registrations: AU 147335, CH 128.711, CH 128.712, DE 40202008, DE 40201723, ES 153516, ES 153518, FR 021407, GB 3001820, GB 3001821, JP 1164266, JP 1164267,
SE 75598, SE 75715, US D476077, US D477868. Other designs pending.
HumidAire is a trademark of ResMed Ltd and is registered in the U.S. Patent and Trademark Office.
CIDEX is a trademark of Johnson & Johnson. Alconox is a trademark of Alconox Inc. Neodisher MediZym is a trademark of Chemische Fabrik Dr Weigert.
© 2008 ResMed Ltd. 308236-UEng/2 08 06
8
Global leaders in sleep and respiratory medicine
www.resmed.com