1
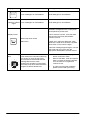
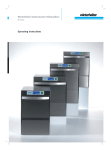
Betriebsanleitung
Operating instructions
Manuel d‘utilisation
GS 302, GS 315
Winterhalter Gastronom GmbH
Tettnanger Straße 72
D-88074 Meckenbeuren
Telefon 07542/402-0
Telefax 07542/402-199
www.winterhalter.de
[email protected]
89007312-04/07-08
Operating instructions
for Winterhalter Gastronom dishwasher GS 302 and GS 315
Contents
1
2
3
4
5
6
7
8
9
10
11
1
Intended use---------------------------------------------------------------------------------------------------------------------- 3
Safety instructions--------------------------------------------------------------------------------------------------------------- 3
Installation and connection---------------------------------------------------------------------------------------------------- 4
Commissioning------------------------------------------------------------------------------------------------------------------- 5
Description of the machine---------------------------------------------------------------------------------------------------- 6
Before washing ------------------------------------------------------------------------------------------------------------------ 8
Washing ------------------------------------------------------------------------------------------------------------------------- 11
After washing ------------------------------------------------------------------------------------------------------------------- 13
Maintenance and care ------------------------------------------------------------------------------------------------------- 14
Faults----------------------------------------------------------------------------------------------------------------------------- 16
Emissions ----------------------------------------------------------------------------------------------------------------------- 18
Intended use
The Winterhalter Gastronom dishwashers (GS 302 and GS 315) may only be used for cleaning crockery
(plates, cups, dishes, presentation trays, cutlery) and similar items from the restaurant trade and commercial
catering.
The machine may only be used for this purpose and in accordance with the operating instructions.
Any change in design or use of the dishwasher carried out without the written permission of Winterhalter
Gastronom GmbH, leads to the guarantee and product liability becoming null and void.
If damage is caused to the dishwasher due to failure to observe the instructions given in this manual, no
claims under guarantee can be made to Winterhalter Gastronom GmbH or any associated companies.
2
Safety instructions
Make sure that you have read and understood the operating instructions before you start to use the washer.
The Winterhalter customer service department can tell you how to operate the washer and how it works.
Do not modify, extend or convert the machine without the manufacturer’s approval.
This appliance is not intended for use by persons (including children) with reduced physical, sensory or
mental capabilities or lack of experience and knowledge unless they have been given initial supervision or
instruction concerning the use of the appliance by a person responsible for their safety.
The following symbols are used in this manual:
DANGER! Danger of death due to live components! Failure to observe these instructions
can lead to danger to life, e.g. from electrical equipment.
Attention: Failure to observe these instructions can lead to damage to equipment.
Not drinking water: The water in the washer is not drinking water.
89007312
3
3
Installation and connection
DANGER! Danger of death due to live components!
Installation and connection of the washer to the customer’s water inlet, waste water
drainage and electricity connections are to be carried out in accordance with national
and local criteria by qualified engineers.
Check for completeness:
After unpacking the machine, first check the delivery against the delivery note to ensure that it is complete,
and inspect for damage that may have occurred during transportation. Immediately report any damage to the
carrier, the insurance company and the manufacturer.
Setting up and alignment
If machine is installed with accessible back side, back panel is absolutely necessary.
When setting up the machine, remember that the machine gives off water vapour during
operation (e.g. when you open the door). Protect adjacent wooden furniture to prevent it
absorbing moisture and swelling up.
Protect the washer against frost. Systems that carry water can be damaged if they freeze.
Before starting installation, use a spirit level to check that the system is totally horizontal. Adjust the
machine’s feet to compensate for any unevenness of the floor.
Connection to the water supply:
Note all the information on the enclosed connection diagram!
For the machine to work correctly, the required water pressure and flow rate must be
guaranteed at all times.
•
Fit a main stop valve in the water inlet near the washer and in an easily accessible position. It must
not be located behind the washer.
•
The washer has been tested by the DGVW (German Association for the Gas and Water Industry), and
was designed and constructed in accordance with DGVW guidelines. It can be connected directly to
the fresh water inlet without the need for further safety devices.
•
Use the feed pipe and fine filter in the dishwasher for the water feed. Check that there are no leaks at
the connections. The feed pipe may not be shortened or damaged
•
Use the flexible drain pipe in the dishwasher to drain the water. The drain pipe may not be shortened
or damaged.
•
Installation of a water treatment system (if not already integrated into the machine) is recommended if
the water hardness exceeds 3°d. This will guarantee optimum washing results. The Winterhalter
customer service department will be happy to advise on a suitable system.
•
The washer is equipped with a drain pump. The maximum pump-out head is shown in the connection
diagram.
4
89007312
Connection to the power supply:
DANGER! Danger of death due to live components!
Have the electric installation of the washer and the auxiliary devices belonging to it carried out
only by a specialist firm of electricians approved by the responsible electricity board in
accordance with the norms.
Observe the technical connection regulations.
Before commissioning the washer, check that all electrical protection systems are working
correctly.
Caution! The machine is only to be considered free from voltage when the mains
disconnecting switch (mains switch) provided by the customer is switched off.
•
The total load of the washer is shown on the machine’s rating plate.
•
The electrical connection of the washer is to be fused by the customer with time-lag fuses or circuit
breaker according to wattage (see machine rating plate). No other consumers may be fused with the
washer.
•
Install a mains disconnecting device (mains or inspection switch) and a fault current breaker in the
electrical feeder according to regulations. These switches must switch off all-polo and have at least 3
mm contact distance. The place of installation must be near the washer and easily accessible.
•
Connect the washer to the customer’s equipotential bonding system. The connecting screw is located
in the machine base.
If the machine is mounted on a base, the base has to be connected to the equipotential bonding
system of the machine.
Connecting cable
The connecting cable may only be changed or replaced by the manufacturer, its customer service
representative or a similarly qualified person. Use an H07 RN-F type cable or equivalent.
Phase sequence of main power cable
Mains
No. of leads
PE
N
L1
L2
L3
1/N/~
3
green-yellow
blue
brown
-
2/-/~
3
green-yellow
brown
blue
-
3/N/~
5
green-yellow
blue
grey
brown
black
3/-/~
4
green-yellow
brown
grey
black
Connecting dosing units not made by Winterhalter Gastronom GmbH
A connection for dosing units not made by Winterhalter Gastronom GmbH is found in the machine base. This
connection is marked on the circuit diagram. If needed, a description of connection possibilities can be
ordered.
Commissioning (initial washing in) is carried out by a Winterhalter service engineer, who also trains the
operator in how to use the washer.
4
Commissioning
Once the washer is connected correctly to the customer's power supply and water inlet, contact the
Winterhalter works representative with responsibility for the location to arrange commissioning and
instruction in use of the dishwasher.
89007312
5
5
Description of the machine
5.1 Operating panel
The operating panel is situated in the upper part of the machine.
DOS
1
2
3 4 5
6
7
8
9
10
11
12
13
14
6
1
On/Off switch
2
Tank drainage / self-cleaning
3
Control lamp for fault
4
Control lamp for lack of detergent or rinse aid (optional)
5
Control lamp for lack of salt or external water treatment exhausted
6
Programme button normal programme
7
Temperature display – Boiler
8
Temperature display – Tank
9
Function button – activates the special programmes (10-13)
10
Short programme
11
Reduced rinse temperature (optional)
12
Not allocated
13
Intensive programme
14
Button area for special programmes
89007312
5.2 How the dishwasher works
When the machine is switched on, the boiler and tank fill up and are heated to operating temperature. The
programme button (6) is lit red during the heating up phase.
As soon as the target temperatures are reached (tank: approx. 60°C, boiler: approx. 85°C), the washer is
ready for operation. The programme button (6) then lights up green.
Please note: A special variant of the washer allows the boiler to be operated at 65 °C, primarily for washing
glasses.
The machine is operated using fully-automatic programmes. These consist of three steps: washing, draining
and rinsing. The programme button (6) is lit blue during the programme.
An integral dosing pump doses the rinse aid from a storage tank behind the front panel.
Depending on the machine version, detergent is added either manually (powder) or by means of an integral
or external dosing pump (liquid detergent). It is dosed either from the storage tank behind the front panel or
from a storage tank outside the machine.
Washing: The wash pump pumps the wash water from the tank onto the glasses via the wash arms and
jets. As the wash water circulates, it passes constantly through a filter system and the patented Mediamat
Cyclo (separator for suspended particles).
Draining: After washing, there is a brief pause to allow the wash water to drain off the glasses.
Rinsing: In the final step of the programme, the cleaned glasses are rinsed with fresh hot water to remove
any detergent residues and to heat up the glasses for optimum drying outside the machine. The rinsing
water also replaces the wash water.
Do not open the door while the programme is running. There is a risk of hot water spraying
out of the machine.
Do not sit or stand on the open door.
5.3 Wash programmes
The dishwasher can be operated with various wash programmes. The individual programmes are selected
by means of the control panel.
Programme (button)
Description
Normal programme (6)
For normal soiling
Medium drying time
Short programme (10);
For lightly soiled dishes
Short/no drying time
Intensive programme (13);
For heavy soiling
Long drying time
Programme with reduced rinse
temperature (optional) (11)
Tank drainage / self-cleaning (2)
For washing glasses
Programme duration: according to selected wash programme
Cleaning of the machine:
•
Circulation of the wash water inside the wash chamber
•
Pumping out the wash water
•
Flushing out the wash chamber with fresh hot water
•
Pumping out the used fresh water.
The washer switches off automatically when the cleaning
programme is finished.
89007312
7
6
Before washing
Turn water stop valve to open position.
Switch on the mains disconnecting device (mains switch) provided by the customer.
Checking the filter system:
Open the door.
Check that the filter cartridge and flat filter are inserted correctly.
Close the door.
Switch on machine:
Press On/Off switch (1), heating up phase begins.
The programme button (6) is lit red: the boiler and tank are filling and heating up.
8
89007312
Adding rinse aid and detergent1:
Only use detergent and rinse aid which are suitable for commercial washers. Do not use
normal washing-up liquid. This leads to large amounts of foam building up in the
washer.
We recommend the products developed by Winterhalter Gastronom. These are
specially developed to suit Winterhalter Gastronom washers.
Warning: Detergents for commercial dishwashers cause corrosion. Always follow the
instructions on the packaging and drums.
Do not mix different detergent products, since this could cause the dosing pump to
break down due to crystallisation (see Maintenance and care).
Check the amount of detergent1 and rinse aid when the symbol DOS lights up on the
operating panel.
Optional extra: an acoustic signal indicates that you have to top up the machine with
detergent or rinse aid.
To do this fold the lower panelling forwards.
The storage tanks are identified with “detergent” and “rinse aid”.
When filling, make sure that no detergent goes into the rinse aid container and
vice versa.
The programme button (6) is lit green: The tank and boiler have reached their target
temperatures.
The machine is now ready for operation.
Add the detergent powder2:
Open the door.
Do not load dishes at this stage.
Add approx. 50g detergent powder to the filter cartridge using a cup.
We recommend Winterhalter Gastronom detergent powder. Observe the recommended
dosage printed on the instruction label.
Close the door.
Start normal programme. For this, press button (6).
Detergent powder is mixed with wash water.
1
2
Detergent for machines with automatic detergent dosing only.
For machines without liquid detergent dosing only
89007312
9
Adding regenerating salt *:
* Only for machines with an integral water softener
The salt container inside the machine must be filled with regenerating salt when the
symbol lights up on the operating panel3.
You can do this while the machine is on: you do not have to switch off the machine or
drain the water.
The symbol goes out at the latest after the third cycle.
Open the screw cap of the salt container and fill the salt container up to the rim with
fresh water (only necessary the first time the machine is used). Place the funnel in the
charging hole and pour in 3 bags of Winter-halter special salt (=1.5kg).
Remove the funnel and clean the filling area from salt residues.
Screw the cap back on the salt container tightly without tilting it.
Then perform a washing program immediately to flush out any salt residues. Otherwise
there is a risk of rust forming in the filling area.
Only add regenerating salt to the salt tank!
The salt used should be very fine (max. grain size 5 – 7 mm). Salt tablets are not
suitable.
Do not add any other chemicals, such as detergent or rinse aid. These will cause
damage to the machine.
3
Note:
If the machine does not have an integral water softener and this symbol lights up, the connected external
water treatment system is exhausted and must be regenerated. Follow the instructions in the documentation
supplied with the water treatment system.
10
89007312
7
Washing
Before loading the dishes into the rack, first:
•
Remove large food residues.
•
Load plates facing forward.
•
Wash cutlery either vertically in cutlery inserts or horizontally in a flat rack. Make sure that the racks
are not filled too full.
Place knives in the cutlery boiler with the handle at the top.
Pre-soak any heavily soiled cutlery with dried-on food residues.
7.1 Washing with the normal programme
Push the full wash rack into the machine and close the door.
Press programme button (6). The programme button is lit blue while the programme is
running.
The programme button (6) is flashing green when the programme has ended and the
door has not yet been opened. As soon as the door of the machine is opened, the
flashing stops and the programme button 6 switches to a continuous green light.
The flashing programme button (6) indicates that the wash programme is complete and the door has not yet
been opened.
If the flashing disturbs you, the machine control system can be adjusted by an authorised service engineer to
prevent key 6 from emitting the flashing green light.
Open the door and remove the wash rack.
The intrinsic heat of the crockery and the effect of the rinse aid added to the rinsing
water combine to quickly dry the crockery with a bright and shiny finish.
Do not dry recently cleaned dishes with a towel to avoid spreading bacteria and germs.
Close the door once more.
Add more detergent powder4:
After 5 wash cycles, the concentration of detergent in the machine will have dropped to
such an extent that optimum results are no longer obtained. More detergent must be
added:
Open the door
Add approx. 45G detergent powder to the filter cartridge using a cup.
Close the door.
4
For machines without liquid detergent dosing only
89007312
11
7.2 Washing with the special programmes
Press the function button to activate the area with the special programmes. Press the
button again to deactivate this area.
The special programmes can now be used in
addition to the normal programme. The number
of special programmes depends on the
equipment supplied with the machine.
If a button is lit, then it can be used.
6
9
The temperatures are also shown now.
This means that once a special programme has been selected, it will always be activated by pressing button
6. To clear the special programme press button 9 again. If switched off the machine will revert to the normal
programme.
Short programme or intensive programme
Use: Depending on the level of soiling on the wash items, select one of the two special programmes:
Press one of the two buttons to select the short or intensive programme.
Press the button to start the selected programme.
Optional: Programmes with reduced rinse temperature
Usage: The temperature required for rinsing glasses is lower than the rinse temperature for crockery in order
to prevent glass breakage.
Important: The first wash cycle after changing over will take place at the higher rinse temperature.
Press the function button, then start the required programme.
The function button flashes while it is selected.
Normal programme with reduced rinse temperature
Short programme with reduced rinse temperature
Intensive programme with reduced rinse temperature
12
89007312
8
After washing
8.1 Draining the tank; self-cleaning programme
Remove the rack.
Close the door.
Hold down the function button for three seconds to start the cleaning programme. The
function button flashes.
The wash water is then circulated inside the wash chamber while it is pumped out. The machine interior is
finally flushed out with hot fresh water. The washer switches off automatically when the cleaning programme
is finished. The operating panel is no longer lit.
8.2 Switching off
The end of the cleaning programme automatically switches off the dishwasher controller, although the
machine is not yet isolated from the power supply.
Turn water stop valve to closed position5.
Switch off the mains disconnecting device (mains switch) provided by the customer.
Now the machine is isolated from the power supply.
5
If an external water treatment system is used, follow the instructions in the system documentation.
89007312
13
9
Maintenance and care
The washer should be regularly cleaned to ensure that it remains reliable and in good working order for
many years to come.
In addition to daily cleaning, we recommend that you have the washer serviced at least twice a year by a
Winterhalter service engineer.
Do not spray the machine or direct vicinity (walls and floor) with a water hose, steam jet or highpressure cleaner.
When cleaning the floor, take care to avoid flooding the substructure of the machine, in order to
prevent the uncontrolled entry of water.
9.1 Every day after washing
Remove the filter cartridge, clean it under running water and reinsert it.
Remove the bottom wash trays and rinse them with water.
The endcaps of the wash trays are removeable.
Check, if the wash jets are clean.
Remove the flat filter with the filter cartridge and clean it under running water.
Use a brush to remove any deposits inside the machine.
During cleaning, make sure that no rusting foreign bodies remain inside the washer.
This can cause the interior to rust. The foreign bodies may come from non-stainless
steel items washed, cleaning aids, damaged wire racks or from supply lines which have
not been rust-proofed.
Reinsert the flat filter with the filter cartridge.
Reinsert the bottom wash trays.
14
89007312
Clean the outer walls of the washer with cleaning products for high grade stainless steel.
We recommend Winterhalter Gastronom high grade stainless steel cleaner and
Winterhalter high grade stainless steel protection.
Open the door slightly using the to the vent position. This will allow the interior to dry
more easily, which is important for long-lasting protection against corrosion – even for
stainless steel.
9.2 As required
If the upper washing arm is particularly dirty:
Take out the upper washing-rinsing system. Loosen the screw with a coin. Rinse the washing arm off with
water.
Check that the nozzles are clean.
Put the washing-rinsing system back in. Tighten the screw again.
FI fault-current circuit-breaker:
Check the FI fault current circuit breaker on your premises regularly according to
regulations by pressing the function test knob.
Descaling
Machines that are operated in hard water areas and do not have an integral water softener or are not
connected to an external water treatment system must be descaled from time to time. There are descaling
agents specially designed for commercial washers available for this purpose.
Warning: Descaling agents for commercial washers cause corrosion. Always follow the
instructions for use and safety instructions on the packaging and drums.
Changing the detergent type.
If changing to a different detergent type (even one by the same manufacturer), you must rinse the suction
and pressure hoses with fresh water before connecting the new detergent container.
Otherwise, the mixing of different types of detergent will cause crystallisation, which may result in a
breakdown of the dosing pump.
Failure to observe this condition will invalidate the guarantee and product liability claims vis-à-vis
Winterhalter Gastronom GmbH.
89007312
15
10 Faults
10.1 Faults where it is not necessary to call Winterhalter Services
You can rectify minor faults yourself following the steps described in the table below. If you are unable to
rectify the fault, contact Winterhalter service.
DANGER! Danger of death due to live components!
Do not open any panels or expose any parts of the machine if tools are necessary to do so.
Risk of electric shock.
Work on the electrical equipment is only to be carried out by specialist personnel. First
disconnect the washer from the mains.
Do not switch the washer on again until the cause of the fault has been identified.
Turn off the main switch on the machine. The dishwasher is then isolated from the power
supply.
Display
The washer
cannot be
switched on
Cause
The mains disconnecting device (mains Switch on the mains disconnecting device
switch) provided by the customer is not (mains switch) provided by the customer.
switched on.
Customer’s fuses blown
Door not fully closed
Wash
programme does
not start
Machine not ready for operation
Detergent or rinse aid storage tank is
empty
Dishes are not
clean
Filter cartridge and/or flat filter is dirty
Wash jets in the wash arms blocked
Functional fault in the water treatment
Limescale buildup, even though
the machine has
an integral water
softener
Display shows:
16
Remedy
Replace the customer’s fuses
Close the door.
Switch on the mains disconnecting device
(mains switch) provided by the customer,
open the water stop valve and switch on the
machine
Top up the storage tank
Clean the filter cartridge and flat filter
Clean wash jets. The end pieces of the wash
fields can be removed.
Call Winterhalter service engineer
No regenerating salt added
Add regenerating salt. If this does not bring
about an improvement, call Winterhalter
service
Out of regeneration salt
Top up with regeneration salt and perform a
washing program immediately to flush out
any salt residues. Otherwise there is a risk
of rust forming in the filling area. The symbol
goes out at the latest after the third cycle.
External water treatment system needs
regenerating
Regenerate external water treatment system
89007312
Display
Cause
Remedy
Lack of detergent or rinse additive
Re-fill detergent or rinse additive
Optional: audible
Lack of detergent or rinse additive
signal
Re-fill detergent or rinse additive
DOS
Switch off machine (press on-off switch).
Then Err will appear on the control panel
accompanied by a fault code.
Display shows
Water stop valve closed
Malfunction
If error code 20 is shown, close the water
shut-off valve and notify Winterhalter
customer service.
If other error codes are displayed, check
whether the water shut-off valve is opened.
Then switch on the machine again.
If the fault message appears again, note the
fault code and get in touch with the
appropriate Winterhalter customer service
Button is flashing
If the dishes have not been sufficiently
blue
pre-rinsed, so much dirt may have
accumulated on the flat filter and the
cartridge filter that the wash
programme's operation is interrupted.
The wash pump turns itself off and the
programme button flashes blue.
89007312
•
Turn off the machine, the programme
button continues to flash.
•
Remove the filters, clean and replace.
After 2 minutes the flashing will stop.
Turn the machine on again and
continue to use.
•
In order to avoid further problems
please ensure better pre-rinsing.
17
10.2 Faults where it is necessary to call Winterhalter Service
•
Flashing light: Temperature in boiler or tank is greater than 95°C.
Caution: Surface is very hot. The fault (3) symbol appears together with the fault code
Err 2 or Err 3. Switch off the mains disconnecting device (mains switch) provided by the
customer.
Notify the Winterhalter service team immediately.
When the machine can no longer be used because of internal malfunctions, the machine turns itself off
automatically and displays an error code
Display
Machine switches
off and displays
Err
1
Machine switches
off and displays
Err
6
Machine switches
off and displays
Err
20
Machine is
switched off and
displays
Err
..21
Machine switches
off and displays
nothing at all
Possible cause
Remedy
Fault inside machine
Notify Winterhalter customer service
Fault inside machine or
water drain is clogged
Notify Winterhalter customer service or remove
cause of clogging.
Magnetic valve not closing
Close the water shut-off valve and notify
Winterhalter customer service.
Magnetic valve not closing
Close the water shut-off valve and notify
Winterhalter customer service.
Fault inside machine
Notify Winterhalter customer service
11 Emissions
Noise
The workplace related emission value LpAeq according to DIN EN ISO 11202 is <60dB(A)
Water vapour
The machine gives off water vapour during operation (e.g. when you open the door). Protect adjacent
wooden furniture to prevent it absorbing moisture and swelling up.
18
89007312