1
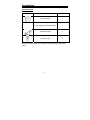
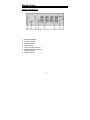
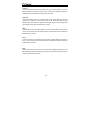
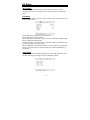
Docking Station
ADS-2000
User’s Manual
20060623
Table of Contents
Important Safety Instruction-------------------------------------------- 3
Accessories-----------------------------------------------------------------
5
Features ---------------------------------------------------------------------- 6
Front View ------------------------------------------------------------------- 7
Display Panel----------------------------------------------------------------- 8
Rear Panel & Side Panel---------------------------------------------------- 9
Remote Control ----------------------------------------------------------- 10
Attaching & Detaching Portable DVD player---------------------- 13
System Connections----------------------------------------------------------- 14
TV Setup -------------------------------------------------------------------------- 17
AV Setup -------------------------------------------------------------------------- 21
Troubleshooting ------------------------------------------------------------- 24
Specifications ---------------------------------------------------------------- 25
-2-
Important Safety Instruction
The lightning flash with arrowhead symbol, within an equilateral triangle, is intended
to alert the user to the presence of un-insulated “dangerous voltage” within the
product’s enclosure that may be of sufficient magnitude to constitute a risk of
electric to persons.
The exclamation point within an equilateral triangle is intended to alert the user to
the presence of important operating and maintenance (servicing) instructions in the
literature accompanying the appliance.
CAUTION
1.
The product contains a low-power laser device. In order to ensure the safety of the laser
device, do not remove any cover and attempt to repair the unit. If any service is needed,
please contact the distributor or its authorized service center.
2.
To reduce the risk of electric shock, do not remove the cover (or back). No user-serviceable
parts inside. Refer servicing to qualified service personnel. Unplug the product from the wall
outlet before servicing or when it is unused for a long period of time.
3.
The manufacturer should not hold responsibility for the damage caused by any substitutions
and modifications of the product without authorization from the manufacturer or authorized unit.
WARNING
The apparatus shall not be exposed to dripping or splashing and that no objects filled with liquids,
such as vases, shall be placed on the apparatus.
WEEE
This product contains electrical or electronic materials. The presence of
these materials may, if not disposed of properly, have potential adverse
effects on the environment and human health. Presence of this label on
the product means it should not be disposed of as unsorted waste and
must be collected separately. As a consumer, you are responsible for
ensuring that this product is disposed of properly. To find out how to
properly dispose of this product, please go to www.polaroid.com and
click on “Company“ or call the customer service number for your country
listed in the instruction manual.
-3-
Important Safety Instruction
NOTES
1. Read these instructions.
2. Keep these instructions.
3. Heed all warnings.
4. Follow all instructions.
5. Do not use this apparatus near water.
6. Clean only with dry cloth.
7. Do not block any ventilation openings. Maintain well ventilated conditions around
the product. Do not put product on bed, sofa or anything that blocks ventilation.
Install according to the manufacturer’s instructions.
8. Do not install near any heat sources such as radiators, heat registers, stoves or
other apparatus (including amplifiers) that produce heat.
9. Read, heed and follow all instructions to ensure correct and safe installation and
interconnection of the apparatus;
10. The apparatus shall not be exposed to dripping or splashing and that no objects
filled with liquids, such as vases, shall be placed on the apparatus;
11. The mains socket-outlet shall be installed near the apparatus and the mains plug
shall remain readily operable;
12. Protect the power cord from being walked on or pinched particularly at plugs,
convenience receptacles, and the point where they exit from the apparatus.
13. Only use attachments/accessories specified by the manufacturer.
14. Use only with the cart, stand, tripod, bracket, or table specified by the
manufacturer, or sold with the apparatus. When a cart is used, use caution when
moving the cart/apparatus combination to avoid injury from tip-over.
15. Unplug the apparatus during lightning storms or when unused for long periods of
time.
16. Refer all servicing to qualified service personnel. Servicing is required when the
apparatus has been damaged in any way, such as power-supply cord or plug is
damaged, liquid has been spilled or objects have fallen into the apparatus, the
apparatus has been exposed to rain or moisture, does not operate normally, or
has been dropped.
-4-
Accessories
Accessories list
ITEM
NAME
QTY
Owner’s Manual
1
Power-supply Cord with AC adapter
1
Audio/Video Cable
1
Remote Control
1
Note: accessories and their parts numbers are subject to change without prior
notice.
-5-
Features
The Docking Station is designed for connecting to a compatible portable DVD player. It
features an electrical connection interface that enables the portable DVD to effectively
serve as a desktop DVD. It is integrated with connectors for peripheral devices to
eliminate complicated connections and save valuable space around the unit. With the
Docking Station, you can enjoy the expansion possibilities of desktop DVD with the
portability of a portable DVD.
Multiple Mode
z
z
z
DVD
TV
External Audio & Video mode
AV Input & AV Output
A/V input and output extend the connections for a portable DVD player.
Switching Power Adapter
Automatically adapts to the voltage required.
TV Functions
z
z
z
Clear TV signal reception.
Search for TV channels automatically.
Automatically memorize the channels.
Clock Function
Displays the time even if in stand-by mode or if there is no DVD player attached. Timer
will turn the docking station and attached DVD player on and off at desired times.
Designed with alarm function.
-6-
Front View
Front Panel Drawing
1.
2.
3.
4.
5.
Power Indicator: in standby mode, it is red; when in operation, it turns green.
Remote Sensor: Receives remote control signal for operation.
Display panel: Displays the time and status.
SOURCE button: Press to shift among DVD, TV, AV1 and AV2 mode.
Menu: Press to adjust the Picture standard, including Brightness, Contrast, Color,
Language, or Reset all items.
6. ▲CH+/▼CH- button: Press to select items in the setup menu. Press to select
channels in TV mode. Press to adjust the value when setting the time on the
display panel.
7. ◄VOL - /►VOL+ buttons: Press to select items in the setup menu. Press to
adjust the value in the picture setup menu. Press the ►VOL+ button to enter the
selection. Press the ◄VOL- button to exit the selection.
8. MUTE button: Press to mute off the speakers output.
9. 16:9/4:3 button: Press to change the screen aspect ratio between 16:9 and 4:3.
10. POWER button: Press to enter or exit the STANDBY mode.
11. Spring Tab: Used to spring the portable DVD player up when it is removed. (See
page12)
12. Fixing hooks: Fix the portable DVD player on the Docking Station. (See page12)
13. Docking jack: For connection with a portable DVD player.
-7-
Display Panel
Display Panel Drawing
1.
DVD status indicator
2.
AV status indicator
3.
TV status indicator
4.
Alarm indicator
5.
Hour or character indicators
6.
Minute or character indicators
7.
PM time indicator
8.
AM time indicator
-8-
Rear Panel & Side Panel
Rear Panel Drawing
1. ANT INPUT jack
Connects to external antenna to receive the TV program in TV mode
2. L/R AUDIO OUT jack
Output the audio signal to external equipment, such as amplifiers, etc.
3. VIDEO OUT jack
Output the video signal to external equipment such as monitors, etc.
4. L/R AUDIO IN jack
Connects to external audio signal source
5. VIDEO input jack
Connects to external video signal source
6. DC 12V input jack
Connects to the AC adapter
7. Main Power Switch
Side Panel Drawing
1. Speakers: output high quality
stereo sound.
2. Release buttons: Slide these
buttons to release the portable
DVD player from the Docking
Station. (See page 12)
-9-
Remote Control
Preparation
Using Of Remote Control
Refer to the drawing and take out the
Point the remote control towards the
main unit when operating. The remote
control works best at a distance less
than 7m and at an angle of up to 60°to
the front of the unit. No obstacles may
stand in the way between remote control
and infrared sensor.
empty battery receptacle.
Insert the battery into the receptacle.
Make sure the polarity matches the
marks inside the component.
The batteries normally last for about six
months. This depends on how often and
for what operations the remote control is
Insert the receptacle into the remote
used.
control.
If the remote control unit fails to work
even when it is operated near the player,
replace the battery.
If the remote control is not used for a
long period of time, remove the battery
from the compartment, to prevent
damage by leakage.
- 10 -
Remote Control
Remote Control Drawing
1. POWER button
Press to access to or exit the STANDBY mode.
2. TV button
Press to enter TV mode.
3. DVD button
Press to enter DVD mode.
4. AV1 button
Press to shift to external AV1 input mode.
5. AV2 button
Press to shift to external AV2 input mode.
- 11 -
Remote Control
6. Press to select menu items or settings. Press buttons to adjust value in the
picture setup menu. Press buttons to select channels forward and backward
in TV mode. Or press to adjust the value of time when setting time on the display
panel. Press to enter the selection. Press to exit the selection.
7. ENT button
Press to confirm selections.
8. MENU button
Press to access the menu of current mode.
9. CH +/Press to select channels in TV mode.
10. MUTE button
Press to mute off the speakers output.
11. 0-9 number buttons
Select numbers by pressing these buttons.
One-digit number: press the number button and press the ENT button or wait 2
seconds to confirm.
Two-digit number: press the first number and input the second number in 2
seconds.
Three-digit number: press the first number, then input the second number in 2
seconds, and input the third number in the next 2 seconds.
12. CH DISP
In TV mode, display the current channel information.
13. P-MODE button
Press to change the picture modes: Bright, Soft or Nature.
14. LAST button
Press to back the last channel that you watch in TV mode.
15. 16:9/4:3 button
Press to change the screen aspect ratio between 16:9 and 4:3.
16. VOL-/+ button
Press to adjust the volume.
Note: When the portable DVD player is connected to the docking station, the mute
button on the docking station remote control mutes the docking station only. If you
want to turn off the volume of the portable DVD player, adjust the volume control on
the portable DVD player to its minimum volume level.
- 12 -
Attaching & Detaching Portable DVD player
Note: Do not connect the power cord until all other connections have been made.
Attaching Portable DVD player to Docking Station
Follow the steps below to attach the portable DVD player to the Docking Station. It is
advised to attach the rechargeable battery to the portable DVD player before this
connection.
Step1: Center the player on the Docking Station and line up the 4 slots on the bottom
of the player with the 4 fixing hooks on the Docking Station.
Step2: Press the portable DVD player down gently with two hands and the fixing
hooks will fix the portable DVD player on the Docking station from moving.
Detaching Portable DVD player from Docking Station
Step1: Slide the two release buttons toward the front of the Docking Station to unlock
the fixing hooks. The five spring tabs will spring the portable DVD player up.
Step2: Remove the portable DVD player from Docking Station.
- 13 -
System Connections
•
•
Do not connect the power cord until all other connections have been made.
Ensure that you observe the color cord when connecting audio and video cables.
Expand the Connections
The following drawing shows a sample of expanding the connections of a portable
DVD player with Docking Station:
After connecting with external AV source by AV jacks, please turn on the power of the
unit and press the SOURCE button on the front panel to shift to AV1 mode, or press
the AV1 button on the remote control to shift the mode directly.
If the AV source is from docking station, please press the SOURCE button on the front
panel to shift to AV2 mode, or, press the AV2 button on the remote control to shift the
mode directly.
- 14 -
System Connections
Connecting to TV Signal Input Source
The unit can be connected to a TV antenna to receive TV programs.
Connections should be made as follows:
After connecting the antenna, turn on the power of the Docking Station; press the
SOURCE button on the front panel or the TV button on the remote control to switch to
TV mode.
- 15 -
System Connections
Connecting To the Power Adapter
This unit is powered via the switching power adapter (supplied):
1.
Connect the AC adapter to jack marked with “DC 12V IN” on the rear panel of the
unit.
2.
3.
Plug the other end of the power cord to the grounded electrical socket.
When not using the unit, turn off the power of the unit first, and then unplug the
power supply to prevent malfunctions.
- 16 -
TV Setup
Basic Operation
Connect the antenna to the antenna jack on the rear panel. After connecting the
antenna, connect the power supply cord. If the player is in standby mode, press the
POWER button on the front panel to turn on the power.
Press the TV button on the remote control to shift to TV mode.
Press the buttons on the remote control to select the desired channel, or press
the number buttons to select your desired channel.
Some preferences can be preset:
LCD Setup
Press the MENU button once on the remote control to enter LCD setup menu, and
screen display as shown:
Use the ▼▲ buttons to select the item you want to set.
Use the ► ◄ buttons to adjust or select.
Use the ▼ ▲ buttons to select the Language, press the ► ◄ buttons to select English,
French or Spanish for OSD language.
To restore a setting to the original value, use the ▼▲ buttons to select Default, then
press the ► buttons to confirm the change.
Press the ▼▲ buttons to highlight the LCD sign on the top of the menu, then press ►
button on the remote control to enter TV Setup menu. Press the MENU button to exit
the setup.
TV Setup
Press the MENU button and display the setup menu, press the ► ◄ buttons to select
the TV sign, the screen will display as below:
- 17 -
TV Setup
Use the ▼▲ buttons to select the item you want to set.
Use the ► ◄ buttons to select the item and enter it.
Press the ▼▲ buttons to highlight the TV sign on the top of the menu, then press the
► button to enter the Video setup menu; press the ◄ button to return to the LCD
setup menu. Press the MENU button to exit the setup.
System
Use the ►,◄ buttons to select TV system: Secam L/L’, Pal D/K, Pal B/G, Pal I.
Channel
Use the ►, ◄ buttons to change the channel. You can select from channels 1 to 125.
Skip
When the ► button is pressed to turn the function ON, it will skip the current channel
Press ▼▲ to select channels.
When the ◄ button is used to turn the function OFF, it will play the channels in
sequence when selecting under normal playback status.
Blue Screen
This function is only available in no signal input mode.
Use the ◄► buttons to turn the function ON or OFF.
Fine Tuning
Use the ▼▲ buttons to select Fine Tuning, and then press the ► ◄ buttons to tune
forward or backward from the current channel
Auto Memory
Use the ▼▲ buttons to select Auto Memory, press the ► button to enter auto memory
mode:
The auto memory will take a few minutes. The unit will search channels from the
lowest channel to the highest channel in the standard channel list. When tuning
operations are complete the unit will exit and store the channels by sequence in the
memory.
During tuning, press the ◄ button to exit the auto memory.
- 18 -
TV Setup
Video Setup
Press the MENU button and display the setup menu, press the ► ◄ buttons to select
the Video setup sign (the third sign), the screen will display as below:
Use the ▼▲ buttons to select, press the ► ◄ buttons to enter the select video mode.
Press the ▼▲ buttons to highlight the video sign on the top of the menu, then press
the ► button to enter the Clock menu; press the ◄ button to return to the TV setup
menu. Press the MENU button to exit the setup.
Clock Setup
Press the MENU button and display the setup menu, press the ► ◄ buttons to select
the clock sign, the screen will display as below:
Use the ▼▲ buttons to select the item you want to set.
Use the ► ◄ buttons to enter the item or to select.
Press the ▼▲ buttons to highlight the Clock sign on the top of the menu, then press
the ► button to enter the LCD setup menu; press the ◄ button to return to the video
setup menu. Press the MENU button to exit the setup.
Timer
Use the ► ◄ direction buttons to select ON or OFF. This function allows you to set
the start time and end time of the desired signal source. No matter what mode the unit
is in, it will automatically start the playback of the desired signal source.
Select ON to activate the function; select OFF to disable the function.
- 19 -
TV Setup
Power on
To set the playback start time of the signal source, use number buttons to input the
desired start time in sequence of hour, minute. Press the ► ◄ direction buttons to
shift between AM and PM. Press the ENT button to confirm.
Power off
To set the playback end time of the signal source, use number buttons to input the
desired time in sequence of hour, minute. Press the ► ◄ direction buttons to shift
between AM and PM. When the playback of the signal source is over, the player will
enter standby mode. Press the ENT button to confirm.
Alarm
To set the alarm time, use number buttons to input the desired start time in sequence
of hour, minute. Press the ► ◄ direction buttons to shift between AM and PM. Press
the ENT button to confirm.
Clock
To set the clock time, use number buttons to input the desired start time in sequence
of hour, minute. Press the ► ◄ direction buttons to shift between AM and PM. Press
the ENT button to confirm.
Note:
The function is active as long as the unit is continuously supplied with power. The unit
will automatically play the selected input signal at the set start time and enter standby
mode at the set end time each day.
- 20 -
AV Setup
AV Function
The docking station has additional AV input and output. When an AV source is
connected, press the AV1 or AV2 button on the remote control to enter external AV
mode.
LCD Setup
Press the MENU button once on the remote control to enter LCD setup menu, and
screen display as shown:
Use the ▼▲ buttons to select the item you want to set.
Use the ► ◄ buttons to adjust or select.
Use the ▼ ▲ buttons to select the Language, press the ► ◄ buttons to select English,
French or Spanish for OSD language.
To restore a setting to the original value, use the ▼▲ buttons to select Reset, then
press the ► buttons to confirm the change.
Press the ▼▲ buttons to highlight the LCD sign on the top of the menu, then press ►
button on the remote control to enter Video Setup menu. Press the MENU button to
exit the setup.
Video Setup
Press the MENU button and display the setup menu, press the ► ◄ buttons to select
the Video setup sign (the third sign), the screen will display as below:
- 21 -
AV Setup
Use the ▼▲ buttons to select, press the ► ◄ buttons to enter the select video mode.
Press the ▼▲ buttons to highlight the video sign on the top of the menu, then press
the ► button to enter the Clock menu; press the ◄ button to return to the LCD setup
menu. Press the MENU button to exit the setup.
Clock Setup
Press the MENU button and display the setup menu, press the ► ◄ buttons to select
the clock sign, the screen will display as below:
Use the ▼▲ buttons to select the item you want to set.
Use the ► ◄ buttons to enter the item or to select.
Press the ▼▲ buttons to highlight the Clock sign on the top of the menu, then press
the ► button to enter the LCD setup menu; press the ◄ button to return to the video
setup menu. Press the MENU button to exit the setup.
Timer
Use the ► ◄ direction buttons to select ON or OFF. This function allows you to set
the start time and end time of the desired signal source. No matter what mode the unit
is in, it will automatically start the playback of the desired signal source.
Select ON to activate the function; select OFF to disable the function.
Power on
To set the playback start time of the signal source, use number buttons to input the
desired start time in sequence of hour, minute. Press the ► ◄ direction buttons to
shift between AM and PM. Press the ENT button to confirm.
Power off
To set the playback end time of the signal source, use number buttons to input the
desired time in sequence of hour, minute. Press the ► ◄ direction buttons to shift
between AM and PM. When the playback of the signal source is over, the player will
enter standby mode. Press the ENT button to confirm.
- 22 -
AV Setup
Alarm
To set the alarm time, use number buttons to input the desired start time in sequence
of hour, minute. Press the ► ◄ direction buttons to shift between AM and PM. Press
the ENT button to confirm.
Clock
To set the clock time, use number buttons to input the desired start time in sequence
of hour, minute. Press the ► ◄ direction buttons to shift between AM and PM. Press
the ENT button to confirm.
Note:
The function is active as long as the unit is continuously supplied with power. The unit
will automatically play the selected input signal at the set start time and enter standby
mode at the set end time each day.
Note:
Under AV mode, if there is no signal, the LCD screen will be blue screen.
In the DVD mode, the setup menus are the same as the menus in the AV mode,
you can go on with the setups according to the operations in the AV mode.
- 23 -
Troubleshooting
SYMPTOM
CHECK ITEM
z
The attached
portable DVD player
does not work.
z
z
z
z
There is no TV
function.
z
z
There is no picture or
picture is unsteady.
z
z
z
The remote control
does not work.
z
z
z
Make sure the Docking Station power is on.
Make sure the portable DVD player is properly
connected with the Docking Station. If not, attach the
DVD player again. (See page12).
Make sure the SOURCE mode has been switched to
the DVD mode.
Make sure the SOURCE mode has been switched to
the TV mode.
Make sure the portable DVD player is properly
connected with the Docking Station. If not, attach the
DVD player again. (See page 12)
Make sure the TV cable is firmly connected with the
Docking Station.
Make sure the TV channels have been programmed
with the Auto Memory. (See page17)
Make sure the video type of the AV signal source is
PAL/SECAM.
Make sure system connection is correct.
Make sure there are no obstructions between the
remote control and the player.
Make sure the remote control is pointing at the
Docking Station’s remote receiver.
Make sure battery is inserted correctly.
Replace weak battery
- 24 -
Specifications
This unit is compatible with all PDM series players with Docking Jack.
Power
AC100V~ 240V, 50/60Hz
TV Type
PAL/SECAM
Power Consumption
≤30W
Dimension
230mm X 221mm x 43mm (W/H/D)
Weight
About 0.75 kg
DESIGN AND SPECIFICATIONS ARE SUBJECT TO CHANGE WITHOUT NOTICE
For service, support and warranty information visit www.polaroid.com.
"Polaroid" and “Polaroid and Pixel” are trademarks of Polaroid Corporation, Waltham,
MA, USA.
- 25 -