1
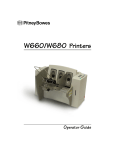
W983 Power Stacker
W863 Ink Dryer
for DA Series Printers
Operator Guide
SV61228 Rev. A
Stacker_Dryer Op Guide Book.indb 1
3/30/2004 10:26:33 AM
FCC Compliance
This equipment had been tested and found to comply with the limits
for a Class A digital device, pursuant to Part 15 of the FCC rules.
These limits are designed to provide reasonable protection against
interference when the equipment is operated in a commercial environment. This equipment generates, uses, and can radiate radio
frequency energy, and if not installed and used in accordance with
the users manuals, may cause harmful interference to radio communications. Operation of this equipment in a residential area is likely to
cause harmful interference in which case the user will be required to
correct the interference at his own expense.
CAUTION: Changes or modifications to this equipment not expressly
approved by the party responsible for compliance could void the
user’s authority to operate the equipment.
Shielded cables must be used with this unit to insure compliance
with Class A limits.
Canadian DOC Compliance
This digital apparatus does not exceed in the Class A limits for radio
noise emissions from digital apparatus set out in the Interferencecausing Equipment Regulations (Standard ICES-003) of the Canadian Department of Communications.
Le present appareil numerique n’emet pas de bruits radioelectriques
depassant les limites applicables aux appareils numeriques de la
class A prescrites dans le Reglement sur le brouillage radioelectrique
edicte par le ministere des Communications du Canada.
NOTE: This equipment has been tested and found to comply with the
U.S. Standard for Safety UL1950, Third Edition, Safety of Information
Technology Equipment including Electrical Business Equipment and
Canadian Standards C22.2 No 950-95, Third Edition, Safety of Information Technology Equipment including Electrical Business Equipment.
First Edition, March 2004
© 2004 Pitney Bowes Inc.
All rights reserved. This book may not be reproduced in whole or
in part in any fashion or stored in a retrieval system of any type or
transmitted by any means, electronically or mechanically, without the
express written permission of Pitney Bowes Inc.
We have made every reasonable effort to assure the accuracy and
usefulness of this manual, however, we cannot assume responsibility
for errors or omissions or liability for the misuse or misapplication of
our products. AddressRight® is registered trademark of Pitney Bowes.
Stacker_Dryer Op Guide Book.indb 2
3/30/2004 10:26:42 AM
W983 Stacker/W863 Dryer Operating Guide
Table of Contents
Safety Summary ....................................................................3
W983 Power Stacker
Controls and Indicators .........................................................5
Operator Panel ...............................................................5
Conveyor Deck ...............................................................6
Connector and Side Panels ............................................7
Optional Stand for Stacker ..............................................8
Technical Specifications ........................................................9
Materials Specifications .........................................................9
Stacker Setup Guidelines ....................................................10
Media, Stacker Height and Distance.............................10
Hold Down Assembly ....................................................10
Full Arm Fixture and Full Arm Tip ..................................10
Speed Control ............................................................... 11
Stacker Job Setup ............................................................... 11
Adjust Stacker Height and Distance ............................. 11
Adjust Media Stop .........................................................12
Adjust Stacker Full Arm .................................................13
Adjust Hold Downs ........................................................14
Set Conveyor Belt Speed..............................................14
Auto/Manual Switch ......................................................14
Power Switch ................................................................14
Full Light (Red LED) .....................................................14
Stacker Setup Tables .............................................. 15-19
Stacker Tips and Troubleshooting .......................................20
Cleaning ........................................................................20
Smudged Addresses .....................................................20
Jams .............................................................................20
Fuse Replacement ........................................................20
SV61228 Rev. A
Stacker_Dryer Op Guide Book.indb 1
1
3/30/2004 10:26:42 AM
W983 Stacker/W863 Dryer Operating Guide
Table of Contents
W863 Ink Dryer
Controls and Indicators .......................................................21
Technical Specifications ......................................................21
Dryer Operation ...................................................................22
Dryer Job Setup ..................................................................23
Adjust Dryer Height .......................................................23
Dryer Tips and Troubleshooting ..........................................24
Clearing .........................................................................24
Jams .............................................................................24
Fuse Replacement ..................................................24, 25
Troubleshooting Table ...................................................26
2
Stacker_Dryer Op Guide Book.indb 2
SV61228 Rev. A
3/30/2004 10:26:43 AM
W983 Stacker/W863 Dryer Operating Guide
Safety Summary
Various messages are used throughout this guide to alert you to
potentially hazardous or error causing conditions. The messages are
as follows:
• WARNING – alerts you to conditions or practices
that could cause serious injury.
• CAUTION – alerts you to conditions or practices
that could cause damage to the equipment or to the
material being run.
• IMPORTANT–alerts you to conditions or practices
that could adversely affect equipment operation if
instructions are not followed exactly.
• NOTE – provides a comment or explanation of the
associated topic.
When using this machine, follow the normal safety precautions for all
office equipment:
•
•
•
•
•
•
•
Keep loose clothing, jewelry and long hair away from all moving
parts.
Avoid touching moving parts or materials while the machine is in
use. Before clearing a jam, be sure machine mechanisms come
to a stop.
Read all instructions before attempting to operate this
equipment.
Use this equipment only for its intended purpose.
To reduce the risk of fire and/or electric shock, do not attempt
to disassemble this machine. All areas of the machine requiring
disassembly should be accessed only by your Pitney Bowes
Customer Service Representative. If service is required, contact
your Pitney Bowes Customer Service Representative.
Do not remove covers. This machine cabinet serves to enclose
hazardous parts. If the machine has been dropped or the
cabinet has been damaged in any way, notify your Pitney Bowes
Customer Service Representative.
To protect against electric shock, plug the machine into properly
grounded wall outlets only.
SV61228 Rev. A
Stacker_Dryer Op Guide Book.indb 3
3
3/30/2004 10:26:43 AM
W983 Stacker/W863 Dryer Operating Guide
•
•
•
•
•
•
•
•
Be certain that the area in front of the wall outlet into which this
machine is plugged is free from obstruction.
The power cord wall plugs are the primary means of
disconnecting the machine from the AC supply.
The wall outlet should be near the machine and easily
accessible.
DO NOT use an adapter plug on the line cord or wall outlet.
DO NOT remove the ground pin from the line cord
Ground must be properly connected before powering machine.
Do not alter or defeat the grounding system throughout the
machine in any way.
Avoid using wall outlets that are controlled by wall switches or
shared with other equipment. DO NOT route the power cord over
sharp edges or let it be trapped between furniture. Insure there is
no strain on the power cord and that it does not become jammed
between the equipment, walls or furniture.
Be certain the area in front of the wall outlets into which the
machine is plugged are free from obstruction.
4
Stacker_Dryer Op Guide Book.indb 4
SV61228 Rev. A
3/30/2004 10:26:43 AM
W983 Stacker/W863 Dryer Operating Guide
W983 Power Stacker Controls and Indicators
Operator Panel
3
1
4
1
2
3
4
2
Power Switch - This is a rocker switch with indicator light. Press
the top in to turn the Stacker on. Press the bottom in to turn the
Stacker off.
Speed Adjustment Knob - To eliminate possible ink smudging
of the printed address, you can vary the speed of the conveyor
belts so that the mailpieces are separated (do not overlap) as
they are delivered to the belt. Turn clockwise to increase speed
and counterclockwise to decrease speed.
Auto/Manual Switch - This is a rocker switch. Press the top in
to select Automatic mode. In automatic mode, the Stacker belts
will move when the printer is feeding mailpieces and stops the
printer when the Stacker is full. Press the bottom in to select
manual mode. In Manual mode, the Stacker runs constantly
(independent of the printer).
Stacker Full Light - This LED flashes when the Stacker ramp is
full.
SV61228 Rev. A
Stacker_Dryer Op Guide Book.indb 5
5
3/30/2004 10:26:43 AM
W983 Stacker/W863 Dryer Operating Guide
Conveyor Deck
1
3
2
4
1
2
3
4
Media Stop - This plate is adjusted so that mailpieces from the
printer hit the stop and drop flat onto the conveyor belt. The
height adjustment handles materials of varying thicknesses.
Stacker Full Arm Fixture - Sets the stop position for mailpieces
on the ramp and raises/lowers full arm.
Stacker Full Arm - This arm is adjusted so that the mailpieces
stack in an orderly sequence for retaining presort order and stop
the printer when the Stacker is full.
Hold Down Springs and Rollers - These springs and rollers are
adjusted to keep the mailpieces in contact with the conveyor belts.
6
Stacker_Dryer Op Guide Book.indb 6
SV61228 Rev. A
3/30/2004 10:26:43 AM
W983 Stacker/W863 Dryer Operating Guide
Connector and Side Panels
1
2
3
4
4
5
6
The illustrations above show the Stacker connectors and fuses.
1
2
3
4
5
6
Trip Sensor connector - This is where the cable from the
Stacking full arm is connected. This activates when the Stacker
is full.
Printer Interface connector - This is where the interface cable
coming from the printer is connected.
Circuit Breaker 1.0 A switch - This is a switch that “toggles”
if pieces jam in the Stacker, causing the Stacker to power off
automatically. After the jam is cleared, you must press this switch
to reset the Stacker before you can resume operation.
Fuses - Two 1.6 Amp Slo Blow 250 VAC fuses.
Dryer 11.5 A 120 VAC - This is an 11.5 amp convenience outlet
to be used with the optional ink Dryer (W863).
Power 12.0 A 120 VAC receptacle - This is where the input
power cord is connected for the Stacker.
SV61228 Rev. A
Stacker_Dryer Op Guide Book.indb 7
7
3/30/2004 10:26:44 AM
W983 Stacker/W863 Dryer Operating Guide
WARNING: The Stacker (when used with the Dryer)
requires its own separate 15 amp branch circuit for
power. Do not plug other appliances (such as your
printer) into the same circuit as the Stacker/Dryer.
Optional Stand for Power Stacker
1
2
The illustration above shows the location of these stand components.
1
2
Height Adjustment Knob - used to adjust the height of the
stacker so it can be aligned with your printer or to operator level.
Casters (in circles above) - allows for easier movement of
stacker. Two are locking casters for holding the stacker in place.
8
Stacker_Dryer Op Guide Book.indb 8
SV61228 Rev. A
3/30/2004 10:26:44 AM
W983 Stacker/W863 Dryer Operating Guide
Stacker Technical Specifications
Input Power:
120 AC, 60 Hz, 12 Amps
Fuses:
Two 1.6 A Slo Blow 250 VAC
Dimensions:
Conveyor/Stacker:
Height: 9”
Width: 15”
Length: 70”
Weight: 58 lbs.
Stacker Stand:
Height: 30” (maximum)
24” (minimum)
Width: 15”
Length: 36”
Weight: 20 lbs.
Operational
Temperature:
55° - 95°F
Conditions:
Humidity
8% - 80%
Stacker Materials Specifications
The following media meet all the defined quality and performance
requirements of the Stacker. These specifications apply to all styles
of media (flats, envelopes, catalogs, etc.). All media may be stuffed,
unstuffed, sealed or unsealed, as long as the dimensional limits are
within specified ranges.
Papers:
White Wove, Bond Paper, Tyvec*, Recycled Paper,
Newsprint*, Coated Paper, Card Stock, Brown Kraft,
Manila and Perforations.
*Cannot be used in Executive print mode without
fast dry ink
Thickness:
Weight:
.004” to .500”
Flat sheets, half fold or C-fold:
Envelopes:
Size:
From 3.5 x 5” to 10 x 13”
SV61228 Rev. A
Stacker_Dryer Op Guide Book.indb 9
16 lbs. to 24 lbs.
16 lbs. to 32 lbs.
9
3/30/2004 10:26:44 AM
W983 Stacker/W863 Dryer Operating Guide
Stacker Setup Guidelines
The following are guidelines to consider when making your Stacker
Job Setup adjustments.
Media Stop, Stacker Height and Distance
The Stacker height and distance adjustments and the media stop
adjustment are set so that the leading edge of the mailpiece contacts
the conveyor belt as close to the media stop as possible, while the
mailpiece is being released from the output rollers of the printer.
If the mailpiece contacts the conveyor belt too soon, skewing will
occur. The general rule is that at slower speeds, the longer the
mailpiece is, the Stacker is positioned lower and farther away
from the printer output. While at higher speeds and with shorter
mailpieces, the Stacker is positioned higher and closer to the printer
output.
The media stop is set closer to the printer for short mailpieces and
farther away for longer mailpieces.
Hold Down Assembly
The function of the large rollers is to provide drive and control of
the mailpiece as it transitions to the stacking conveyor. The rollers
should be positioned in such a way that they retain the mailpiece but
do not come in contact with the address zones. If positioned in the
address zones, the rollers will cause smudging.
The function of the springs (retainers) is to control the mailpiece as it
lands on the stacking conveyor. The general rule is that with thinner,
slower moving mailpieces, the retainers should be positioned close
to the deck. In the case of thicker, faster moving mailpieces, the
retainers should be positioned higher off from the deck.
Full Arm Fixture and Full Arm Tip
These adjustments need to be made so that the “Stacker full”
indicator switch functions correctly while allowing the maximum
number of mailpieces to be stacked.
The position of the full arm fixture is dependent on the width of the
mailpiece. The wider the mailpiece, the farther up the ramp the fixture
needs to be set. The position of the full arm tip is dependent on the
length and thickness of the mailpiece. The general rule is that the
shorter and thinner the mailpiece is, the less the tip is extended. While
the longer and thicker the mailpiece is, the more the tip is extended.
10
Stacker_Dryer Op Guide Book.indb 10
SV61228 Rev. A
3/30/2004 10:26:44 AM
W983 Stacker/W863 Dryer Operating Guide
Speed Control
The speed adjustment allows the proper amount of spacing between
mailpieces. This value varies greatly depending on mailpiece size.
Stacker Job Setup
You will be required to check and make the following adjustments
when you change from one job to another job.
Adjust Stacker Height and Distance
Depending on the mailpiece, you will have to adjust the height and
distance of the Stacker in relation to the output of the printer.
CAUTION: The Stacker deck may rapidly
drop to its lowest height when you loosen the
Stacker height adjustment knob.
To adjust the height:
1
Hold the Stacker steady with upright pressure and loosen the
adjustment knob.
Adjustment
Knob
2
Set the height to the recommended value (referenced from the
top of the printer output roller) and tighten the knob. Refer to
tables and graphs on pages 15-19 to determine the value.
DA Series Printer
SV61228 Rev. A
Stacker_Dryer Op Guide Book.indb 11
W983 Stacker with
W863 Dryer
11
3/30/2004 10:26:45 AM
W983 Stacker/W863 Dryer Operating Guide
To adjust the distance:
1
2
Unlock wheels if they are locked.
Move the Stacker to the recommended distance from the printer
output roller and lock the wheels. Refer to tables and graphs on
pages 15-19 to determine the value.
Adjust Media Stop
The media stop is adjusted so that mailpieces from the printer hit the
stop and drop flat onto the conveyor belt. There are two adjustments
on the media stop: height and depth.
Depth
Knobs
Depth
Scales
Height Adjustment Knob
To adjust the height:
•
Loosen the knob on the side of the media stop and slide the
plate up or down. For 1/16” thickness, slide a sample mailpiece
under the balls and lower the media stop to the point of contact
and then lock. For over 1/16” thickness, set the media stop
low enough so that mailpiece cannot get below the edge of the
media stop and then lock.
To adjust the depth:
•
There is a scale on the media stop that is used to set up for
different size mailpieces. Loosen the two knobs and set the
knobs to the desired value on the scale. Refer to tables and
graphs on pages 15-19 to determine the value. Tighten the
knobs when you are finished.
12
Stacker_Dryer Op Guide Book.indb 12
SV61228 Rev. A
3/30/2004 10:26:45 AM
W983 Stacker/W863 Dryer Operating Guide
Adjust Stacker Full Arm
This consists of making two adjustments: locating the full arm fixture
on the ramp and locating a metal tip on the full arm. There is a
scale on the ramp and one on the arm that are used to set up for
different size material. Refer to the table on page 15 to determine the
recommended values.
Knob
Arm Fixture
(knob under
ramp)
Arm
Scales
To adjust the full arm fixture on the ramp:
•
Loosen the knob on the bottom of the ramp holding the fixture.
Move the fixture so that the lower end of the box aligns with the
desired value on the scale. Refer to tables and graphs on pages
15-19 to determine the value. Tighten the knob when you are
finished.
To adjust the full arm metal tip:
•
Loosen the knob holding the metal tip to the arm. Slide the knob
to the desired value on the scale. Refer to the table on page 15
to determine the value. Tighten the knob when you are finished.
SV61228 Rev. A
Stacker_Dryer Op Guide Book.indb 13
13
3/30/2004 10:26:45 AM
W983 Stacker/W863 Dryer Operating Guide
Adjust Hold Downs
The hold downs consists of two rollers and two springs used to keep
the media in contact with the conveyor belts. They are adjusted
by loosening the knob on each roller and spring and setting the
desired distance from the conveyor belt. Tighten the knobs when
you are finished. Refer to the table on page 13 to determine the
recommended values.
Knobs
Auto/Manual Switch
When the switch is in Auto mode (up), operation is controlled by the
printer. Out of paper, jam or tray break stops the Stacker and restarts
Stacker with printer. Stacker full shuts off the printer feeding. The
switch is down for fully manual operation.
Power Switch
When power is switched to the On position and Auto mode is
selected, the Stacker will not run until the printer operation begins.
Full Light (Red LED)
The LED flashes when the full arm is lifted. Lift the full arm to clear
the material and lower the arm to resume operation.
14
Stacker_Dryer Op Guide Book.indb 14
SV61228 Rev. A
3/30/2004 10:26:46 AM
SV61228 Rev. A
Stacker_Dryer Op Guide Book.indb 15
0.0
7.5
11.0
11.5
6.5
11.0
11.5
6.5
11.0
11.5
6.5
11.5
11.5
11.5
4.0
11.5
11.5
11.5
11.5
11.5
10.5
10.5
10.5
Full Arm
Tip Setting
- Scale on
Arm
4.0”
4.0”
3.0”
4.0”
4.0”
3.0”
4.25”
3.0”
2.75”
4.0”
3.0”
2.5”
3.5”
1.5”
1.5”
2.0”
1.0”
1.0”
2.0”
1.25”
1.0”
DistancePrinter
Output
Edge to
Stacker lip
N/U – Not used. Raise or slide springs so that they do not interfere with the pieces.
3/8
0.0
7.5
7.5
0.0
0.0
3/8
7.5
0.0
7.5
0.0
0.0
0.0
1/4
0.0
0.0
7.5
0.0
4.0
0.0
3.0
Empty
Flat Envelope/
Empty
Executive Mode
1/4
Flat Envelope/
Letter Mode
3/8
Flat Envelope/
Empty
Draft,Super Draft 1/4
3/8
4.0
.5
3.0
3.0
3/8
4.0
4.0
3.0
1/8
4.0
4.0
3.0
3.0
3.0
4.0
4.0
3.0
0.0
11
3.0
0.0
11
Empty
3/8
# 10 Envelope/ Empty
Executive Mode 1/8
# 10 Envelope/
Letter Mode
# 10 Envelope/ Empty
Draft,Super Draft 1/8
0.0
Full Arm
Fixture
Setting
- Scale on
Ramp
11
Thickness Media
Stop
3 x 5 Postcard/ Empty
Draft,Super Draft
3 x 5 Postcard/ Empty
Letter Mode
3 x 5 Postcard/ Empty
Executive Mode
Media/
Resolution
2.5
3.0
3.0
3.0*
6.0
6.0
6.0
7.0
7.0
3.0
2.0*
2.0
3.0
3.5
3.5
5.0*
4.0*
4.0
2.0
3.5
4.0
* Not recommended
3.0”
1.5”
4.0”
3.0”
4.0”
3.0”
1.0”
3.5”
2.5”
1”
0”
0”
0.5”
0.5”
0”
0”
0”
0”
0”
0”
0”
3.0
3.4*
3.5
3.5*
7.0
7.0*
7.0*
8.0
8.0*
3.5
2.5*
2.5
5.5*
5.0
5.0
6.5
6.5
6.5
2.2
5.0
6.0
Horizontal
Speed
Speed Setting
Distance
Setting - w/ - w/1” Gap
From Printer 1” Overlap Between Pieces
Output Edge
W983 Stacker Setup Table
2.7
3.2
5.5*
4.0*
6.5
5.5*
6.5*
7.5
7.5*
3.2
2.2
2.2
4.0*
4.0
4.0
5.5
5.5
5.5
2.1
4.5
5.0
Speed
Setting
-No Gap
Between
Pieces
20
80
150
20
90
150
25
75
210
40
326
400
50
333
425
40
349
450
720
860
898
Capacity
3.5
3.0
4.0
5.0
6.0
4.0
5.0
7.5
5.5
4.5
3.0
3.0
3.0
4.0
5.0
8.0
6.5
6.5
2.0 to 3.0
3.5 to 5.0
4.0 to 6.0
Recommended
Speed
2”
2”
0.5”
2”
1.5”
0.5”
1.5”
1.5”
0.5”
N/U
0.25”
0
2”
1.5”
0
3”
0.25”
0
0
0
0
Distance - Hold
Down Retainers
to Conveyor
Surface
W983 Stacker/W863 Dryer Operating Guide
15
3/30/2004 10:26:46 AM
W983 Stacker/W863 Dryer Operating Guide
Use the following charts to determine the indicated settings for the
Stacker for various material lengths and thicknesses (where applicable).
Media Stop Setting
11
10
9
Media Stop Setting
8
7
6
5
4
3
2
1
0
5
Min.
6
7
8
9
10
11
12
13
Max.
Material Length (in inches)
Full Arm Fixture Setting on Ramp
13
12
Full Arm Fixture Setting
11
10
9
8
7
6
5
4
3
2
1
0
3
4
5
6
7
8
9
10
Material Length (in inches)
The top chart is used to determine the setting for the media stop dependent on the
length of the material. The bottom chart is used to determine the setting for the full arm
fixture dependent on the length of the material.
In order to use the charts:
1
Measure the length of your material in inches.
2
Go to the that length at the bottom of the chart and then up that line to where it
intersects the drawn line on the chart.
3
Follow a straight line to the left side of the chart from that intersect and that is the
setting that should be used for that adjustment.
16
Stacker_Dryer Op Guide Book.indb 16
SV61228 Rev. A
3/30/2004 10:26:47 AM
W983 Stacker/W863 Dryer Operating Guide
Horizontal Distance (in inches) W983 Stacker to DA Printer Output Roller
Vertical Distance (in inches) W983 Conveyor Deck to DA Printer Output Roller
STACKER HEIGHT AND DISTANCE - SUPER DRAFT & DRAFT MODE
5.5
5.0
4.5
4.0
3.5
3.0
2.5
Max. thickness=3/8”
2.0
1.5
1.0
Min. thickness=0”
0.5
0
5.0
5.5
6.0
6.5
7.0
7.5
8.0
8.5
9.0
9.5
10.0
10.5
11.0
11.5 12.0
12.5
13.0
Material Length (in inches)
5.5
5.0
4.5
Max. thickness=3/8”
4.0
3.5
3.0
2.5
2.0
1.5
1.0
Min. thickness=0”
0.5
0
5.0
5.5
6.0
6.5
7.0
7.5
8.0
8.5
9.0
9.5
10.0
10.5
11.0
11.5 12.0
12.5
13.0
Material Length (in inches)
The top chart is used to determine the distance to set between the Stacker deck and
the DA Printer output roller. This is done by adjusting the height of the stand.
The bottom chart is used to determine the distance from the Stacker to the output roller.
This is done by moving the Stacker closer or farther from the DA Printer output roller.
In order to use the charts:
1
Measure the length and thickness of your material in inches.
2
Go to the length at the bottom of the chart and then up that line to the thickness
(the thickness must be approximated in the gray area which represents 3/8”
between the Min. thickness and Max. thickness).
3
Follow a straight line to the left side of the chart. That is the distance in inches for
that setting.
For example: if the material is 11 inches long and 1/8 inch thick, the reading on
the top chart would be approximately 2 inches and on the bottom chart approximately 1.75 inches.
SV61228 Rev. A
Stacker_Dryer Op Guide Book.indb 17
17
3/30/2004 10:26:47 AM
Vertical Distance (in inches) W983 Conveyor Deck to DA Printer Output Roller
W983 Stacker/W863 Dryer Operating Guide
STACKER HEIGHT AND DISTANCE - LETTER MODE
5.5
5.0
4.5
Max. thickness=3/8”
4.0
3.5
3.0
2.5
2.0
1.5
Min. thickness=0”
1.0
0.5
0
5.0
5.5
6.0
6.5
7.0
7.5
8.0
8.5
9.0
9.5
10.0
10.5
11.0
11.5 12.0
12.5
13.0
Horizontal Distance (in inches) W983 Stacker to DA Printer Output Roller
Material Length (in inches)
5.5
5.0
4.5
Max. thickness=3/8”
4.0
3.5
3.0
2.5
2.0
1.5
Min. thickness=0”
1.0
0.5
0
5.0
5.5
6.0
6.5
7.0
7.5
8.0
8.5
9.0
9.5
10.0
10.5
11.0
11.5 12.0
12.5
13.0
Material Length (in inches)
The top chart is used to determine the distance to set between the Stacker deck and
the DA Printer output roller. This is done by adjusting the height of the stand.
The bottom chart is used to determine the distance from the Stacker to the output roller.
This is done by moving the Stacker closer or farther from the DA Printer output roller.
In order to use the charts:
1
Measure the length and thickness of your material in inches.
2
Go to the length at the bottom of the chart and then up that line to the thickness
(the thickness must be approximated in the gray area which represents 3/8”
between the Min. thickness and Max. thickness).
3
Follow a straight line to the left side of the chart. That is the distance in inches
for that setting.
For example: if the material is 11 inches long and 1/8 inch thick, the reading on
the top chart would be approximately 2.5 inches and on the bottom chart approximately 1.75 inches.
18
Stacker_Dryer Op Guide Book.indb 18
SV61228 Rev. A
3/30/2004 10:26:47 AM
W983 Stacker/W863 Dryer Operating Guide
Vertical Distance (in inches) W983 Conveyor Deck to DA Printer Output Roller
STACKER HEIGHT AND DISTANCE - EXECUTIVE MODE
5.5
Max. thickness=3/8”
5.0
4.5
4.0
3.5
3.0
2.5
2.0
Min. thickness=0”
1.5
1.0
0.5
0
5.0
5.5
6.0
6.5
7.0
7.5
8.0
8.5
9.0
9.5
10.0
10.5
11.0
11.5 12.0
12.5
13.0
Material Length (in inches)
Horizontal Distance (in inches) W983 Stacker to DA Printer Output Roller
5.5
5.0
4.5
4.0
3.5
3.0
2.5
Max. thickness=3/8”
2.0
1.5
1.0
Min. thickness=0”
0.5
0
5.0
5.5
6.0
6.5
7.0
7.5
8.0
8.5
9.0
9.5
10.0
10.5
11.0
11.5 12.0
12.5
13.0
Material Length (in inches)
The top chart is used to determine the distance to set between the Stacker deck and
the DA Printer output roller. This is done by adjusting the height of the stand.
The bottom chart is used to determine the distance from the Stacker to the output roller.
This is done by moving the Stacker closer or farther from the DA Printer output roller.
In order to use the charts:
1
Measure the length and thickness of your material in inches.
2
Go to the length at the bottom of the chart and then up that line to the thickness
(the thickness must be approximated in the gray area which represents 3/8”
between the Min. thickness and Max. thickness).
3
Follow a straight line to the left side of the chart. That is the distance in inches for
that setting.
For example: if the material is 11 inches long and 1/8 inch thick, the reading on
the top chart would be approximately 4 inches and on the bottom chart approximately 1.25 inches.
SV61228 Rev. A
Stacker_Dryer Op Guide Book.indb 19
19
3/30/2004 10:26:47 AM
W983 Stacker/W863 Dryer Operating Guide
Stacker Tips and Troubleshooting
Cleaning
The Stacker requires a clean environment, free from dust, airborne
contaminants and moisture. Operator maintenance is limited to
cleaning the belts with a lint-free cloth dampened with a mild soap
and water solution.
Smudged Addresses
You can lift or slide any of the hold down rollers or springs where
heavily printed areas of your envelopes may be smudged by running
under the rollers/springs. Lift the roller/spring slightly and turn knob
to lock in place away from the conveyor belt.
NOTE: To assure the envelopes travel properly through the Stacker,
they must pass under the rollers and springs.
Jams
If mailpieces jam in the Stacker, the circuit breaker switch will automatically shut the Stacker off. DO NOT press the power switch. With
the Stacker off, clear the jam and any remaining mailpieces. Wait 1 to
2 minutes before pressing the circuit breaker switch. The Stacker will
power back up automatically when you press the circuit breaker switch.
Fuse Replacement
CAUTION: Disconnect power before replacing fuses.
Turn the power switch Off and unplug the power
cord from the AC power receptacle. For continued
protection against risk of fire, replace only with same
type and rating of fuse.
If fuse replacement is required, turn the Stacker off, unplug the AC
power cord from the outlet and replace the defective fuse with another
1.6 amp fuse. Fuse locations are shown in the illustration below. If the
blown fuse condition occurs again, call Pitney Bowes for service.
Fuses
20
Stacker_Dryer Op Guide Book.indb 20
SV61228 Rev. A
3/30/2004 10:26:47 AM
W983 Stacker/W863 Dryer Operating Guide
Optional W863 Ink Dryer
Controls and Indicators
2
1
3
4
The illustrations above show the location of the Dryer components.
1
2
3
4
Power On/Off Switch - turns on or off Dryer.
Power Cord - where the input power cord is connected.
Height Handle - adjusts the height of the Dryer over the material
(six position settings).
Power Outlet - the other end of the power cord is attached to
the Stacker AC outlet labeled "Dryer".
Dryer Technical Specifications
Input Power:
120 AC, 60 Hz, 11.8 Amps
Power Consumption:
1824 Watts
Heat Dissipation:
6,000 BTU
Heater Type:
Quartz Heater, Fan-Forced Air
Operating Temperature: 100º F
Fuses:
15 A (120 VAC)
Dimensions:
Height: 3-1/2" (9 cm)
Width: 13”
Length: 14-1/4”
Weight:
SV61228 Rev. A
Stacker_Dryer Op Guide Book.indb 21
17 lbs. (8 kg)
21
3/30/2004 10:26:48 AM
W983 Stacker/W863 Dryer Operating Guide
Dryer Operation
The Dryer contains only one operator control, a power on/off switch
with an associated indicator. This switch is used to turn power to the
Dryer on or off. The switch will light when on.
Since the Dryer receives its power from a dedicated power outlet on
the associated Stacker, this switch will light (if set at on) only when
the power switch on the Stacker is switched on.
Therefore, when the power switch on the Dryer is left in the ON
position, the Dryer will activate only when the conveyor belts start to
move. This effectively causes the Dryer to operate only when needed
(when mailpieces are conveyed under it to be dried). When the
conveyor stops, the Dryer will automatically switch off.
IMPORTANT: Be sure to observe all labeled warnings and
precautions on Dryer (see below).
CAUTION:Turn Power Off
When Not In Use. Only Operate
With Conveyor Moving.
CAUTION:
Do not operate
unattended.
CAUTION:
Hot Surface
-Avoid Contact
CAUTION:
Keep air intake
vents free at all
times.
WARNING: Dryer will ignite
combustible materials. Keep
all items clear of this machine,
except envelopes specified for
use with this machine.
22
Stacker_Dryer Op Guide Book.indb 22
CAUTION: Disconnect
power before changing fuse. For
continued protection against risk
of fire, replace only with same
type and rating of fuse.
SV61228 Rev. A
3/30/2004 10:26:48 AM
W983 Stacker/W863 Dryer Operating Guide
WARNING: The Dryer with Stacker combination
requires its own separate 15 amp branch circuit for
power. Do not plug other appliances (such as your
printer) into the same circuit as the Dryer/Stacker.
Dryer Job Setup
You will be required to check and make the following adjustments
when you change from one job to another job.
Adjust Dryer Height
You will have to adjust the height of the Dryer whenever the following
changes drastically from the previous job:
•
•
•
speed of the conveyor on the Stacker
the size of the material being dried
how much ink is used
The height handle is used to raise or lower the Dryer. It has six
positions.
Height Adjustment Handle
Six Positions
Release Lever
(under handle top) (see circle)
Height is adjusted by squeezing the release lever under handle
top, lifting the Dryer unit to the new position, and then releasing the
handle in the new slot position.
SV61228 Rev. A
Stacker_Dryer Op Guide Book.indb 23
23
3/30/2004 10:26:48 AM
W983 Stacker/W863 Dryer Operating Guide
Dryer Tips and Troubleshooting
Cleaning
The Dryer requires a clean environment, free from dust, airborne
contaminants and moisture. Operator maintenance is limited to
keeping the vents open and avoiding dust, paper fragments, and
material from touching the quartz heater bulb inside.
Jams
To clear jams under the Dryer, use the height adjustment handle and
move it to the highest position to make the material accessible. After
clearing jam, move handle back to original position.
If mailpieces jam in the Stacker, the circuit breaker switch will
automatically shut the Stacker and Dryer off. DO NOT press the
power switch on the Stacker or Dryer. With the Stacker off, clear
the jam and any remaining mailpieces. Wait 1 to 2 minutes before
pressing the circuit breaker switch on the Stacker. The Stacker and
Dryer will power back up automatically when you press the circuit
breaker switch.
Fuse Replacement
CAUTION! Disconnect power before replacing
fuses. Turn the power switch Off and unplug the
power cord from the AC power receptacle. For
continued protection against risk of fire, replace only
with same type and rating of fuse.
24
Stacker_Dryer Op Guide Book.indb 24
SV61228 Rev. A
3/30/2004 10:26:49 AM
W983 Stacker/W863 Dryer Operating Guide
Follow these steps to replace the fuse in the Dryer:
1. Turn the Dyer off and unplug the AC power cord from the Stacker
outlet.
2. Using a small flat object or screwdriver, lift up the fuse holder by
from its slot located directly above the AC input connector.
3. Remove blown fuse and insert replacement fuse, making sure it
is the same type and rating.
4. Slide fuse holder back into slot.
5. Plug in the Dryer AC power cord back into the Stacker and turn
the power on. If the blown fuse condition occurs again, call
Pitney Bowes for service.
SV61228 Rev. A
Stacker_Dryer Op Guide Book.indb 25
25
3/30/2004 10:26:49 AM
W983 Stacker/W863 Dryer Operating Guide
Dryer Troubleshooting Table
Symptom
Possible Cause
Remedy
Does not run
No power
Check plug connections.
Check power switch.
Check Dryer fuse.
Check Stacker fuse.
Ink not drying
Wrong Stacker
speed
Adjust Stacker speed control for a slower speed to allow more time for mailpiece
travel under the Dryer.
Incorrect height
Reposition the Dryer height
for best drying position.
No power
Check Dryer fuse.
Check Stacker fuse.
Open "one shot"
temp
Wait until unit cools (5
minutes) and try again. If it
persists, call Service.
Open thermal
sensor
Wait until unit cools (5
minutes) and try again. If it
persists, call Service.
No air from fan
Fan inoperative
Call Service.
Only cold air
from fan
Heater inoperative
Call Service.
Stopped running
26
Stacker_Dryer Op Guide Book.indb 26
SV61228 Rev. A
3/30/2004 10:26:49 AM