1
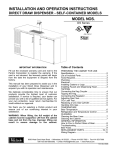
INSTALLATION AND OPERATION INSTRUCTIONS
SINGLE DOOR BACK BAR COOLER
MODEL NOS.
CS1DPSP
IMPORTANT INFORMATION
A Warranty card is enclosed that must be filled out
and mailed to the Perlick Corporation in order to register the warranty. If the card is not returned to
Perlick, the warranty period will begin from the date
the equipment is shipped from the factory.
This manual has been prepared to assist you in the
installation of your Single Keg Dispenser and to
acquaint you with its operation and maintenance.
We dedicate considerable time to ensure that our
products provide the highest level of customer
satisfaction. If service is required, your dealer can
provide you with a list of qualified service agents. For
your own protection, never return merchandise for
credit without our approval.
We thank you for selecting a Perlick product and
assure you of our continuing interest in your
satisfaction.
Table of Contents
PREPARING THE CABINET FOR USE
Specifications.........................................................2
List of Included Parts.............................................3
Tools Required.......................................................3
Plumbing................................................................3
Electrical ................................................................3
Uncrating ...............................................................3
Installing Casters ...................................................3
Placing the Cabinet ...............................................3
Leveling the Cabinet..............................................3
Installing Base Plates ............................................3
TEMPERATURE
Refrigeration and Temperature Control .................4
Adjusting the Temperature.....................................4
CLEANING
Cleaning the Cabinet .............................................4
Cleaning the Condenser........................................4
Condenser .............................................................4
GENERAL INFORMATION
REPLACEMENT PARTS .......................................5
Wiring Diagram......................................................6
WARNING: When lifting, the full weight of the
cabinet must be supported. Lift from the cabinet
base and not from the top. Improper lifting can
result in severe damage to the cabinet.
8300 West Good Hope Road • Milwaukee, WI 53223 • Phone 414-353-7060 • Fax 414-353-7069
Toll Free 800-558-5592 • E-Mail: [email protected] • www.Perlick.com
Form No. Z2091A
Rev. 08.03.04
Installation and Operating Instructions
Sizes and Specifications, Single Door Back Bar Cooler
MODEL NOS.
CONDENSING UNIT H.P.
AMPS
SHIP WT lbs. (kg)
INTERIOR
EXTERIOR
REFRIGERATION
VENTILATION
ELECTRICAL
PLUMBING
VENTILATION
OPTIONAL ACCESSORIES
CS1DPSP
1/6 h.p
3.2
205 (93)
Door Sill: Reinforced 14 gauge stainless steel sill. Door Pan: High strength polystyrene.
Floor Pan: Stainless steel. Walls & Ceiling: Galvanized steel. Includes pilasters, two shelves and
one (1) mini-flourescent energy efficient light.
Stainless steel top with square edges. Door, front, back and ends, black texture-painted steel.
Decorative handle and lock. Base is black painted galvanized steel. Full back panel with air gap
vent on top.
R-134a capillary tube-type. Aluminum fin and copper tube evaporator coil.
Adjustable temperature control. Self-defrosting.
Two inches of clearance is required behind cabinet for proper air flow.
115 Volt, 60 Hz., 1 Phase AC. Furnished with three prong, six foot rubber cord.
Contact Perlick-Milwaukee for other voltages/frequency requirements.
Floor drain 3/4 ” female taper pipe exits out right bottom or right end.
Requires tow inches of clearance at back of cabinet for proper air-flow.
• Leg Set
• Caster Set
• Leg & Front Base Plate
20 1/4" [514]
BACK TO INSIDE
OF DOOR PAN
23
[58 " R
4]
3 9/32" [83]
5 11/16" [144]
20"
[508]
DOOR
OPENING
CONDENSER
AIR (DISCHARGE)
29 1/8"
[740]
24"
[610]
28 11/16"
[729]
OPENING
2 1/4"
[57]
34 7/16"
[875]
26 1/4"
[666]
1/2" 25/32"
[13] [20]
27 3/4"
[705]
10 25/32"
[273]
3 9/32"
[83]
3 29/32"
[99]
CONDENSER
AIR (INTAKE)
Perlick is committed to continuous improvement. Therefore, we reserve the right to change specifications without prior notice.
Form No. Z2091A
Rev. 08.03.04
2
Preparing the Cabinet for Use – Single Door Back Bar Cooler
Parts List
■
■
■
Installing Casters
(2) Shelves.
Mini-Flourescent Light.
Shelf Clips.
(Optional)
Attach four casters to the cabinet bottom; rigid casters at the rear and swivel casters on the front. Use
the supplied 1/ 4”- 20 x 3/ 4” hex head self-tapping
machine screws.
Tools Required
■
■
■
■
■
#2 Phillips Screwdriver.
10” Crescent Wrench.
9/ 16” Allen Wrench.
3/ 8” Nut driver.
power Drill or Driver (for Leg Installation).
Placing the Cabinet
Push the cabinet into place using rollers when
necessary. Important: Proper air flow around the
condensing unit is necessary for efficient operation.
Never obstruct the air flow in and out of the
condensing unit. A minimum of 2” clearance is
required from back.
Plumbing
Features a floor drain with a 3⁄4” female pipe thread
connection for disposal of condensate. Remove
bottom or side drain plug with Allen wrench and
attach 3⁄4” male pipe to external drain.
Leveling the Cabinet
When the cabinet is in place, check installation with
carpenter’s level. When perfectly level, accumulated
water will drain out. A slight pitch to the drain side
will not harm the cabinet. Water may accumulate if
cabinet is pitched to the opposite side.
Electrical
The cabinet must be connected to a separately
fused power source (see electrical specification
plate) and grounded in accordance with National
and Local Electrical Codes. Caution: Do not
attempt to operate the equipment on any other
power source than that listed on the Electrical
Specification plate.
Installing Base Plate
(Optional)
Attach brackets to cabinet bottom in holes provided.
Use #10 self-drilling hex sheetmetal screws. (See
separate instructions, provided with kit). When
returning cabinet to upright position, be careful not
to bend brackets.
Uncrating and Inspection
Remove all crating material before operating.
Carefully inspect cabinet for hidden damage. If
damage is discovered, file your claim immediately
with the transportation company. Perlick is
not responsible for damage in transit.
WARNING!
To avoid compressor damage,after returning
cabinet to an upright position, let unit stand for
24 hours before plugging it in and running the unit.
Perlick is committed to continuous improvement. Therefore, we reserve the right to change specifications without prior notice.
3
Form No. Z2091A
Rev. 08.03.04
General Information – Single Door Back Bar Cooler
Refrigeration and Temperature Control
Cleaning the Cabinet
Use a mild detergent and water to clean the inside
and outside of the cabinet. Dry thoroughly. Never
use a scouring pad or abrasive cleanser.
NOTE: An industrial strength, commercial cleaner
can be used to clean the outside of painted
cabinets.
The Back Bar cabinet is equipped with a heavyduty refrigeration system designed to automatically
maintain a storage temperature of 36-41 degrees F.
The control is factory set at 38 degrees F.
Cleaning the Condenser
Use a long handled, stiff brush to clean the dirt from
the front surface of the condenser. Keeping the
condenser free from dust and dirt will ensure efficient operation.
CAUTION: Do not bend the fins while brushing the
front of the condenser.
Condenser
The condenser (located behind the back cover)
should be inspected every 30 days and cleaned, if
necessary. Failure to keep the condenser clean will
cause a loss in condenser unit efficiency.
Adjusting the temperature
The temperature control is inside the cabinet on
the right-hand side of the evaporator fan panel
assembly. You will need a screwdriver to turn the
adjusting screw. Make small adjustments until the
desired temperature is achieved.
■ Colder Temperatures:
Turn the adjusting screw clockwise (to the right).
■ Warmer Temperatures:
Turn the adjusting screw counterclockwise
(to the left).
In normal operation the condensing unit will run
approximately 16 hours per day. The condenser fan
motor turns off and on with the condensing unit.
The evaporator fan motor runs continuously. The
fan motors are lifetime lubricated and will require
no oiling.
NOTE:
Cabinet Temperatures lower than 34° will not allow
for proper defrosting of the evaporator coil. If
defrosting is necessary, turn the control knob to the
OFF position until coil is defrosted.
Perlick is committed to continuous improvement. Therefore, we reserve the right to change specifications without prior notice.
Form No. Z2091A
Rev. 08.03.04
4
Replacement Parts – Single Door Back Bar Cooler
MODEL NOS.
Item Description
1
Compressor for R134a
2
Condenser fan motor
3
Condenser fan motor bracket
4
Condenser fan blade
5
Condenser fan pan
6
Rear panel
7
Back panel partition
8
Condenser assembly
9
Condenser panel
10
Evaporator fan guard
11
Evaporator fan blade - 51⁄2”
12
Evaporator fan motor
13
Evaporator assembly - complete
14
Top assembly
15
Temperature control parts kit
16
Right hinged door assembly
Left hinged door assembly
17
Door hinge kit, right
Door hinge kit, left
18
Magnetic door gasket
19
Door sill
20
Door handle
Parts Not Shown on Drawing
Light, mini-flourecent
Wiring harness
Door lock with keys
Drain line hose kit
CS1DP
Part #’s
C22650
C15240A
61289-1
C6914
62209-1
62433-1
62131-1
C18634A
62132-1
C25400A1
C14649
C15239A
62212B
62439
57360
64357SRBL
64357SLBL
63407R
63407L
62085-1
60944-1
C31409-1
57822A
61346-1
57851
57854
14
12
13
11
9
10
15
6
7
16
8
5
17
4
3
2
1
20
19
18
Perlick is committed to continuous improvement. Therefore, we reserve the right to change specifications without prior notice.
Form No. Z2091A
Rev. 08.03.04
5
Wiring Diagram – Single Door Back Bar Cooler
EVAPORATOR FAN
BLACK
OUTLET
WHITE
THERMOSTAT
RED
WHITE
BLACK
BLACK
CONDENSING UNIT
POWER CONNECTION
BLACK
WHITE
GREEN
JUNCTION BLOCK
8300 West Good Hope Road • Milwaukee, WI 53223 • Phone 414-353-7060 • Fax 414-353-7069
Toll Free 800-558-5592 • E-Mail: [email protected] • www.Perlick.com
Perlick is committed to continuous improvement. Therefore, we reserve the right to change specifications without prior notice.
6
Form No. Z2091A
Rev. 08.03.04