1
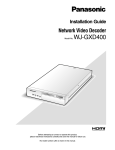
Installation Guide
Network Video Decoder
WJ-GXD400
WJ-GXD400/G
Model No.
OPERAT
E ERRO
R1 ER
ROR2
ALARM
Before attempting to connect or operate this product,
please read these instructions carefully and save this manual for future use.
The model number is abbreviated in some descriptions in this manual.
We declare under our sole responsibility that the product to which this
declaration relates is in conformity with the standards or other normative
documents following the provisions of Directives 2006/95/EC and
2004/108/EC.
Wij verklaren als enige aansprakelijke, dat het product waarop deze
verklaring betrekking heeft, voldoet aan de volgende normen of andere
normatieve documenten, overeenkomstig de bepalingen van Richtlijnen
2006/95/EC en 2004/108/EC.
Wir erklären in alleiniger Verantwortung, daß das Produkt, auf das sich
diese Erklärung bezieht, mit den folgenden Normen oder normativen
Dokumenten übereinstimmt. Gemäß den Bestimmungen der Richtlinie
2006/95/EC und 2004/108/EC.
Vi erklærer os eneansvarlige for, at dette produkt, som denne deklaration
omhandler, er i overensstemmelse med standarder eller andre normative
dokumenter i følge bestemmelserne i direktivene 2006/95/EC og
2004/108/EC.
Nous déclarons sous notre propre responsabilité que le produit auquel se
réfère la présente déclaration est conforme aux normes spécifiées ou à tout
autre document normatif conformément aux dispositions des directives
2006/95/CE et 2004/108/CE.
Vi deklarerar härmed vårt fulla ansvar för att den produkt till vilken denna
deklaration hänvisar är i överensstämmelse med de standarder eller andra
normativa dokument som framställs i direktiv nr 2006/95/EC och
2004/108/EC.
Nosotros declaramos bajo nuestra única responsabilidad que el producto a
que hace referencia esta declaración está conforme con las normas u otros
documentos normativos siguiendo las estipulaciones de las directivas
2006/95/CE y 2004/108/CE.
Ilmoitamme yksinomaisella vastuullamme, että tuote, jota tämä ilmoitus
koskee, noudattaa seuraavia standardeja tai muita ohjeellisia asiakirjoja,
jotka noudattavat direktiivien 2006/95/EC ja 2004/108/EC säädöksiä.
Noi dichiariamo sotto nostra esclusiva responsabilità che il prodotto a cui si
riferisce la presente dichiarazione risulta conforme ai seguenti standard o
altri documenti normativi conformi alle disposizioni delle direttive
2006/95/CE e 2004/108/CE.
WARNING:
• This apparatus must be earthed.
• To prevent fire or electric shock hazard, do not expose this
apparatus to rain or moisture.
• The apparatus should not be exposed to dripping or splashing
and that no objects filled with liquids, such as vases, should be
placed on the apparatus.
• All work related to the installation of this product should be
made by qualified service personnel or system installers.
• The connections should comply with local electrical code.
CAUTION:
Before attempting to connect or operate this product, please
read the label on the bottom.
CAUTION
RISK OF ELECTRIC SHOCK
DO NOT OPEN
CAUTION: TO REDUCE THE RISK OF ELECTRIC SHOCK,
DO NOT REMOVE COVER (OR BACK).
NO USER-SERVICEABLE PARTS INSIDE.
REFER SERVICING TO QUALIFIED SERVICE PERSONNEL.
The lightning flash with arrowhead symbol,
within an equilateral triangle, is intended to
alert the user to the presence of uninsulated
"dangerous voltage" within the product's
enclosure that may be of sufficient magnitude to constitute a risk of electric shock to
persons.
The exclamation point within an equilateral
triangle is intended to alert the user to the
presence of important operating and maintenance (servicing) instructions in the literature accompanying the appliance.
2
Vi erklærer oss alene ansvarlige for at produktet som denne erklæringen
gjelder for, er i overensstemmelse med følgende normer eller andre
normgivende dokumenter som følger bestemmelsene i direktivene
2006/95/EC og 2004/108/EC.
The serial number of this product may be found on the surface of the unit.
You should note the serial number of this unit in the space
provided and retain this book as a permanent record of your
purchase to aid identification in the event of theft.
Model No.
Serial No.
For Canada
This Class A digital apparatus complies with Canadian
ICES-003.
For U.S.A
NOTE: This equipment has been tested and found to comply with the limits for a Class A digital device, pursuant to
Part 15 of the FCC Rules. These limits are designed to provide reasonable protection against harmful interference
when the equipment is operated in a commercial environment. This equipment generates, uses, and can radiate
radio frequency energy and, if not installed and used in
accordance with the instruction manual, may cause harmful
interference to radio communications.
Operation of this equipment in a residential area is likely to
cause harmful interference in which case the user will be
required to correct the interference at his own expense.
FCC Caution: To assure continued compliance, (example use only shielded interface cables when connecting to computer or peripheral devices). Any changes or modifications
not expressly approved by the party responsible for compliance could void the user’s authority to operate this equipment.
3
Important Safety Instructions
1) Read these instructions.
2) Keep these instructions.
3) Heed all warnings.
4) Follow all instructions.
5) Do not use this apparatus near water.
6) Clean only with dry cloth.
7) Do not block any ventilation openings. Install in accordance with the manufacturer's instructions.
8) Do not install near any heat sources such as radiators, heat registers, stoves, or other apparatus (including amplifiers) that
produce heat.
9) Do not defeat the safety purpose of the polarized or grounding-type plug. A polarized plug has two blades with one wider
than the other. A grounding type plug has two blades and a third grounding prong. The wide blade or the third prong are
provided for your safety. If the provided plug does not fit into your outlet, consult an electrician for replacement of the
obsolete outlet.
10) Protect the power cord from being walked on or pinched particularly at plugs, convenience receptacles, and the point
where they exit from the apparatus.
11) Only use attachments/accessories specified by the manufacturer.
12) Use only with the cart, stand, tripod, bracket, or table specified by the manufacturer, or sold with the apparatus. When a
cart is used, use caution when moving the cart/apparatus combination to avoid injury from tip-over.
S3125A
13) Unplug this apparatus during lightning storms or when unused for long periods of time.
14) Refer all servicing to qualified service personnel. Servicing is required when the apparatus has been damaged in any way,
such as power-supply cord or plug is damaged, liquid has been spilled or objects have fallen into the apparatus, the
apparatus has been exposed to rain or moisture, does not operate normally, or has been dropped.
4
Limitation of Liability
THIS PUBLICATION IS PROVIDED "AS IS" WITHOUT WARRANTY OF ANY KIND, EITHER EXPRESS OR IMPLIED,
INCLUDING BUT NOT LIMITED TO, THE IMPLIED WARRANTIES OF MERCHANTABILITY, FITNESS FOR ANY PARTICULAR PURPOSE, OR NON-INFRINGEMENT OF THE
THIRD PARTY’S RIGHT.
THIS PUBLICATION COULD INCLUDE TECHNICAL INACCURACIES OR TYPOGRAPHICAL ERRORS. CHANGES
ARE ADDED TO THE INFORMATION HEREIN, AT ANY
TIME, FOR THE IMPROVEMENTS OF THIS PUBLICATION
AND/OR THE CORRESPONDING PRODUCT (S).
Disclaimer of Warranty
IN NO EVENT SHALL Panasonic Corporation BE LIABLE
TO ANY PARTY OR ANY PERSON, EXCEPT FOR
REPLACEMENT OR REASONABLE MAINTENANCE OF
THE PRODUCT, FOR THE CASES, INCLUDING BUT NOT
LIMITED TO BELOW:
(1) ANY DAMAGE AND LOSS, INCLUDING WITHOUT LIMITATION, DIRECT OR INDIRECT, SPECIAL, CONSEQUENTIAL OR EXEMPLARY, ARISING OUT OF OR
RELATING TO THE PRODUCT;
(2) PERSONAL INJURY OR ANY DAMAGE CAUSED BY
INAPPROPRIATE USE OR NEGLIGENT OPERATION
OF THE USER;
(3) UNAUTHORIZED DISASSEMBLE, REPAIR OR MODIFICATION OF THE PRODUCT BY THE USER;
(4) ANY PROBLEM, CONSEQUENTIAL INCONVENIENCE,
OR LOSS OR DAMAGE, ARISING OUT OF THE SYSTEM COMBINED BY THE DEVICES OF THIRD PARTY;
(5) ANY CLAIM OR ACTION FOR DAMAGES, BROUGHT
BY ANY PERSON OR ORGANIZATION BEING A PHOTOGENIC SUBJECT, DUE TO VIOLATION OF PRIVACY
WITH THE RESULT OF THAT SURVEILLANCE-CAMERA'S PICTURE, INCLUDING SAVED DATA, FOR SOME
REASON, BECOMES PUBLIC OR IS USED FOR THE
PURPOSE OTHER THAN SURVEILLANCE;
(6) LOSS OF REGISTERED DATA CAUSED BY ANY FAILURE.
5
Preface
The network video decoder (WJ-GXD400, WJ-GXD400/G) is designed to convert digital image data (JPEG/MPEG-4/H.264) to
analog video signals.
By connecting to a network (LAN), images and audio from cameras and encoders connected to the network can be displayed
on an HDMI monitor or on an analog monitor (NTSC/PAL).
Features
• Up to 6 cameras can be displayed on a single monitor by using the HDMI connector or the BNC output connector
(NTSC/PAL).
• One (1) x 4VGA (1 280 x 960) image with 2 x VGA (640 x 480) images or 6 x VGA (640 x 480) images can be displayed in
a split screen.
• Images, audio and the other data packets can be received via a network.
6
About the User Mannuals
There are 2 manuals provided for the WJ-GXD400, WJ-GXD400/G as follows.
• Installation Guide (this book)
• Setup Instructions (PDF)
The "Installation Guide" contains descriptions of how to install and connect this unit.
Refer to the "Setup Instructions (PDF)" on the provided CD-ROM for descriptions of how to perform the unit settings. Adobe®
Reader® is required to read these operating instructions (PDF).
"WJ-GXD400" or "GXD400" shown in the instructions and llustrations used in these operating instructions indicate the WJGXD400, WJ-GXD400/G.
The screens used in these operating instructions show the case of NTSC model.
Software License (Licence)
This product includes a software component that is licensed by GNU General Public License (GPL) or GNU Lesser General
Public License (LGPL). For more details, refer to the Readme. txt file in the CD-ROM.
System Requirements for a PC
CPU
Memory:
Network Interface:
Monitor:
OS:
OS Language:
Web Browser
Other:
Pentium® 4 3.0 GHz or faster
1 GB or more (512 MB or more is required when using Microsoft® Windows® XP)
100/1000 Mbps Ethernet port x1
Image capture size: 1 024 x 768 pixels or more
Color: 24-bit True color or better
Microsoft® Windows Vista® Business 32-bit
Microsoft® Windows® XP Home Edition SP2
Microsoft® Windows® XP Professional SP2
English
Microsoft® Internet Explorer® 6.0 SP2
Windows® Internet Explorer® 7.0
CD-ROM Drive: It is necessary to read the operating instructions on the provided CD-ROM.
Adobe® Reader®: It is necessary to read the operating instructions on the provided CD-ROM.
Important:
• When using a PC that does not meet the above requirements, displaying of images may become slow or the web browser
may become inoperable.
• Microsoft® Windows® XP Professional 64-bit Edition is not supported.
7
Trademarks and Registered Trademarks
• Adobe, Adobe logo and Reader are either registered trademarks or trademarks of Adobe Systems Incorporated in the
United States and/or other countries.
• Microsoft, Windows, Windows Vista, Internet Explorer, ActiveX and DirectX are either registered trademarks or trademarks
of Microsoft Corporation in the United States and other countries.
• Intel and Pentium are trademarks or registered trademarks of Intel Corporation or its subsidiaries in the United States and
other countries.
• HDMI, HDMI logo and High-Definition Multimedia Interface are trademarks or registered trademarks of HDMI Licensing
LLC.
• Other names of companies and products contained in these operating instructions may be trademarks or registered trademarks of their respective owners.
Copyright
Distributing, copying, disassembling, reverse compiling, reverse engineering, and also exporting in violation of export laws of
the software provided with this product, is expressly prohibited.
This product incorporates copy protection technology that is protected by U.S. and foreign patents, including patent numbers
5,315,448 and 6,836,549, and other intellectual property rights. The use of Macrovision's copy protection technology in the
product must be authorized by Macrovision. Reverse engineering or disassembly is prohibited.
Network Security
As you will use this product connected to a network, your attention is called to the following security risks.
• Leakage or theft of information through this product
• Use of this product for illegal operations by persons with malicious intent
• Interference with or stoppage of this product by persons with malicious intent
It is your responsibility to take precautions such as those described below to protect yourself against the above network
security risks.
• Use this product in a network secured by a firewall, etc.
• If this product is connected to a network that includes PCs, make sure that the system is not infected by computer viruses
or other malicious entities (using a regularly updated anti-virus program, anti-spyware program, etc.).
• Protect your network against unauthorized access by restricting users to those who log in with an authorized user name
and password.
• Apply measures such as user authentication to protect your network against leakage or theft of information, including
authentication information (user names and passwords) and DDNS server information.
8
CONTENTS
Important Safety Instructions ....................................................................................................................... 4
Limitation of Liability .................................................................................................................................... 5
Disclaimer of Warranty ................................................................................................................................ 5
Preface ........................................................................................................................................................ 6
Features ...................................................................................................................................................... 6
About the User Manuals .............................................................................................................................. 7
Software License (Licence) ......................................................................................................................... 7
System Requirements for a PC ................................................................................................................... 7
Trademarks and Registered Trademarks .................................................................................................... 8
Copyright ..................................................................................................................................................... 8
Network Security ......................................................................................................................................... 8
Precautions ..................................................................................................................................................10
Major operating controls and their functions ................................................................................................12
Front view ................................................................................................................................................. 12
Rear view ................................................................................................................................................. 13
Setup window and live image display ......................................................................................................... 14
Outline of the functions ............................................................................................................................... 17
Operation flow ............................................................................................................................................ 18
Setup procedure ....................................................................................................................................... 18
Install the decoder in a rack ........................................................................................................................ 19
Connections ................................................................................................................................................ 20
When connecting to a network using a hub ............................................................................................. 20
Turn on/off the power of the decoder ......................................................................................................... 21
Turn on the power of the decoder ............................................................................................................ 21
Turn off the power of the decoder ............................................................................................................ 21
Troubleshooting .......................................................................................................................................... 22
Specifications ............................................................................................................................................. 24
Standard Accessories ................................................................................................................................. 25
9
Precautions
• Do not block the ventilation opening or slots on the
cover.
To prevent the apparatus from overheating, place it at
least 5 cm {2 inches} away from the wall.
• Do not drop metallic parts through slots.
This could permanently damage the apparatus. Turn
the power off immediately and contact qualified service
personnel for service.
• Do not attempt to disassemble the apparatus.
To prevent electric shock, do not remove screws or
covers.
There are no user-serviceable parts inside. Contact
qualified service personnel for maintenance.
• Do not expose the apparatus to water or moisture.
Do not try to operate it in wet areas.
Take immediate action if the apparatus gets wet. Turn
the power off and refer servicing to qualified service
personnel. Moisture can damage the apparatus and
also cause electric shocks.
• Built-in backup battery
Before the first use, charge the built-in backup battery
(lithium battery) by turning on the power for 48 hours or
more. If it is not charged enough, in a case where the
power goes down, the internal clock may keep bad
time or the operative condition may be different to that
before the electric power failure.
The built-in battery life is approximately 5 years as an
indication of replacement. (This is just an indication of
replacement. We are not providing any guarantee of the
built-in battery lifetime. Replacement cost of the built-in
battery is not covered by the warranty even if it needs
to be done within the warranty period.) Ask the shop
where you purchased the unit when replacement of the
battery is required.
Use this product for indoor use only.
Do not expose this product to direct sunlight for hours and
do not install the product near a heater or an air conditioner. Otherwise, it may cause deformation, discoloration and
malfunction. Keep this product away from water.
To continue using with stable performance
• Parts of this product may deteriorate and it may shorten
the lifetime of this product when using in locations subject to high temperatures and high humidity. Do not
expose the product to direct heat such as from a
heater.
• Use this product at temperature within 5 °C to 35 °C
{41 °F to 95 °F} and humidity below 90%. (When using
this product without turning the power off)
The input power source for this apparatus is 100 V AC
to 240 V AC, 50 Hz/60 Hz.
10
Use only the supplied power cord.
Be sure to use the supplied power cord. Any cord other
than the supplied power cord is not usable. The supplied
power cord cannot be used with any other equipment.
When the supplied power cord does not fit to an outlet,
contact your dealer. (PAL model)
Handle the appliance with care.
Do not strike or shake, as this may damage the product.
Failure to observe this may cause trouble.
About the monitor
When displaying the same image on the monitor for a long
time, the monitor may be damaged.
When an error is detected, the unit will restart automatically.
This unit will restart when detecting an error caused by any
reason. The unit will be inoperable for around 1 minute after
the restart just as when the power is turned on.
About the self-diagnosis function
When the unit malfunctions due to exogenous noise, etc. for
30 seconds or more, the unit will automatically reset and
will return to normal state. When the unit is reset, initialization will be carried out as when the power of the unit is
turned on. When the unit repeatedly resets, exogenous
noise level around the unit may be high and that may cause
malfunction. Contact your dealer for instructions.
Cleaning
Turn the power off when cleaning the unit. Otherwise it may
cause injuries.
Do not use strong or abrasive detergents when cleaning
the apparatus body. Use a dry cloth to clean the apparatus
when it is dirty. When the dirt is hard to remove, use a mild
detergent and wipe gently.
Distributing, copying, disassembling, reverse compiling, reverse engineering, and also exporting in violation
of export laws of the software provided with this product, is expressively prohibited.
Refresh interval
The refresh interval may be longer depending on a network
environment, PC spec, photographic subject, access traffic, etc.
Location to install this unit
To protect your network against unauthorized access,
install this unit within the security zone.
Avoid installing in the following locations.
• Locations exposed to direct sunlight
• Locations subject to strong magnetic field or radio
waves
• Locations subject to condensation as the result of
severe changes in temperature
• Locations subject to steam and oil smoke such as a
kitchen
• Read the “Readme.txt” file on the provided CD-ROM for
further information about the software.
• Please note that Panasonic shall not respond to any
inquiries regarding the source code.
Rack mounting
• When mounting this unit, use EIA equivalents (450 mm
{17-3/4"} or more depth).
• When operating the units, keep the temperature inside
the rack surely below 45 °C {113 °F}.
Refer to page 19 for rack mounting.
Code label
Unique IP address of your unit is marked on the code label.
Attach the code label on the CD-ROM case, etc. to avoid
losing.
Radio interference
When the unit is used near TV/radio antenna, strong electric
field or magnetic field (near a motor or a transformer),
images may be distorted and noise sound may be produced.
MPEG-4 Visual patent portfolio license
This product is licensed under the MPEG-4 Visual patent
portfolio license for the personal and non-commercial use
of a consumer for (i) encoding video in compliance with the
MPEG-4 Visual Standard ("MPEG-4 Video") and/or (ii)
decoding MPEG-4 Video that was encoded by a consumer
engaged in a personal and non-commercial activity and/or
was obtained from a video provider licensed by MPEG LA
to provide MPEG-4 Video. No license is granted or shall be
implied for any other use. Additional information including
that relating to promotional, internal and commercial uses
and licensing may be obtained from MPEG LA, LLC. See
http://www.mpegla.com.
AVC patent portfolio license
This product is licensed under the AVC Patent Portfolio
License for the personal and non-commercial use of a consumer to (i) Encode video in compliance with the AVC
Standard ("AVC video") and/or (ii) Decode AVC video that
was encoded by a consumer engaged in a personal and
non-commercial activity and/or was obtained from a video
provider licensed to provide AVC video. No license is
granted or shall be implied for any other use. Additional
information may be obtained from MPEG LA, L.L.C.
See http://www.mpegla.com.
GPL/LGPL
• This product contains software licensed under GPL
(GNU General Public License), LGPL (GNU Lesser
General Public License), etc.
• Customers can duplicate, distribute and modify the
source code of the software under license of GPL
and/or LGPL.
11
Major operating controls and their functions
Front view
WJ-GXD400
OPERATE
q
ERROR1 ERROR2 ALARM
w
e
r
q Operation indicator (OPERATE)
Lights when the power is on.
Important:
• This indicator will blink for around a minutes until the
unit becomes ready to operate.
• It may take a few minutes more to complete it when the
ambient temperature is 0 °C {32 °C} or lower.
w Error 1 indicator (ERROR1)
Blinks to indicate any of the following.
• Network link down error
e Error 2 indicator (ERROR2)
Blinks to indicate any of the following.
• Thermal error
• Cooling fan error
• Network camera error
r [ALARM] indicator
Lights when an alarm is detected (received).
t [LINK/ACT] indicator
Lights when the network connection is established.
Blinks when data packets are being transmitted/
received.
y [100 BASE-TX] indicator
Lights when the decoder is connected to a network at
100 BASE-TX.
u [1000 BASE-T] indicator
Lights when the decoder is connected to a network at
1000 BASE-T.
i Reset switch
Press this button to reboot the decoder.
12
t y u i
o
!0
o Mode switches
Not be used normally. Make sure that all the switches
are in the "OFF" position before starting operation.
(ON)
(OFF)
1
2
3
4
!0 Maintenance port
Use this port to connect directly to a PC and perform
maintenance operations.
Do not use for normal operation.
Note:
• When connecting with a PC directly, use the straight
cable.
Rear view
OUT
XX-XX-XX-XX-XX-XX
IN
12V
G
IN
AUDIO OUT VIDEO OUT
q
w
e
r t
q Network port
Connect a LAN cable. (100BASE-TX/1 000BASE-T)
NTSC model: category 5e, straight
PAL model: category 7, straight
(Cable is not provided.)
wAudio output connector (AUDIO OUT)
Connect an audio device such as an amplifier, speaker,
etc.
e Video output connector (VIDEO OUT)
Connect a video device such as a monitor.
r SIGNAL GND terminal
Connect this terminal with the SIGNAL GND terminals of
the devices in the system for signal ground. When operating the decoder and the devices in the system without
signal ground, oscillation or noise may be produced.
t HDMI connector
Connect an HDMI monitor.
y Alarm/Control terminals (ALARM/CONTROL)
Connect an external device or an alarm device such as
a buzzer or a lamp.
When connecting an external device, first remove
9 mm - 10 mm of the outer jacket of the cable and twist
the cable core to prevent a short circuit.
Output
y
u i
Approx. 9 - 10 mm
Specification of cable (wire):
AWG #22 - #28 Single core, twisted
Important:
• Do not connect 2 or more wires directly to a terminal.
When it is necessary to connect 2 wires or more, use a
splitter.
<Ratings>
• Alarm reset input (IN 1):
Non-voltage make contact (DC 4 - 5 V internal pull-up)
• GND (G):
• Alarm output (OUT 2):
Open collector output
(Maximum applied voltage: 24 V DC, 100mA)
• Error output (OUT 1):
Open collector output
(Maximum applied voltage: 24 V DC, 100mA)
• NC: Do not use.(IN 2, OUT 3)
u Power connector (12V
IN)
Connect to the provided AC adaptor.
Do not connect other than the provided AC adaptor.
i Cable clamp
Fix the cable of the provided AC adaptor.
Cable clamp
Input
G
Cable clamp
13
Setup window and live image display
● Setup window
Launch a web the browser. Enter the IP address set to the
decoder in the address box, and press the enter key.
Refer to the setup instructions (PDF) for further information about
the operation window.
(1) Setup menu buttons
(2) Setup page
(1)
(2)
● Live image display
(1) Image display area
(2) Information display area
Information of the detected alarm or error will be displayed.
(3) Time & date display area
The current time (of the decoder’s clock) will be displayed.
(1)
● Border
It is possible to apply a color on the frame border that divides a
screen.
Select a color from the following.
Off/White/Gray/Black
(☞ Setup instructions (PDF))
● Alarm display
• When an alarm occurrence is detected, the frame border will
turn red to indicate which images are from the alarm camera.
The "ALARM" indication will also be displayed.
• When an alarm occurred, time and date of the alarm occurrence, information about the alarm source will be displayed.
14
(2)
(3)
● Screen Pattern
It is possible to display images from up to 6 cameras on a screen.
1-screen, 3-screen and 6-screen are available to display images from cameras.
1-screen display
6-screen display
3-screen display (primary screen on the left (PSL))
3-screen display (primary screen on the right (PSR))
● Information display on each screen (live image display)
The following information can be displayed according to the settings.
Information display area
(1)
(2)
(3) Optional info.
Information about the sequence display will be displayed.
When the sequence display is triggered by a schedule,
a sequence number will be displayed.
(4) Camera title
The camera title will be displayed.
When "Off" is selected for "camera title", it will not be
displayed.
(3)
(4)
(1) Screen ID
The screen ID will be displayed.
(2) Time & date display area
Time and date (of the camera’s clock) will be displayed.
Time and date (of the camera’s clock) will be displayed
when stream data from the camera contains time and
date information.
Note:
• Information display position and display or hide information display can be determined by configuring the
settings on the setup menu.
• When the "Image capture size" setting is other than
"QVGA", "VGA" or "4VGA", a black screen will be displayed.
15
● Display mode
There are 2 display modes, "Full screen" mode (full-resolution display) and the "Trimmed screen" mode (trimming mode).
Normally, select "Full screen". When the displayed images do not fit in the screen even by adjusting the display settings of the
monitor in use, select "Trimmed screen". In the "Trimmed screen" mode, however, images to be displayed in each screen
will also be trimmed.
Notes:
• When displaying smaller images on a larger screen area e.g. displaying VGA images on a 4VGA screen area, the images
are enlarged to fit to the screen size.
• It is not possible to display larger images on a smaller screen area i.e. displaying 4VGA images on a VGA screen area.
16
Outline of the functions
● Live image display
Live images can be displayed on a high-definition monitor
(1 920 x 1 080) using the HDMI connector.
Live images from up to 6 cameras with the image capture
size of VGA (640 x 480) can be displayed simultaneously.
Displaying of live images from a single camera with the
image capture size of 4VGA (1 280 x 960) is also available.
It is possible to simultaneously display JPEG images and
MPEG-4 images/H.264 images on the same monitor.
It is also possible to connect and display live images on an
analog monitor (NTSC/PAL).
● Audio output
Audio (G.726) from a single camera among the cameras of
which images are being displayed on a screen can be
heard.
Audio output is available via the HDMI output connector or
the audio output connector (RCA, pin jack).
Refer to the setup instructions (PDF) for how to output
images (video) and audio.
17
Operation flow
Setup procedure
The operation flow of the decoder is as follows.
x
Connections
c
Startup
Install the decoder in the rack. (page 19)
Go to step 2 when not installing in the rack.
➜
z
Rack Mounting
Connect PCs and cameras. (page 20)
➜
Turn on the power of the decoder. (page 21)
➜
Network settings of a PC
b
Setup
n
Start operation
➜
v
Change the TCP/IP setting of the PC to conform to the settings of the decoder. Refer to the setup instructions (PDF).
Perform the required settings on the setup menu to start
operation. Refer to the setup instructions (PDF).
➜
18
Images from the registered camera will be displayed.
Install the decoder in a rack
z Remove
the rubber feet (4 pcs.) on the bottom of the
unit.
Remove the
rubber feet.
x Install the rack mounting brackets (Option: Refer to the
following.) on both sides of the unit. Using the mounting
screws (4 pcs.) for the rack mounting brackets, fix them
firmly.
1. When installing one unit:
Model No.: WV-Q204/1S
• Rack mounting bracket (Small) x 1
• Rack mounting bracket (Large) x 1
• Bracket mounting screws (M3 x 8: 6 pcs.)
2. When installing two units:
Model No.: WV-Q204/2S
• Rack mounting bracket (Small) x 2
• Joint bracket x 3
• Bracket mounting screws (M3 x 8: 6 pcs.)
• Bracket mounting screws
(Flat head, M3 x 6: 12 pcs.)
Bracket mounting
screws
Rack mounting bracket (Small)
Rack mounting bracket (Large)
Joint bracket
(Remove two screws at the rear side,
and fix the brackets with bracket
mounting screws (Flat head, M3 x 6).
Flat head screws
Rack mounting
bracket (Small)
Rack mounting
bracket (Small)
Flat head screws
Bracket mounting
screws
c Install the unit in the rack.
• Using the rack mounting screws, fix them firmly.
Important:
• When operating the units, keep the temperature inside
the rack surely below 45 °C {113 °F}.
• Mount the unit into the rack with a space equivalent to
approx. 1 unit (44 mm) or more to separate from other
devices.
• To prevent the unit from overheating, do not block the
ventilation openings or slots in the cover.
• Be sure to keep the temperature inside the rack below
30 °C {86 °F} when operating the units. Installing ventilation fan(s) in the rack is recommended especially
when the rack is covered with front lids.
Rack mounting screws
19
Connections
When connecting to a network using a hub
When connecting the decoder to a network using a hub, use a LAN cable).
Network camera
PC
Hub
LAN cable
(category 5e, straight
(NTSC model)/
category 7, straight
(PAL model)
OPERATE
Monitor
ERROR1 ERROR2 ALARM
Network Video Decoder WJ-GXD400
To an outlet
AC adaptor
(standard accessory)
Important:
• Use a switching hub or a router which is compliant with 100BASE-TX/1000BASE-T.
• Power supply is required for each decoder.
20
Power cord
(standard accessory)
Turn on/off the power of the decoder
Turn on the power of the decoder
Turn off the power of the decoder
To shut down the decoder, do the following.
Insert the power plug of the power cord to an outlet.
Connect the power plug of the power cord to a 120 V AC,
60 Hz for NTSC model, 220 to 240 V AC, 50 Hz for PAL
model.
The OPERATE indicator will start blinking for around a
minute just after turning on the power of the decoder. It will
stop blinking and light steadily when the decoder becomes
in operation status.
Default screen
When the power of the decoder is turned on or when the
decoder is rebooted, images from the camera channel
selected in advance will automatically be displayed. It is
necessary to configure the "Default screen" setting in
advance.
• A black screen will be displayed when "No output" is
selected for "Video/Audio output settings for the default
screen".
• Audio from the camera can be heard when "On" is
selected for "Audio output". When other than "1-screen"
is selected for "Screen pattern", audio from the camera
to be displayed on a screen at the upper left corner will
be heard.
• When using a camera that does not have the microphone input function, audio will not be heard even when
"On" is selected for "Audio output".
Detach the power plug from the outlet.
The OPERATE indicator on the decoder will go off.
Important:
• Detach the plug from the outlet if not operating the
decoder for a long period of time.
• When the decoder has not been used for a certain period, turn on the power of the decoder (approximately
once a week) and operate the decoder to prevent interferences with functions.
21
Troubleshooting
Check the following before requesting repair. Contact a dealer if a problem cannot be solved even after checking and trying
the solution or if a problem is not described below, or when having a problem with installations.
Check item/Remedy
Page
Power is not turned on.
• Is the connector plug of the AC adaptor connected to the
power connector (12V
IN) of the decoder firmly?
• Is the power plug of the power cord connected to the outlet
firmly?
• Is the power cord connected to the AC adaptor firmly?
–
The decoder does not start up
even by turning on the power.
• Are the mode switches positioned correctly?
Make sure that all the switches are in the "OFF" position.
–
• Is the LAN cable (100BASE-TX/1 000BASE-T) firmly connected to the network port? Confirm the cable is firmly connected.
12
• Is the [LINK/ACT] indicator lit?
When it is not lit, connection to a LAN is not established or
a network is not working correctly. Confirm that the connection is correctly made and the cable is connected firmly.
12
• The fan is not functioning because of the malfunction.
Contact your dealer.
12
Problem
The error 1 indicator
(ERROR1) is blinking.
(NW link error)
The error 2 indicator
(ERROR2) is blinking.
(FAN error)
The error 2 indicator
(ERROR2) is blinking.
(Thermal error)
The error 2 indicator
(ERROR2) is blinking.
(Network camera error detection)
(Network camera error detection (audio))
22
• Temperature inside the decoder is beyond the operating
temperature range.
Use the decoder at appropriate ambient temperatures.
• Aren’t the fans on the rear or the ventilation slots of the
decoder blocked?
When dust is collected around the fans or the ventilation
slots, clean it up.
When the ERROR2 indicator is blinking even when turning
on the power of the decoder after leaving the decoder powered off for a while, contact your dealer.
10, 12
Check the status on the “Camera” page of the setup menu.
Refer to the
setup instructions (PDF).
Check the settings on the “Basic” page of the setup menu.
Refer to the
setup instructions (PDF).
Check the IP address, subnet mask, and default gateway of
each of the decoder and the network cameras.
Refer to the
setup instructions (PDF).
Problem
The power cord insulation is
damaged.
The power cord, plug and connectors get hot during use.
Check item/Remedy
Page
• The power cord, plug and connectors are worn out.
This may result in electric shock or a fire. Unplug the power
plug from the AC outlet immediately, and refer to qualified
service personnel.
–
The power cord gets hot when
bent or stretched.
No live image is displayed.
• An error notification (message) is displayed.
Check the displayed message and contact the system
administrator.
• Images from cameras may not sometimes be displayed
when receiving MPEG-4 images/H.264 images via the
Internet. Check the settings of the router or other network
devices. Contact the network administrator.
• Check the following settings of both the decoder and the
network cameras.
• IP address
• Subnet mask
• Default gateway
–
23
Specifications
● Network Video Decoder
Power source:
Power consumption:
Ambient temperature:
Ambient humidity:
Video output connectors:
Audio output connector:
Parallel port:
Resolution:
Image compression method:
Audio compression method:
Protocol:
Network:
Security:
OS:
Browser:
Dimensions:
Weight:
12 V DC 1.4 A (using the supplied AC adaptor)
Approx. 17 W
–10 °C to +50 °C {14 °F to 122 °F}*1
Less than 90 %
WJ-GXD400 (NTSC model): HDMI x 1, 1 V [P-P]/75 Ω (BNC x 1)
WJ-GXD400/G (PAL model): HDMI x 1, 1 V [P-P]/75 Ω (BNC x 1)
Line level, 600 Ω, unbalanced x 1 (RCA pin jack)
Alarm reset input x 1*2, Alarm output x 1*3, Error output x 1*3
640 (H) x 480 (V)/320 (H) x 240 (V)/1 280 (H) x 960 (V) selectable
JPEG/MPEG-4/H.264
G.726
HTTP, RTP, TCP/IP, UDP/IP, DHCP, DNS, DDNS, NTP
100BASE-TX, 1 000BASE-T, RJ-45 connector
Password
Microsoft® Windows Vista® Business 32-bit, Microsoft® Windows® XP Home Edition SP2,
Microsoft® Windows® XP Professional SP2
Windows® Internet Explorer® 7.0, Microsoft® Internet Explorer® 6.0 SP2
210 (W) x 44 (H) x 307 (D) mm {8.27" (W) x 1.73" (H) x 12.09" (D)}
(excluding rubber feet and projections)
Approx. 2.0 kg {4.4 lbs.}
● AC adaptor
Power Source:
Output voltage:
Dimensions:
Weight:
100 V AC to 240 V AC, 50 Hz/60 Hz
12 V DC
120 mm (W) x 60 mm (H) x 35 mm (D) {4.72" (W) x 2.36" (H) x 1.38" (D)} (excluding the DC cable)
0.35 kg {0.77 lbs.}
*1 When using this product without turning the power off
*2 Non-voltage make contact input, 50 kΩ +5 V DC pull-up
*3 Open Collector output, +24 V, 100 mA maximum
24
Standard Accessories
CD-ROM* .................................................................... 1 pc.
Operating Instructions (this book) .............................. 1 pc.
Warranty card (NTSC model only) ............................. 1 pc.
The following are for installation.
AC adaptor ................................................................. 1 pc.
Code label .................................................................. 1 pc.
Power cord ................................................................. 1 pc.
* The CD-ROM contains the operating instructions (PDFs
and the software).
25
26
Information for Users on Collection and Disposal of Old Equipment and used Batteries
These symbols on the products, packaging, and/or accompanying documents mean that used electrical and electronic products
and batteries should not be mixed with general household waste.
For proper treatment, recovery and recycling of old products and used batteries, please take them to applicable collection
points, in accordance with your national legislation and the Directives 2002/96/EC and 2006/66/EC.
By disposing of these products and batteries correctly, you will help to save valuable resources and prevent any potential
negative effects on human health and the environment which could otherwise arise from inappropriate waste handling.
For more information about collection and recycling of old products and batteries, please contact your local municipality, your
waste disposal service or the point of sale where you purchased the items.
Penalties may be applicable for incorrect disposal of this waste, in accordance with national legislation.
For business users in the European Union
If you wish to discard electrical and electronic equipment, please contact your dealer or supplier for further information.
[Information on Disposal in other Countries outside the European Union]
These symbols are only valid in the European Union. If you wish to discard these items, please contact your local authorities or
dealer and ask for the correct method of disposal.
Cd
Note for the battery symbol (bottom two symbol examples):
This symbol might be used in combination with a chemical symbol. In this case it complies with the requirement set by the
Directive for the chemical involved.
27
For U.S. and Canadian fields:
For European and other fields:
Panasonic System Networks Company of America,
Unit of Panasonic Corporation of North America
http://panasonic.net
www.panasonic.com/business/
For customer support, call 1.800.528.6747
Three Panasonic Way, Secaucus, New Jersey 07094 U.S.A.
Panasonic Canada Inc.
5770 Ambler Drive, Mississauga, Ontario, L4W 2T3 Canada
(905)624-5010
www.panasonic.ca
© Panasonic System Networks Co., Ltd. 2010
Importer's name and address to follow EU rules:
Panasonic Testing Centre
Panasonic Marketing Europe GmbH
Winsbergring 15, 22525 Hamburg F.R.Germany
NM0608-5010
3TR005589FAA
Printed in Japan