1
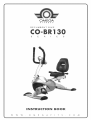
F
I T
N
RECUMBENT
E $
BIKE
iNSTRUCTiON
W
W
W
0
M
E
$
G
BOOK
A
F
n
T
S
C
0
M
IT
CTIO
Thank you for purchasing the CO-BR130 recumbent exercise bike. Please take time to
read these instructions which have been written to ensure that you get the very best
from your purchase.
SAFETY P ECAUTIONS
WARNING: To reduce the risk of serious injury, read the following
important precautions before using the recumbent
exercise cycle.
1.
The recumbent exercise bike should
Use the recumbent exercise bike only
in the way described in this instruction
book.
7.
2.
Ensure that the voltage of the electrical
supply is the same as that indicated
on the rating plate of the AC adapter.
8.
Wear appropriate clothing and athletic
shoes when exercising; do not wear
loose clothing or jewelry that may get
caught in moving parts.
3.
It is the responsibility of the owner to
ensure that all users are adequately
informed of all precautions.
g.
Do not arch your back when using the
recumbent exercise bike, always try
to keep your back straight.
Use the recumbent exercise bike
indoors on a level surface. Keep the
recumbent exercise bike away from
excessive moisture and dust.
10. If you feel pain ordizziness while
exercising, stop immediately and cool
down.
,
,
The safety level of the recumbent
exercise bike can be maintained only
if it is examined regularly for damage
and wear. Replace defective
components immediately. If there are
any defective components, do not use
the recumbent exercise bike.
not be used by persons weighing
more than 150kgs or 3001bs
11. The pulse sensor is not a medical
device. Several things, including user
movement, may affect the accuracy of
the sensor. The sensor is intended
only as an exercise aid in determining
general heart rate trends.
12. The recumbent
exercise bike is
intended for home use only.
,
2
Keep unsupervised children away
from the recumbent exercise bike at
all times.
OMEGA
FITNESS
CO TE TS
INTRODUCTION ...............................................................................
SAFETY PRECAUTIONS .................................................................
PARTS LiST .....................................................................................
TOOLS LIST .....................................................................................
2
2
4
ASSEMBLING
..................................................................................
Seat Base ...............................................................................................
Seat .........................................................................................................
Front and rear supports .............................................................................
Handlebars post ........................................................................................
Pedals .......................................................................................................
Rear handlebars ........................................................................................
Seat back ..................................................................................................
Handlebars ................................................................................................
Console
.................................................................................................
6
6
7
8
9
10
11
12
13
15
USING THE RECUMBENT
17
EXERCISE BiKE
..............................
Making adjustments ................................................................................
Pulse sensor ...........................................................................................
Using the console
.................................................................................
AC adapter
..........................................................................................
CONDiTiONiNG
GUiDELiNES
........................................................
Target heart rate ......................................................................................
BEGINNER'S
GUIDE
......................................................................
Workout tips ............................................................................................
How to begin ...........................................................................................
STRETCHING GUIDE .....................................................................
SPECIFiCATiONS ...........................................................................
OMEGA
FITNESS
5
17
18
19
19
25
25
26
26
26
27
34
3
PARTS LiST
1
2
3
4
5
6
7
8
4
Main body
Front support
Rear support
Handlebars post
Pedal with toe strap x 2
Rear handlebars
Seat back
Handlebars
9
Console
10 Top cover
11 Bottom cover
12 Seat
13 Seat back support
14 Seat base
15
16
End Cap
Safety Stopper
OMEGA FITNESS
TOOLS LiST
?
17
Multi tool
18
Hexagonal
OMEGA FITNESS
key
5
AS
G
STEP 1 OF 9
SEAT BASE AND END CAP
FiG 1
14-A
Iv
The screws and washers
6
may be prefitted to the supports.
1.
Insert the Seat Base (14) into the seat frame(I-A)
of main body (1). Press down the
2.
handlebar (14-A) to the direction shown to secure the Seat Base (14).
Insert the end cap (15), safety stopper (16) onto the seat frame(I-A) of main body(1 ).
OMEGA FITNESS
AS
G
STEP
2 OF
9
SEAT BACK SUPPORT AND SEAT
FiG 2
G..
The screws and washers ma
be
refitted to the su
orts
1. Insert the seat back support (13) to the seat base (14). Tighten the screws, using the
hexagonal key (18) provided.
2. Tilt the seat (12) onto seat base (14). Tighten the screws, using the hexagonal key (18)
provided.
OMEGA FITNESS
7
ASS
G
STEP 3 OF 9
FRONT AND REAR SUPPORTS
FiG 3
\
The screws and washers may be prefitted to the supports.
.
.
3.
8
Tilt the main body (1) backwards and fit the front support (2) onto the main body
(fig 1). The front support faces backwards.
Secure with the four screws and washers provided. Tighten the screws using the
hexagonal key (18) provided.
Repeat steps 1 and 2 for the rear support (3) but, at step 1, tilt the main body forwards.
OMEGA FITNESS
ASS
G
STEP 4 OF 9
HANDLEBARS
POST
FIG 4
,J
The screws and washers may be prefitted to the handlebars
,
2.
OMEGA
post.
Connect the console cables (A) and (B) (fig 2).
Insert the handlebars post (4) into the main body (1), and secure in place with
the four screws and washers provided. Tighten the screws, using the hexagonal
key (18) provided.
FITNESS
9
ASSE
LI G
STEP 5 OF 9
PEDALS
FIG 5
.
.
3
Fit the pedal (5) marked L to the crank (A) on the left side of the recumbent
exercise bike, and the pedal (5) marked R to the crank (B) on the right side of the
recumbent exercise bike, viewed from the rider's seated position (fig 5).
Tighten the pedals (5) with the multi tool (17) provided.
Fit the toe straps.
Note: The left pedal has a left-hand thread, and therefore the multi tool
should be turned in an counterclockwise
direction to tighten.
10
OMEGA FITNESS
ASSE
LI
STEP 6 OF 9
REAR HANDLEBARS
FiG 6
The screws and washers may be prefitted to the main body.
.
2.
Fit the rear handlebars (6) to the main body (1), and secure in place with the
four screws and washers provided. Tighten the screws using the hexagonal
key (18) provided (fig 6).
Connect the console cables (A) and (B).
Note: Take care not to damage
OMEGA
FITNESS
the seat base with the hexagonal
key (18).
11
AS
G
STEP 7 OF 9
SEAT BACK
FIG 7
The screws may be prefitted to the seat back.
.
Position the seat back (7) to the main body (1), and secure in place with the
four screws provided. Tighten the screws using the hexagonal key (18) provided
Note: The seat position
12
can be adjusted
(see page
(fig 7).
14)
OMEGA FITNESS
ASS
LI G
STEP 8 OF 9
HANDLEBARS
FIG 8
1.
Unscrew and remove the handlebars
tightening
bolt (A).
2.
Attach the handlebars (8) to the handlebars post (4) by lifting the clamp (B) upwards.
Replace the handlebars tightening bolt (A) and secure the handlebars in position,
Note: The handlebars tightening bolt (A) is loosened and tightened by moving the lever
counter clockwise and clockwise respectively.
To reposition the lever, press against the
central button and gently move the lever outwards; release to continue loosening or
tightening.
OMEGA FITNESS
13
ASS
LI G
STEP 8 OF 9 (CONT'D)
HANDLEBARS
(CONT'D)
FIG 8 (CONT'D)
Note: The handlebars (8) and handlebars post clamp (B) have
which allow the handlebars (8) to be repositioned.
interlocking
splines,
Note: Take care to ensure that the console cables or the pulse cables (A) are
not trapped between the handlebars post (4) and the handlebars (8),
14
OMEGA
FITNESS
ASSE
LI
STEP 9 OF 9
CONSOLE
FIG 9
%
The screws may be prefitted to the computer.
1.
Connect
the console cable (A) to the console (9).
2.
Position the console (9) carefully onto the bracket on the top of the handlebars post (4) and,
using the multi tool (12) provided, secure with the four screws provided.
3.
Plug the pulse sensor cable (B) into the console.
4.
Fit the top cover (10) to the underside of the console (9), align the holes and, using the
multi tool (12) provided, secure using two of the four screws provided.
5.
Repeat step 4 for the bottom cover (11).
Note " The bottom cover (11) has a larger cutout in order to accommodate
tightening
the handlebars
bolt.
OMEGA FITNESS
15
GT
E
EC
T
MAKING ADJUSTMENTS
SEAT POSiTiON
1.
There are nine seat positions. To adjust,
loosen the seat tightening bolt (A) and move
the seat to the desired position. Tighten the
seat tightening bolt (A).
HANDLEBARS
1.
To adjust, loosen the handlebars tightening
bolt (B), move the handlebars to the
desired position and tighten the
handlebars tightening bolt(B).
LEVEL
1.
POSITION
ADJUSTMENT
To level the recumbent exercise bike,
screw the adjustable feet (C), on the front
and rear supports, in or out accordingly.
PULSE SENSOR
The pulse sensor
medical device.
is not a
The pulse sensor is intended only as an exercise
aid in determining general heart rate trends.
1.
Set the computer to Pulse mode (see
'Selecting modes' in the 'Using the
computer' section).
2.
To start the pulse sensor on the computer,
grip the sensors on the handlebars.
Note.
Several
things,
movement,
may affect
of the sensor.
16
including
user
the accuracy
OMEGA FITNESS
I GT
E
EC
E T
USING THE CONSOLE
The programmable magnetic bike is equipped with a programmable console to help you
reach your fitness goals. The console provides different programs designed to meet your
exercise requirements. In addition, the console has a wide variety of modes that enable you
to monitor your performance as you exercise.
The computer is powered from the AC supply
via a AC adapter.
ACADAPTER
d_
Plug the ACAdapter
lead into the DC IN jack
at the back of the programmable magnetic bike.
Connect the2 pin plug to the AC socket and
switch on.
If held, the up and down buttons will
switch between the MANUAL and
PROGRAM modes automatically.
SWITCHING
•
ON
Switch on the AC supply. The console
will emit a BEEP and reset itself.
SWITCHING
OFF
•
If the console is not used for several
•
minutes,
resets all
to switch
To switch
it switches off automatically and
values to zero. Press any button
the console back on again.
the console off, switch off at the
AC supply and unplug the adaptor.
TRAINING WITH NO PRESET
FUNCTION
•
Press the RESET button for more than 2
seconds to clear the previous program,
•
MANUAL and PROG RAM will be flashing on the top screen. Press the START/STOP
button to select MANUAL with no preset functions.
The lower display will show '1' and the corresponding resistance row pattern will be
displayed. While you are training you can change the resistance level using the UP/DOWN
buttons.
OMEGA
FITNESS
17
USI GT
E RECU
ENT
When you start training, the main screen will be set to SCAN mode. To select a particular
function use the MODE button.
e
You can stop training at any time by pressing the START/STOP
e
When you stop training, all the functions
from the training session.
button.
(except PULSE) will show the accumulated
data
To start a new training program, press the RESET button for more than 2 seconds to clear
the previous program.
TRAINING
WITH
MANUAL
PRESET
FUNCTION
- except
watt
target
Press the RESET button for more than 2 seconds to clear the previous program.
MANUAL and PROGRAM will be flashing on the top screen. Press the UP/DOWN
buttons to select MANUAL and then press the MODE button to enter the selection.
The lower display will show '1' and the corresponding
displayed.
resistance row pattern will be
Press the UP button to increase the resistance level and press the MODE
button to enter. The resistance levels go from 1 (lowest) to 16 (highest).
The TIME on the upper display will be flashing. Press the UP/DOWN
buttons to set the
target time and press the MODE button to enter. You can set the Distance, Calories and
Pulse, as required, in the same way. Press the MODE button to move to the next function.
To start training, press the START/STOP
button. The preset functions, except pulse, will
either count down from the preset (time) or up from zero (distance and calories).
During training, pressing the UP/DOWN buttons will change the resistance level.
During training, you can stop at any time by pressing the START/STOP
button. When a
preset target is reached, the console will beep and a flashing P will appear in the top
left hand corner of the upper display. The display will stop. The manual preset functions will
show the accumulated
value.
data for the session. The preset function will return to its preset
When the monitor stops, the preset function (except PULSE) will show its count down
data, others will show the accumluated training data. If the monitor stop due to target
achieved, the monitor will beep and display the function target again.
You can use the same preset function again by pressing the START/STOP
can press the MODE button to select a function to set a new preset value.
18
button or you
OMEGA
FITNESS
USI GT
TRAiNiNG
WiTH
E RECU
MANUAL
PRESET
FUNCTION
ENT
- with Watt
target
preset
If you have preset Watt data, the training resistance level will be adjusted automatically
according to the training speed and RPM.
If you see the symbol _' on the monitor, it means your training speed is slow and the
resistance level will be increased automatically to maintain the preset watt.
If you see the symbol ,& on the monitor, it means the speed is fast and the resistance
will be decreased automatically to maintain the preset watt.
If you see the symbol --- and '_'on the monitor, it means your current speed is too slow
and the resistance has been achieved to the maximum level. The monitor beeps 3 times
per second to remind you to increase your training speed. If you maintain the same
training speed for 1 minute, the monitor will beep 6 times per second) for 30 seconds and stop
the system automatically.
If you see the symbol --- and ,_, on the monitor, it means your current speed is too fast
and the resistance has been droped to the minimum level. Monitor will beep 3 times per
second to remind you to decrease your training speed. If you maintain the same training speed
for 1 minute, the monitor will beep 6 times per second for 30 seconds and stop the sytem
automatically.
OMEGA
FITNESS
19
USI G T E REC
TRAINING
WITH PROGRAM
T
I
FUNCTION
•
Press the RESET button for more than 2 seconds to clear the previous program.
•
MANUAL and PROGRAM will be flashing on the top screen. Press the UP/DOWN
button to select PROGRAM
-
and press the MODE button to enter.
The lower display will show '1' and the corresponding
displayed. Press the UP/DOWN
resistance row pattern will be
buttons to select a progam profile between
P]
P2
P3
P4
P5
P6
P7
P8
P9
P]0
P]]
P]2
Press the MODE button again and TIME will start flashing on the top display.
1 and ] 2.
Press the
UP/DOWN buttons to set the target time and press the MODE button to enter. You can set
the Distance, Calories and Pulse, as required, in the same way. Press the MODE button to
move to the next function.
To start training, press the START/STOP
button. The preset functions, except pulse, will
either count down from the preset (time) or up from zero (distance and calories).
During training, pressing the UP/DOWN buttons will change the resistance level.
During training you can stop at any time by pressing the START/STOP
button. When a
preset target is reached the console will beep and a flashing P will appear in the top
left hand corner of the upper display. The display will stop. The non preset functions will
show the accumulated
value.
data for the session. The preset function will return to its preset
You can use the same preset function again by pressing the START/STOP
can press the MODE button to select a function to set a new preset value.
button or you
To clear the program, press the RESET button for more than 2 seconds and you will return
to the initial screen with MANUAL and PROGRAM flashing.
20
OMEGA
FITNESS
USI GT
TRAINING
E REC
IN USER
PROFILE
ENT
MODE
-
Press UP/DOWN
•
Press UP/DOWN/MODE
to preset your own profiles for training. You can stop Profile
setting mode by pressing the MODE button for more than 2 seconds.
•
Press UP/DOWN/MODE
to set target function data of Time, Distance, Calories, and
Pulse. Each function (except PULSE) will start count down when the training starts.
-
During training, you may press UP/DOWN/MODE
START/STOP to start training with USER mode.
-
The console will beep to remind you once each function target has count down to zero
(except PULSE) and stop at same time.
TRAINING
to increase or decrease training level when select User Training mode.
IN TARGET
to adjust resistance level. Press
N.R. MODE
Press ST/STOP to start training with TARGET
H.R. mode.
When TARGET H.R. training mode is selected, the console will ask you to input your age.
Press UP/DOWN/MODE
to set the age. This data is key point for the proper target heart
rate data calculated by the console.
Press UP/DOWN/MODE
to select a different percentage of target heart rate figure you
would like to achieve for your training. You can select between 55%, 75%, 90%, or you
may input manually a target heart rate figure for training.
When training in TARGET H.R. mode, resistance level is not adjustable.
Resistance level will be adjusted automatically as according to you actual heart rate figure.
If your current heart rate figure is under preset, the resistance level will be increased 1
level per 30 seconds up to level 16 to achieve the preset heart rate figure. If your current
heart rate figure is exceed preset, the resistance level will be decreased 1 level per 15
second down to level 1. If your heart rate figure is still exceed the preset, the resistance level
decreased to level 1 for 30 seconds, the console will beep to remind you and stop at
same time.
Press UP/DOWN/MODE
to set target function data of Time, Distance, Calories, and
Pulse. Each function (except PULSE) will start count down when the training starts.
OMEGA FITNESS
21
USI GT
FUNCTION
E REC
T
PRESET
Each function
target preset range is as below "
TIME:
Preset area is from 00:00 to 99:00, each increment
DISTANCE:
Preset area is from 0.00 to 99.90, each increment
CALORIE:
Preset area is from 0 to 990, each increment
PULSE:
Preset area is form 30 to 240, each increment
WATT:
Preset range is from 10 watt to 250, each increment
The profile unit will switch forward
Training
according
to different
is 0.10 km or mile.
is 10 cal.
is 1 Beats Per Minute
is 10 watts.
preset :
with preset Time target :
If you have preset Time,each unit of the profile moves forward
per preset time devided by 10
Training
is 1:00 (minute).
without
preset Time target, without
preset Distance
to another
target "
If you do not preset Time,each unit of the profile switches
km or mile in counting up mode.
forth to another
Training
target "
without
preset Time target, with preset Distance
in
per 0.1
If you do not preset Time, but set the target Distance, each unit of the profile
switches forth to another per 0.1 km or mile in counting down mode until the
target is achieved.
22
OMEGA
FITNESS
USI GT
SELECTING
The console's
E REC
ENT
MODES
mode function enables you to monitor your performance
as you exercise and
input values for specific exercise parameters.
Press the MODE button to display the following
modes. The mode name will flash on
the display to indicate that it is the selected mode.
If not already selected,
press the MODE button until SCAN appears on the display, to
scan the modes automatically
as you exercise.
RPM
-
RPM mode displays the flywheel speed.
SPEED
-
Speed mode displays your workout speed.
TIME
-
Time mode displays the elapsed workout time in minutes and seconds. The console
automatically
counts up from 0:00 to 99:00 in one second intervals. You can set the
time to count down from a preset value to zero. Refer to 'Training with program
function' for how to enter preset time.
DISTANCE
-
Distance mode displays the cumulative
distance traveled during each workout. You
can set the distance to count up from zero to a preset distance. Refer to 'Training with
program function' for how to enter preset distance.
CALORIES
•
Calories mode displays the estimated
during your workout. The computer
number of calories burned at any given time
counts up in increments
reaches 999, it resets to zero and starts counting
of 1.0. After the console
up again.
You can set the calories to count up from zero to a preset value. Refer to 'Training with
program function' for how to enter preset calories.
OMEGA FITNESS
23
USI G T E REC
T
I
PULSE
-
Pulse mode displays your pulse rate in beats per minute during your workout. When
you grip the handlebar, cover the pulse sensors (see 'Pulse monitor position' in the
'Using the recumbent
bike trainer' section). The pulse rate will be displayed
after four
stable pulse signals have been detected.
You can set the pulse to count up from zero to a preset value. Refer to 'Training with
program function' for how to enter preset pulse rate.
RECOVERY
•
After finishing a training session, grip the handlebar and cover the pulse sensors (see
'Pulse monitor position' in the 'Using the recumbent bike trainer' section). Press the
RECOVERY
button to start the recovery function. The time will count down for one
minute and measure how near your pulse rate is to normal after the one minute. Your
recovery index is graded between F1 to F6, F1 is the best, F6 the worst.
By using the recovery program regularly, you can monitor your fitness. As your fitness
improves, your recovery index will come down.
EXPLAINING
PROGRAM
PROFILES
The program profiles illustrate how the work resistance
changes during the program.
The more black blocks the higher the work resistance.
If you have a preset time target, each column of the program profile lasts for 1/10 of the
total time.
If you have a preset distance target or no target set, each column of the program
profile lasts for 0.1 km.
24
OMEGA FITNESS
CO
T
G GUI ELi
E
The following guidelines will help you to plan your exercise program. Remember
proper nutrition and adequate rest are essential for successful results,
that
doctor. This is especially
important
for people over the age of 35 or those
ARNING: Before beginning
this or any exercise program, consult with your
with health problems.
A
WHY EXERCISE?
Exercise has been proven essential for good health and general well being. Regular
exercise will:
- Relieve tension and stress
• Provide enjoyment and fun
• Stimulate the mind
•
•
•
-
Help maintain stable weight
Control appetite
Boost self-image
Improve muscle tone and strength
Improve flexibility
Lower blood pressure
Relieve insomnia
TARGET
T
TE
TRAINING ZONE
OMEGA
AGE
MIN..MAX (BPM)
2O
133 -167
25
132 -166
3O
130 -164
35
129 -162
4O
127 -161
45
125 -159
50
124 -156
55
122 -155
6O
121 -153
65
119-151
7O
118-150
75
117-147
80
115-146
85
114-144
FITNESS
Note: This is a guide only and
performance will depend on
the fitness and condition
(health) of the person using
the recumbent bike trainer.
25
'
G I E
If you're beginning an exercise
program, you should check with your
doctor if:
[]
You have been diagnosed with heart
problems, high blood pressure or
other medical conditions.
[]
You have not exercised for over a year.
[]
If you are over 35 and do not currently
exercise.
[]
You are pregnant.
[]
You have diabetes.
[]
You have chest pain, or experience
dizziness or fainting spells.
[]
You are recovering
illness.
WORK-OUT
[]
15 minute
Warm-up for 5 to 10 minutes with
gentle movements like walking or
swinging your arms in a circle and then
stretch the muscles you'll use during
your work-out.
[]
Increase the pace and resistance to
slightly harder than comfortable and
exercise for as long as you can. You
may only be able to exercise for a few
minutes at a time, but that will change
quickly if you exercise regularly.
[]
End each work-out with a 5-minute
cool down with the resistance set to a
low level. You should then stretch the
muscles you've just worked to prevent
injury and cramp.
Always perform stretching exercises
both before and after your work-out
see page 23.
[]
Start slowly, doing too much too soon
can lead to injuries.
If you are sore or tired, give yourself a
few extra days to recover.
When exercising,
twoorthree
[]
TIPS
How hard should
Startwith
sessions per week with a rest day
between work-outs.
from an injury or
[]
[]
HOW TO BEGIN
[]
Increase your work-out time by a few
minutes each week until you can work
continuously for 30 minutes per
session.
[]
Don't worry about distance or pace.
For the first few weeks, focus on
endurance and conditioning.
you work?
you should try to stay within your Target Heart Rate (THR) zone.
The table on the previous page will tell you the THR for your age. This is only a
guide and will depend on the fitness and condition (health) of the person using
the elliptical trainer.
Always be aware of how you feel when you exercise. If you feel dizzy or lightheaded, stop immediately and rest. If you're not breaking a sweat, speed it up!
26
OMEGA FITNESS
ST
TC
I
G I E
TIPS FOR STRETCHING
-
Begin with gradual mobility exercises
of all the joints, i.e. simply rotate the
wrists, bend the arm and roll your
shoulders. This will allow the body's
natural lubrication (synovial fluid) to
protect the surface of your bones at
these joints.
Always warm up the body before
stretching, as this increases blood flow
around the body, which in turn makes
the muscles more responsive.
Start with your legs, and work up the
body.
Each stretch should be held for at least
10 seconds (working up to 20 to 30
seconds) and usually repeated about
2 or 3 times.
Do not stretch until it hurts. If there's
any pain, ease off.
Don't bounce. Stretching should be
gradual and relaxed.
-
Don't hold your breath during a stretch.
Stretch after exercising to prevent
muscles from tightening up.
Stretch at least three times a week to
maintain flexibility.
OMEGA FITNESS
27
ST
CALF
TC
I
G I E
STRETCH
Stand with one leg in front of the other,
both feet facing forwards and the front
leg bent (the knee should be above the
ankle).
Press the heel of the back leg into the
floor until you begin to feel the calf
muscle in the back of the rear leg
starting to stretch.
Note: Keep your back and rear
leg straight when performing this
stretch.
Slide the rear leg backwards to
increase this stretch if required.
HAMSTRING
STRETCH
Sit with one leg extended. Bring the
other leg towards you and rest the
sole of that foot onto the inner thigh
of the extended leg.
Keeping your shoulders square,
reach forward towards your toes as
far as possible, hold for the required
count and then relax.
/Vote: Keep your shoulders
square when performing this
stretch.
28
OMEGA FITNESS
ST
QUADRICEPS
TC
I
G I E
STRETCH
With one hand against a wall for
balance, reach back and grasp one
foot with your other hand. Bring your
heel as close to your buttocks as
possible. Hold for the required count
and then relax.
INNER THIGH STRETCH
Sit with the soles of your feet
together and your knees outward.
Pull your feet toward your groin area
as far as possible. Hold for the
required count and then relax,
OMEGA FITNESS
29
ST
TC
TOE TOUCH
I
G I E
STRETCH
Stand with your knees bent slightly
and slowly bend forward from your
hips.
Allow your back and shoulders to
relax as you reach down toward your
toes, stretch as far as possible. Hold
for the required count, then slowly
return to the upright position and
relax.
GLUTES
(BUTTOCKS)
STRETCH
Sit up with your right leg stretched
outwards, place your left foot over your
right leg at the knee joint, placing your
foot flat on the floor.
Use your right arm to pull the bent
knee across your body until you begin
to feel a stretch in the left buttock. Hold
for the required count and then relax.
Repeat using the opposite arms and
legs.
30
OMEGA
FITNESS
ST
TC
LOWER
I
G I E
BACK
Lie on your back with your knees
bent.
Keeping your upper back firmly on
the floor, allow your knees to fall to
one side, your lower back will rotate
naturally. Hold for the required count
and then relax.
•
Repeat on the other side.
Note. If any pain is felt avoid this
stretch.
UPPER
ABDOMINALS
STRETCH
Lie on your stomach with your
forearms flat on the floor, palms
facing down.
Try to lift your head upwards while
looking forwards at all times, taking
the weight onto your forearms and
allowing your hips to relax into the
floor. Hold for the required count and
then relax.
OMEGA FITNESS
31
ST
TC
UPPER
I
G I E
BACK
Start off on all fours looking down
towards the floor.
Push your shoulders as high as
possible, imagine a wire placed
between your shoulder blades lifting
you. Hold for the required count, then
relax.
Note: This stretch is sometimes
called the cat stretch.
CHEST STRETCH
Stand up and place both hands on
the small of your back (just above
your backside).
Keeping your hands where they are,
slowly push your elbows together,
and push your chest outwards.
Note. Keep your elbows as high
as possible during this stretch.
Hold for the required
relax.
32
count, then
OMEGA
FITNESS
ST
TC
DELTOIDS
SHOULDER
I
G I E
STRETCH
Stand up and place one arm across
the front of the body.
Use the other arm to push the
outstretched arm into your chest.
Note: Push at the point just above
the elbow.
Try to keep the arm straight and
breathe normally. Hold for the required
count and then relax.
ALL
OVER
STRETCH
Stand with your feet shoulder width
apart and your knees slightly bent.
Place your hands above your head
with your thumbs touching. Reach up
evenly as high as possible, and hold
for the required count and then relax.
OMEGA
FITNESS
33
PECIFICATIONS
Dimensions
(L x W x H)
1400 mm x 650 mm x 1180 mm
56 in x 26 in x 43 in
Net Weight
46kg / 1011b
Class Rating
HB
Maximum
150kg / 3001b
User Weight
Please note that the specifications
www
34
o m eg
are subject to change
afits
without notice.
co
m
OMEGA
FITNESS