1
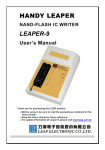
HANDY LEAPER USB UNIVERSAL IC WRITER LEAPER-48 User’s Manual Thank you for purchasing this LEAP product. z z z Before using it, be sure to read the precautions contained in this User’s Guide. Keep the User’s Guide for future reference. For update information of Leaper-48, please visit www.leap.com.tw Contents INTRODUCTION .........................................................................1 GENERAL GUIDE ..........................................................................1 SPECIFICATIONS ..........................................................................2 PRECAUTIONS .............................................................................3 GETTING READY ........................................................................5 INSTALL PROGRAMMING SOFTWARE .............................................5 INSTALL HARDWARE USB DRIVER .................................................5 OPERATION GUIDE ....................................................................8 MENU INTERFACE ........................................................................8 SOURCE – PROGRAMMING SOURCE DATA.....................................9 PROCESS - START TO PROGRAMMING IC .....................................10 PROGRAMMING PROCESS......................................................11 SELECT IC NUMBER ...................................................................11 LOAD SOURCE DATA FROM PC....................................................12 READ SOURCE DATA FROM IC .....................................................13 EDIT SOURCE DATA ...................................................................14 GET IC CHECK SUM ...................................................................15 BLOCK PROCESS-DATA MOVE/COPY/SWAP ................................16 FILL DATA ..................................................................................17 SAVE DATA ................................................................................18 SETTING PARAMETERS ..............................................................19 COMMON SETUP ........................................................................19 EXTRA PARAMETER ....................................................................20 SERIAL NUMBER ........................................................................21 DEVICE OPTION .........................................................................21 OPTIONS .................................................................................22 SYSTEM OPTION ........................................................................22 SELF TEST .................................................................................23 ADVANCED INSTRUCTION........................................................24 WHAT’S HOTKEY ........................................................................24 PROJECT ...................................................................................25 ERROR MESSAGES ....................................................................27 INTRODUCTION Please check the programmer provided with above accessories. If there’s something missing, please contact the distributors you purchased the programmer as soon as possible. Handy IC Writer DC 12V/2A switching power USB cable S/W & Operation CD-R Gener al Guide X \ ] Y ^ [ ` _ Z X Model name Y Textool / Socket Z Textool handle [ PIN assignment \ Power indicator light ] Working indicator light ^ Power switch _ Power plug-in ` USB port 1 Introduction LEAPER-48 is an UNIVERSAL IC Programmer with high efficiency, performance. It is small, light, portable and power saving programmer provided with USB connecting to PC or notebook. LEAPER-48 has the simple operation software graph showing users. It selects devices brand & number by prompt and convenient by crossing search. It even can detect FLASH IC brand and number automatically. It also provides system self-test to check hardware status. When new devices added, LEAPER-48 can download the latest driver via USB connecting to PC to update the IC library. Specifications Physical Dimension Dimension: 16cm × 11cm × 4.5cm Weight: 0.5Kgs Operative temperature: +5℃~ 45℃ Operative humidity: up to 90% non-condensing System requirements Operating System: Windows 98(OSR2)/ME/2000/XP Processor: above Pentium pro Memory: 128MB RAM above, RAM added by IC size Hard disk: 60 Mb above Communication Interface: USB ver1.1 Electrical Requirements Voltage wide range: 90 ~ 260 VAC, auto-switching Frequency: 47 ~ 63 Hz Power consumption: 24 W maximum Supported Devices EPROMs, EEPROMs, FLASH EPROMs, Serial E/EPROMs, NV RAM, Microcontroller, DSP, PLDs…, Optional Adaptors PLCC, SOP, TSOP, SSOP, TSSOP, VSOP, PSOP, WSOP, QFP, SDIP, BGA, TBGA, TFBGA… Device Socket 48-pin DIP ZIF (Zero Insertion Force) socket Use various adaptors to support different packages 2 Introduction DC/AC Characteristics Signal Voltage: 2.5V- 5.0V VCC Voltage: 1.0V-9.0V 500mA VPP, VHH Voltage: 1.0V-20.0V 500mA CLOCK Frequency: 0Hz - 32.0MHz Data File Format Binary, HEX..., auto detects data format. Pr ecautions z The most suitable display of the UNIVERSAL IC WRITER programming software is small font (96dpi). Please confirm the [Font Size] of Windows has been set as small fonts to bring you the optimal operation menu. z Recommend using the computer with internal USB port built-in, but not external appended to. Because the external USB Card might cause problems on running LEAPER-48. If there’re any damage caused by users using external USB Card, LEAP Electronic Co., Ltd won’t be responsible for the damages or losses. z If it is needed to additional socket adaptors/modules (for different packages like PLCC, TSOP, SOP…), please use the adaptors produced by LEAP to match up LEAPER-48. LEAP Electronic Co., Ltd won’t be responsible for the damages or losses caused by users using other adaptors. z When you use special socket adapters (PLCC, TSOP, SOP...), please pull o the textool up to 80 . Put the special socket adapter in the textool and pull the handle down to fix the socket adapter, so that it could be clipped tightly. 3 Introduction z Considering about possible variation and situations while programming IC, LEAPER-48 can’t guarantee 100% programming success. If users are programming the IC for production master IC purpose, please make sure to execute the Verify process to check the IC content to ensure the quality of devices mass production. z The socket textool is one of consumption materials. It’s not included in LEAP products guaranteed. z If there’s any problem on using LEAPER-48 and the service staffs can’t help you to solve it on line, please send it back to LEAP or distributors worldwide you purchase it from for repairing. Do not try to disassemble and repair it by yourself. Otherwise, LEAP Electronic Co., Ltd won’t be responsible for the damages or losses or offer the free products repair services. z LEAP Electronic Co., Ltd won’t be responsible for the damages or losses caused by user inappropriate using LEAPER-48. Neither the free products repair services. 4 Getting Ready This section contains information about things you need to know about and do before trying to use the UNIVERSAL IC writer. Includes the installation of LEAPER-48 programming software and hardware USB drive. Insert the s/w and manual CD-ROM attached into computer. Install the programming software first and then connect the writer to computer and start up the hardware USB driver. Please follow below installation illustrations to install software and driver. Install Pr og r amming Software 1. If your computer supports Auto-Run, it will start up the installation program when you insert the CD-R into it. Please follow the Wizard to complete programming software installation. 2. If your computer doesn’t support Auto-Run, please click the installation program (Setup.EXE) in the CD-R or the subdirectory where the installation program is in. Install Har dwar e USB Driver 1. Take out the programmer from the cartoon. Check if the power switch is turn off. 2. Use the USB cable to establish the connection between the computer and the IC programmer. 3. Connect the power switching converter to the programmer. Then plug in the power converter (not to turn on the power yet). Check if the USB cable and power are connected correctly. 4. Now, turn on the power of the programmer. The green light on the converter and the power light on the programmer should be lighted up. 5. Installing hardware USB driver is different according to the OS of the computer is Windows 98, ME, 2000 or XP. The driver for USB N-FLASH WRITER is enclosed in the CD-R. The subdirectory is: [CD-R:\UNIVERSAL IC WRITER\Driver\USBWrite.inf] 5 Getting Ready If you have installed the programming software, you can also find the USB driver in following subdirectory where you the software installed. [C:\Program Files\UNIVERSAL IC WRITER\Driver\USBWrite.inf]。 If you are running Windows 98 or ME… z z Follow Step 6 to install USB driver. Note that the example installation presented here uses Windows 98. If you are running Windows XP, you do not need to install the USB driver manually. z Follow Step7 to install USB driver. z Note that the example installation presented here uses Windows 2000. 6. Install USB drive on Windows 98 or ME When you turn on the power of the programmer, a message window will shows that the computer finds a new USB Plug-and-Play hardware and starts to install the USB driver. If your computer doesn’t show any message, please open [Add New Hardware Wizard] to install manually. Click [Add New Hardware]. Follow the Hardware Add Wizard (Search the most suitable driver) to complete installing UNIVERSAL IC WRITER. If Windows can’t find the driver in last step, please select the second option to find out the driver by yourself. The driver is in the subdirectory [CD-R:\UNIVERSAL IC WRITER\Driver\USBWrite.inf] If Windows still can’t find the driver in designate location, please click [System] and check if there’s any new USB device (UNIVERSAL IC WRITER) in [Device Manager]. z If there’s a question mark or exclamation mark in front of the UNIVERSAL IC WRITER, that means the computer can’t find its driver. Please double click the left button on it. Select Reinstall Driver in General label to install USB driver. The driver is in the subdirectory [CD-R:\UNIVERSAL IC WRITER\Driver\USBWrite.inf] z If there’s nothing in front of UNIVERSAL IC WRITER, that means the programmer has been drove. You can start to use it. You need to perform this step only once, the first time you connect the programmer to your computer. 6 Getting Ready 7. Install USB driver on Windows XP When you turn on the power of the programmer, there’s message window showing that the computer has found a new USB Plug-and-Play hardware and starts to install the USB driver. Add New Hardware Wizard will ask you how to search the driver. Please select the auto search (default). Where to find the driver? Please select the CD-ROM Drives. [CD-R:\UNIVERSAL IC WRITER\Driver\USBWrite.inf] If you had installed the programming software, you can also find the driver in subdirectory where the software installed. [..\UNIVERSAL IC WRITER\Driver\USBWrite.inf]。 Please make sure the version of Windows XP had been updated and newer than Service Pack 1 above. Otherwise, it may not be able to work successfully with LEAPER-48. You need to perform this step only once, the first time you connect the programmer to your computer. 8. Why I can’t find the programmer hardware? z Check if the power switch on the programmer is turned on. z If the power is O.K., the green light on the power converter and the power light on the programmer should be lighted up. z Please confirm if your Windows version supports USB Plug-and Play device. z Please check if the USB cable has established the connection between the programmer and the computer correctly. z If auto searching still can’t find the driver, please go to the subdirectory [Driver] in CD-R to install driver manually. Complete installing hardware USB driver and programming software, you may start to use UNIVERSAL IC WRITER. If there’s showing a message window as follows when you run the programming software, that might has several reasons. Such like the USB driver hasn’t been installed, the power isn’t turned on or the USB cable or power cord doesn’t connect properly. Then the software will only be run in DEMO mode. 7 Operation Guide This section describes operation menu and option function. Menu Interface X Y X Parameters: setting devices parameters Y Options: system options and self-test Z About: the software and hardware version of the programmer [ Exit: Z \ exit the programming system \ Project: Save settings users used as a file. H/D & S/W information of the programmer after clicking About. Exit message window after click Exit 8 [ Operation Guide Sour ce-Pr og r amming Sour ce Data Y X [ _ ] Z ^ \ ` X Type: Select IC manufacturer, number and package, also set the Block Size of Code Area (Setting Block Size described in advanced option instruction) Y Load: Load data from the PC Z Read: Read data from the IC [ File: The location of the data loaded/read in PC \ Confirm: Default is selected, for verifying the data in Buffer area and in the IC ] Edit: Edit the data loaded or read ^ Save: Save the data that has been revised _ Device: IC information of the IC selected ` DeviceSum: Sum value of the data loaded/read Ú When first time load/read data and hasn’t run the Edit, the sum value is computed by the range of IC memory. 9 Operation Guide Pr ocess- Star t to Pr og ramming IC ` Y [ \ X ^ Z ] _ X Erase: Erase the content of IC. Y Check: Check if the IC is empty. Z Prog: Program the data loaded or read into target IC. [ Verify: Verify if the data programmed into IC is the same with the source data. Ú Default is X~[ selected. Clear the mark in the check to un-selected. a \ Prot: Security protecting. UNIVERSAL IC Writer doesn’t support this function. ] X: Start to run the programming processes marked. ^ : Stop programming processes. _ Processing Bar: Indicating the percentage of the processes completed. ` Result: The outcome of processes completed. Please wait while running programming processes. Processes running completely and successfully. Processes running failed and interrupted. a Counter: Count the number those have been processed successfully. Click the button on the right to clear the counter. Ú The background color of the process item changes to yellow when running the process. It turns into green when the process is done, and goes on next process. If fails, the procedures stops and the result column shows “FAIL“. 10 Programming Processes When users first time run the programming system, be sure to select IC type then go no other processes. Otherwise, processes can’t work. Select IC Number Click on Main Operation Menu to enter this menu to select the IC manufacturer, number and package. X Z [ Y ] \ X Manufacturer: IC brand Y You can just input the IC manufacturer here to locate it directly. (capitalization/lowercase) Z Type Number: IC number, package and PIN [ Input the IC number here to locate it directly. (capitalization/lowercase) \ IC information PIN: PIN assignment of the IC VCC: VCC voltage of the IC VCCP: VCCP voltage of the IC VPP: VPP voltage of the IC SIZE: The memory size of the IC Manufacturer ID: ID Code of the IC manufacturer Device ID: ID Code of the IC Note: Additional adaptor needed ] AotoDetect Auto detects IC brand and number Only for FLASH devices 11 Programming Processes LOAD Sour ce Data Fr om PC Click on the Main Operation Menu to enter this menu to load the source data from the computer to the buffer area. X Y Z \ ] [ X File: The filename and location of the source data You can just input the source filename and exactly location to load the data. Or you can click to locate the file. Y Format: The format of the source data The programming system supports 7 kinds of format. If you are not sure the format of the source data, you can select [Auto Detect] to detect it automatically. Z Source Select: Set the range of the source data You can set the start and end address to limit the source data area. [ Destination Select: Set the start address of the destination You can set the start address to limit the destination area in the IC. Fill unused with Fill the empty space with xx You can set to fill the empty space with some value while programming IC. The default value if FF(blank) \ Load: Confirm to load file in the computer with selected settings. ] Cancel: Abandon loading file. Ú Item Y、Z、[ setting depends user’s demand but not necessary. 12 Programming Processes After loading data, there’s a message window popping up to notify the file format and sum value of the data. As following. Ú Check Sum value is used for IC data confirming and verifying. READ Sour ce Data Fr om IC Click on the Main Operation Menu to enter this menu to read data from the IC to the buffer area. If you have mark on , the system will check that if the data in the buffer area and the data in the IC are the same completely. If there’s no IC placed on the socket, or the IC type is different from the IC type user selected, there will pop up following alarm message window. When read data from source IC, there’ll pop up message window showing data format and sum value. Just the same with loading data from computer (refer to LOAD procedure). 13 Programming Processes EDIT Sour ce Data Click on the Main Operation Menu to enter this menu to edit data in buffer area. X Z Y [ \ X 8bits data (hexadecimal format) Y Data Address (HEX) You can move cursor to this column and click on it to input the address you want to move to. Z 16bits data (hexadecimal) [ HEX column Data in hexadecimal format. Click here to edit directly. \ ASCII column Data in ASCII format. Click here to edit directly. ] Buffer Information Information of data in buffer area. ] 14 Programming Processes Get IC Check Sum Click in EDIT menu to enter this menu. X Y Z [ ] \ ^ _ ` X 8 Bit: device (hexadecimal format) Y 16 Bit: device (hexadecimal format) Z Start Address: Set start address of the data range computed in sum. [ End Address: Set end address of the data range computed in sum. \ IC: Compute the sum in range of the IC size selected. ] Max: Compute the sum in range of the buffer area size. ^ File: Compute the sum in range of the file size loaded. _ Cancel: Abandon and quit. ` OK: Confirm to compute the sum. 15 Programming Processes Block Pr ocess-Data Copy/Move/Swap in EDIT menu to enter this menu. Click _ Y X ` Z \ [ ^ ] X 8 Bit: device (hexadecimal format) Y 16 Bit: device (hexadecimal format) Z IC: Set Block area in range of the IC size selected. [ Max: Set Block area in range of the buffer area size. \ File: Set Block area in range of the file size loaded. ] Destination Range: Set the start address of destination. Ú After inputting Start Address, system will get the End Address automatically and display below. Ú If the Destination Range exceeds regular range, there’ll be an error message showing as following. ^ Action: Copy: Copy block data to elsewhere designate Move: Move block data to another block Swap: Swap block data to another block _ OK: Confirm to execute action. ` Cancel: Abandon and quit. 16 Programming Processes Fill Data Click in EDIT menu to enter this menu. X ^ _ Y Z \ [ ] X Range: The start address and end address of the block which data is going to fill in. Y IC: Set the range according to the IC size selected. Z Max: Set the range according to the buffer size. [ File: Set the range according to the file size loaded. \ User define [BYTE] Byte Fill with [FF] byte by byte. Word Fill with [FFFF] word by word. ] Fill Data Select All Bit 1 Fill the block with 1. All Bit 0 Fill the block with 0. Random Data Fill the block with random number. Sequential Byte Fill the block with sequential byte. Sequential Word Fill the block with sequential word. ^ OK: Confirm to fill data. _ Cancel: Abandon and quit. 17 Programming Processes SAVE Data Click on the Main Operation Menu to enter this menu to save data. ^ X Y Z [ \ _ ] X Name You can just input the filename and exactly location to save the data. Or click to search the subdirectory where the data’s saving. Ú When you input the filename in the blank space, be sure to input the complete filename, path and subdirectory. YFormat Supports 6 kinds of file format. If you pick the wrong format to save data, that will cause data incorrect. Z Save Range You can set the Start Address and the End Address to limit the saving range. Ú Only allow value in HEX-Byte. [ File:: Set the range according to the file size loaded. \ Max: Set the range according to the buffer size. ] IC: Set the range according to the IC size selected. ^ Save: Confirm to save data and quit. _ Cancel: Abandon and quit. 18 Setting Parameters This section instructs setting IC parameters. Common Setup About parameters of ICs, please refer to IC Datasheet first. Because different IC has different features, the setting of parameters is also different. Following describes some settings of IC for users’ reference. X Y Z \ [ X Data Set 8 Bits-Every: Load data by every bit 16 Bits: Cutting the data into Even and Odd and loading in separately 32 Bits: Cutting the data into 4 blocks and loading in separately Y Verify Method the way of verifying IC Z Insertion Test When any action Checking IC insertion whenever placing an IC [ To Check IC ID-CODE When any action Checking IC ID-CODE whenever placing an IC \ Verify Error List (Only for MPU and Memory) Listing the error address and data content while running IC Confirm and Verify. 19 Setting Parameters Extra Parameter Detail information of IC parameters. For users to adjust for advanced applications. 1. Description Definition of parameters 2. Symbol The signal of the parameters 3. Min The minimum of the parameters 4. Value The value of the parameters 5. Max The maximum of the parameters 6. Units The unit of the parameters Click on the column to revise the value of the parameter directly. 20 Setting Parameters Following 2 functions are only used for certain ICs but not all devices. Here is not described in detail. Serial Number Device Option Security: When users mark of Security in IC programming process, you can designate Programming System to lock which address of the data. 21 Options This section describes the operation interface of options and illustrates option functions. System Option Information about the settings of programming system, hardware, software and the programmer. X Y [ \ Z ] ^ X System Option: Programming system options Y Hardware Information: Programmer information and status Z Connect: Check the connection status of the programmer with the computer [ Sound Setup: Set the sound effect \ Sound Testing: Test the sound effect ] Hot Key: Quick function key Hot Key Function Active: Enable the Hotkey function ^ Exit: Quit system option menu 22 Options Self Test LEAPER-48 can test hardware status itself. Repairing persons can find out the problems and solutions quickly. X Y Z [ ] ^ \ X Self Test: Programmer hardware testing. Y Selftest Ver: The version of Self-Test program. Z & [: The results of all hardware check points testing (PASS or FAIL). Ú If the result is FAIL, please contact LEAP services team or distributors you purchased the item. Let the professional check the programmer for you. Do not try to take apart it, fix it or refit it. Otherwise, LEAP Electronic Co., Ltd won’t be responsible for the damages or losses or offer the free products repair services. \ Test Status READY!! Ready to start testing. Not Connected The programmer isn’t connected to the computer. Time Out Stop detecting. The time trying to detect the programmer exceed regulation. ] Cancel: Cancel and be back to previous menu. ^ Execute: Run the Self-Test. Ú Make sure to remove IC on the programmer before starting to running Self-Test. Otherwise that will damage the IC even the programmer and LEAP Electronic Co., Ltd won’t responsible for any lost. 23 Advanced Instruction W hat’s Hotkey Press space bar on the keyboard on Main Operation Menu to open the Hotkey window. Item: Image Process icon Description Key function Key Function key Hotkey Description 1. Verify IC: Check source data with IC data programmed 2. Select IC Type: Pick IC manufacturer and number 3. Load Source File: Load data from the computer 4. Erase IC: Clear the content in the IC 5. Edit Data: Revise the data which is loaded or read 6. Save Data to File: Save the data revised in the computer 7. Exit System: Quit programming system 8. Run Process: Execute the processes selected 9. Program IC: Copy data to the IC 10. Blank Check: Check if the IC is empty 11. Read IC Data: Read data from the IC Cancel: Abandon and quit 24 Advanced Instruction This section describes information about advanced functions particular for NAND FLASH devices. Pr oject Click on the Main Operation Menu to enter this menu. During IC programming process, users might revise some parameters, change some setting, load certain file and etc. Universal Programming System can save these changes in a Project. Next time, users only have to select the Project to programming an IC but do not need to do all the changes again and again. 1. Description: Project name and description. (Users defined) 2. Device: IC brand, number and package. 3. Auto: Enable/Disable Auto Programming ICs 4. Lock: Enable/Disable Project Protect 5. Delete: Delete selected project 6. Create: Move the cursor to blank column and click Create to open a new project. It records all settings include IC selected, parameters, data and etc. Select the exist project and click Create to see its contents, then users can revise it. If project number is over 10, the unlocked project which is not used for longest will be covered. 25 Advanced Instruction 7. Cancel: Quit Project menu. 8. Execute: Run the project. Move the cursor to a project column. Double click left button on the mouse to execute the project, and single click left button to select it. Double click left button on a blank column to create a new project. Users can see and revise the current process and settings. Save Project 1. Description: Project name and description. (Users defined) 2. Device: IC brand, number and package. 3. Process: The programming processes which users selected. E: Erase IC, C: Blank Check, P: Program IC V: IC Verify, S: Security/Protect IC 4. Date: Recording the date and time of the project being created 3. Auto Run: Auto programming loop Once Auto Programming once Batch Auto programming continuously 26 Advanced Function Definition Er r or Messages LEAPER-48 can auto check IC insertion. When an IC is inserted into the textool of LEAPER-48, LEAPER-48 will check immediately. Following is some probable situations. X Y Z X The IC insertion status. Y Working guiding light Z Ignore: not to check IC insertion [ Cancel: Abort \ Direction: Please Insert IC! [ \ Direction => Please Check IC! z Retry: Try the IC again z Direction => Please Check IC! 27 Er r or Messages After programming an IC successfully, you can Read the data from it to the Buffer area. While you are reading data from IC, there might be several unexpected situations happening. z When the system reads data from an IC, it checks the format of the data first. If correct, the data will be read to Buffer area. The system will write the data from 00000H in the Buffer area. z If the IC is unformatted, here’s the alarm message as following. And you won’t see any data in Buffer area at Edit menu. z If the data format of the IC is incorrect, here’s the alarm message as following. And you won’t see any data in Buffer area at Edit menu. 28