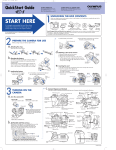
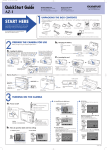
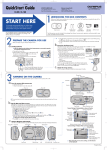
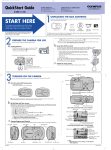
1
b. Zooming
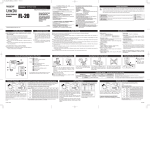
TAKING PICTURES
P
a. Turning on the camera in the
shooting
Using the situation-related shooting modes
1) Select SCENE SELECT, then SCENE in the menu.
W
T
W
P
T
SH 3M
SH 3M
Press to confirm
mode
MENU/OK
SCENE SELECT
RESET
FLASH MODE
Shutter button
Press
Press to confirm
MENU/OK
MENU/OK
P
c. Taking the picture
Rotate to
select
Press to confirm
EXIT BACK
P
P
SCENE SELECT
PROGRAM AUTO
SCENE
AUTO
OFF
SH 3M
EXIT BACK
GO OK
SELECT
GO OK
SELECT
2) Select the situation-related shooting mode.
Rotate to
select
2 1
3
4
P
MENU/OK
Position the AF target mark on the subject
you want to focus on. Adjust the focus.
Press the shutter button gently (halfway).
Lights steadily when the focus is locked.
Lights when the flash fires.
6
7
8
SH 3M
1
5
9
1 Flash stand-by/
Flash charging mark
2 Battery check
3 Shooting modes
4 Green lamp
5
6
7
8
9
Record mode
AF target mark
Card access mark
Memory gauge
Number of storable still pictures
landscapes.
Vivid reproduction
of blues and greens.
VIEWING AND
ERASING IMAGES
GO OK
Pressing the shutter button optimizes the settings for the selected shooting
mode, such as NIGHT SCENE, CUISINE and SPORT, etc.
When the mode switch is set to
b.
c.
Selecting images
Rotate to
select
Displays the previous image.
Erasing pictures [
FILE
100–0015
, you can record movies.
ERASE]
1) Select
ERASE in the menu.
2) Select THIS IMAGE.
Rotate to
select
Turning on the camera in the
play
mode
LANDSCAPE
For shooting
Release the shutter.
Press the shutter button all the way (fully).
Still picture
1
LANDSCAPE
SELECT
a.
Press to confirm
Currently selected mode
ERASE
THIS IMAGE
SEL. IMAGE
SH 3M
Press to confirm
’04.01.01.00:00
15
JUMP NEXT
CANCEL BACK SELECT
GO OK
MENU/OK
Rotate to
select
Displays the next image.
3) Select YES.
Rotate to
select
Press
Press to confirm
Pressing BACK/NEXT switches the playback method between the
one-by-one mode and the 10-frame jump mode.
MENU/OK
1
2
FILE
Close-up playback
0.0
3
4
5
6
’04.01.01.00:00
10
JUMP NEXT
7
8
9
SH 3M
100–0010
SIZE :2048x1536
Press the zoom button
Press the zoom button
Battery check
File number
Record mode
Resolution
White balance
6
7
8
9
to enlarge it.
Press the zoom button
. Rotate the control dial to move
the frame to the desired image.
Press the zoom button
SELECT
GO OK
. The screen returns to single-frame playback.
Exposure compensation
Date/time
Frame number
Operation guide
CONNECTING THE CAMERA
TO A COMPUTER
You can connect your camera to a computer with the USB cable and transfer images stored on
a card to the computer.
a.
YES
NO
to return to the original size (1x).
Index display
Still image
1
2
3
4
5
ERASE
2) Insert the provided USB cable into the USB connector on the cradle.
3) Attach the camera to the cradle.
● The selection screen for the USB connection is displayed on the
camera’s monitor.
Windows 98 users must install the “USB Driver for
Windows 98” software before connecting this
digital camera to the computer.
TIP: Non-Windows 98/98SE users, start at Step b.
1) Insert the provided software CD into your CD-ROM drive. The menu is displayed.
2) Select [USB driver].
b.
4) Select [PC] and press MENU/OK.
● The computer recognizes the camera as a new
device.
Rotate to
select
USB
PC
PRINT
END
Look for this mark.
Connecting the camera to the
computer
Press to confirm
1) Insert the marked end of the provided
USB cable into the USB port on your
computer.
MENU/OK
SELECT
GO OK
TIP: To ensure a consistent power
supply when downloading
images, Olympus recommends
using the AC adapter.
USB cable
USB port
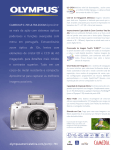
To use advanced features
For details on the
camera’s features
and operations...
Refer to the Reference Manual.
● More than 20 scene modes to suit a wide range of
shooting situations.
● Movie recording capability.
● Telephoto shooting with optical zoom and digital
zoom.
● Direct printing on a PictBridge-compatible printer.
● Image can be transferred to a computer for editing
and storage.
● Image management for grouping photos or
creating photo albums.
Viewing images
shot on a PC...
The provided software CD
includes Olympus CAMEDIA Master
software for viewing and
editing images.
● Install “CAMEDIA Master”.
● Complete the on-line user registration. Make
sure that your PC is communicating with the
Internet before submitting the registration.
● “Ferrari Photo Collection” is included with
CAMEDIA Master.
● Makes it easy to edit your digital photos.
© 2004 OLYMPUS CORPORATION