1
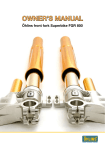
Owner’s Manual
Öhlins Superbike Front Fork FG 470
Safety signals
Important information concerning safety is
distinguished in this manual by the
following notations:
!
This Safety alert symbol means: Caution!
Your safety is involved.
! WARNING!
Failure to follow warning instructions could
result in severe or fatal injury to anyone
working with, inspecting or using the suspension, or to bystanders.
CAUTION!
Caution indicates that special precautions
must be taken to avoid damage to the
suspension.
NOTE!
This indicates information that is of importance with regard to procedures.
2. Please study and make certain that you
fully understand all the mounting instructions
and the owner´s manuals before handling
this suspension kit. If you have any questions
regarding proper installation procedures,
contact an Öhlins dealer or other qualified
person.
3. The vehicle service manual must be
referred to when installing the Öhlins suspension.
Introduction
All of Öhlins advanced suspension products
are adapted to the brand and model. This
means that length, travel spring action and
damping characteristics, are tested individually just for the motorcycle that you have
decided to fit with Öhlins suspension.
NOTE!
Öhlins products are subject to continual
improvement and development. Consequently, although these instructions include
the most up-to-date information available
at the time of printing, there may be minor
differences between your suspension and
this manual. Please consult your Öhlins
dealer if you have any questions with regard to the contents of the manual.
Before installation
Öhlins Racing AB can not be held responsible for any damage whatsoever to suspension or vehicle, or injury to persons, if
the instructions for fitting and maintenance
are not followed exactly. Similarly, the
warranty will become null and void if the
instructions are not adhered to.
NOTE!
During storage and transportation, especially at high ambient temperature, the oil
and grease used for assembling may run
out inside the packing and damage the expanded polystyrene packing material. This
is not unusual and is in no way detrimental
to the suspension.
© Öhlins Racing AB.
All rights reserved.
Any reprinting or unauthorized use
without the written permission of
Öhlins Racing AB is prohibited.
Printed in Sweden.
2
! WARNING!
1. Installing a suspension, that is not approved by the vehicle manufacturer, may
affect the stability of your vehicle. Öhlins
Racing AB cannot be held responsible for
any personal injury or damage whatsoever
that may occur after fitting the suspension.
Contact an Öhlins dealer or other qualified
person for advice.
Öhlins Front Fork FG 470
This Super Bike front fork is an improved
version of FG 370 with pressurised damping system. FG 470 is based on 4 years
experience from factory road racing. The
pressurised damping system improves the
front fork function at high frequency movements. The immediate damping responses
improve the tyre feeling and also give more
possibilities for adjustments. Of course
the combination of spring and air-gap (oil
level*) still gives a possibility to adjust the
characteristic of the fork to suit different
tracks and riders.
For example a soft spring in combination
with a small air-gap (high oil level) gives a
more progressive action of the front forks.
NOTE!
Gas pressure should not be changed or
used as an alternative to adjust the damping.
For better understanding, please refer to
our oil level chart see page 17.
A telescopic front fork is depending on a
smooth friction-free action. Make sure your
front forks are serviced regularly and don’t
use strong solvents such as brake cleaner
to clean the front forks. This will dry out the
seals and cause friction.
For tighten torque, loctite and grease see
page 19.
Contents
Before installation ...........................................................2
Öhlins front fork FG 470 .................................................3
...........................................................................4
Adjusters
Setting up your forks ......................................................5
Changing springs ...........................................................6
Changing seals ...............................................................7
Dismantling the forks .....................................................8
Assembly of the forks ..................................................12
Oil level adjustment ......................................................17
Troubleshooting ............................................................18
Technical information ...................................................19
Spare parts list .............................................................20
Service tools ...............................................................23
*
Front fork 470 is equipped with an external reservoir, pressurized
with nitrogen. A dividing piston separates the oil from the gas.
3
Adjusters
Your Öhlins super bike front fork is provided with the following external adjusters:
•
•
•
Spring pre-load adjuster
Rebound damping adjuster.
Two type of compression
damping adjuster:
- Reservoir valve adjuster in the
lower part of the fork leg.
- Main valve bleed circuit.
NOTE!
The rebound damping adjuster is located at
the top of the right hand fork leg. The Main
valve bleed circuit (compression adjuster) is
located at the top of the left hand fork leg.
Compression adjustment reservoir valve
(Base valve)
Adjust the compression damping (shaft
displacement) on the lower part of the fork
legs. Use a normal screwdriver. Adjustment
range from closed valve (clockwise) to
maximum open valve (counter clockwise)
is 20 “clicks”. Recommended adjustment
“clicks”, from closed position:
See specification card.
Spring pre-load adjustment
17 mm wrench
Increase spring pre-load
Spring pre-load adjustment
Use a 17-mm wrench to turn the upper
adjustment screw. The adjustment range
is 0-18mm. On the adjustment screw one
turn will change 1mm in spring pre-load.
Recommended static sag is 25-30 mm.
Reduce spring pre-load
Compression adjustment main valve.
Adjust the compression damping on the
adjustment screw positioned at the top of
the left hand fork leg. Use a hex key with
spherical head (use tool 794-01).
Compression adjustment
Left Hand Fork Leg
Adjustment range from closed valve
(clockwise) to maximum open valve
(counter clockwise) is 20 “clicks”. Recommended adjustment “click”, from closed
position: See specification card.
Counter clockwise
turn opens = reduced
compression damping
Rebound adjustment
Adjust the rebound damping on the adjustment screw positioned at the top centre of
the right hand fork leg. Use a hex key with
a spherical head (use tool 794-01).
Adjustment range from closed valve (clockwise) until maximum open valve (counter
clockwise) is 20 “clicks”. Recommended
adjustment “click”, from closed position:
See specification card.
4
Top cap
Clockwise turn
closes = increase
compression
damping
Tool 794-01
Rebound adjustment
Right Hand Fork Leg
Tool 794-01
Clockwise turn
closes = increase
rebound damping
Counter clockwise
turn opens = reduced
rebound damping
Compression adjusment reservoir valve (Base valve))
Counter clockwise turn opens =
reduced compression damping
Screwdriver
Clockwise turn closes =
increase compression damping
Setting up your forks
F1
F2
R1
R2
A-D. Bike on a stand
R3
E. Bike on the ground
Here is some basic guidelines, how to set
up your Öhlins front forks. However you
must remember that the front forks are just
one part of your motorcycle and to get it to
work properly, the whole motorcycle has to
be set up according to your bikes manual.
1
Put your bike on a front stand and fit the
Öhlins front fork.
NOTE!
The lower triple clamp must not be tightened to more than 12-15 Nm. This is also
important for the steering damper bracket,
when located around the upper front leg.
To high torque might deform the front fork
leg.
17 mm wrench
Increase spring pre-load
F. Bike with rider on
Setting the spring pre-load generally on
the bike
3
Pre-load on the spring/springs is very
important, since it affects the height of
the motorcycle and the fork angle. Consequently, handling characteristics can be
changed, even negatively.
Proceed as follows (it will be much easier if
done by two persons):
1
2
3
4
2
Set your initial pre-load of the spring, by
using a 17mm socket or wrench, until you
get a static sag of 25-30 mm. Each turn
gives 1mm in pre-load, maximum pre-load
is 18mm.
Spring pre-load adjustment
F3
5
6
Place the motorcycle on a stand.
Lift up the rear end to a fully extended upper
position.
Measure the distance, e.g. from the ower edge of
the rear mud guard or from a point marked by a
piece of tape, immediately above the rear whee
axle, to the wheel axle. (R1)
Make a similar measurement on the front axle, e.g.
from the bottom of the upper fork crown to the
front wheel axle. The fork must be fully
extended. (F1)
Allow the motorcycle (without rider) to apply load
on the springs and repeat the measuring procedure. (R2, F2)
Then take the same measurements with the rider
and equipment on the motorcycle. It is important
that the rider has a correct riding posture, so that
the weight is balanced on the front and rear wheel
in the same way as when riding. (R3, F3)
4
The measurements may not differ from the
following sizes:
Without rider:
Rear:
5-15 mm
Front: 25-30 mm
(R1-R2)
(F1-F2)
With rider:
Rear:
30-40 mm
Front: 35-50 mm
(R1-R3)
(F1-F3)
Reduce spring pre-load
5
Changing springs
1.
Unload the spring pre-load completely
by turning the adjustment nut counter
clockwise as far as possible. Use a 17 mm
wrench or socket.
1
2.
Loosen the screws that hold the fork legs
in the upper tripple clamps.
3.
Remove the Top nut assembly. Use tool
797-01.
2
17 mm socket
3
4
Tool 797-01
17 mm socket
4.
Remove the top nut assembly from the
piston shaft. Use a 17 mm wrench to the
top and tool 4705-01 to hold the nut on the
lower side of the top nut.
5.
Remove the adjustment driver and the
spring. Use a wire with a hook and carefully pull out the preload tube.
Tool 4705-01
5
6
Tool 1765-03
Adjustment driver
6.
Check the oil level according to page 17.
Spring
NOTE!
Use Öhlins Front fork oil 1305-01 only.
1305-01
Check the oil level
7.
Refit the Pre-load tube. Install the new
spring and refit the adjustment driver.
8.
Refit the top nut assembly to the piston
shaft. Tighten the jam nut to 20 Nm.
Preload tube
CAU
TIO
9.
Refit the top nut into the fork leg, with
the front wheel off the ground (use tool
797-01). Tighten the upper triple clamps
and adjust the preload, compression and
rebound according to above instructions.
CAUTION!
The top nut should only be tightened by
hand into the fork leg.
6
8
20 Nm
9
N!
Tool 797-01
Changing seals
1.
Remove the fork legs from the motorcycle.
Put the fork legs in upright position for
about 5 minutes to allow the oil to settle.
2
4
2.
Fasten the fork leg in a vice. Use soft jaws.
3.
Carry out instructions 1 to 5 in “Changing
springs”, page 6.
4.
Drain the cylinder tube from oil.
5.
Remove the outer tube, clean the seal and
check the condition. If the seal is in good
condition apply some red grease (146-01)
to it. A damaged seal must be replaced!
5
6
180
0
1st, Circlip
6.
First remove the circlip, then the seal and
finally the washer.
2nd, Seal
7.
Apply a thin layer of Öhlins red grease
(146-01) to the washer and to the sealing
surfaces of the fork seal. Install the seal
and the washer in the outer tube. Fit the
circlip into the groove.
NOTE!
It is important to use the correct grease in
order to achieve optimum fork function.
3rd, Washer
NOT
!
E!
7
Circlip
8
WA
R
NIN
G!
Seal
8.
Apply some front fork oil (1305-01) to the
inner tube surface and carefully mount the
outer tube (slide it completely down).
Washer
! WARNING!
Be careful not to damage the fork seal!
9.
Repeat instructions 6 to 9 in “Changing
springs” on page 6. Refit the front fork.
7
Dismantling the Forks
1.
Remove the fork legs from the motorcycle.
Put the fork legs in upright position for
about 5 minutes to allow the oil to settle.
2.
Fasten the fork leg in a vice. Use soft jaws.
2
3
3.
Unload the spring pre-load completely
by turning the adjustment nut counter
clockwise as far as possible. Use a 17 mm
wrench or socket.
4.
Loosen the top nut assembly. Use tool
797-04.
17 mm socket
4
5
Tool 797-04
17 mm socket
5.
Remove the top nut assembly from the
piston shaft. Use a 17 mm wrench to the
top and tool 4705-01 to hold the nut on the
lower side of the top nut.
6.
Remove the adjustment driver and the
spring. Use a wire with a hook and carefully pull out the preload tube.
7.
Remove the screw and o-ring from the
reservoir end cap.
Tool 4705-01
6
NO
7
TE
!
Adjustment driver
Spring
NOTE!
Before the gas pressure is relieved the
adjuster settings must be counted and
noted. Even check that the gas pressure is
correct. Follow that, the adjusters should
be set in a fully open position.
8.
Relieve the nitrogen gas by inserting an
injection needle into the reservoir end cap
through the rubber valve.
8
!
8
Preload tube
WA
R
NIN
G!
! WARNING!
Releasing high pressure gas from the
shock absorber can be hazardous. Do not
perform any kind of service until gas pressure is completely released.
9
10
Tool 720-03
Tool 720-02
9.
Remove the circlip.
10.
Use tool 720-03 to lift up the reservoir end
cap. Install the tool 720-02 into the gas
piston.
11.
Use tool 1797-04 and 1765-03 to unscrew
the seal head from the cartridge tube.
Remove the piston rod unit.
Tool 1765-03
11
12.
Fasten the piston rod in a vice. Use soft
jaws (727-02). Remove the nut with a 13
mm wrench or socket. Remove the valve
from the piston rod.
Tool 1797-04
Piston rod unit
Seal head
Place all parts, including the shims, in their
correct position on the work bench. Clean
all parts thoroughly and dry with compressed air.
NOTE!
The right hand fork leg is the rebound leg.
The left hand fork leg is the compression
leg.
NO
12
TE
!
Notes
13 mm socket
Nut
Rebound Valve RH-Leg
Soft jaws
(727-02)
Compression Valve LH-Leg
9
13.
Remove the Piston holder. Use a 14 mm
wrench.
13
14 mm Wrench
14
Piston holder
14.
Remove the Topout spring, the Sleeve, the
Spacer and the O-ring.
Topout spring
Sleeve
Spacer
O-ring
15.
Remove the Seal head. Check the O-ring
and the X-ring. Change them if necessary.
16.
Remove the needle and change the O-ring
if necessary.
15
16
X-ring
17.
Drain the cylinder tube from oil.
Seal head
O-ring
O-ring
Rebound neendle
18.
Remove the gas piston in the reservoir, use
tool 720-02.
19.
Drain the reservoir from oil.
17
18
19
20
20.
Use a 17 mm wrench to unscrew the
complete compression valve at the bottom
of the fork.
21.
Remove the piston from the compression valve. Place the shims in their correct
position on the work bench. Clean all parts
thoroughly, change O-rings if necessary
and dry all parts with compressed air.
Notes
21
10
22.
Remove the outer tube, clean the seal and
check the condition. If the seal is in good
condition apply some red grease (146-01)
to it. A damaged seal must be replaced!
22
23
180
0
1st, Circlip
2nd, Seal
23.
First remove the circlip, then the seal and
finally the washer.
3rd, Washer
24.
Heat the tube where the bushings are positioned. Use a heat air gun.
25.
Put the outer tube standing up on a soft
suface, seal side facing down. Remove the
bushings by pushing them out. Use attachment bar (1757-01) and dismantling sleeve
(1759-07) from the top nut side.
26.
Tap gently on the attachment bar with a
heavy hammer, until the bushings are free
and can be released from the seal side of
the outer tube.
27.
Check the innertube for damages, replace
if necessary. Use a heat gun to warm up
the fork bottom and tool 786-05 to unscrew the inner tube of the fork leg.
24
25
Attachment bar
(1757-01)
Dismantling sleeve
(1759-07)
Heat air gun
Rubber mat
26
27
Tool 786-05
28.
Check the reservoir tube for damages,
replace if necessary. Use tool 786-07 to
unscrew the reservoir tube.
Upper bushing
Lower bushing
28
Tool 786-07
11
Assembly of the forks
1.
Use Tool 786-07 to refit the reservoir tube.
Tighten to 45 Nm.
1
2.
Use Tool 786-05 to refit the inner tube of
the fork leg. Tighten to 80 Nm.
3.
Put the outer tube standing up on a soft
surface, seal side up. Fit the bushings
from the seal side of the outer leg. Install
first the upper bushing then the lower one.
Use installing sleeve (1759-08), guide ring
(1758-04) and attachment bar (1757-01)
when installing the upper bushing. Apply Loctite 601 on the seat position of the
upper bushing, use a long brush. Tap the
attachment bar until it reaches the correct
position (stop against a shoulder).
4.
When the upper bushing is in position, the
lower bushing is to be installed the same
way. Apply some red grease (146-01) to
the bushing before installation.
3
e
reas
!
ctite
o lo
ed g
ly R
App
-0
(146
Lower bushing
Upper bushing
Long brush
Guide ring
(1758-04)
Attachment bar
(1757-02)
Loctite 601
Installing sleeve
(1759-08)
Outer tube
Rubber mat
NOT
E!
4
12
Tool 786-05
1), N
5.
Apply a thin layer of Öhlins red grease
(146-01) to the washer and to the sealing
surfaces of the fork seal. Install the seal
and the washer in the outer tube. Fit the
circlip into the groove.
NOTE!
It is important to use the correct grease in
order to achieve optimum fork function.
2
Tool 786-07
5
Circlip
Washer
Seal
6.
Install the piston and the shims on the
compression valve. Tighten the 8 mm nut
with a torque of 7 Nm. Check the piston
ring and the O-rings for damages. Replace
if necessary.
6
8 mm Nut,
7Nm
Install the compression valve assembly into
the valve housing. Tighten to 20 Nm.
!
7.
Apply some front fork oil (1305-01) to the
inner tube surface and carefully mount the
outer tube (slide it completely down).
7
WA
RN
IN
G!
338-53, O-ring
1473-02, Circlip
884-02 x 2, Ball
1474-01, Spring
1242-03, Needle
438-02, O-ring
1672-01, Collar
1669-01, Sleeve
1693-01, Spring
530-22, Shims
338-11, O-ring
1670-01, Piston
Shim stack Comp.
641-02, Washer
153-01, Washer
1675-01, Nut
1658-01, End piece
Comp. valve assembly,
20 Nm
Compression valve assembly:
8
! WARNING!
Be careful not to damage the fork seal!
8.
Fill up with Öhlins front fork oil (1305-01) all
the way to the edge of the reservoir. Continue to fill until the oil level is the same in
both the reservoir and in the cylinder tube.
9.
Push the gas piston, with teflon band
and O-ring fitted, to the reservoir bottom
without allowing it to be pressed back over
the circlip groove, make sure that there is
no air between the piston and the oil. Use
tool 720-02.
9
Tool 720-02
Close the compression adjuster.
13
10.
Grip the piston shaft with soft jaws 727-02.
Fit the O-ring on the adjustment needle.
Apply plenty of red grease on the O-ring so
that the needle slides easily into the piston
shaft.
11
10
X-ring
O-ring
11.
Check the X-ring and O-ring on the seal
head. Replace if necessary. Smear plenty
of white grease on the X-ring before you fit
it. Use tool 0715-01 to get the X-ring into
the right position.
Tool 0715-01
11
10
Piston holder
10.
Wrap some teflon tape arond the thread
of the shaft to protect the seal and O-ring
from damages. Apply some red grease
(146-01) to the tape and the shaft end.
Mount the seal head and the O-ring.
Topout spring
Sleeve
Spacer
11.
Use a brass wire brush to clean the piston
rod from tape. Mount Spacer, Sleeve, Topout spring and the Piston holder.
NOT
13
12
E!
15 Nm
8 mm Nut (7 Nm)
12.
Tighten the Piston holder to a torque of 15
Nm.
14
1654-06,
Piston holder
641-02, Washer
Shim stack
(compression)
1447-02,
Pison ring
2061-03, Piston
Shim stack
(rebound)
1674-01 4x,
Washer
641-02, Washer
1675-01, Nut
1654-06,
Piston holder
338-19, O-ring
1618-02, Cup
530-22, Shims
1149-01, Wave
520-20, Shims
1618-01, Holder
Shim Stack
(compression)
641-02, Washer
1447-02,
Piston ring
2061-03, Piston
Shim stack
(rebound)
641-02, Washer
153-01, Washer
1674-01, Washer
1675-01, Nut
CAUTION
COMPRESSION
LEG (LH)
!
REBOUND
LEG (RH)
CAUTION
!
13.
Refit the Compression/Rebound valve. Use
the picture below to make it right. Tighten
the 8 mm nut with a torque of 7 Nm.
NOT
CAUTION!
The Washers must be positioned correctly
(Notice that there is a difference between
the compression and the rebound valve).
Also make sure to fit the Wave washer
(1149-01) in the correct position (convex
side facing piston).
E!
14
Tool 1765-03
Tool 2810-01
Tool 1797-04
NOTE!
The right hand fork leg is the rebound leg.
The left hand fork leg is the compression
leg.
14.
Fit the Seal head tool and the Top-out
spring tool on the piston rod. Pull the Topout spring tool and, at the same time, push
the Seal head tool to contract the Top out
spring. Install tool 2810-01 on tool 176503 to keep the contraction. Assemble the
complete piston rod into the cartridge tube
and tight it by hand (3-4 turns).
20 Nm
15
16
Tool 720-03
NOTE!
Make sure that the gas piston is pressed
down completely
15.
Tighten the Seal head to 20 Nm. Use Seal
head tool (1797-04 and 1765-03).
16.
Check the O-ring on the reservoir cap
assy. Replace if necessary. Apply some red
grease on the O-ring and push the reservoir cap assy into the chamber using tool
720-03.
17
18
17.
Fit the circlip. Make certain that it enters its
groove properly.
18.
Once again contract the top out spring
using tool 2810-01, tool 1765-03 and tool
1797-04
NOTE!
Nitrogen (N2) gas. Use pressure gauge
(1781-01)
15
! WARNING!
Use of inflammable gas for pressurising
the soch absorber can be hazardous. Use
nitrogen gas (N2) only!
!
WA
R
NIN
G!
19
20
19.
Check the gas pressure stipulated in the
spec. card. Dip the needle of the gas tool
(1781-01) in red grease and insert the needle through the gas filler valve.
3 Nm
Charge with gas to the correct pressure,
according to the spec. card.
NOTE!
Ensure that there is no leakage of gas or
fluid.
20.
Screw the gas filler screw with O-ring.
Remove tool 2810-01 and tool 1797-04 to
release the top-out spring.
NOT
E!
22
21
Tool 1765-03
21.
Push tool 1765-03 to a stop and check the
oil level according to page 17.
NOTE!
Use Öhlins Front fork oil 1305-01 only.
1305-01
Check the oil level
22.
Refit the Pre-load tube. Install the spring
and refit the adjustment driver.
23
Refit the top nut assembly to the piston
shaft. Tighten the jam nut to 20 Nm.
24.
Refit the top nut into the fork leg (use tool
797-01). Adjust the preload, compression
and rebound.
CAUTION!
The top nut should only be tightened by
hand into the fork leg. The tightening force
of the triple clamp will hold it in locked
position.
16
CAU
23
24
TIO
N!
20 Nm
Tool 797-01
Oil level adjustment
Compared with conventional type of front
forks, the upside down front forks are very
sensitive to variations in oil level. Therefore,
adjust the oil level with special care.
A change in the fork oil level will not affect
the spring force at the beginning of the fork
travel, but will have a great effect at the
end of the travel.
When the oil level is raised:
The air spring in the later half stage of
travel is stronger, and make the front forks
more progressive.
Air spring characteristics
Air inside the front fork works as a spring.
The graph at the bottom of the page shows
the spring force related to stroke when the
oil level is changed between 140 mm and
200 mm. Standard oil level is 180 mm.
Öhlins front fork fluid 1305-01
Push to a stop,
use tool 1765-03
Check the oil level
When the oil level is lowered:
The air spring of the travel is lessened, and
thus the front fork less progressive. The
oil level works most efficient at the end of
the fork travel. Air spring characteristics
shown, is a general card description to understand the difference when the oil level is
changed.
NOTE!
Adjust the oil level in mm according to the
figure with the fork leg fully compressed.
For the right oil-level, please see the specification card.
17
Troubleshooting
Below are a few examples of how to adjust
for the most common road holding problems in Road Racing driving.
4.
The front end loses grip coming out of a
corner.
1.
The front wheel “chatters” entering a
corner, the problem goes away, as soon as
you let the brakes off, or when you get on
the power.
•
Not enough rebound damping. Put on some more
rebound damping.
•
Too much pre-load. Take off some pre-load.
•
Rear end is too soft. Put on a harder rear spring.
•
Front end is too high. Lower the front end by
pulling the fork legs through the triple clamps.
•
This is caused by the fact that the fork is working
too low in the travel and reaches the progressive,
hard part at the end of the travel.
•
Put on more pre-load.
•
Change to a harder spring.
•
If a lot of stroke remains after riding, drop the oil
level. See oil level chart.
•
Make sure the front forks have no friction.
•
Rear ride height is to high, too much rear spring
pre-load.
•
Lower the rear end by taking off pre-loadfrom rear
shock spring.
As mentioned in the beginning, the whole
bike setup affects the front forks. Try to
understand the feelings and work step by
step.
NOTE!
Our advice is to change only one thing at a
time and do everything step by step.
1
2.
The front wheel is jumping during the last
part of braking.
• If a lot of stroke remains, the oil level is too high.
Lower the oil level.
• If the fork is bottoming, put in harder springs and
keep the oil level.
3.
The front end feels unpredictable and unsafe in the middle of the corner (between
braking and getting on power).
•
Not enough rebound damping. Put on more
damping.
•
Too much rebound damping. If it at the same time
feels harsh, take off some rebound damping.
•
Too much compression damping. Also gives a
harsh feeling. Take off some compression
damping.
18
4
Technical information
Fork length: 730 mm.
Stroke: 130 mm.
Free spring length: 260 mm.
Tighten torque, Loctite and Grease:
Compression adjustment:
Base setting 6-16 “clicks”.
Maximum open valve 20 “clicks”.
4744-95
9.5 N/mm (marking -95).
Piston rod/piston shaft, 15 Nm
Loctite 270
Red grease
Reservoir tube, 45 Nm
Nut, 7 Nm
Loctite 222
Inside of reservoir tube
White grease, thin film
Nut, 7 Nm
Loctite 222
Cylinder tube, 80 Nm
Loctite 648
Service interval:
Every 10 hours
Screw, 3 Nm
Both fill-up points
Grease:
Öhlins front fork grease 146-01
(red grease).
Fork leg, 140 Nm
Loctite 542
Tighten torque:
Lower triple clamp bolt 12-15 Nm.
Upper triple clamp bolt 18-22 Nm
Lower bushing
No loctite
Oil Capacity:
Please see specification card.
Use Öhlins high performance front fork
fluid No. 5 (1305-01) only.
Screw, 3 Nm
8.5 N/mm (marking -85)
8.0 N/mm (marking -80)
X-ring
White grease
Attach piston holder to rod
before assemble piston details!
Optional springs:
4744-85
4744-80
Seal head, 20 Nm
Optional springs supplied:
4744-10 10.0 N/mm (marking -10)
4744-90 9.0 N/mm (marking -90)
Red grease on all other o-rings!
Spring rate:
Rod extensioner/bolt spring adjuster, 20 Nm
Spring pre-load adjustment:
0-18 mm (0-18 turns).
Piston shaft/rod extensioner, 15 Nm
Loctite 270
Upper bushing
Loctite 601
Compression adjustment (Base valve):
Base setting 6-16 “clicks”.
Maximum open valve 20 “clicks”.
Adjustment housing, By hand only
O-ring, No grease
Rebound adjustment:
Base setting 9-12 “clicks”.
Maximum open valve 20 “clicks”.
Base valve, 45 Nm
19
Spare parts list, FG 470
Pos. Part No. Pcs. Description
1
1
2
3
12
2
13
3
14
15
4
16
17
5
30
18
19
4
20
21
22
23
24
6
31
25
26
27
7
32
8
33
28
29
9
10
57
11
56
55
54
53
52
34
51
50
49
35
36
37
38
45
48
39
40 41
47
43
44
46
42
20
4
5
6
7
8
9
10
11
12
13
14
15
16
17
18
19
20
21
22
23
24
25
26
27
28
29
30
31
32
33
34
35
36
37
38
39
40
41
42
43
44
45
46
47
48
49
50
51
52
53
54
55
56
57
01408-04
04744-95
04744-10
04744-90
01438-04
01460-37
01900-05
01683-02
01684-02
04758-01
04720-02
04759-01
02807-01
01901-03
02302-08
01499-01
01440-01
01651-04
01027-04
00438-02
01056-04
00438-41
02803-01
01653-05
01585-11
01698-30
00338-14
02367-06
01656-02
01699-02
01565-04
00338-63
00194-10
04759-02
01682-28
01678-14
00382-08
01902-09
01902-10
01050-01
00338-59
01240-08
00438-33
00382-07
05426-02
00338-72
02804-01
00338-25
01447-02
02806-01
00604-01
00338-25
02805-01
00338-59
01050-01
01152-01
2
2
2
2
2
4
2
2
2
2
2
2
2
2
2
2
2
2
2
2
2
2
2
2
2
2
2
2
2
1
1
2
2
2
2
2
2
2
2
2
1
1
2
2
4
2
2
2
2
2
2
2
2
2
2
2
2
2
2
2
Top nut assembly
Adjustment driver
Spring
Option spring
Option spring
Guide ring
Preload tube
Fork leg outer
Bushing, upper
Bushing, lower
Washer
Seal
Circlip
Adjustment rod
Rod extensioner
Guide sleeve
Circlip
Bump rubber
Seal head
X-ring
O-ring
Bushing
O-ring
Spacer
Sleeve
Topout spring
Rebound needle
O-ring
Shaft
Compression valve (LH)
Rebound valve (RH)
Cylinder tube
Fork leg inner
Stroke indicator
O-ring
Sticker “Öhlins”
Circlip
Fender bracket ring
Fender bracket
Screw
Fork bottom
Fork bottom
Screw
O-ring
Bolt
O-ring
Screw
Plug Koenig
Base valve
O-ring
Reservoir tube
O-ring
Piston ring
Gas piston
Rubber valve
O-ring
Reservoir end
O-ring
Screw
Circlip
Type/remarks
See page 21
25.5/260/9.5
25.5/260/10.0
25.5/260/9.0
See page 22
See page 22
Left
Right
Titan
See page 21
Spare parts list, Top nut assey
Top nut assey
Pos. Part No. Pcs. Description
1
2
3
4
5
6
7
8
9
10
11
12
13
14
1
2
3
4
3
5
6
04747-02
04756-01
00884-04
04727-01
04722-07
04748-01
04722-04
04749-02
02801-01
00338-61
04751-02
04752-01
04753-01
04762-03
2
2
4
2
2
2
2
2
2
2
2
2
2
2
Type/remarks
Cap
Adjuster
Ball
Spring
O-ring
Bolt spring adjuster
O-ring
Plate, center
Adjustment housing
O-ring
Washer
Washer
Washer
Spring seat
7
Spare parts list, Base valve
8
Base valve
16
9
17
18
10
19
20
11
21
12
Pos. Part No. Pcs. Description
15
16
17
18
19
20
21
22
23
24
25
26
27
28
29
30
31
15
01675-01
00153-01
00641-02
01670-01
00338-11
00530-22
01693-01
01669-01
01672-01
01658-01
00438-02
01242-03
00884-02
01474-01
00338-53
01473-02
2
2
2
2
2
2
2
2
2
2
2
2
4
2
2
2
Nut
Washer
Washer
Shim stack
Piston compression
O-ring
Shims
Spring
Sleeve
Spring collar
End piece
O-ring
Adjustment needle
Ball
Spring
O-ring
Circlip
Type/remarks
See spec. card
22
23
13
24
14
25
26
27
28
29
28
30
31
21
Spare parts list, Compression valve (LH)
Compression valve
1
2
Rebound valve
3
Pos. Part No. Pcs. Description
1
2
3
4
5
6
7
8
9
10
11
12
13
14
15
16
01654-06
00338-19
01618-02
00530-22
01149-01
00520-20
01618-01
00641-02
01447-02
02061-03
00641-02
01674-01
00153-01
01675-01
1
1
1
1
1
1
1
1
1
1
1
1
1
1
Piston holder
O-ring
One way valve cup
Shims
Wave washer
Shims
Cup holder
Washer
Shim stack (comp.)
Piston ring
Piston rebound
Shim stack (reb.)
Washer
Washer
Washer
Nut
Type/remarks
See spec. card
See spec. card
17
4
Spare parts list, Rebound valve (RH)
5
Pos. Part No. Pcs. Description
6
18
7
19
8
9
10
20
21
11
22
12
13
23
24
24
14
24
15
16
22
24
25
17
18
19
20
21
22
23
24
25
01654-06
00641-02
01447-02
02061-03
00641-02
01674-01
01675-01
1
1
1
1
1
4
1
Piston holder
Washer
Shim stack (comp.)
Piston ring
Piston rebound
Shim stack (reb.)
Washer
Washer
Nut
Type/remarks
See spec. card
See spec. card
Service tools
Pos. Part No. Pcs. Description
1
2
3
5
4
6-9
14
10
11
12
1
2
3
4
5
6
7
8
9
10
11
12
13
14
15
16
00727-02
00786-05
00786-07
01781-01
00797-01
01757-01
01759-07
01759-08
01758-04
00720-02
00720-03
04705-01
01765-03
01797-04
02810-01
00715-01
1
1
1
1
1
1
1
1
1
1
1
1
1
1
1
1
Soft jaws (one pair)
Inner tube tool
Cartridge tube tool
Gas tool
Top nut socket
Attachment bar
Dismantling bar
Installing sleeve
Guide ring
Measure pin
Pin tool
Spanner
Pull-up spring tool
Seal head tool
Pull-up spring tool holder
Screwdriver
13
15
16
23
More info
Öhlins Racing AB, Box 722, S-194 27 Upplands Väsby, Sweden
Phone +46 8 590 025 00, Fax +46 8 590 025 80
07280-10, Issued 06 07 26. Öhlins Racing AB, Mattias Johansson, majo/ Update: Tiina Harakka
www.ohlins.com