1
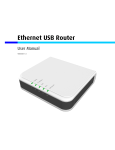
NB5PLUS4W Quick Start Guide for Mac
Start Here
This Quick Start provides basic instructions for connecting your NB5PLUS4W to an Apple
Macintosh computer and to the Internet.
1. USB Installation.
2. Ethernet Installation
3. Airport Installation
4. Modem Set-up
Before you can use this Quick Start Guide, you must have already established an ADSL service
with your Internet Service Provider (ISP).
These instructions provide a basic set-up configuration that should get home or small office Macs
up and running. This will be sufficient for most users.
If you need to perform more advanced configurations, please see the comprehensive User Guide on
the supplied CD-ROM for additional instructions.
NOTE: NetComm Technical Support for this product only covers the essential installation and
features outlined in this Quick Start Guide. For detailed information regarding the
advanced features of this product, please see the configuring sections in the
NB5PLUS4W User Guide on the supplied CD-ROM.
Connecting your NB5PLUS4W
The NetComm NB5PLUS4W Modem can be connected directly to your Mac via an Ethernet or
USB interface. In addition, you can use your Mac’s Airport to connect to the NB5PLUS4W
wirelessly.
Warning: Before you begin, turn the power off for all devices. These include your Mac and your
NB5PLUS4W Modem.
Do I need to use the MicroFilter?
MicroFilters prevent common telephone equipment – such as telephones, answering machines and
fax machines – from interfering with your ADSL service.
NetComm NB5PLUS4W QuickStart Guide for Mac
If you are using a telephone, fax machine, answering machine or any other equipment (other than
your NB5PLUS4W Modem) on your ADSL-enabled phone line, you will need to use one Micro
filter for each phone device.
Splitters are sometimes installed when your ADSL service is installed. If your telephone line is split
you will not need to use a MicroFilter. Please check with your ADSL service provider if you are
unsure.
Each MicroFilter is connected in-line with your telephone or fax machine so that all signals for
these devices pass through the MicroFilter. Refer to the comprehensive User Guide supplied on the
CD-ROM for more information.
© NetComm Limited 2005
p2
NetComm NB5PLUS4W QuickStart Guide for Mac
USB INSTALLATION
Important Note: To connect your NB5+4 to your Mac via USB, you will need to install a special
utility that creates a new virtual Ethernet port on your Mac. This process shows you how to do this.
Step 1 – Install the Hardware
To connect your modem using the USB cable, follow these step-by-step instructions:
1. Connect the ADSL cable.
Connect one end of the telephone cable provided to the port labelled ADSL on the rear
panel of your NB5PLUS4W. Connect the other end to your wall phone jack.
2. Connect the USB cable.
Connect one end of the USB cable provided to a USB port on your Mac and the other end of
the cable to the USB port of your NB5PLUS4W.
3. Attach the power connector.
Connect the AC power adapter to the Power connector on the back of the NB5PLUS4W and
plug in the adapter into a wall outlet or power strip.
4. Switch on the power. Your NB5PLUS4W will start up. Turn on your Mac.
Step 2 – Set up your Mac
This is how to configure your Mac to work with your NB5PLUS4W Modem using USB.
Mac OS X (10.2 to 10.4)
Please note that you cannot use USB with versions of the Mac OS prior to 10.2. If you wish to use a
Mac OS prior to 10.2, you will have to connect your Mac to the NB5PLUS4W via Ethernet.
1. Locate and double-click the file NB5+4/W USB Installer.pkg. This will launch an Installer
called “USBCDCEthernetv1_2 Installer”.
2. Click “Continue”.
3. If you are offered a choice of hard drives upon which to install the software, choose your startup drive. Otherwise, choose the only drive offered. Click “Continue”.
4. Click “Install” or “Upgrade”.
5. If you are asked to enter an Administrator’s User Name and Password, please do so. If you do
not have the Administrator’s User Name and Password, you must contact the person who does
have them. If you cannot do this, you will not be able to install the software.
© NetComm Limited 2005
p3
NetComm NB5PLUS4W QuickStart Guide for Mac
6. When the Installation has finished, you will be asked to Restart your Mac. Please do so.
7. When your Mac has restarted, go to the Apple menu and select System Preferences.
8. The Systems Preferences window opens.
9. In the Systems Preferences window, locate the “Internet and Network” heading and click once
on the Network icon. A dialogue box will display, confirming that your driver installation was
successful and that the new virtual Ethernet port has been created correctly.
10. Click OK.
11. The Network window opens.
© NetComm Limited 2005
p4
NetComm NB5PLUS4W QuickStart Guide for Mac
12. If you want to use this Mac in more than place (perhaps at home as well as at your workplace)
or on more than one network, you can achieve this easily by setting up a Location for each place
or network. Swapping Locations then becomes a simple matter of selecting the appropriate
Location. If you wish to do this, you will need to click on the “Location” pop-up menu and
select “New Location…”. You will be asked to name your new location.
13. Give your New Location a meaningful name and click OK. Make sure that the Location you
have just created is displayed in the Location pop-up menu,
14. If you do not wish to set up more than one Location, make sure that the Location pop-up menu
is set to “Automatic”.
15. Click on the “Show” pop-up menu and select “Ethernet Adapter (en2)”. Click on the TCP/ IP
tab. The TCP/IP settings will be displayed. Click on the “Configure” pop-up menu (“Configure
iPV4” if you’re using Mac OS 10.3) and select “Using DHCP”. Click on Apply Now to save
the changes.
© NetComm Limited 2005
p5
NetComm NB5PLUS4W QuickStart Guide for Mac
Your dialog box should now look like this:
16. If your Mac does not accept an IP address from the DHCP server in your NB5PLUS4W and the
IP address field remains blank, try selecting “Using DHCP with manual address” from the
“Configure” pop-up menu (“Configure iPV4” if you’re using Mac OS 10.3) and entering
192.168.1.3 in the “IP address” field.
17. Click on the “Show” pop-up menu and select “Network Status”. Check to see that the bullet
alongside “Ethernet Adaptor (en2)” is green.
18. Close the Network window by clicking the red close button (System 10.3) or select “Quit
System Preferences” under the “System Preferences” menu (System 10.2 or earlier).
© NetComm Limited 2005
p6
NetComm NB5PLUS4W QuickStart Guide for Mac
ETHERNET INSTALLATION
Step 1 – Install the Hardware
To connect your modem using the Ethernet cable, follow these step-by-step instructions:
5. Connect the ADSL cable.
Connect one end of the telephone cable provided to the port labelled ADSL on the rear
panel of your NB5PLUS4W Modem. Connect the other end to your wall phone jack.
6. Connect the Ethernet cable.
Connect one end of the Ethernet cable provided to the Ethernet port on your Mac and the
other end of the cable to the Ethernet port of your NB5PLUS4W ADSL Modem.
7. Attach the power connector.
Connect the AC power adapter to the Power connector on the back of the NB5PLUS4W and
plug in the adapter into a wall outlet or power strip.
8. Switch on the power. Your NB5PLUS4W will start up. Turn on your Mac.
Step 2 – Set up your Mac
This is how to configure your Mac to work with your NB5PLUS4W ADSL Modem.
Mac OS 9.
1. From the Apple Menu, select Control Panels, and then select TCP/IP from the secondary menu.
2. From the “Connect via” pop-down menu, select “Ethernet”.
3. From the “Configure” pop-up menu, select “Using DHCP Server”.
© NetComm Limited 2005
p7
NetComm NB5PLUS4W QuickStart Guide for Mac
4. Click the close box to close the TCP/IP configuration box. When asked if you wish to save the
changes, click YES.
© NetComm Limited 2005
p8
NetComm NB5PLUS4W QuickStart Guide for Mac
Mac OS X (10.3 Panther & 10.4 Tiger)
1. From the Apple menu, select System Preferences.
2. The Systems Preferences window opens.
3. In the Systems Preferences window, locate the “Internet and Network” heading and click
once on the Network icon. The Network window opens.
© NetComm Limited 2005
p9
NetComm NB5PLUS4W QuickStart Guide for Mac
4. If you want to use this Mac in more than place (perhaps at home as well as at your
workplace) or on more than one network, you can achieve this easily by setting up a
Location for each place or network. Swapping Locations then becomes a simple matter of
selecting the appropriate Location. If you wish to do this, you will need to click on the
“Location” pop-up menu and select “New Location…”. You will be asked to name your
new location.
5. Give your New Location a meaningful name and click OK. Make sure that the Location you
have just created is displayed in the Location pop-up menu.
6. If you do not wish to set up more than one Location, make sure that the Location pop-up
menu is set to “Automatic”.
7. Click on the “Show” pop-up menu and select “Built in Ethernet”. Click on the TCP/ IP tab.
The TCP/IP settings will be displayed. Click on the “Configure” pop-up menu (“Configure
iPV4” if you’re using Mac OS 10.3) and select “Using DHCP”. Click on Apply Now to
save the changes.
Your dialog box should now look like this:
8. If your Mac does not accept an IP address from the DHCP server in your NB5PLUS4W and
the IP address field remains blank, try selecting “Using DHCP with manual address” from
the “Configure” pop-up menu (“Configure iPV4” if you’re using Mac OS 10.3) and entering
© NetComm Limited 2005
p 10
NetComm NB5PLUS4W QuickStart Guide for Mac
192.168.1.3 in the “IP address” field.
9. Click on the “Show” pop-up menu and select “Network Status”. Check to see that the bullet
alongside “Built-in Ethernet” is green.
10. Close the Network window by clicking the red close button (System 10.3) or select “Quit
System Preferences” under the “System Preferences” menu (System 10.2 or earlier).
© NetComm Limited 2005
p 11
NetComm NB5PLUS4W QuickStart Guide for Mac
AIRPORT INSTALLATION
Step 1 – Install the Hardware
To connect your modem using Airport, follow these step-by-step instructions:
1. Install your Airport or Airport Extreme card.
If your Airport is not already installed, follow the instructions in the User Guide that came
with your Mac to install an Airport or Airport Extreme card.
2. Connect the ADSL cable.
Connect one end of the telephone cable provided to the port labelled ADSL on the rear
panel of your NB5PLUS4W Modem. Connect the other end to your wall phone jack.
3. Attach the power connector.
Connect the AC power adapter to the Power connector on the back of the NB5PLUS4W and
plug in the adapter into a wall outlet or power strip.
4. Switch on the power. Your NB5PLUS4W will start up. Turn on your Mac.
Step 2 – Set up your Mac
This is how to configure your Mac to work with your NB5PLUS4W ADSL Modem.
Please note that, while it may be possible to connect wirelessly to the NB5PLUS4W using Mac OS
9.x, only Mac OS X is supported.
1. From the Apple menu, select System Preferences.
© NetComm Limited 2005
p 12
NetComm NB5PLUS4W QuickStart Guide for Mac
2. The Systems Preferences window opens.
3. In the Systems Preferences window, locate the “Internet and Network” heading and click
once on the Network icon. The Network window opens.
4. If you want to use this Mac in more than place (perhaps at home as well as at your
workplace) or on more than one network, you can achieve this easily by setting up a
Location for each place or network. Swapping Locations then becomes a simple matter of
selecting the appropriate Location. If you wish to do this, you will need to click on the
“Location” pop-up menu and select “New Location…”. You will be asked to name your
new location.
© NetComm Limited 2005
p 13
NetComm NB5PLUS4W QuickStart Guide for Mac
5. Give your New Location a meaningful name and click OK. Make sure that the Location you
have just created is displayed in the Location pop-up menu.
6. If you do not wish to set up more than one Location, make sure that the Location pop-up
menu is set to “Automatic”.
7. Click on the “Show” pop-up menu and select “Airport”. Click on the “Airport” tab.
8. Click the pop-up menu “By default, join” and select “Preferred networks”. Select “wireless”
from the list that is displayed.
© NetComm Limited 2005
p 14
NetComm NB5PLUS4W QuickStart Guide for Mac
9. With “wireless” selected, click on the “Edit” button at the foot of the list. The following
dialogue box is displayed.
10. Using the “Wireless Security” pop-up menu, select “WEP Security”, In the dialogue box,
enter the WEP password that appears on the sticker underneath your NB5PLUS4W.
11. Click OK.
12. Click on the TCP/ IP tab. The TCP/IP settings will be displayed. Click on the “Configure
iPV4” pop-up menu and select “Using DHCP”. Click on Apply Now to save the changes.
Your dialog box should now look like this:
© NetComm Limited 2005
p 15
NetComm NB5PLUS4W QuickStart Guide for Mac
13. If your Mac does not accept an IP address from the DHCP server in your NB5PLUS4W and
the IP address field remains blank, try selecting “Using DHCP with manual address” from
the “Configure iPV4” pop-up menu and entering 192.168.1.3 in the “IP address” field.
14. Click on the “Show” pop-up menu and select “Network Status”. Check to see that the bullet
alongside “Airport” is green.
15. Close the Network window by clicking the red close button (System 10.3 and 10.4) or select
“Quit System Preferences” under the “System Preferences” menu (System 10.2).
© NetComm Limited 2005
p 16
NetComm NB5PLUS4W QuickStart Guide for Mac
MODEM SET-UP
You will now log directly into the configuration page of your ADSL Modem and configure basic
settings for your Internet connection. Your ISP should provide you with the necessary information
to complete this step.
To make it as easy as possible for you, there is a single Quick Configuration page for the settings
that you most likely need to change before using your ADSL Modem.
To configure your NB5PLUS4W ADSL Modem, follow the steps below:
1. Open a web browser such as Safari or Internet Explorer.
2. In the Location Bar, type 192.168.1.1 and press Enter.
3. Your browser will locate your ADSL Modem and the modem’s logon page will be displayed.
4. Enter the username and password. The default username is admin. The default password is
admin. Click on OK.
5. The Quick Settings will be displayed.
© NetComm Limited 2005
p 17
NetComm NB5PLUS4W QuickStart Guide for Mac
6. Make sure that PPPoE is selected, enter the username and password that your ISP has provided
and click on Apply.
7. You will see a message “Settings Updated Successfully!” and the Quick Settings page will
again be displayed. After a few seconds, the Connection Status should show green. If this does
not occur, please check that you have entered your User Name and Password exactly as your
ISP has specified.
8. You have now completed the set-up which will be sufficient for most uses. You should now be
able to access the Internet by selecting one of your Favourites or Bookmarks or by entering a
URL in the Location Bar.
9. You may need to change the settings in Mail, Outlook Express or whatever email application
you use. Your ISP will supply these settings.
10. If you need to perform more advanced configurations, please see the comprehensive User Guide
on the supplied CD-ROM for additional instructions.
© NetComm Limited 2005
p 18