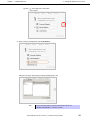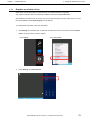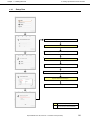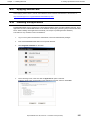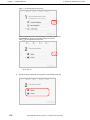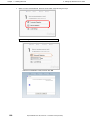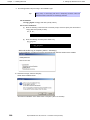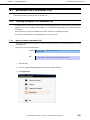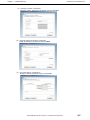
1
NEC Express Server
Express5800 Series
Express5800/R120e-1M, R120e-2M
EXP291, EXP292
Installation Guide (Windows)
Chapter 1
Installing Windows
Chapter 2 Installing the Bundled Software
10.102.01-102.01
July 2013, First Edition
© NEC Corporation 2013
Documents Provided with This Product
Documents Provided with This Product
Documents for this product are provided as accompanying booklets (
within the EXPRESSBUILDER DVD (
) and as electronic manuals (
PDF
) stored
).
Precautions for Use
Describes points of caution to ensure the safe use of this server.
Read these cautions before using this server.
Getting Started
Describes how to use this server, from unpacking to operations.
Refer to this guide as you begin for an overview of this server.
EXPRESSBUILDER
PDF
User’s Guide
Chapter 1: General Description
Chapter 2: Preparations
Chapter 3: Setting Up Your Server
Chapter 4: Appendix
PDF
PDF
Installation of additional options, connection of peripheral devices,
and ideal location for this server
System BIOS configurations and summary of EXPRESSBUILDER
Specifications and other information
Installation Guide (Windows)
Chapter 1: Installing Windows
Installation of Windows and drivers, and important information for
installation
Chapter 2: Installing the Bundled
Software
Installation of bundled software, such as NEC ESMPRO and
Universal RAID Utility
Maintenance Guide
Chapter 1: Maintenance
Chapter 2: Convenient Features
Chapter 3: Appendix
PDF
Overviews, names, and functions of the server’s parts
Server maintenance and troubleshooting
Useful features and the detail of system BIOS settings, RAID
Configuration Utility, and EXPRESSBUILDER
Error messages and Windows Event Logs
Other documents
Provides the detail of NEC ESMPRO, Universal RAID Utility, and the other features.
2
Express5800/R120e-1M, R120e-2M
Installation Guide (Windows)
Contents
Contents
Documents Provided with This Product ................................................................................................................. 2
Contents ................................................................................................................................................................ 3
Notations Used in This Document ......................................................................................................................... 6
Notations used in the text.............................................................................................................................. 6
Optical disk drives ......................................................................................................................................... 6
Hard Disk Drives ........................................................................................................................................... 6
Removable media ......................................................................................................................................... 6
Abbreviations of Operating Systems (Windows) ........................................................................................... 7
Trademarks ........................................................................................................................................................... 8
License Notification ............................................................................................................................................... 9
Regulatory Notices .............................................................................................................................................. 10
Warnings and Additions to This Document .......................................................................................................... 13
Latest editions ............................................................................................................................................. 13
Chapter 1 Installing Windows............................................................................................................................ 14
1.
Before Starting Setup .................................................................................................................................. 15
1.1 Starting EXPRESSBUILDER ........................................................................................................... 15
1.2 Supported Windows OS................................................................................................................... 16
1.3 Service Pack Support ...................................................................................................................... 17
1.4 Mass Storage Controllers Supported by EXPRESSBUILDER ......................................................... 18
1.5
Using a Mass Storage Controller Not Supported by EXPRESSBUILDER ....................................... 19
2.
Setting Up the Operating System................................................................................................................ 20
3.
Setting Up Windows Server 2012 ............................................................................................................... 21
3.1 Precautions for Windows Server 2012 Installation........................................................................... 21
3.2 Setup with EXPRESSBUILDER....................................................................................................... 26
3.2.1
Setup flow.......................................................................................................................... 27
3.2.2
Requirements for Setup ..................................................................................................... 28
3.2.3
Setup procedure ................................................................................................................29
3.3 Setup with Windows Standard Installer............................................................................................ 44
3.3.1
Setup flow.......................................................................................................................... 45
3.3.2
Requirements for Setup ..................................................................................................... 46
3.3.3
Setup procedure ................................................................................................................47
3.4 Installing Starter Pack ...................................................................................................................... 62
3.4.1
Installing Starter Pack Using EXPRESSBUILDER DVD .................................................... 62
3.4.2
Installing Starter Pack Using Internal Flash Memory ......................................................... 65
3.5 Setting Up Device Drivers................................................................................................................ 70
3.5.1
Installing the LAN drivers ................................................................................................... 70
3.5.2
Setting up LAN drivers....................................................................................................... 71
3.5.3
Graphics accelerator driver................................................................................................ 73
3.5.4
Using a SAS Controller(N8103-142).................................................................................. 75
3.5.5
Using a RAID Controller (N8103-161) ............................................................................... 75
3.5.6
Using a Fibre Channel controller (N8190-153/154) ........................................................... 75
3.6 License Authentication ..................................................................................................................... 76
3.7 Installing the Applications................................................................................................................. 79
3.8 Installing With Multiple Logical Drives.............................................................................................. 81
3.9 Setting up for Windows Server 2012 NIC Teaming (LBFO) ............................................................. 83
Express5800/R120e-1M, R120e-2M
Installation Guide (Windows)
3
Contents
4
4.
Setting Up Windows Server 2008 R2.......................................................................................................... 84
4.1 Before Starting Setup....................................................................................................................... 84
4.2 Setup with EXPRESSBUILDER....................................................................................................... 90
4.2.1
Setup flow.......................................................................................................................... 91
4.2.2
Requirements for Setup ..................................................................................................... 92
4.2.3
Setup procedure ................................................................................................................93
4.3 Setup with Windows Standard Installer.......................................................................................... 109
4.3.1
Setup flow........................................................................................................................ 110
4.3.2
Requirements for Setup ................................................................................................... 111
4.3.3
Setup procedure .............................................................................................................. 112
4.4 Installing Starter Pack .................................................................................................................... 127
4.4.1
When using EXPRESSBUILDER DVD............................................................................ 127
4.4.2
When using Internal Flash Memory ................................................................................. 130
4.5 Setting Up Device Drivers.............................................................................................................. 135
4.5.1
Installing the LAN drivers and BACS (teaming utility) ...................................................... 135
4.5.2
Setting up LAN drivers..................................................................................................... 136
4.5.3
Setting up team/LiveLink(BACS) ..................................................................................... 138
4.5.4
Setting up team (PROSet) ............................................................................................... 149
4.5.5
Graphics accelerator driver.............................................................................................. 151
4.5.6
When using a SAS controller (N8103-142) ...................................................................... 151
4.5.7
When using a RAID Controller (N8103-161).................................................................... 151
4.5.8
When using a Fibre Channel controller (N8190-153/154)................................................ 151
4.6 License Authentication ................................................................................................................... 152
4.7 Applying Service Pack ................................................................................................................... 155
4.8 Installing the Applications............................................................................................................... 155
4.9 Installation When Multiple Logical Drives Exist.............................................................................. 157
5.
Setting Up Windows Server 2008 ............................................................................................................. 159
5.1 Before Starting Setup..................................................................................................................... 159
5.2 Setup with EXPRESSBUILDER..................................................................................................... 164
5.2.1
Setup flow........................................................................................................................ 165
5.2.2
Requirements for Setup ................................................................................................... 166
5.2.3
Setup procedure .............................................................................................................. 167
5.3 Setup with Windows Standard Installer.......................................................................................... 183
5.3.1
Setup flow........................................................................................................................ 184
5.3.2
Requirements for Setup ................................................................................................... 185
5.3.3
Setup procedure .............................................................................................................. 186
5.4 Installing Starter Pack .................................................................................................................... 202
5.4.1
When using EXPRESSBUILDER DVD............................................................................ 202
5.4.2
When using Internal Flash Memory ................................................................................. 205
5.5 Setting Up Device Drivers.............................................................................................................. 210
5.5.1
Installing the LAN drivers and BACS (teaming utility) ...................................................... 210
5.5.2
Setting up LAN drivers..................................................................................................... 211
5.5.3
Setting up team/LiveLink (BACS) .................................................................................... 214
5.5.4
Setting up team (PROSet) ............................................................................................... 224
5.5.5
Graphics accelerator driver.............................................................................................. 226
5.5.6
When using a SAS controller (N8103-142) ...................................................................... 227
5.5.7
When using a RAID Controller (N8103-161).................................................................... 227
5.5.8
When using a Fibre Channel controller (N8190-153/154)................................................ 227
5.6 Specifying PAE Option ................................................................................................................... 228
5.7 License Authentication ................................................................................................................... 229
5.8 Applying Service Pack ................................................................................................................... 232
5.9 Installing the Applications............................................................................................................... 232
5.10 Installation When Multiple Logical Drives Exist.............................................................................. 234
6.
Setup for Solving Problems....................................................................................................................... 236
6.1 Specifying Memory Dump Settings (Debug Information) ............................................................... 236
6.1.1
For Windows Server 2012 ............................................................................................... 236
6.1.2
For Windows Server 2008 R2.......................................................................................... 243
6.1.3
For Windows Server 2008 ............................................................................................... 244
6.2 How to Create a User-mode Process Dump File ........................................................................... 246
6.2.1
For Windows Server 2012 ............................................................................................... 246
6.2.2
For Windows Server 2008 R2 and Windows Server 2008............................................... 247
Express5800/R120e-1M, R120e-2M
Installation Guide (Windows)
Contents
6.3
7.
Installing Network Monitor.............................................................................................................. 248
Windows OS Parameter File ..................................................................................................................... 249
7.1 Creating Windows OS Parameter File ........................................................................................... 249
7.1.1
How to create a parameter file......................................................................................... 249
Chapter 2 Installing Bundled Software ............................................................................................................ 260
1.
Bundled Software for the Server ............................................................................................................... 261
1.1 NEC ESMPRO Agent (for Windows) ............................................................................................. 261
1.2 NEC ESMPRO Agent Extension.................................................................................................... 262
1.3 BMC Configuration ........................................................................................................................ 262
1.4 NEC ExpressUpdate Agent............................................................................................................ 262
1.5 Universal RAID Utility .................................................................................................................... 263
1.5.1
Setup of Universal RAID Utility ........................................................................................ 263
1.5.2
Management by NEC ESMPRO Manager ....................................................................... 263
1.6 Express Report Service / Express Report Service(HTTPS)........................................................... 264
1.7 NEC Product Info Collection Utility ................................................................................................ 265
1.7.1
Installation........................................................................................................................ 265
1.7.2
Uninstallation ................................................................................................................... 265
2.
Bundled Software Applied to PC for Management .................................................................................... 266
2.1 NEC ESMPRO Manager................................................................................................................ 266
2.2 Express Report Service(MG) ......................................................................................................... 267
Express5800/R120e-1M, R120e-2M
Installation Guide (Windows)
5
Notations Used in This Document
Notations Used in This Document
Notations used in the text
In addition to safety-related symbols urging caution, 3 other types of notations are used in this document.
These notations have the following meanings.
Important
Indicates critical items that must be followed when handling the hardware or operating
software. If the procedures described are not followed, hardware failure, data loss, and
other serious malfunctions could occur.
Note
Indicates items that must be confirmed when handling the hardware or operating software.
Tips
Indicates information that is helpful to keep in mind when using this server.
Optical disk drives
This server is equipped with one of the following drives, depending on the order at the time of purchase. These
drives are referred to as optical disk drives in this document.
• DVD-ROM drive
• DVD Super MULTI drive
Hard Disk Drives
Unless otherwise stated, Hard Disk Drives (HDD) described in this document refer to the following.
• Hard disk drives (HDD)
• Solid state drive (SSD)
Removable media
Unless otherwise stated, removable media described in this document refer to the following.
• USB memory
• Flash FDD
6
Express5800/R120e-1M, R120e-2M
Installation Guide (Windows)
Notations Used in This Document
Abbreviations of Operating Systems (Windows)
Windows Operating Systems are referred to as follows.
Refer to Chapter 1 (1.2 Supported Windows OS) for detailed information.
Notations in this document
Official names of Windows
Widnows Server 2012 Standard
Windows Server 2012
Widnows Server 2012 Datacenter
Windows Server 2008 R2 Standard
Windows Server 2008 R2
Windows Server 2008 R2 Enterprise
Windows Server 2008 Standard
Windows Server 2008
*
Windows Server 2008 Enterprise
*
Includes 64-bit and 32-bit Editions unless otherwise stated.
The following appears on EXPRESSBUILDER.
•
•
Windows Server 2008 64-bit Edition:
Windows Server 2008 32-bit Edition:
Express5800/R120e-1M, R120e-2M
Windows Server 2008 x64
Windows Server 2008 x86
Installation Guide (Windows)
7
Trademarks
Trademarks
EXPRESSSCOPE is a registered trademark of NEC Corporation.
Microsoft, Windows, Windows Server, Windows Vista, and MS-DOS are registered trademarks or trademarks of Microsoft
Corporation in the United States and other countries. Intel, Pentium, and Xeon are registered trademarks of Intel Corporation of the
United States. AT is a registered trademark of International Business Machines Corporation of the United States and other countries.
LSI and the LSI logo design are trademarks or registered trademarks of LSI Corporation. Adobe, the Adobe logo, and Acrobat are
trademarks of Adobe Systems Incorporated. DLT and DLTtape are trademarks of Quantum Corporation of the United States. PCI
Express is a trademark of Peripheral Component Interconnect Special Interest Group. Linux is a trademark or registered trademark
of Linus Torvalds in Japan and other countries. Red Hat® and Red Hat Enterprise Linux are trademarks or registered trademarks of
Red Hat, Inc. in the United States and other countries.
All other product, brand, or trade names used in this publication are the trademarks or registered trademarks of their respective
trademark owners.
8
Express5800/R120e-1M, R120e-2M
Installation Guide (Windows)
License Notification
License Notification
The System BIOS of this product contains open source software for the following license.
EDK FROM TIANOCORE.ORG
BSD License from Intel
Copyright (c) 2004, Intel Corporation
All rights reserved.
Redistribution and use in source and binary forms, with or without modification, are permitted provided that the
following conditions are met:
-
Redistributions of source code must retain the above copyright notice, this list of conditions and the following
disclaimer.
Redistributions in binary form must reproduce the above copyright notice, this list of conditions and the following
disclaimer in the documentation and/or other materials provided with the distribution.
Neither the name of the Intel Corporation nor the names of its contributors may be used to endorse or promote
products derived from this software without specific prior written permission.
THIS SOFTWARE IS PROVIDED BY THE COPYRIGHT HOLDERS AND CONTRIBUTORS "AS IS" AND ANY
EXPRESS OR IMPLIED WARRANTIES, INCLUDING, BUT NOT LIMITED TO, THE IMPLIED WARRANTIES OF
MERCHANTABILITY AND FITNESS FOR A PARTICULAR PURPOSE ARE DISCLAIMED. IN NO EVENT SHALL
THE COPYRIGHT OWNER OR CONTRIBUTORS BE LIABLE FOR ANY DIRECT, INDIRECT, INCIDENTAL,
SPECIAL, EXEMPLARY, OR CONSEQUENTIAL DAMAGES (INCLUDING, BUT NOT LIMITED TO,
PROCUREMENT OF SUBSTITUTE GOODS OR SERVICES; LOSS OF USE, DATA, OR PROFITS; OR BUSINESS
INTERRUPTION) HOWEVER CAUSED AND ON ANY THEORY OF LIABILITY, WHETHER IN CONTRACT, STRICT
LIABILITY, OR TORT (INCLUDING NEGLIGENCE OR OTHERWISE) ARISING IN ANY WAY OUT OF THE USE OF
THIS SOFTWARE, EVEN IF ADVISED OF THE POSSIBILITY OF SUCH DAMAGE.
Copyright (c) 2004 - 2007, Intel Corporation
All rights reserved. This program and the accompanying materials are licensed and made available under the terms
and conditions of the BSD License which accompanies this distribution. The full text of the license may be found at
http://opensource.org/licenses/bsd-license.php
THE PROGRAM IS DISTRIBUTED UNDER THE BSD LICENSE ON AN "AS IS" BASIS, WITHOUT WARRANTIES
OR REPRESENTATIONS OF ANY KIND, EITHER EXPRESS OR IMPLIED.
Express5800/R120e-1M, R120e-2M
Installation Guide (Windows)
9
Regulatory Notices
Regulatory Notices
FCC Statement
This equipment has been tested and found to comply with the limits for a Class A digital device, pursuant
to Part 15 of the FCC Rules. These limits are designed to provide reasonable protection against harmful
interference when the equipment is operated in a commercial environment. This equipment generates,
uses, and can radiate radio frequency energy and, if not installed and used in accordance with the
instruction manual, may cause harmful interference to radio communications. Operation of this equipment
in a residential area is likely to cause harmful interference in which case the user will be required to
correct the interference at his own expense.
Industry Canada Class A Emission Compliance Statement
This Class A digital apparatus complies with Canadian ICES-003.
Avis de conformité à la réglementation d'Industrie Canada
Cet appareil numérique de la classe A est conforme à la norme NMB-003 du Canada.
CE / Australia and New Zealand Statement
This is a Class A product. In domestic environment this product may cause radio interference in which
case the user may be required to take adequate measures (EN55022).
BSMI Statement
Disposing of your used product
In the European Union
EU-wide legislation as implemented in each Member State requires that used electrical and
electronic products carrying the mark (left) must be disposed of separately from normal household
waste. This includes Information and Communication Technology (ICT) equipment or electrical
accessories, such as cables or DVDs.
When disposing of used products, you should comply with applicable legislation or agreements you
may have. The mark on the electrical and electronic products only applies to the current European
Union Member States.
Outside the European Union
If you wish to dispose of used electrical and electronic products outside the European Union, please
contact your local authority and ask for the correct method of disposal.
10
Express5800/R120e-1M, R120e-2M
Installation Guide (Windows)
Regulatory Notices
Turkish RoHS information relevant for Turkish market
EEE Yönetmeliğine Uygundur
CCC声明
部件名称
印刷线路板
铅
(Pb)
×
汞
(Hg)
○
有毒有害物质或元素
镉
六价铬
(Cd)
(Cr(Ⅵ))
○
○
多溴联苯
(PBB)
○
多溴二苯醚
(PBDE)
○
HDD、DVD等
×
○
○
○
○
○
机箱、支架
○
○
○
○
○
○
电源
×
○
○
○
○
○
键盘
×
○
○
○
○
○
其他(电缆、鼠标
×
○
○
○
○
○
等)
○:表示该有毒有害物质在该部件所有均质材料中的含量均在SJ/T11363-2006标准规定的限量要求以
下。
×:表示该有毒有害物质至少在该部件的某一均质材料中的含量超出SJ/T11363-2006标准规定的限量要
求。
Vietnam RoHS information relevant for Vietnam market
Complying with "CIRCULAR, No.30/2011/TT-BCT (Hanoi, August 10 2011), Temporary regulations on
content limit for certain hazardous substances in electrical products”
Express5800/R120e-1M, R120e-2M
Installation Guide (Windows)
11
Regulatory Notices
Declaration of Conformity
with the requirements of Technical Regulation on the Restriction Of the use of certain Hazardous
Substances in Electrical and Electronic Equipment
(adopted by Order №1057 of Cabinet of Ministers of Ukraine)
The Product is in conformity with the requirements of Technical Regulation on the Restriction Of the use
of certain Hazardous Substances in electrical and electronic equipment (TR on RoHS).
The content of hazardous substance with the exemption
of the applications listed in the Annex №2 of TR on RoHS:
1.
2.
3.
4.
5.
6.
Lead (Pb) – not over 0,1wt % or 1000wt ppm;
Cadmium (Cd) – not over 0,01wt % or 100wt ppm;
Mercury (Hg) – not over 0,1wt % or 1000wt ppm;
Hexavalent chromium (Cr6+) – not over 0,1wt % or 1000wt ppm;
Polybrominated biphenyls (PBBs) – not over 0,1wt % or 1000wt ppm;
Polybrominated diphenyl ethers (PBDEs) – not over 0,1wt % or 1000wt ppm.
Декларація про Відповідність
Вимогам Технічного Регламенту Обмеження Використання деяких Небезпечних Речовин в
електричному та електронному обладнанні
(затвердженого Постановою №1057 Кабінету Міністрів України)
Виріб відповідає вимогам Технічного Регламенту Обмеження Використання деяких Небезпечних
Речовин в електричному та електронному обладнанні (ТР ОВНР).
Вміст небезпечних речовин у випадках, не обумовлених в Додатку №2 ТР ОВНР, :
1. свинець(Pb) – не перевищує 0,1 % ваги речовини або в концентрації до 1000 частин на
мільйон;
2. кадмій (Cd)– не перевищує 0,01 % ваги речовини або в концентрації до 100 частин на
мільйон;
3. ртуть(Hg) – не перевищує 0,1 % ваги речовини або в концентрації до 1000 частин на
мільйон;
4. шестивалентний хром (Cr6+ ) – не перевищує 0,1 % ваги речовини або в концентрації до
1000 частин на мільйон;
5. полібромбіфеноли (PBB) – не перевищує 0,1% ваги речовини або в концентрації до 1000
частин на мільйон;
6. полібромдефенілові ефіри (PBDE) – не перевищує 0,1 % ваги речовини або в концентрації
до 1000 частин на мільйон.
Декларация о Соответствии
Требованиям Технического Регламента об Ограничении Использования некоторых Вредных
Веществ в электрическом и электронном оборудовании
(утверждённого Постановлением №1057 Кабинета Министров Украины)
Изделие соответствует требованиям Технического Регламента об Ограничении Использования
некоторых Вредных Веществ в электрическом и электронном оборудовании (ТР ОИВВ).
Содержание вредных веществ в случаях, не предусмотренных Дополнением №2 ТР ОИВВ:
1. свинец (Pb) – не превышает 0,1 % веса вещества или в концентрации до 1000 миллионных
частей;
2. кадмий (Cd) – не превышает 0,01 % веса вещества или в концентрации до 100 миллионных
частей;
3. ртуть (Hg) – не превышает 0,1 % веса вещества или в концентрации до 1000 миллионных
частей;
4. шестивалентный хром (Cr6+)– не превышает 0,1 % веса вещества или в концентрации до
1000 миллионных частей;
5. полибромбифенолы (PBB) – не превышает 0,1 % веса вещества или в концентрации до
1000 миллионных частей;
6. полибромдифеноловые эфиры (PBDE) – не превышает 0,1 % веса вещества или в
концентрации до 1000 миллионных частей.
12
Express5800/R120e-1M, R120e-2M
Installation Guide (Windows)
Warnings and Additions to This Document
Warnings and Additions to This Document
1.
Unauthorized reproduction of the contents of this document, in part or in its entirety, is
prohibited.
2.
The contents of this document may change without prior notice.
3.
Do not make copies or alter the document content without permission from NEC
Corporation.
4.
Every effort has been made to ensure the completeness of this document. However, if
you have any concerns, or discover errors or omissions, please contact your retailer.
5.
Regardless of these 4 items, NEC Corporation assumes no responsibility for effects
resulting from operations.
6.
The sample values used in this document are not the actual values.
Keep this document nearby so that you may refer to it as necessary.
Latest editions
This document was created based on the information available at the time of its creation. The screen images,
messages and procedures may differ from the actual screens, messages and procedures. Substitute as
appropriate when content has been modified.
The most recent version of User’s Guide, as well as other related documents, is also available for download
from the following website.
http://www.nec.com/
Express5800/R120e-1M, R120e-2M
Installation Guide (Windows)
13
NEC Express5800 Series
Express5800/R120e-1M, R120e-2M
Installing Windows
This chapter describes how to install Windows. Read through this chapter to set up the system correctly.
1. Before Starting Setup
Describes Service Packs and mass storage controllers that support EXPRESSBUILDER attached to the
server.
2. Setting Up the Operating System
Describes the flow chart of setting up the operating system.
3. Setting Up Windows Server 2012
Describes how to set up Windows Server 2012.
4. Setting Up Windows Server 2008 R2
Describes how to set up Windows Server 2008 R2.
5. Setting Up Windows Server 2008
Describes how to set up Windows Server 2008.
6. Setting Up for Solving Problems
Describes the features that must be set up in advance so that the server can recover from any trouble
immediately and precisely.
7. Windows OS Parameter File
Describes how to set up the operating system by using the parameter file.
14
Express5800/R120e-1M, R120e-2M
Installation Guide (Windows)
1. Before Starting Setup
Chapter 1 Installing Windows
1.
Before Starting Setup
This section describes the points of using EXPRESSBUILDER to set up Windows operating systems.
1.1
Starting EXPRESSBUILDER
Use the attached EXPRESSBUILDER to reconfigure the RAID system or re-install the OS.
Start EXPRESSBUILDER by either of the following two ways according to the media in which the
EXPRESSBUILDER is stored. See Chapter 2 (5. Details of EXPRESSBUILDER) in Maintenance Guide for
more information.
EXPRESSBUILDER DVD
Insert the DVD to the optical disk drive of the server, and then restart the server by pressing <Ctrl> + <Alt> +
<Delete> keys.
Internal Flash Memory (optional)
Press <F3> key when the following message appears on POST screen. At this time, be sure to remove a
bootable disc from the optical disk drive.
Press <F2> Setup, <F3> Internal Flash Memory, <F4> ROM Utility, <F12> Network
Express5800/R120e-1M, R120e-2M
Installation Guide (Windows)
15
1. Before Starting Setup
Chapter 1 Installing Windows
1.2
Supported Windows OS
EXPRESSBUILDER supports the following editions of Windows operating systems:
Inquiries about installing other editions may be made at your sales representative.
See the next section (1.3 Service Pack Support) for Service Pack.
: Confirm during Setup with EXPRESSBUILDER
: Confirm during Setup with OS standard installer
Supported
Name of Windows OS
Windows Server 2012 Standard
9
9
Windows Server 2012 Datacenter
9
9
Windows Server 2008 R2 Standard
9
9
Windows Server 2008 R2 Enterprise
9
9
Windows Server 2008 Standard
9
9
Windows Server 2008 Enterprise
9
9
Windows Server 2012
Windows Server 2008 R2
Windows Server 2008
9 : Supported
16
Express5800/R120e-1M, R120e-2M
Installation Guide (Windows)
− : Not Supported
1. Before Starting Setup
Chapter 1 Installing Windows
1.3
Service Pack Support
The following combination of operating system installation media and Service Packs are supported by
EXPRESSBUILDER.
OS installation media
Windows Server 2012
Windows Server 2008 R2
Windows Server 2008
Service Pack
Supported
NO Service Pack
9
Service Pack 1 Included
9
NO Service Pack + Service Pack 1
9
NO Service Pack
9
Service Pack 2 Included
9
NO Service Pack + Service Pack 2
9
NO Service Pack
9
9 : Supported
Note
− : Not supported
You can install the Service Pack on the server. When the Service Pack is not
attached to your system, prepare it by yourself.
Express5800/R120e-1M, R120e-2M
Installation Guide (Windows)
17
1. Before Starting Setup
Chapter 1 Installing Windows
1.4
Mass Storage Controllers Supported by EXPRESSBUILDER
The table below lists the controllers for this server, supported by the attached EXPRESSBUILDER.
If an optional board not mentioned below is connected, set it up while referring to the instructions supplied with
the board and Chapter 1 (1.5 Using a Mass Storage Controller Not Supported by EXPRESSBUILDER).
Windows Server 2012
Windows Server 2008 R2
Windows Server 2008
RAID Controllers supporting OS installation by EXPRESSBUILDER
N8103-172 RAID Controller
(512MB, RAID 0/1)
9
9
9
N8103-173 RAID Controller
(512MB, RAID 0/1/5/6)
9
9
9
N8103-174 RAID Controller
(1GB, RAID 0/1/5/6)
9
9
9
N8103-168 RAID Controller
(1GB, RAID 0/1/5/6)
9
9
9
N8103-142 SAS Controller
9
9
9
N8103-161 RAID Controller
(1GB, RAID 0/1/5/6)
9
9
9
N8190-153 Fibre Channel Controller
(1ch)(8Gbps/Optical)
9
9
9
N8190-154 Fibre Channel Controller
(2ch)(8Gbps/Optical)
9
9
9
Other options
9: Supported by EXPRESSBUILDER
18
Express5800/R120e-1M, R120e-2M
Installation Guide (Windows)
1. Before Starting Setup
Chapter 1 Installing Windows
1.5
Using a Mass Storage Controller Not Supported by EXPRESSBUILDER
To install the Windows when using a mass storage controller not supported by EXPRESSBUILDER such as
the newest RAID controller, follow the steps below.
You do not need to perform the following instructions usually.
1. Have the instructions for the mass storage controller ready.
Note
If the contents of this document differ from that of the mass storage controller,
prioritize the contents of the controller ’s document.
2. If you use a RAID controller, follow the controller instructions to configure a RAID array.
3. See Setup with Windows Standard Installer of each Windows family in this guide.
Express5800/R120e-1M, R120e-2M
Installation Guide (Windows)
19
2. Setting Up the Operating System
Chapter 1 Installing Windows
2.
Setting Up the Operating System
See the figure below to find a section appropriate to your OS installation.
Start
Is the first setup after purchase?
No
Re-installation
Yes
Hard disk drive status at purchase
Not installed
Execute Setup with EXPRESSBUILDER?
Yes
No
Setup with EXPRESSBUILDER
Setup with OS standard installer
Windows Server 2012
Chapter 1 (3.2)
Windows Server 2012
Chapter 1 (3.3)
Windows Server 2008 R2
Chapter 1 (4.2)
Windows Server 2008 R2
Chapter 1 (4.3)
Windows Server 2008
Chapter 1 (5.2)
Windows Server 2008
Chapter 1 (5.3)
Setup for solving problems
Windows Server 2012
Windows Server 2008 R2
Chapter 1 (6)
Windows Server 2008
End
20
Express5800/R120e-1M, R120e-2M
Installation Guide (Windows)
3. Setting Up Windows Server 2012
Chapter 1 Installing Windows
3.
3.1
Setting Up Windows Server 2012
Precautions for Windows Server 2012 Installation
Read through the following precautions before starting setup.
: Precautions for the installation using EXPRESSBUILDER
: Precautions for the installation using Windows standard Installer
Precautions for hardware
The following hardware configurations require special procedures.
Reinstalling to a mirrored volume
When you reinstall Windows Server 2012 with a mirrored volume of Windows feature, disable
mirroring before installing and enable it again after the installation.
Use [Computer Management] – [Disk Management] to create, disable, or remove the mirrored
volume.
Peripheral devices such as RDX/MO
Remove an MO device before installing. Some peripheral devices need to be halted. Refer to
the manual attached to the peripheral devices .
DAT, LTO, and similar media
Do not set media, such as DAT, LTO, during setup.
Connecting to multiple hard disk drives or logical drives
For details about installing operating systems with multiple drives, see Chapter 1 (3.8 Installing
With Multiple Logical Drives).
Reinstalling to hard disk drives that have been upgraded to dynamic disks
If the hard disk drive has been upgraded to a dynamic disk, the operating system cannot be
reinstalled to it with the existing partitions.
Set up the operating system with the Windows standard installer.
Express5800/R120e-1M, R120e-2M
Installation Guide (Windows)
21
3. Setting Up Windows Server 2012
Chapter 1 Installing Windows
Setup when installing with a large amount of memory
When your system installed a large amount of memory, the large paging file is required at
installation and the dump file for debugging information may not be created.
If you fail to create the dump file, use Windows Standard Installer for setup, and allocate the
required file space to multiple disks by the following steps.
1. Set the system partition size to a size sufficient to install the OS and paging file.
2. Specify another disk as destination to save the debug information by referring to Chapter 1
(6. Setup for Solving Problems).
If the hard disk drive does not have enough space to save the debug information, set the partition
size to a size sufficient to install the OS and paging file, and then add another hard disk drive for
the dump file.
Note
If the partition size for installing Windows is smaller than the recommended
size, expand the partition size or add another hard disk drive.
If sufficient space cannot be allocated for the paging file, perform either of the following after the
installation using Windows Standard Installer is complete.
― Specify a hard disk drive other than the system drive as the location to store the
paging file for collecting memory dump
Create a paging file of the installed memory size + 400 MB or more in a drive other than the
system drive.
The size of the paging file must be "installed memory size + 400 MB" or more.
Paging files in dynamic volumes are not used for dumping memory. The setting is
applied after restarting the system.
Example of correct setting
C: No paging file exists
D: Paging file whose size is "installed memory size + 400 MB" or more
→ The paging file in drive D can be used for collecting memory dump
because its size satisfies the requirement.
22
Express5800/R120e-1M, R120e-2M
Installation Guide (Windows)
3. Setting Up Windows Server 2012
Chapter 1 Installing Windows
Example of incorrect setting 1
C: Paging file whose size is smaller than the installed memory size
D: Paging file whose size is "installed memory size + 400 MB" or more
→ The paging file in drive C is used for collecting memory dump, but
collection may fail because the size of the paging file is smaller than the
installed memory size.
Example of incorrect setting 2
C: Paging file whose size is "installed memory size × 0.5"
D: Paging file whose size is "installed memory size × 0.5"
E: Paging file whose size is 400 MB
→ The total paging file size in all drives is "installed memory size + 400 MB",
but collection may fail because only the paging file in drive C is used for
collecting memory dump.
Example of incorrect setting 3
C: No paging file exists
D: Paging file whose size is "installed memory size + 400 MB" or more
(in dynamic volume)
→ Paging files in a dynamic volume cannot be used for collecting memory
dump.
― Specify a drive other than the system drive for "Dedicated Dump File".
Create the registry shown below by using the Registry Editor and specify the name of
Dedicated Dump File.
<When specifying the file named "dedicateddumpfile.sys" in drive D>
Key:
HKEY_LOCAL_MACHINE\SYSTEM
\CurrentControlSet\Control\CrashControl
Name:
DedicatedDumpFile
Type:
REG_SZ
Data:
D:\dedicateddumpfile.sys
Note the following when specifying Dedicated Dump File:
•
The setting is applied after restarting the system.
•
Specify a drive that has free space of "installed memory size + 400 MB" or more.
•
Dedicated Dump File cannot be placed in dynamic volumes.
•
To collect memory dump by using Dedicated Dump File, a paging file is required in
•
Dedicated Dump File is only used for collecting memory dump, and is not used as
any drive.
virtual memory. Specify the paging file size so that sufficient virtual memory can be
allocated in the entire system.
Express5800/R120e-1M, R120e-2M
Installation Guide (Windows)
23
3. Setting Up Windows Server 2012
Chapter 1 Installing Windows
Precautions for system partition size
The system partition size can be calculated by using the following way.
(OS size) + (paging file size) + (dump file size) + (application size)
Server with a GUI
OS size
= 9,400MB
Paging file size (recommended)
= installed memory size × 1.5
Dump file size
= installed memory size + 400MB
Application size
= as required by the application
Server Core installations
OS size
= 6,300MB
Paging file size (recommended)
= installed memory size × 1.5
Dump file size
= installed memory size + 400MB
Application size
= as required by the application
For example, if the installed memory size is 1 GB (1,024 MB) and Server with a GUI is selected,
the partition size is calculated as follows:
9,400MB + (1,024MB × 1.5) + 1,024MB+ 400MB+ application size
= 12,360MB + application size
The above mentioned partition size is the minimum partition size required for system installation.
Ensure that the partition size is sufficient for system operations.
The following partition sizes are recommended.
Server with a GUI
:
32,768MB(32GB) or more
Server Core installations
:
32,768MB(32GB) or more
*1 GB = 1,024 MB
Note
The above paging file sizes are recommended for collecting debug
information (dump file). The initial size of the Windows partition paging
file must be large enough to store dump files.
Make sure you set a sufficient paging file size. If the paging file is
insufficient, there will be a virtual memory shortage that may result in
an inability to collect correct debug information.
Regardless of the sizes of internal memory and write debug
information, the maximum size of the dump file is "size of internal
memory + 400 MB".
When installing other applications or other items, add the amount of
space needed by the application to the partition.
If the partition size for installing Windows is smaller than the recommended size, expand the
partition size or add another hard disk drive.
24
Express5800/R120e-1M, R120e-2M
Installation Guide (Windows)
3. Setting Up Windows Server 2012
Chapter 1 Installing Windows
Tips
When creating a new partition, Windows OS assigns an initial boot
partition of 350 MB.
For example, when creating a partition of 40,960 MB (40 GB), usable
space will be 40,960 MB – 350 MB = 40,610 MB.
Free space
System Partition (40,610 MB)
Boot Partition (350 MB)
The boot partition is not recognized from the operating system.
Precautions for Windows Server 2012 with Hyper-V
Refer to the following web site for information related to Windows Server 2012 Hyper-V.
http://www.58support.nec.co.jp/global/download/w2012/hyper-v/hyper-v-ws2012.html
Precautions for using BitLocker
Note the following precautions when using BitLocker.
Be sure to keep the recovery password secure. Do not keep it near a server running
BitLocker.
Important
If the recovery password is not entered, the OS cannot be started, and
the content of the partition encrypted by BitLocker cannot be
referenced any more.
The recovery password might be required at startup of the OS after
the following:
−
Replacement of motherboard
−
Initialization of trusted platform module (TPM)
−
Change of BIOS setting
To reinstall the operating system into a partition that is encrypted with BitLocker, delete the
BitLocker-encrypted partition prior to reinstallation.
Precautions for NIC teaming feature in Windows Server 2012
The NIC teaming feature, which used to be provided by network interface card (NIC) vendors, is
built into Windows Server 2012. In Windows Server 2012, this feature is also called "load
balancing and failover (LBFO)".
See 3.9 Setup of Windows Server 2012 NIC Teaming (LBFO) for more information.
Express5800/R120e-1M, R120e-2M
Installation Guide (Windows)
25
3. Setting Up Windows Server 2012
Chapter 1 Installing Windows
3.2
Setup with EXPRESSBUILDER
This section describes how to install Windows with EXPRESSBUILDER.
This feature automatically recognizes the RAID controller connected to the server and configures the RAID
system. Therefore the hardware installation of the server needs to be finished by following " User’s Guide ".
Important
• Setup with EXPRESSBUILDER may delete all data of the hard disk drive
depending on the settings. Pay attention to input parameters. You must
be especially careful when configuring the following:
− RAID settings
− Partition Settings
Backing up user data, as needed, is recommended.
• Before starting setup, be sure to disconnect hard disk drives from the
RAID Controller that is not to be setup. Install those hard disk drives after
setup has completed. Conducting setup with hard disk drives being
connected with RAID Controller may cause existing data to be erased
unintentionally. It is recommended to make backup copy of user data
before starting setup.
Note
• The Scalable Networking Pack (SNP) function is disabled on systems that have
been installed by using EXPRESSBUILDER.
The setting of SNP function may affect the system performance.
Contact your sales representative for details.
Tips
• Setup with EXPRESSBUILDER allows you to use a pre-specified parameter file
or save the parameters specified in setup as a parameter file on removable
media or Internal Flash Memory (if purchased optionally).
• For details on creating a parameter file, see 7. Windows OS Parameter File.
26
Express5800/R120e-1M, R120e-2M
Installation Guide (Windows)
3. Setting Up Windows Server 2012
Chapter 1 Installing Windows
3.2.1
Setup flow
Configure the RAID system.
Set EXPRESSBUILDER in the optical disk drive.
Copy the selected applications and setup modules.
Insert the OS installation media into the optical disk drive.
The OS is installed automatically.
The Starter Pack and the selected applications are installed.
Agree the license terms and sign in.
Installation completes.
Process that requires input or selection
Process that proceeds automatically
Express5800/R120e-1M, R120e-2M
Installation Guide (Windows)
27
3. Setting Up Windows Server 2012
Chapter 1 Installing Windows
3.2.2
Requirements for Setup
Prepare the following disc and media and instruction manuals before starting setup.
Either of the following OS installation disc
•
NEC operating system installation media (hereafter referred to as Backup DVD-ROM)
•
Microsoft operating system installation media (hereafter referred to as Windows Server 2012
DVD-ROM)
Either of the following EXPRESSBUILDER
•
EXPRESSBUILDER DVD
•
Internal Flash Memory (optional)
Prepare if needed:
•
Removable media for Windows OS parameter file
Tips
• EXPRESSBUILDER can be run from Internal Flash Memory without the DVD
when it is installed in the server.
28
Express5800/R120e-1M, R120e-2M
Installation Guide (Windows)
3. Setting Up Windows Server 2012
Chapter 1 Installing Windows
3.2.3
Setup procedure
During Setup with EXPRESSBUILDER, parameters are specified through the wizard.
Note
Read through the items in Chapter 1 (3.1Precautions for Windows Server 2012
Installation) prior to installing Windows.
1.
Turn peripheral device, such as a display, power on, and then turn the server power on.
2.
Start EXPRESSBUILDER according to Chapter 1 (1.1 Starting EXPRESSBUILDER).
3.
Choose OS installation from Boot selection.
The following screen appears.
Express5800/R120e-1M, R120e-2M
Installation Guide (Windows)
29
3. Setting Up Windows Server 2012
Chapter 1 Installing Windows
The server starts from EXPRESSBUILDER.
30
4.
Choose English on the language selection window, and then click [OK].
5.
Click Setup.
Express5800/R120e-1M, R120e-2M
Installation Guide (Windows)
3. Setting Up Windows Server 2012
Chapter 1 Installing Windows
6. On the OS selection menu, choose the OS to install or specify the parameter file.
Not using parameter file : Go to Step 7.
Using a parameter file
: Go to Step 8.
7. When not using a parameter file, choose an OS by either of the following two ways:
To automatically detect the OS on the OS installation disc:
(1) Click Automatic Detection.
Insert the OS installation disc, and then click OK.
Express5800/R120e-1M, R120e-2M
Installation Guide (Windows)
31
3. Setting Up Windows Server 2012
Chapter 1 Installing Windows
(2) Click
on the right side of the screen.
→ Go to step 9.
To select an OS from the menu:
(1) Click Manual Selection.
(2) From the Windows list, choose Windows Server 2012, and then click OK.
32
Express5800/R120e-1M, R120e-2M
Installation Guide (Windows)
3. Setting Up Windows Server 2012
Chapter 1 Installing Windows
(3) Click
on the right side of the screen.
→ Go to step 9.
8. When using the parameter file, click Load Settings.
Follow the on-screen instructions to load the parameter file (*.tre).
Tips
For the removable media in which the parameter file is saved, see
"/mnt/usr_connect/usb*" (* indicates a number).
Express5800/R120e-1M, R120e-2M
Installation Guide (Windows)
33
3. Setting Up Windows Server 2012
Chapter 1 Installing Windows
Click
on the right side of the screen.
When the parameter file is correctly loaded, the settings are determined.
Click Custom to check and modify the settings in the wizard.
Click
on the right side of the screen.
→ Go to step 10.
9.
34
Specify the setup parameters by using either of the following ways:
Express5800/R120e-1M, R120e-2M
Installation Guide (Windows)
3. Setting Up Windows Server 2012
Chapter 1 Installing Windows
Default:
(1) Click Default.
(2) Choose the edition of the OS to install from the Edition list.
Type the password, and then click Finish.
(3) Click
on the right side of the screen.
→ Go to step 10.
Express5800/R120e-1M, R120e-2M
Installation Guide (Windows)
35
3. Setting Up Windows Server 2012
Chapter 1 Installing Windows
Custom:
(1) Click Custom.
(2) Use the wizard to configure the RAID system with the RAID controller detected automatically.
Creating new logical drives:
Clear the Skip a RAID Configuration check box and click Next. Follow the wizard to set up the
RAID array and logical drives.
Important
The existing RAID system is cleared and all data on the hard disk drives will
be lost when proceeding to the installation.
Skipping the creation of new logical drives:
Select the Skip a RAID Configuration check box, and then click Next.
36
Express5800/R120e-1M, R120e-2M
Installation Guide (Windows)
3. Setting Up Windows Server 2012
Chapter 1 Installing Windows
(3) Specify the settings for Basic Settings.
Choose Install Windows using EXPRESSBUILDER, modify the Edition, Language and Time zone
settings as needed, and then click Next.
(4) Specify the settings for Partition Settings.
Modify the settings as needed, and then click Next.
Important
• Partition size:
− Specify a partition size larger than the minimum required for installing
the operating system. (See Chapter 1 (3.1 Precautions for Windows
Server 2012 Installation).)
− The maximum partition size is 2,097,152 MB.
• All data on the hard disk drive will be deleted.
Express5800/R120e-1M, R120e-2M
Installation Guide (Windows)
37
3. Setting Up Windows Server 2012
Chapter 1 Installing Windows
(5)
Enter the user information, and then click Next.
Note
Type Administrator Password that satisfies the following requirements:
− Contains 6 or more characters
− Contains characters from at least three of the following categories: numbers,
uppercase letters, lowercase letters, and symbols.
Tips
If you want to type a computer name without default settings, clear the Automatic
Numbering checkbox.
(6) Specify the settings for Network Protocols.
Modify the settings as needed, and then click Next.
Tips
The order of entry in Custom settings may differ from the numbering of LAN
connectors.
Note
Even when an optional network board is connected, Custom settings only shows
standard network boards.
After finishing Setup with EXPRESSBUILDER, specify the optional network
settings again.
38
Express5800/R120e-1M, R120e-2M
Installation Guide (Windows)
3. Setting Up Windows Server 2012
Chapter 1 Installing Windows
(7) Specify the settings for the domain or workgroup.
Modify the settings as needed, and then click Next.
(8) Specify the settings for Windows components.
Modify the settings as needed, and then click Next.
Server with a GUI
Server Core Installation
Express5800/R120e-1M, R120e-2M
Installation Guide (Windows)
39
3. Setting Up Windows Server 2012
Chapter 1 Installing Windows
(9) Specify the settings for applications.
Modify the settings as needed, and then click Finish.
On the following screen, click
on the right side of the screen.
10. Confirm installation settings
If you want to save the settings, click Save.
Click
40
on the right side of the screen.
Express5800/R120e-1M, R120e-2M
Installation Guide (Windows)
3. Setting Up Windows Server 2012
Chapter 1 Installing Windows
11. Click Start to start the setup.
12. When the server has started from the EXPRESSBUILDER disc, insert the EXPRESSBUILDER disc into the
optical disk drive, and then click OK.
13. Insert the OS installation disc into the optical disk drive, and then click OK.
Windows Server 2012 is installed automatically.
Express5800/R120e-1M, R120e-2M
Installation Guide (Windows)
41
3. Setting Up Windows Server 2012
Chapter 1 Installing Windows
14. The Starter Pack and the selected applications are automatically installed.
Screen displayed when Starter Pack is being installed
Screen displayed when an application is being installed
15. Read the terms of License Agreement. If you agree, select the I accept the license terms for using
Windows check box, and then click Accept (only in the server with a GUI).
42
Express5800/R120e-1M, R120e-2M
Installation Guide (Windows)
3. Setting Up Windows Server 2012
Chapter 1 Installing Windows
16. Press the <Ctrl> + <Alt> + <Delete> keys to sign in.
On the following screen, type the password you have set at step 9.
17. Click OK.
18. Follow the instructions described in Chapter 1 (3.5 Setting Up Device Drivers) to set up the device drivers.
19. Install the optional device drivers according to the instructions of the manuals for the optional devices.
20. Perform the setup by following the instructions described in Chapter 1 (6. Setup for Solving Problems).
Setup with EXPRESSBUILDER is now complete.
Express5800/R120e-1M, R120e-2M
Installation Guide (Windows)
43
3. Setting Up Windows Server 2012
Chapter 1 Installing Windows
3.3
Setup with Windows Standard Installer
This section describes how to install Windows with Windows Standard Installer.
This feature automatically recognizes the RAID controller connected to the server and configures the RAID
system. Therefore the hardware installation of the server needs to be finished by following "User’s Guide ".
Important
Setup with Windows standard Installer may delete all data of the hard disk
drive depending on the settings. Pay attention to input parameters. You
must be especially careful when configuring the following:
− RAID settings
Backing up user data, as needed, is recommended.
Tips
• Setup with Windows Standard Installer allows you to use a pre-specified
parameter file or save the parameters specified in setup as a parameter file on
removable media or Internal Flash Memory (if purchased optionally).
• For details on creating a parameter file, see 7. Windows OS Parameter File.
44
Express5800/R120e-1M, R120e-2M
Installation Guide (Windows)
3. Setting Up Windows Server 2012
Chapter 1 Installing Windows
3.3.1
Setup flow
Configure RAID System
Insert the OS installation media
Restart (automatically)
Installation
Agree the license terms and sign in.
Install Starter Pack
End of installation
Process that requires input or selection
Process that proceeds automatically
Express5800/R120e-1M, R120e-2M
Installation Guide (Windows)
45
3. Setting Up Windows Server 2012
Chapter 1 Installing Windows
3.3.2
Requirements for Setup
Prepare the following disc and media and instruction manuals before starting setup.
Either of the following OS installation disc
•
NEC operating system installation media (hereafter referred to as Backup DVD-ROM)
•
Microsoft operating system installation media (hereafter referred to as Windows Server 2012
DVD-ROM)
Either of the following EXPRESSBUILDER
•
EXPRESSBUILDER DVD
•
Internal Flash Memory (optional)
Prepare if needed:
−
Removable media for Windows OS parameter file
Tips
• EXPRESSBUILDER can be run from Internal Flash Memory without the DVD
when it is installed in the server.
46
Express5800/R120e-1M, R120e-2M
Installation Guide (Windows)
3. Setting Up Windows Server 2012
Chapter 1 Installing Windows
3.3.3
Setup procedure
Note
Read through the items in Chapter 1 (3.1 Precautions for Windows Server 2012
Installation) prior to installing Windows.
1. Turn peripheral device, such as a display, power on, and then turn the server power on.
2. Start EXPRESSBUILDER according to Chapter 1 (1.1 Starting EXPRESSBUILDER).
3. Choose OS installation from Boot selection.
The following screen appears.
Express5800/R120e-1M, R120e-2M
Installation Guide (Windows)
47
3. Setting Up Windows Server 2012
Chapter 1 Installing Windows
The server starts from EXPRESSBUILDER.
4. Choose English on the language selection window, and then click [OK].
5. Click Setup.
6. On the OS selection menu, choose the OS to install or specify the parameter file.
Not using parameter file : Go to Step 7.
Using a parameter file : Go to Step 8.
48
Express5800/R120e-1M, R120e-2M
Installation Guide (Windows)
3. Setting Up Windows Server 2012
Chapter 1 Installing Windows
7.
When not using a parameter file, choose an OS by either of the following two ways:
To automatically detect the OS on the OS installation disc:
(1) Click Automatic Detection.
Insert the OS installation disc, and then click OK.
Express5800/R120e-1M, R120e-2M
Installation Guide (Windows)
49
3. Setting Up Windows Server 2012
Chapter 1 Installing Windows
(2) Click
on the right side of the screen.
→ Go to step 9.
To select an OS from the menu:
(1) Click Manual Selection.
(2) From the Windows list, choose Windows Server 2012, and then click OK.
50
Express5800/R120e-1M, R120e-2M
Installation Guide (Windows)
3. Setting Up Windows Server 2012
Chapter 1 Installing Windows
(3) Click
on the right side of the screen.
→ Go to step 9.
8.
When using the parameter file, click Load Settings.
Follow the on-screen instructions to load the parameter file (*.tre).
Tips
For the removable media in which the parameter file is saved, see
"/mnt/usr_connect/usb*" (* indicates a number).
Express5800/R120e-1M, R120e-2M
Installation Guide (Windows)
51
3. Setting Up Windows Server 2012
Chapter 1 Installing Windows
Click
on the right side of the screen.
When the parameter file is correctly loaded, the settings are determined.
Click Custom to check and modify the settings in the wizard.
Click
on the right side of the screen.
→ Go to step 10.
9.
52
Click Custom.
Express5800/R120e-1M, R120e-2M
Installation Guide (Windows)
3. Setting Up Windows Server 2012
Chapter 1 Installing Windows
(1) Use the wizard to configure the RAID system with the RAID controller detected automatically.
Creating new logical drives:
Clear the Skip a RAID Configuration check box and click Next. Follow the wizard to set up the
RAID array and logical drives.
Important
The existing RAID system is cleared and all data on the hard disk drives will
be lost when proceeding to the installation.
Skipping the creation of new logical drives:
Select the Skip a RAID Configuration check box, and then click Next.
(2) Specify the settings for Basic Settings.
Choose Use Windows standard installer, modify the settings as needed, and then click Next.
Express5800/R120e-1M, R120e-2M
Installation Guide (Windows)
53
3. Setting Up Windows Server 2012
Chapter 1 Installing Windows
(3) Click
on the right side of the screen.
10. Confirm installation settings.
If you want to save the settings, click Save.
Click
on the right side of the screen.
11. Click Start to start the setup.
54
Express5800/R120e-1M, R120e-2M
Installation Guide (Windows)
3. Setting Up Windows Server 2012
Chapter 1 Installing Windows
12. When the following window appears, insert the OS installation disc into the disk drive, and then click OK.
13. The server restarts automatically.
If you want to use Internal Flash Memory, press <F3> key when the following message appears during
POST.
Press <F2> Setup, <F3> Internal Flash Memory, <F4> ROM Utility, <F12> Network
Note
Since the OS installation disc is set in the optical disk drive in Step 12, boot the
system from the optical disk drive having higher boot priority, not from Internal
Flash Memory.
14. Start from the OS installation disc.
If an operating system is already installed on the hard disk drive, press <Enter> key while the message
“Press any key to boot from CD or DVD…” is displayed on the top of the screen.
The boot sequence proceeds and the message “Windows is loading files…” appears.
Note
If “Windows is loading files...” message does not appear, <Enter> key was not
pressed correctly. Reboot and retry.
15. Click Next.
Express5800/R120e-1M, R120e-2M
Installation Guide (Windows)
55
3. Setting Up Windows Server 2012
Chapter 1 Installing Windows
16. Click Install now.
Windows setup starts.
17. Choose the operating system to install, and then click Next.
The screen display differs depending on an OS installation disc.
18. When the following window appears, confirm the content of the license agreement. If you agree,
select I accept the license terms and then click Next.
56
Express5800/R120e-1M, R120e-2M
Installation Guide (Windows)
3. Setting Up Windows Server 2012
Chapter 1 Installing Windows
19. When the following message appears, select the installation type.
Choose Custom: Install Windows only (advanced) in this case.
20. Click Drive options (advanced) when not reinstalling.
If the hard disk drive already contains an OS, go to the next step.
If a partition has already been created, go to step 24.
21. Click New.
Express5800/R120e-1M, R120e-2M
Installation Guide (Windows)
57
3. Setting Up Windows Server 2012
Chapter 1 Installing Windows
22. Specify the partition size in the text box, and the click Apply.
Tips
When creating a new partition and installing the OS, a 350 MB boot partition is
created. When the following window appears, click OK.
23. Select the partition created in step 21, and then click Format.
24. Select the created partition, and then click Next.
Tips
The number of partitions displayed differs depending on the hardware
configuration.
58
Express5800/R120e-1M, R120e-2M
Installation Guide (Windows)
3. Setting Up Windows Server 2012
Chapter 1 Installing Windows
When the following message appears, Windows installation starts automatically.
25. Type a password and click Finish.
26. To Sign-in to Windows Server 2012, press <Ctrl> + <Alt> + <Del> on the screen below.
Express5800/R120e-1M, R120e-2M
Installation Guide (Windows)
59
3. Setting Up Windows Server 2012
Chapter 1 Installing Windows
27. Type the password and press Enter.
Windows Server 2012 starts.
28. The following screen appears according to the contents selected (or displayed) in Step 17.
Server with a GUI
Server Core Installation
Tips
See Microsoft Website for more details.
Configure and Manage Server Core Installations
http://technet.microsoft.com/us-en/library/jj574091.aspx
60
Express5800/R120e-1M, R120e-2M
Installation Guide (Windows)
3. Setting Up Windows Server 2012
Chapter 1 Installing Windows
29. Install Starter Pack by referring to Chapter 1 (3.4 Installing Starter Pack).
30. Install drivers and specify detailed settings by referring to Chapter 1 (3.5 Setting Up Device Drivers).
31. Install the optional device drivers according to the instructions of the manuals for the optional devices.
32. Install the applications as needed by referring to Chapter 1 (3.7 Installing the Applications).
33. Perform the setup by following the instructions described in Chapter 1 (6. Setup for Solving Problems).
Setup with Windows standard installer is now complete.
Express5800/R120e-1M, R120e-2M
Installation Guide (Windows)
61
3. Setting Up Windows Server 2012
Chapter 1 Installing Windows
3.4
Installing Starter Pack
Starter Pack contains drivers customized for this server. Be sure to apply Starter Pack before running the
system.
Important
Also install Starter Pack in the following cases.
− The system configurations have changed
(If an internal optional device is installed or removed, apply the Starter
Pack. If a dialog box prompting system reboot is displayed, reboot the
system according to the on-screen instructions, and then apply the
Starter Pack.)
− If the system was restored using a restore process
− If a system has been restored using the backup tool
Note
The Scalable Networking Pack (SNP) function is disabled upon Starter Pack
installation is complete.
The setting of SNP function may affect the system performance.
Tips
If the OS is installed by using EXPRESSBUILDER, Starter Pack is already applied.
If the configuration is not changed, you do not need to apply Starter Pack again.
3.4.1
Installing Starter Pack Using EXPRESSBUILDER DVD
1.
Sign-in to the system with the built-in administrator, which has administrative privileges.
2.
Insert EXPRESSBUILDER DVD into the optical disk drive.
3.
Start the installer of Starter Pack according to the installation type.
Server with a GUI
Click Integrated Installation on the menu.
62
Express5800/R120e-1M, R120e-2M
Installation Guide (Windows)
3. Setting Up Windows Server 2012
Chapter 1 Installing Windows
When the following screen appears, make sure that the Starter Pack option is selected, and then
click Install.
Server Core installations
(1)
Type the following command from the command prompt.
In the example below, the optical disk drive is D drive.
Cd /d D:\002\win\winnt\bin
C:\Users\administrator>cd /d D:\002\win\winnt\bin
(2)
Type the following, and then press <Enter> key.
Pkgsetup.vbs
D:\002\win\winnt\bin>pkgsetup.vbs
Wait for several minutes without attempting any further operation until the following window appears.
On the server with GUI, the following progress message appears while the Starter Pack is installed.
Express5800/R120e-1M, R120e-2M
Installation Guide (Windows)
63
3. Setting Up Windows Server 2012
Chapter 1 Installing Windows
4. Read the message, and then click OK.
Starter Pack installation starts.
Wait until installation completes (about 3 to 5 minutes).
Note
The screen will black out instantaneously or resolution will change while Starter
Pack is installed.
On the server with GUI, the following progress message appears while the Starter Pack is installed.
5.
When the following message appears, Starter Pack installation is complete.
Follow the instructions in the message, and remove EXPRESSBUILDER DVD.
6.
Click OK and then restart the system.
Installation of Starter Pack is now complete.
64
Express5800/R120e-1M, R120e-2M
Installation Guide (Windows)
3. Setting Up Windows Server 2012
Chapter 1 Installing Windows
3.4.2
Installing Starter Pack Using Internal Flash Memory
If your system is installed the optional " Internal Flash Memory ", you can install Starter Pack by using Internal
Flash Memory.
1. After installing the operating system, restart the server.
2. Remove the DVD or other media from the server and press <F3> key when the message “Press <F2>
Setup, <F3> Internal Flash Memory, <F4> ROM Utility, <F12> Network” appears during POST.
3. When the following message appears, choose OS installation.
The following screen appears.
Express5800/R120e-1M, R120e-2M
Installation Guide (Windows)
65
3. Setting Up Windows Server 2012
Chapter 1 Installing Windows
The server starts from EXPRESSBUILDER.
66
4.
Select English on the language selection window, and then click OK.
5.
Click Utilities.
Express5800/R120e-1M, R120e-2M
Installation Guide (Windows)
3. Setting Up Windows Server 2012
Chapter 1 Installing Windows
6. Click Starter Pack Installation.
7.
Read the message, and then click Yes.
8. Click Close on the following screen.
The server will restart. Do not press <F3> key during POST.
Express5800/R120e-1M, R120e-2M
Installation Guide (Windows)
67
3. Setting Up Windows Server 2012
Chapter 1 Installing Windows
9. Proceed with the following procedure according to the installation type.
Tips
During setup, a virtual floppy disk drive is temporarily connected. Follow the
instructions below to reference the virtual floppy disk drive.
Server with a GUI
Click app_pkg.bat of the virtual floppy disk drive (usually A: drive).
Server Core installations
(1) Type the following command at the command prompt, and then specify the drive letter of
the virtual foppy disk drive (usually A: drive).
Cd /d A:\
C:\Users\administrator>cd /d A:\
(2) Type the following, and then press <Enter> key.
app_pkg.bat
A:\>app_pkg.bat
Wait until the file copy is complete. (About 1-3minute(s))
On the server with GUI, the following progress message appears while the Starter Pack is installed.
10. Read the message, and then click OK.
Starter Pack installation starts.
Wait until the installation of the Starter Pack is complete. (About 3-5 minutes)
Note
The screen will black out instantaneously or resolution will change while Starter
Pack is installed.
68
Express5800/R120e-1M, R120e-2M
Installation Guide (Windows)
3. Setting Up Windows Server 2012
Chapter 1 Installing Windows
On the server with GUI, the following progress message appears while the Starter Pack is installed.
11. Click OK to restart the system.
Installation of Starter Pack is now complete.
Express5800/R120e-1M, R120e-2M
Installation Guide (Windows)
69
3. Setting Up Windows Server 2012
Chapter 1 Installing Windows
3.5
Setting Up Device Drivers
Install and set up device drivers provided for the standard configuration.
For details about the installation and setup of a driver for an optional device, refer to the manual supplied with
the optional device.
3.5.1
(1)
Installing the LAN drivers
LAN drivers
Starter Pack includes the drivers for the standard LAN adapter. You can install the drivers by applying Starter
Pack using EXPRESSBUILDER.
Important
• Teaming of network adapters by using BACS or PROSet is not supported.
• Wake On LAN in the shutdown state is not supported in the following case:
Select [Control Panel] - [System and Security] - [Power Options] - [Choose
what the power button does], and if [Turn on fast startup] is selected in
[Shutdown settings] on [System Settings] screen.
When [Turn on fast startup] is not displayed, fast startup feature is
disabled.
Note
• To change the LAN or BACS driver settings, log on to the system from a local
console using an administrator’s account. Remotely changing the settings by
using the operating system’s remote desktop feature is not supported.
• Be sure to select the Internet Protocol (TCP/IP) check box when specifying an
IP address.
(2)
Optional LAN board
This server supports the following optional LAN boards. The optional LAN boards do not support the Wake On
LAN (WOL) feature.
Optional LAN boards: N8104-128/132/133/138/145
The drivers for LAN boards are automatically installed using the OS plug-and-play feature.
The LAN driver is not installed if N8104-145 is not installed at the time of the OS installation by using
EXPRESSBUILDER or Starter Pack.
Follow the steps below to install the N8104-145 LAN driver manually.
1.
Insert EXPRESSBUILDER DVD into the optical disk drive.
If Autorun Menu appears, close the menu.
Tips
EXPRESSBUILDER DVD is unnecessary if Starter Pack was installed from
Internal Flash Memory. Proceed to the next step.
70
Express5800/R120e-1M, R120e-2M
Installation Guide (Windows)
3. Setting Up Windows Server 2012
Chapter 1 Installing Windows
2.
Run install.bat in the following folder at the command prompt.
Using EXPRESSBUILDER DVD:
EXPRESSBUILDER DVD:\002\win\winnt\ws2012\lan\intel
Using System Drive when Starter Pack was installed from Internal Flash Memory:
System Drive:\StartPKG\ws2012\lan\intel
3.
When the command prompt prompts again, remove the EXPRESSBUILDER DVD from the optical disk
drive, and then restart the system.
Setup is now completed.
Note
Using an optional LAN board, perform procedure "3.6.2 Setting up LAN drivers" for
each optional LAN board.
(3)
Network adapter name
After installing the LAN drivers, the following network adapter names will be displayed by the Device Manager.
Network adapters for the standard configuration:
Broadcom NetXtreme Gigabit Ethernet #xx*
Connecting with an optional LAN board:
[N8104-128] Broadcom BCM57711 NetXtreme II 10 GigE (NDIS VBD Client) #xx*
[N8104-132/133/138] Broadcom NetXtreme Gigabit Ethernet #xx*
[N8104-145] Intel(R) Ethernet Server Adapter I340-T2 #xx*
* When the same adapter name exists, a different identification number will be assigned to xx.
Tips
The ID for N8104-128 might be a number of two or more digits. This is due to the
LAN driver specifications and this number cannot be changed.
3.5.2
(1)
Setting up LAN drivers
Setting link speed
The transfer rate and duplex mode of the network adapter must be the same as those of the switching hub.
Follow the procedure below to specify the transfer rate and duplex mode.
1. Open the Device Manager.
2. Expand Network Adapters, and then double-click the name of the network adapter you want to set.
The properties of the network adapter will be displayed.
3. Select the Advanced tab, and then set the Speed & Duplex values to the same as those of the
switching hub.
4. Click OK in the Network Adapter Properties dialog box.
5. Restart the system.
The link speed setting is now complete.
Express5800/R120e-1M, R120e-2M
Installation Guide (Windows)
71
3. Setting Up Windows Server 2012
Chapter 1 Installing Windows
(2)
Using N8104-132/133/138
Using N8104-132/133/138 with the server, follow the procedure below.
1.
Insert EXPRESSBUILDER DVD into the optical disk drive.
If Autorun Menu appears, close the menu.
Tips
EXPRESSBUILDER DVD is unnecessary if Starter Pack was installed from
Internal Flash Memory. Proceed to the next step.
2.
Double-click pgdyavd_disable.vbs in the following folder.
Using EXPRESSBUILDER DVD:
EXPRESSBUILDER DVD:\002\win\winnt\WS2012\ bcom\WS2012\lan
Using System Drive when Starter Pack was installed from Internal Flash Memory:
System drive:\StartPKG\ws2012\lan\bcom\WS2012\lan
3.
When the following message appears, click OK.
Configuration Completed
[Option:PopUp RLV Disabled(Action:Done)]
Reboot the system
Tips
4.
The message “Action:Non” indicates that the LAN driver is already set.
Remove EXPRESSBUILDER DVD from the optical disk drive, and then restart the system.
Setup is now completed.
72
Express5800/R120e-1M, R120e-2M
Installation Guide (Windows)
3. Setting Up Windows Server 2012
Chapter 1 Installing Windows
3.5.3
Graphics accelerator driver
Starter Pack includes the graphics accelerator driver for standard hardware configuration.
The graphic accelerator driver is automatically installed on setup with EXPRESSBUILDER.
After installation of Starter Pack, the screen may corrupt when returning from power-saving mode. To avoid
this, specify Never for Turn off the display in Power Options.
To reinstall drivers separately, follow the steps below.
1.
Click Settings on the Charms bar, or right-click the bottom left corner on the screen and click Control
Panel. The screen shown in Step 3 appears.
Select Settings
2.
Select Control Panel
Under Settings, click Control Panel.
Express5800/R120e-1M, R120e-2M
Installation Guide (Windows)
73
3. Setting Up Windows Server 2012
Chapter 1 Installing Windows
74
3.
Click System and Security.
4.
Double-click Power Options.
5.
Choose the Balanced option in Preferred plans, and then click Change plan settings.
Express5800/R120e-1M, R120e-2M
Installation Guide (Windows)
3. Setting Up Windows Server 2012
Chapter 1 Installing Windows
6.
Select Never in the Turn off the display list, and then click Save changes.
Graphic accelerator driver installation is now complete.
3.5.4
Using a SAS Controller(N8103-142)
The driver for SAS Controller N8103-142 is automatically installed by Windows Plug-and-Play.
3.5.5
Using a RAID Controller (N8103-161)
The driver for RAID Controller N8103-161 is automatically installed by Windows Plug-and-Play.
3.5.6
Using a Fibre Channel controller (N8190-153/154)
The driver for Fibre Channel controller N8190-153/154 is automatically installed by Windows Plug-and-Play.
Express5800/R120e-1M, R120e-2M
Installation Guide (Windows)
75
3. Setting Up Windows Server 2012
Chapter 1 Installing Windows
3.6
License Authentication
To use Windows Server 2012, perform the license authentication procedure.
Confirm if your license is authenticated. If not, perform the following procedures to have your license
authenticated.
Connect to the Internet to perform the authentication procedure, or use the telephone to perform the
authentication procedure.
(1)
Server with a GUI
1.
Click Search on the Charms bar, or right-click the bottom left corner on the screen and click Run.
Search
Run
2. Type "slui" in the Search box, and then press the <Enter> key.
Search
76
Run
Express5800/R120e-1M, R120e-2M
Installation Guide (Windows)
3. Setting Up Windows Server 2012
Chapter 1 Installing Windows
3. Read the message, and then continue the license authentication procedure.
Tips
If your license is already authenticated, you need not perform this procedure.
Windows activation is now complete.
(2)
Server Core installations
1.
Type the following at the command prompt, and then press <Enter> key.
slmgr –dli
C:\Users\administrator>slmgr –dli
If license authentication is required, go to the next step.
If your license is already authenticated, you can skip the next and the subsequent steps.
2.
Change the product key.
Using Backup DVD:
Type the following command, and then press the <Enter> key.
C:\Users\administrator>slmgr –ipk <Product key on COA label>
Using Windows Server 2012 DVD-ROM:
You do not need to change the product key.
Go to the next step.
3.
Perform license authentication.
Using the Internet:
License authentication is performed through the Internet.
Type the following command, and then press the <Enter> key.
C:\Users\administrator>slmgr –ato
The authentication is now complete.
Express5800/R120e-1M, R120e-2M
Installation Guide (Windows)
77
3. Setting Up Windows Server 2012
Chapter 1 Installing Windows
Not using the Internet:
Use telephone for license authentication.
Type the following command, and then press the <Enter> key.
C:\Users\administrator>slmgr -dti
Get an Install ID for license authentication.
Refer to the file "%systemroot%\system32\sppui\phone.inf" to confirm the telephone number of
Microsoft Licensing Center.
Call Microsoft Licensing Center and tell them your Install ID.
Type the confirmation ID you have received in the following command, and then press the <Enter> key.
C:\Users\administrator>slmgr –atp <Confirmation ID>
The authentication is now complete.
78
Express5800/R120e-1M, R120e-2M
Installation Guide (Windows)
3. Setting Up Windows Server 2012
Chapter 1 Installing Windows
3.7
Installing the Applications
EXPRESSBUILDER includes applications such as NEC ESMPRO Agent or NEC ESMPRO Manager. Some
applications can be installed collectively by performing the procedures described below. When installing these
applications individually, see Chapter 2 (Installing Bundled Software). This feature is only available on the
server with a GUI.
1.
Sign in Windows on the server with the Built-in Administrator or an account having administrative
privilege.
2.
Insert the EXPRESSBUILDER DVD into the optical disk drive.
3.
Click Integrated Installation on the menu.
4.
Click Applications and select the check boxes corresponding to the applications to install, and then
click Install.
Note
If your system does not satisfy the requirements for an application installation, you
cannot install it. For details, refer to the on-screen information and the relevant
page of each application.
Express5800/R120e-1M, R120e-2M
Installation Guide (Windows)
79
3. Setting Up Windows Server 2012
Chapter 1 Installing Windows
The selected applications are automatically installed.
5.
When a message appears, click Restart, and then remove the EXPRESSBUILDER disc from the
optical disk drive.
Now installation of applications is complete.
80
Express5800/R120e-1M, R120e-2M
Installation Guide (Windows)
3. Setting Up Windows Server 2012
Chapter 1 Installing Windows
3.8
Installing With Multiple Logical Drives
Backup data for future use in case of data loss before starting installation.
(1)
Installing
− Setup with EXPRESSBUILDER
Important
Before starting setup, be sure to disconnect hard disk drives from the RAID
controller that is not to be setup. Install those hard disk drives after setup
has completed. Conducting setup with hard disk drives being connected
with RAID Controller may cause existing data to be erased unintentionally.
See Chapter 1 (3.2 Setup with EXPRESSBUILDER), and proceed with setup.
In this case, EXPRESSBUILDER installs the Windows on the first detected hard disk drive or logical drive.
− Setup with Windows standard installer
1.
See Chapter 1 (3.3 Setup with Windows Standard Installer), and start setup.
2.
When the following message appears, select the partition to which you want to install the operating
system.
Select the location to which Windows will be installed
The order and numbers of the disks displayed on the screen might not match the server’s slot of the
hard disk drives. Distinguish between the hard disk drives by viewing the hard disk drive
capacity and partition size displayed on the screen, and then select a drive to install the Windows
system.
Selecting an improper drive might cause an unintentional corruption of the existing data. Be careful
when selecting a hard disk drive on which to install the system.
Important
• For details, refer to the following Microsoft website:
http://support.microsoft.com/kb/937251/en-us
• You cannot edit the drive letters for the system volume or boot volume
after setup is complete. Make sure that the drive letters assigned in this
window are correct, and then proceed with setup.
3.
See Chapter 1 (3.3 Setup with Windows Standard Installer), and proceed to setup Windows with
Windows standard installer and the instructions.
Tips
The drive letter might change after installation. If you want to change the drive
letter, use the procedure shown in Changing drive letter assignments below.
Express5800/R120e-1M, R120e-2M
Installation Guide (Windows)
81
3. Setting Up Windows Server 2012
Chapter 1 Installing Windows
(2)
Changing drive letter assignments
To change the drive letter, follow the steps below. These steps cannot change drive letter assignments for the
system volume or boot volume. If you want to change them, re-install the Windows.
1.
From the Start menu, right-click Computer and then select Management. Launch Server Manager.
2.
From the window on the left, select Storage and then Disk Management.
3.
Right-click the volume whose drive letter you want to change, and then select Change drive letter and
path.
4.
Click Change.
5.
Click Assign next drive letter, and then select the drive letter you want to assign.
6.
Click OK.
7.
When the following message appears, read the message and then click OK.
Some programs are dependent on drive letters, and may
not run properly. Continue?
8.
82
Close the Server Manager.
Express5800/R120e-1M, R120e-2M
Installation Guide (Windows)
3. Setting Up Windows Server 2012
Chapter 1 Installing Windows
3.9
Setting up for Windows Server 2012 NIC Teaming (LBFO)
Set up the network adapter teaming feature as shown below.
(1)
Launching the NIC teaming setup tool
1.
Launch Server Manager.
2.
Select Local Server.
3.
In the Properties window, click Enable or Disable for NIC teaming.
The NIC teaming setup tool will launch.
Tips
(2)
The NIC teaming setup tool can also be launched by opening the Run dialog box,
typing lbfoadmin, and then pressing the <Enter> key.
Creating a team
Create a team by using the NIC teaming setup tool.
1. In the Servers section, select the name of the server to set up.
If there is only one server connected, the name of the server is selected automatically.
2. In the Teams section, under Tasks, select New Team. The New Team wizard then starts.
3.
Type the name of the team to create, and then select the network adapter to include in the team from
the Member adapters list.
4. Click Additional properties.
5. Specify the required settings, and then click OK.
Teaming mode
Static Teaming
Configures static aggregation between the NIC and switches.
Switch Independent
Configures teaming on the NIC side without depending on the switch settings.
LACP
Configures dynamic aggregation between the NIC and switches.
Load balancing mode
Address Hash
Distributes the load based on IP addresses and port numbers.
Hyper-V Port
Distributes the load to each of the virtual switch ports used by the virtual
machines.
Standby adapter
Select one adapter to be set to standby mode from the adapters in the team.
Setting all adapters to active mode is also possible.
Primary team interface
Any VLAN ID can be specified for the primary team interface.
(3)
Notes and restrictions
NIC teaming on a guest OS is not supported in the Hyper-V environment.
Express5800/R120e-1M, R120e-2M
Installation Guide (Windows)
83
4. Setting Up Windows Server 2008 R2
Chapter 1 Installing Windows
4.
Setting Up Windows Server 2008 R2
Set up Windows Server 2008 R2.
4.1
Before Starting Setup
Read through the cautions explained here before starting setup.
: Confirm during Setup with EXPRESSBUILDER
: Confirm during Setup with Windows standard installer
Hardware configuration
The following hardware configurations require special procedures.
Reinstalling to a mirrored volume
When you install Windows Server 2008 R2 in an environment with a mirrored volume created
using Windows, disable mirroring before installing the operating system and enable it again after
the installation. Use [Computer Management] – [Disk Management] to create, disable, or remove
the mirrored volume.
Peripheral devices such as RDX/MO
Remove an MO device before installing an OS. Some peripheral devices need to be halted
before installation. Refer to the manual provided with the peripheral devices for how to set a
device appropriate to installation.
DAT, LTO, and similar media
Do not set media that is unnecessary to installation during setup.
Connecting to multiple hard disk drives (logical drives)
For details on installing operating systems to a system in which multiple logical drives exist, refer to
Chapter 1 (4.9 Installation When Multiple Logical Drives Exist).
Reinstalling to hard disk drives that have been upgraded to dynamic disks
If the hard disk drive has been upgraded to a dynamic disk, the operating system cannot be
reinstalled to it with the existing partitions.
Set up the operating system with the Windows standard installer.
84
Express5800/R120e-1M, R120e-2M
Installation Guide (Windows)
4. Setting Up Windows Server 2008 R2
Chapter 1 Installing Windows
Setup when mass memory is installed
If mass memory is installed in your system, the large size of paging file is required at installation.
Thus, the partition size for storing debug information (dump file) may not be secured.
If you fail to secure the dump file size, use Windows standard installer for setup, and allocate the
required file space to multiple disks by performing the following steps.
1. Set the system partition size to a size sufficient to install the OS and paging file.
2. Specify another disk as destination to store the debug information (required dump file size)
by referring to Chapter 1 (6. Setup for Solving Problems).
If the hard disk drive does not have enough space to write the debug information, set the partition
size to a size sufficient to install the OS and paging file, and then add another hard disk drive for
the dump file.
Note
If the partition size for installing Windows is smaller than the recommended
size, expand the partition size or add another hard disk drive.
If sufficient space cannot be secured for the paging file, perform either of the following after
setting up using Windows Standard Installer is complete.
― Specify a hard disk drive other than the system drive as the location to store the
paging file for collecting memory dump
Create a paging file of the installed memory size + 300 MB or more in a drive other than the
system drive.
The paging file that exists in the first drive (in the order of drive letter C, D, E, ...)
is used as the temporary memory dump location. Therefore, the size of the
paging file must be "installed memory size + 300 MB" or more. Paging files in
dynamic volumes are not used for dumping memory. The setting is applied after
restarting the system.
Example of correct setting
C: No paging file exists
D: Paging file whose size is "installed memory size + 300 MB" or more
→ The paging file in drive D can be used for collecting memory dump
because its size satisfies the requirement.
Express5800/R120e-1M, R120e-2M
Installation Guide (Windows)
85
4. Setting Up Windows Server 2008 R2
Chapter 1 Installing Windows
Example of incorrect setting 1
C: Paging file whose size is smaller than the installed memory size
D: Paging file whose size is "installed memory size + 300 MB" or more
→ The paging file in drive C is used for collecting memory dump, but
collection may fail because the size of the paging file is smaller than the
installed memory size.
Example of incorrect setting 2
C: Paging file whose size is "installed memory size × 0.5"
D: Paging file whose size is "installed memory size × 0.5"
E: Paging file whose size is 300 MB
→ The total paging file size in all drives is "installed memory size + 300 MB",
but collection may fail because only the paging file in drive C is used for
collecting memory dump.
Example of incorrect setting 3
C: No paging file exists
D: Paging file whose size is "installed memory size + 300 MB" or more
(in dynamic volume)
→ Paging files in a dynamic volume cannot be used for collecting memory
dump. Thus, collecting memory dump fails.
― Specify a drive other than the system drive for "Dedicated Dump File".
Create the registry shown below by using the Registry Editor and specify the name of
Dedicated Dump File.
<When specifying the file named "dedicateddumpfile.sys" in drive D>
Key:
HKEY_LOCAL_MACHINE\SYSTEM
\CurrentControlSet\Control\CrashControl
Name:
DedicatedDumpFile
Type:
REG_SZ
Data:
D:\dedicateddumpfile.sys
Note the following when specifying Dedicated Dump File:
•
Pay strict attention to edit the registry.
•
The setting is applied after restarting the system.
•
Specify a drive that has free space of "installed memory size + 300 MB" or more.
•
Dedicated Dump File cannot be placed in dynamic volumes.
•
To collect memory dump by using Dedicated Dump File, a paging file is required in
any drive.
•
Dedicated Dump File is only used for collecting memory dump, and is not used as
virtual memory. Specify the paging file size so that sufficient virtual memory can be
allocated in the entire system.
86
Express5800/R120e-1M, R120e-2M
Installation Guide (Windows)
4. Setting Up Windows Server 2008 R2
Chapter 1 Installing Windows
System partition size
The system partition size can be calculated by using the following formula.
Size required to install the OS + paging file size + dump file size + application size
Full installations
Size required to install the OS
= 15,600 MB
(Windows Server 2008 R2 + Service Pack 1)
=
8,400 MB
=
8,000 MB
(Windows Server 2008 R2 with Service Pack 1)
(Windows Server 2008 R2)
= installed memory size × 1.5
Paging file size (recommended)
Dump file size
= installed memory size + 300MB
Application size
= as required by the application
Server Core installations
Size required to install the OS
= 11,100 MB
(Windows Server 2008 R2 + Service Pack 1)
=
3,700 MB
(Windows Server 2008 R2 with Service Pack 1)
=
3,500 MB
(Windows Server 2008 R2)
Paging file size (recommended)
= installed memory size × 1.5
Dump file size
= installed memory size + 300MB
Application size
= as required by the application
For example, if the installed memory size is 1 GB (1,024 MB) and Full installations is selected,
the partition size is calculated as follows:
8,000 MB + (1,024MB × 1.5) + 1,024MB+ 300MB+ application size
= 10,860MB + application size
The above mentioned partition size is the minimum partition size required for system installation.
Ensure that the partition size is sufficient for system operations.
The following partition sizes are recommended.
Full installations
:
32,768MB(32GB) or more
Server Core installations
:
10,240MB(10GB) or more
*1 GB = 1,024 MB
Note
The above paging file sizes are recommended for collecting debug
information (dump file). The initial size of the Windows partition paging
file must be large enough to store dump files.
Make sure you set a sufficient paging file size. If the paging file is
insufficient, there will be a virtual memory shortage that may result in
an inability to collect correct debug information.
Regardless of the sizes of internal memory and write debug
information, the maximum size of the dump file is "size of internal
memory + 300 MB".
When installing other applications or other items, add the amount of
space needed by the application to the partition.
If the partition size for installing Windows is smaller than the recommended size, expand the
partition size or add another hard disk drive.
Express5800/R120e-1M, R120e-2M
Installation Guide (Windows)
87
4. Setting Up Windows Server 2008 R2
Chapter 1 Installing Windows
Tips
When creating a new partition, Windows OS assigns an initial boot
partition of 100 MB.
For example, when making a partition of 40,960 MB (40 GB), usable
space will be 40,960 MB – 100 MB = 40,860 MB.
Free space
System Partition (40,860 MB)
Boot Partition (100 MB)
The boot partition is not recognized from the operating system.
Hyper-V 2.0 support
Refer to the following web site for information related to Hyper-V 2.0.
http://www.58support.nec.co.jp/global/download/w2k8r2/hyper-v/hyper-v-v2.html
Using BitLocker
If using BitLocker, note the following.
Be sure to keep the recovery password secure. Do not keep it near a server running
BitLocker.
Important
If the recovery password is not entered, the OS cannot be started, and
the content of the partition encrypted by BitLocker cannot be
referenced any more.
The recovery password might be required at startup of the OS after
the following:
−
Replacement of motherboard
−
Initialization of trusted platform module (TPM)
−
Change of BIOS setting
To reinstall the operating system into a partition that is encrypted with BitLocker, delete the
BitLocker-encrypted partition prior to reinstallation.
Microsoft releases software updates for BitLocker encryption. If using BitLocker, it is
important that you read through the information provided by Microsoft. Also read through the
checklist published by Microsoft.
For details, visit http://support.microsoft.com/kb/975496/en-us.
88
Express5800/R120e-1M, R120e-2M
Installation Guide (Windows)
4. Setting Up Windows Server 2008 R2
Chapter 1 Installing Windows
Installing Service Pack
If the OS installation media contains Service Pack 1, you need not apply the service pack
again.
You can install the Service Pack on the server. When the Service Pack is not attached to your
system, prepare it by yourself.
License authentication
License authentication is required depending on the installation of Windows.
For details, refer to 4.6 License Authentication.
Note
• Activate within 30 days following installation.
• A virtual product key is used when installing in a virtual environment. It is not
used when directly installing an operating system to a physical server.
Express5800/R120e-1M, R120e-2M
Installation Guide (Windows)
89
4. Setting Up Windows Server 2008 R2
Chapter 1 Installing Windows
4.2
Setup with EXPRESSBUILDER
This section describes how to install Windows with EXPRESSBUILDER.
This feature automatically recognizes the RAID controller connected to the server and configures the RAID
system. Therefore the hardware installation of the server needs to be finished by following " User’s Guide ".
Important
• Setup with EXPRESSBUILDER may delete all data of the hard disk drive
depending on the settings. Pay attention to input parameters. You must
be especially careful when configuring the following:
− RAID settings
− Partition Settings
Backing up user data, as needed, is recommended.
• Before starting setup, be sure to disconnect hard disk drives from the
RAID Controller that is not to be setup. Install those hard disk drives after
setup has completed. Conducting setup with hard disk drives being
connected with RAID Controller may cause existing data to be erased
unintentionally. It is recommended to make backup copy of user data
before starting setup.
Note
The Scalable Networking Pack (SNP) function is disabled on systems that have
been installed by using EXPRESSBUILDER.
The setting of SNP function may affect the system performance.
Contact your sales representative for details.
Tips
• Setup with EXPRESSBUILDER allows you to use a pre-specified parameter file
or save the parameters specified in setup as a parameter file on removable
media or Internal Flash Memory (if purchased optionally).
• For details on creating a parameter file, refer to 7. Windows OS Parameter File.
90
Express5800/R120e-1M, R120e-2M
Installation Guide (Windows)
4. Setting Up Windows Server 2008 R2
Chapter 1 Installing Windows
4.2.1
Setup flow
Configure the RAID system.
Set EXPRESSBUILDER in the optical disk drive.
Copy the selected applications and setup modules.
Insert the OS installation media into the optical disk drive.
The OS is installed automatically.
The Starter Pack and the selected applications are installed.
Agree the license terms and log on.
Installation completes.
Process that requires input or selection
Process that proceeds automatically
Express5800/R120e-1M, R120e-2M
Installation Guide (Windows)
91
4. Setting Up Windows Server 2008 R2
Chapter 1 Installing Windows
4.2.2
Requirements for Setup
Prepare the following media and instruction manuals before starting setup.
¾
Either of the following OS installation media
•
NEC operating system installation media (hereafter referred to as Backup DVD-ROM)
•
Microsoft operating system installation media (hereafter referred to as Windows Server 2008
R2 DVD-ROM)
¾
First Steps Guide
¾
Either of the following EXPRESSBUILDER
¾
•
EXPRESSBUILDER DVD
•
Internal Flash Memory (optional)
Prepare if needed:
•
Removable media for Windows OS parameter file
•
Service Pack
(If the OS installation media contains Service Pack 1, you need not apply the service pack again.)
Tips
• EXPRESSBUILDER may be distributed in Internal Flash Memory.
EXPRESSBUILDER can be run from Internal Flash Memory if it is installed in
the server.
• If you are using a server with Internal Flash Memory installed, you can install the
OS without using EXPRESSBUILDER DVD.
92
Express5800/R120e-1M, R120e-2M
Installation Guide (Windows)
4. Setting Up Windows Server 2008 R2
Chapter 1 Installing Windows
4.2.3
Setup procedure
During Setup with EXPRESSBUILDER, parameters are specified through the wizard. You can also save the
parameters as one file (a parameter file) to removable media.
Note
Read through the items in Chapter 1 (4.1 Before Starting Setup) prior to installing
Windows.
1.
Turn peripheral device (such as a display) power on, and then turn the server power on.
2.
Start EXPRESSBUILDER according to Chapter 1 (1.1 Starting EXPRESSBUILDER).
3.
Select Os installation *** default ***.
You will automatically advance to step 4, with no need for further input.
The following window appears.
Express5800/R120e-1M, R120e-2M
Installation Guide (Windows)
93
4. Setting Up Windows Server 2008 R2
Chapter 1 Installing Windows
The server starts from EXPRESSBUILDER.
4.
Select English on the language selection window, and then click [OK].
5.
Click Setup.
6. On the OS selection menu, select the OS to install or specify the parameter file.
When not using parameter file : Go to Step 7.
When using a parameter file
: Go to Step 8.
Note
When setting up again, parameter input via the wizard can be omitted by loading
the saved parameter file.
94
Express5800/R120e-1M, R120e-2M
Installation Guide (Windows)
4. Setting Up Windows Server 2008 R2
Chapter 1 Installing Windows
7. When not using a parameter file, select an OS by either of the following two ways:
To automatically detect the OS on the OS installation media:
(1) Click Automatic Detection.
Insert the OS installation media, and then click OK.
Express5800/R120e-1M, R120e-2M
Installation Guide (Windows)
95
4. Setting Up Windows Server 2008 R2
Chapter 1 Installing Windows
(2) Click
on the right side of the screen.
→ Go to step 9.
To select an OS from the menu:
(1) Click Manual Selection.
(2) From the Windows list, select Windows Server 2008 R2, and then click OK.
96
Express5800/R120e-1M, R120e-2M
Installation Guide (Windows)
4. Setting Up Windows Server 2008 R2
Chapter 1 Installing Windows
(3) Click
8.
on the right side of the screen.
→ Go to step 9.
When using the parameter file, click Load Settings.
Follow the on-screen instruction to load the parameter file (*.tre).
Tips
For the removable media in which the parameter file is saved, see
"/mnt/usr_connect/usb*" (* indicates a number).
Express5800/R120e-1M, R120e-2M
Installation Guide (Windows)
97
4. Setting Up Windows Server 2008 R2
Chapter 1 Installing Windows
Click
on the right side of the screen.
When the parameter file is correctly loaded, the setting is determined.
Click Custom to check and modify the setting in the wizard.
Click
on the right side of the screen.
→ Go to step 10.
9.
98
Specify the setup parameters by using either of the following methods:
Express5800/R120e-1M, R120e-2M
Installation Guide (Windows)
4. Setting Up Windows Server 2008 R2
Chapter 1 Installing Windows
Use Default:
(1) Click Default.
(2) Select the edition of the OS to install from the Edition list.
Type the password, and then click Finish.
(3) Click
on the right side of the screen.
→ Go to step 10.
Express5800/R120e-1M, R120e-2M
Installation Guide (Windows)
99
4. Setting Up Windows Server 2008 R2
Chapter 1 Installing Windows
Use Custom:
(1) Click Custom.
(2) Use this menu to configure the RAID system with the RAID controller detected automatically.
When creating new logical drives
With the Skip a RAID Configuration check box cleared, click Next. Set up the logical drives
according to the wizard.
Important
If you proceed with wizard, the existing RAID system is destructed and the
contents of hard disk drive will be erased.
When skipping the creation of new logical drives
Select the Skip a RAID Configuration check box, and then click Next.
100
Express5800/R120e-1M, R120e-2M
Installation Guide (Windows)
4. Setting Up Windows Server 2008 R2
Chapter 1 Installing Windows
(3) Check the settings specified for Basic Settings.
Select [Install Windows using EXPRESSBUILDER], modify the settings as needed, and then click
Next.
(4) Check the settings specified for Partition Settings.
Modify the settings as needed, and then click Next.
Important
• Backing up user data, as needed, is recommended.
• Partition size
− Specify a partition size larger than the minimum required for installing
the operating system. (Refer to Chapter 1 (4.1 Before Starting Setup).)
− The maximum partition size is 2,097,152 MB.
• If you select Create a new partition under Partition Settings, the entire
contents of the hard disk drive will be deleted.
Express5800/R120e-1M, R120e-2M
Installation Guide (Windows)
101
4. Setting Up Windows Server 2008 R2
Chapter 1 Installing Windows
(5)
Enter the user information, and then click Next.
Note
Computer name and Administrator Password are required parameters.
Enter Administrator Password that satisfies the following conditions:
− Contains 6 or more characters
− Contains characters from at least three of the following categories: numbers,
uppercase letters, lowercase letters, and symbols.
Tips
• The Computer name has been assigned by automatic assignment function. If
you need to assign another computer name, remove the checkmark from "Auto",
and enter the desired computer name.
• If a parameter file is used for setup or if you return to a previous screen, •••••• is
displayed in the Administrator password and Reenter Administrator password
text boxes.
(6) Check the settings specified for Network Protocols.
Modify the settings as needed, and then click Next.
Tips
The order of entry in Custom settings may differ from the numbering of LAN ports.
Note
Even when an optional network board is connected, Custom settings only shows
standard network boards.
After finishing Setup with EXPRESSBUILDER, specify the optional network
settings again.
102
Express5800/R120e-1M, R120e-2M
Installation Guide (Windows)
4. Setting Up Windows Server 2008 R2
Chapter 1 Installing Windows
(7) Specify the domain or workgroup.
Check the settings, modify them as needed, and then click Next.
(8) Check the settings of Windows components.
Modify the settings as needed, and then click Next.
Full installations
Server Core installations
Express5800/R120e-1M, R120e-2M
Installation Guide (Windows)
103
4. Setting Up Windows Server 2008 R2
Chapter 1 Installing Windows
(9) Check the settings of applications.
Modify the settings as needed, and then click Finish.
On the following screen, click
on the right side of the screen.
10. Check the parameter settings.
To save the settings, click Save.
Click
104
on the right side of the screen.
Express5800/R120e-1M, R120e-2M
Installation Guide (Windows)
4. Setting Up Windows Server 2008 R2
Chapter 1 Installing Windows
11. The setup process starts.
Click Start to continue setup.
If you need to suspend setup due to reasons such as backing up data, restart the setup process from
the beginning.
12. If the server has started from the EXPRESSBUILDER DVD, insert the EXPRESSBUILDER disk into
the optical disk drive, and then click OK.
13. Insert the OS installation media into the optical disk drive, and then click OK.
Windows Server 2008 R2 is installed automatically.
Express5800/R120e-1M, R120e-2M
Installation Guide (Windows)
105
4. Setting Up Windows Server 2008 R2
Chapter 1 Installing Windows
14. The Starter Pack and the selected applications are automatically installed.
Screen displayed when Starter Pack is being installed
Screen displayed when an application is being installed
15. When the software license agreement window appears, select I accept the license terms, and then
click [Start] (Full installation only).
16. When the following message appears, press <Ctrl> + <Alt> + <Del> keys.
106
Express5800/R120e-1M, R120e-2M
Installation Guide (Windows)
4. Setting Up Windows Server 2008 R2
Chapter 1 Installing Windows
Full installations:
When the following screen appears, enter your password into the text box, and then click
.
Server Core installations:
When the following screen appears, enter your password into the text box, and then click
.
17. Click OK.
18. Follow the instructions described in Chapter 1 (4.5 Setting Up Device Drivers) to set up the device
drivers.
19. For optional devices whose driver has not been installed, install the device drivers according to the
instructions supplied in the driver manual.
Express5800/R120e-1M, R120e-2M
Installation Guide (Windows)
107
4. Setting Up Windows Server 2008 R2
Chapter 1 Installing Windows
20. Apply Service Pack as needed according to Chapter 1 (4.7 Applying Service Pack).
21. Execute setup by following the instructions described in Chapter 1 (6. Setup for Solving Problems).
Setup with EXPRESSBUILDER is now complete.
108
Express5800/R120e-1M, R120e-2M
Installation Guide (Windows)
4. Setting Up Windows Server 2008 R2
Chapter 1 Installing Windows
4.3
Setup with Windows Standard Installer
This section describes how to install Windows with Windows Standard Installer.
This feature automatically recognizes the RAID controller connected to the server and configures the RAID
system. Therefore the hardware installation of the server needs to be finished by following " User’s Guide ".
Important
Setup with Windows standard Installer may delete all data of the hard disk
drive depending on the settings. Pay attention to input parameters. You
must be especially careful when configuring the following:
− RAID settings
Backing up user data, as needed, is recommended.
Tips
• Setup with Windows Standard Installer allows you to use a pre-specified
parameter file or save the parameters specified in setup as a parameter file on
removable media or Internal Flash Memory (if purchased optionally).
• For details on creating a parameter file, refer to 7. Windows OS Parameter File.
Express5800/R120e-1M, R120e-2M
Installation Guide (Windows)
109
4. Setting Up Windows Server 2008 R2
Chapter 1 Installing Windows
4.3.1
Setup flow
Configure RAID System
Insert the OS installation media
Restart (automatically)
Installation
Agree the license terms and log on.
Install Starter Pack
End of installation
Process that requires input or selection
Process that proceeds automatically
110
Express5800/R120e-1M, R120e-2M
Installation Guide (Windows)
4. Setting Up Windows Server 2008 R2
Chapter 1 Installing Windows
4.3.2
Requirements for Setup
Prepare the following media and instruction manuals before starting setup.
Either of the following OS installation media
•
NEC operating system installation media (hereafter referred to as Backup DVD-ROM)
•
Microsoft operating system installation media (hereafter referred to as Windows Server 2008
R2 DVD-ROM)
First Steps Guide
Either of the following EXPRESSBUILDER
•
EXPRESSBUILDER DVD
•
Internal Flash Memory (optional)
Prepare if needed:
•
Removable media for Windows OS parameter file
•
Service Pack
(If the OS installation media contains Service Pack 1, you need not apply the service pack again.)
Tips
• EXPRESSBUILDER may be distributed in Internal Flash Memory.
EXPRESSBUILDER can be run from Internal Flash Memory if it is installed in
the server.
• If you are using a server with Internal Flash Memory installed, you can install the
OS without using the EXPRESSBUILDER DVD.
Express5800/R120e-1M, R120e-2M
Installation Guide (Windows)
111
4. Setting Up Windows Server 2008 R2
Chapter 1 Installing Windows
4.3.3
Setup procedure
Note
Read through the items in Chapter 1 (4.1 Before Starting Setup) prior to installing
Windows.
1. Turn peripheral device (such as a display) power on, and then turn the server power on.
2. Start EXPRESSBUILDER according to Chapter 1 (1.1 Starting EXPRESSBUILDER).
3. Select Os installation *** default ***.
You will automatically advance to step 4, with no need for further input.
The following window appears.
112
Express5800/R120e-1M, R120e-2M
Installation Guide (Windows)
4. Setting Up Windows Server 2008 R2
Chapter 1 Installing Windows
The server starts from EXPRESSBUILDER.
4. Select English on the language selection window, and then click [OK].
5. Click Setup.
6. On the OS selection menu, select the OS to install or specify the parameter file.
When not using parameter file : Go to Step 7.
When using a parameter file
: Go to Step 8.
Note
When setting up again, parameter input via the wizard can be omitted by loading
the saved parameter file.
Express5800/R120e-1M, R120e-2M
Installation Guide (Windows)
113
4. Setting Up Windows Server 2008 R2
Chapter 1 Installing Windows
7.
When not using a parameter file, select an OS by either of the following two ways:
To automatically detect the OS on the OS installation media:
(1) Click Automatic Detection.
Insert the OS installation media, and then click OK.
114
Express5800/R120e-1M, R120e-2M
Installation Guide (Windows)
4. Setting Up Windows Server 2008 R2
Chapter 1 Installing Windows
(2) Click
on the right side of the screen.
→ Go to step 9.
To select an OS from the menu:
(1) Click Manual Selection.
(2) From the Windows list, select Windows Server 2008 R2, and then click OK.
Express5800/R120e-1M, R120e-2M
Installation Guide (Windows)
115
4. Setting Up Windows Server 2008 R2
Chapter 1 Installing Windows
(3) Click
on the right side of the screen.
→ Go to step 9.
8.
When using the parameter file, click Load Settings.
Follow the on-screen instruction to load the parameter file (*.tre).
Tips
For the removable media in which the parameter file is saved, see
"/mnt/usr_connect/usb*" (* indicates a number).
116
Express5800/R120e-1M, R120e-2M
Installation Guide (Windows)
4. Setting Up Windows Server 2008 R2
Chapter 1 Installing Windows
Click
on the right side of the screen.
When the parameter file is correctly loaded, the setting is determined.
Click Custom to check and modify the setting in the wizard.
Click
on the right side of the screen.
→ Go to step 10.
9.
Click Custom.
Express5800/R120e-1M, R120e-2M
Installation Guide (Windows)
117
4. Setting Up Windows Server 2008 R2
Chapter 1 Installing Windows
(1) Use this menu to configure the RAID system with the RAID controller detected automatically.
When creating new logical drives
With the Skip a RAID Configuration check box cleared, click Next. Set up the logical drives
according to the wizard.
Important
If you proceed with wizard, the existing RAID system is destructed and the
contents of hard disk drive will be erased.
When skipping the creation of new logical drives
Select the Skip a RAID Configuration check box, and then click Next.
(2) Check the settings specified for Basic Settings.
Select [Use Windows standard installer], modify the settings as needed, and then click Next.
118
Express5800/R120e-1M, R120e-2M
Installation Guide (Windows)
4. Setting Up Windows Server 2008 R2
Chapter 1 Installing Windows
(3) On the following screen, click
on the right side of the screen.
10. Check the parameter settings.
To save the settings, click Save.
Click
on the right side of the screen.
11. The setup process starts.
Click Start to continue setup.
If you need to suspend setup due to reasons such as backing up data, restart the setup process from the
beginning.
Express5800/R120e-1M, R120e-2M
Installation Guide (Windows)
119
4. Setting Up Windows Server 2008 R2
Chapter 1 Installing Windows
12. When the following screen appears, insert the OS installation media into the disk drive, and then click OK.
13. The server reboots automatically.
If you use Internal Flash Memory, press <F3> key when the following message appears during POST.
Press <F2> Setup, <F3> Internal Flash Memory, <F4> ROM Utility, <F12> Network
Note
Since the OS installation media is set in the optical disk drive in Step 12, boot the
system from the optical disk drive having higher boot priority, not from Internal
Flash Memory.
14. Run from the OS installation media.
If a bootable operating system is already installed on the hard disk drive, press <Enter> key while the
message “Press any key to boot from CD or DVD…” is displayed on the top of the screen.
The boot sequence proceeds and the message “Windows is loading files…” appears.
Note
If “Windows is loading files...” message does not appear, <Enter> key was not
pressed correctly. Reboot and retry.
This step is unnecessary if no bootable operating system exists.
15. Click [Next ] at default settings.
120
Express5800/R120e-1M, R120e-2M
Installation Guide (Windows)
4. Setting Up Windows Server 2008 R2
Chapter 1 Installing Windows
].
16. Click [Install Now
Windows Server 2008 R2 installation starts.
17. Select the edition of the Windows you purchased and the installation method.
The screen display differs depending on an OS installation media you are using.
18. When the following window appears, confirm the content of the license agreement. If you agree, select I
accept the license terms and then click [Next].
Express5800/R120e-1M, R120e-2M
Installation Guide (Windows)
121
4. Setting Up Windows Server 2008 R2
Chapter 1 Installing Windows
19. When the following message appears, select the installation type.
Select Custom (advanced) in this case.
20.
“Where do you want to install Windows?” window appears.
Note
If not using a RAID Controller, go to step 24.
Click Load Driver.
If the following message appears, replace the OS installation media and EXPRESSBUILDER DVD in the
optical disk drive, and then click [Browse]. Next, go to step 21.
Load Driver
To install the driver needed to access your hard drive, insert
the installation media containing the driver files, and then
click OK.
Note: The installation media can be a floppy disk, CD, DVD, or
USB flash drive.
Browse
Tips
OK
Cancel
• If using Internal Flash Memory, you do not need to remove the OS installation
media.
• At this time, the message “The Installation media can be a floppy disk, CD,
DVD, or USB flash drive.” appears on the screen, use the supplied
EXPRESSBUILDER DVD or Internal Flash Memory.
21. Specify the following locations, and then click [OK].
(When using EXPRESSBUILDER, select the optical disk drive. When using Internal Flash Memory, select
the volume of INTER-FLASH.)
When using the N8103-172/173/174 RAID Controller:
\002\win\winnt\oemfd\ws2008r2\megasas2
When using the N8103-168 RAID Controller:
\002\win\winnt\oemfd\ws2008r2\megasas2
122
Express5800/R120e-1M, R120e-2M
Installation Guide (Windows)
4. Setting Up Windows Server 2008 R2
Chapter 1 Installing Windows
22. Select the necessary driver from the driver list shown, and then click [Next].
When using the N8103-172/173/174 RAID Controller:
[LSI MegaRAID SAS 9272-8i]
When using the N8103-168 RAID Controller:
[LSI MegaRAID SAS 9265CV-8i]
Tips
When N8103-168 is used, the name of the RAID controller that appears on a
screen is different from one that is showed on WebBIOS and Universal RAID
Utility. But it is not a problem.
23. If you used EXPRESSBUILDER DVD, remove it and then insert the OS installation media.
Tips
If you have not replaced the OS installation media after loading the driver, the
following message may appear.
If it appears, replace the OS installation media, and then click [Refresh].
24. When the following window appears, select the disk in which the partition will be created, and then click
Drive options (advanced).
If a partition has already been created, go to step 27.
25. Click [New], enter the partition size into the size input box, and then click [Apply].
Note
When installing the OS to a disk of over 2,097,152 MB (2 TB), the partition size can
only be set to 2,097,152 MB or less.
Tips
When creating a new partition and installing the OS, a 100 MB boot partition is
created. When the following window appears, click [OK].
Express5800/R120e-1M, R120e-2M
Installation Guide (Windows)
123
4. Setting Up Windows Server 2008 R2
Chapter 1 Installing Windows
26. Select the partition created in step 25, and then click [Format].
27. Select the created partition, and then click [Next].
Tips
The number of partitions displayed differs depending on the hardware
configuration.
When the following message appears, Windows installation starts automatically.
28. After a full installation of Windows Server 2008 R2 is completed, the following window appears, prompting
you to change your password before logging on. Click [OK].
124
Express5800/R120e-1M, R120e-2M
Installation Guide (Windows)
4. Setting Up Windows Server 2008 R2
Chapter 1 Installing Windows
29. Change your password, and then click the [
] button.
Full installations:
Server Core installations:
Tips
Passwords must fulfill the following requirements in Windows Server 2008 R2.
− Contains 6 or more characters
− Contains characters from at least three of the following categories: numbers,
uppercase letters, lowercase letters, and symbols.
30. Click OK.
Express5800/R120e-1M, R120e-2M
Installation Guide (Windows)
125
4. Setting Up Windows Server 2008 R2
Chapter 1 Installing Windows
31. Confirm the following according to the settings selected (displayed) in Step 17.
Full installations:
When the Initial Configuration Tasks window appears after you log on, enter the user information.
Server Core installations:
The command prompt will appear. Set the user information.
Tips
For detailed setup procedures, refer to the Microsoft “Step by Step Guide”.
32. Install Starter Pack by referring to Chapter 1 (4.4 Installing Starter Pack).
33. Install drivers and specify detailed settings by referring to Chapter 1 (4.5 Setting Up Device Drivers).
34. For optional devices whose driver has not been installed, install the device drivers according to the
instructions supplied in the driver manual.
35. Apply Service Pack as needed according to Chapter 1 (4.7 Applying Service Pack).
36. Install the applications as needed by referring to Chapter 1 (4.8 Installing the Applications).
37. Execute setup by following the instructions described in Chapter 1 (6. Setup for Solving Problems).
Setup with Windows standard installer is now complete.
126
Express5800/R120e-1M, R120e-2M
Installation Guide (Windows)
4. Setting Up Windows Server 2008 R2
Chapter 1 Installing Windows
4.4
Installing Starter Pack
Starter Pack contains drivers customized for this server. Be sure to apply Starter Pack before running the
system.
Important
Also install Starter Pack in the following cases.
− The system configurations have changed
(If an internal optional device is installed or removed, apply the Starter
Pack. If a dialog box prompting system reboot is displayed, reboot the
system according to the on-screen instructions, and then apply the
Starter Pack.)
− If the system was restored using a restore process
− If a system has been restored using the backup tool
Note
The Scalable Networking Pack (SNP) function is disabled upon Starter Pack
installation is complete.
The setting of SNP function may affect the system performance.
Tips
If the OS is installed by using EXPRESSBUILDER, Starter Pack is already applied.
If the configuration is not changed, you do not need to apply Starter Pack again.
4.4.1
When using EXPRESSBUILDER DVD
1.
Log on to the system with the built-in administrator, which has administrative privileges.
2.
Insert EXPRESSBUILDER DVD into the optical disk drive.
3.
Start the installer of Starter Pack according to the installation type.
Full installations
Click Integrated Installation on the menu.
Express5800/R120e-1M, R120e-2M
Installation Guide (Windows)
127
4. Setting Up Windows Server 2008 R2
Chapter 1 Installing Windows
When the following screen appears, make sure that the Starter Pack option is selected, and then
click Install.
Tips
If Starter Pack is already installed, the Applications option is selected by default.
To install Starter Pack again, select the Starter Pack option.
Server Core installations
(1) From the command prompt, type the following command. (In the example below, the optical disk
drive is D drive.)
Cd /d D:\002\win\winnt\bin
C:\Users\administrator>cd /d D:\002\win\winnt\bin
(2) Enter the following, and then press <Enter> key.
Pkgsetup.vbs
D:\002\win\winnt\bin>pkgsetup.vbs
Wait for several minutes without attempting any further operation until the following window appears.
On Full Installation, the following progress message appears while the Starter Pack is installed.
128
Express5800/R120e-1M, R120e-2M
Installation Guide (Windows)
4. Setting Up Windows Server 2008 R2
Chapter 1 Installing Windows
4. Read the message, and then click [OK].
Starter Pack installation starts.
Wait until installation completes (about 3 to 4 minutes).
On Full Installation, the following progress message appears while the Starter Pack is installed.
5.
When the following message appears, Starter Pack installation is complete.
Follow the instructions in the message, and remove EXPRESSBUILDER DVD.
6.
Click [OK] and then restart the system.
Installation of Starter Pack is now complete.
Express5800/R120e-1M, R120e-2M
Installation Guide (Windows)
129
4. Setting Up Windows Server 2008 R2
Chapter 1 Installing Windows
4.4.2
When using Internal Flash Memory
(Optional " Internal Flash Memory " is required)
1. After installing the operating system, restart the server.
2. When “Press <F2> Setup, <F3> Internal Flash Memory, <F4> ROM Utility, <F12> Network” appears during
POST, press <F3> key.
Note
At this time, be sure to remove the DVD from the optical disk drive.
3. When the following message appears, select Os installation *** default ***.
You will automatically advance to the next window, with no need for further input.
The following window appears.
130
Express5800/R120e-1M, R120e-2M
Installation Guide (Windows)
4. Setting Up Windows Server 2008 R2
Chapter 1 Installing Windows
The server starts from EXPRESSBUILDER.
4.
Select English on the language selection window, and then click [OK].
5.
Click Utilities.
Express5800/R120e-1M, R120e-2M
Installation Guide (Windows)
131
4. Setting Up Windows Server 2008 R2
Chapter 1 Installing Windows
6. Click Starter Pack Installation.
7.
Read the contents, and then click Yes.
8. When files are copied, click Close on the following screen.
The server then restarts.
Note
132
You do not need to press <F3> key at this time.
Express5800/R120e-1M, R120e-2M
Installation Guide (Windows)
4. Setting Up Windows Server 2008 R2
Chapter 1 Installing Windows
9. Proceed application step according to the installation type.
Tips
During setup, a virtual floppy disk drive is temporarily connected. Follow the
instructions below to reference the virtual floppy disk drive.
Full installations
Click app_pkg.bat of Floppy disk drive (usually A drive).
Server Core installations
(1) Enter the following command at the command prompt, and then specify the drive letter of
Floppy disk drive (usually A drive).
Cd /d A:\
C:\Users\administrator>cd /d A:\
(2) Enter the following, and then press <Enter> key.
app_pkg.bat
A:\>app_pkg.bat
Wait until the file copy is complete. (About 1-3minute(s).
On Full Installation, the following progress message appears while the Starter Pack is installed.
10. Read the message, and then click [OK].
Starter Pack installation starts.
Wait until the installation of the Starter Pack is complete. (About 3-5 minutes)
Express5800/R120e-1M, R120e-2M
Installation Guide (Windows)
133
4. Setting Up Windows Server 2008 R2
Chapter 1 Installing Windows
On Full Installation, the following progress message appears while the Starter Pack is installed.
11. Click [OK] to restart the system.
Installation of Starter Pack is now complete.
134
Express5800/R120e-1M, R120e-2M
Installation Guide (Windows)
4. Setting Up Windows Server 2008 R2
Chapter 1 Installing Windows
4.5
Setting Up Device Drivers
Install and set up device drivers provided for the standard configuration.
For details regarding the installation and setup of a driver for an optional device, refer to the manual supplied
with the optional device.
4.5.1
(1)
Installing the LAN drivers and BACS (teaming utility)
LAN drivers and BACS
If EXPRESSBUILDER is used for setup, the LAN drivers and BACS will automatically be installed.
If the Windows standard installer is used for setup, install Starter Pack to install the LAN driver and BACS.
Important
Note
WOL is supported by the standard network adapters only.
• To change the LAN driver and BACS settings, log on to the system from a local
console using an administrator’s account. Remotely changing the settings by
using the operating system’s remote desktop feature is not supported.
• Be sure to select the Internet Protocol (TCP/IP) check box when specifying an
IP address.
(2)
Optional LAN board
This server supports the following optional LAN boards.
Optional LAN boards: N8104-128/132/133/138/145
The drivers for LAN boards are automatically installed using the OS plug-and-play function.
The LAN driver is not installed if N8104-145 is not installed at the time of installation of the OS by using
EXPRESSBUILDER or at installation of Starter Pack, or on a pre-installation model.
Perform the steps below to install the N8104-145 LAN driver manually.
1.
Insert EXPRESSBUILDER DVD into the optical disk drive.
If Autorun Menu appears, close the menu.
Tips
EXPRESSBUILDER DVD is unnecessary if Starter Pack was installed from
Internal Flash Memory. Proceed to the next step.
2.
Open Command Prompt, and execute install.bat in the following folder.
When using EXPRESSBUILDER DVD:
EXPRESSBUILDER DVD:\002\win\winnt\WS2008x64\r2\lan\intel
If Starter Pack was installed from Internal Flash Memory:
System Drive:\StartPKG\WS2008x64\r2\lan\intel
Express5800/R120e-1M, R120e-2M
Installation Guide (Windows)
135
4. Setting Up Windows Server 2008 R2
Chapter 1 Installing Windows
3. When the following message appears, remove the EXPRESSBUILDER DVD from the optical disk drive,
and then restart the system.
Installation Completed.
Setup is now completed.
Note
• If the LAN driver has been installed in N8104-145, PROSet (Teaming utility) is
also installed.
• Using an optional LAN board, perform procedure "4.5.2 Setting up LAN drivers"
for each optional LAN board.
(3)
Network adapter name
After installing the LAN drivers, the following network adapter names will be displayed by the Device Manager or
BACS.
Network adapters for the standard configuration
Broadcom NetXtreme Gigabit Ethernet #xx*
If connecting with an optional LAN board:
[N8104-128] Broadcom BCM57711 NetXtreme II 10 GigE (NDIS VBD Client) #xx*
[N8104-132/133/138] Broadcom NetXtreme Gigabit Ethernet #xx*
[N8104-145] Intel(R) Ethernet Server Adapter I340-T2 #xx*
* If there are adapters with the same name, a different identification number will be assigned to xx.
Tips
The ID for N8104-128 might be a number of two or more digits. This is due to the
LAN driver specifications and not an error. This number cannot be changed.
4.5.2
(1)
Setting up LAN drivers
Setting link speed
The transfer rate and duplex mode of the network adapter must be the same as those of the switching hub.
Follow the procedure below to specify the transfer rate and duplex mode.
1. Open the Device Manager.
2. Expand Network Adapters, and then double-click the name of the network adapter you want to set.
The properties of the network adapter will be displayed.
3. Select the Advanced or Link Spped tab, and then set the Speed & Duplex values to the same as those
of the switching hub.
4. Click [OK] in the Network Adapter Properties dialog box.
5. Restart the system.
The link speed setting is now complete.
(2)
Using N8104-128
Using N8104-128 with the server, iSCSI Offload Engine must be disabled.
Follow the procedure below to set it.
1. Double-click the Broadcom Control Suite icon on the Control Panel window.
Broadcom Advanced Control Suite starts.
2. Set Filter to ALL VIEW, select Broadcom BCM57711 NetXtreme II 10 GigE # xx under
Explorer View the Adapter xx (BCM57711 A0) - Port x.
3. Tab on Configurations at the right side screen and then expand Resource Reservations.
136
Express5800/R120e-1M, R120e-2M
Installation Guide (Windows)
4. Setting Up Windows Server 2008 R2
Chapter 1 Installing Windows
4. Click the [Configure] button on the Click the button to configure.
The Hardware and Resource Configuration Wizard appears.
5. Remove a checkmark from [iSCSI] under Protocols, if checked.
Select [Next], and then click the [Apply] button.
6. When the following message appears, select [Yes].
Applying the changes will temporarily interrupt the network connection.
The process may take several minutes and the connection will resume
afterwards.
Do you want to continue?
7. Complete steps 2 to 6 for each N8104-128 network adapter.
Then, close the Broadcom Advanced Control Suite.
8. Restart the system.
Setup is now completed.
(3)
Using N8104-132/133/138
Using N8104-132/133/138 with the server, follow the procedure below to set it.
1.
Insert EXPRESSBUILDER DVD into the optical disk drive.
If Autorun Menu appears, close the menu.
Tips
EXPRESSBUILDER DVD is unnecessary if Starter Pack was installed from
Internal Flash Memory. Proceed to the next step.
2.
Double-click pgdyavd_disable.vbs in the following folder.
• When using EXPRESSBUILDER DVD:
EXPRESSBUILDER DVD:\002\win\winnt\ws2008x64\r2\lan\bcom\WS2008x64_r2\lan
• If Starter Pack was installed from Internal Flash Memory:
System drive:\StartPKG\ws2008x64\r2\lan\bcom\ws2008x64_r2\lan
3.
When the following message appears, click [OK].
Configuration Completed
[Option:PopUp RLV Disabled(Action:Done)]
Reboot the system
Tips
4.
The message “Action:Non” indicates that the LAN driver is already set.
Eject EXPRESSBUILDER DVD from the optical disk drive, and then restart the system.
Setup is now completed.
Express5800/R120e-1M, R120e-2M
Installation Guide (Windows)
137
4. Setting Up Windows Server 2008 R2
Chapter 1 Installing Windows
4.5.3
Setting up team/LiveLink(BACS)
Important
• When using Smart Load Balancing and Failover (without Standby Member),
be sure to setup LiveLink at creation of team.
When using Smart Load Balancing and Failover (with Standby Member),
setup for LiveLink is not essential.
• When deleting the team, refer to Chapter 1 (4.5.3 Setting up team/LiveLink)
– (4) Procedure for deleting team. When replacing the motherboard or a
LAN board, follow these steps to remove the team and then create it again
after replacement.
• Be sure to specify the same Jumbo Mtu (Jumbo Packet) setting to all the
adapters that compose a team.
• Using Server Core installations, Not supporting setting up team/LiveLink
by the BACS.
(1)
Team types
The following team types are supported.
• Smart Load Balancing and Failover (without Standby Member)
All adapters that compose the team perform communication.
If a communication failure occurs on an adapter, other adapters that compose the team continue the
communication.
When the adapter on which the communication failure occurred recovers, it joins the team again and
resumes the communication.
• Smart Load Balancing (Auto-Failback Disable) (with Standby Member)
Among the adapters that compose the team, primary adapters except the standby member perform
communication.
If a communication failure occurs, the standby member continues the communication.
When the adapter on which the communication failure occurred recovers, it joints the team again and
the standby adapter returns to the standby state.
• FEC/GEC Generic Trunking
The combination of multiple adapters into a single channel to provide greater bandwidth.
Important
• LiveLink is not available for this team mode.
• FEC/GEC modes require switch support.
(2)
LiveLink
LiveLink is a function that detects communication route failures of adapters.
It periodically investigates the communication status of specified destinations (IP address).
Link packets are sent from each adapter within a team.
If a response to the transmission of a link packet within the specified range is not detected, it is identified as a
communication route failure and adapter communication is stopped.
When a response to the submission of a link packet is detected, communication LiveLink identifies
communication as having been recovered, and communication using that adapter automatically resumes.
Note
138
You must set up LiveLink when you create a team.
Express5800/R120e-1M, R120e-2M
Installation Guide (Windows)
4. Setting Up Windows Server 2008 R2
Chapter 1 Installing Windows
(3)
Setting up team/LiveLink
Important
Possible combinations of network adapters that compose the team are as follows.
When the number of adapters that composes the team is up to four:
− Between standard network adapters
− Between LAN cards excluding N8104-128
− A standard network adapter and LAN card N8104-128
When the number of adapters that composes the team is up to two:
− Between N8104-128 adapters.
Teaming with another N8104-128 on different board is not supported.
Tips
To edit a team, right-click on the BACS team, and then select Edit Team.
Then refer to step 3 and the subsequent steps to edit the team.
1.
Double-click the Broadcom Control Suite icon on the Control Panel window.
Broadcom Advanced Control Suite starts.
2.
Set a Filter in a TEAM VIEW, right-click the adapter to be used for the team, and then select Create a
Team from the short-cut menu.
The Broadcom Teaming wizard appears.
Express5800/R120e-1M, R120e-2M
Installation Guide (Windows)
139
4. Setting Up Windows Server 2008 R2
Chapter 1 Installing Windows
3. Click [Next].
Note
4.
Do not use Expert Mode.
Enter any name into the team name entry column, and then click [Next].
5. Team Type select the type of team you want to create, and then click [Next].
Note
•
802.3ad Link Aggregation using Link Aggregation Control Protocol(LACP) is
not supported.
•
When the FEC/GEC Generic Trunking selected.
The following message will appears, select [OK].
“Verify that the network switch connected to the team members is
configured correctly for the team type.”
•
140
When using Hyper-V, check to "Enable HyperV Mode".
Express5800/R120e-1M, R120e-2M
Installation Guide (Windows)
4. Setting Up Windows Server 2008 R2
Chapter 1 Installing Windows
6. Select the adapters that compose the team, click [Add] to add them to the Team Members area, and
then click [Next].
Note
When selecting FEC/GEC Generic Trunking, skip to step 15.
7. Proceed according to your desired team type.
− Smart Load Balancing and Failover (without Standby Member)
(1)
Select Do not configure a standby member.
(2)
Click [Next].
①
Express5800/R120e-1M, R120e-2M
Installation Guide (Windows)
141
4. Setting Up Windows Server 2008 R2
Chapter 1 Installing Windows
− Smart Load Balancing (Auto-Failback Disable) (with Standby Member)
(1)
Select Use the following member as a standby member.
(2) Select the adapter that is to be a standby member from the drop-down list.
(3)
Select Enable Auto-Failback Disable mode.
(4)
Click [Next].
Note
Enable Auto-Failback Disable mode is cleared while editing the team. Select it
again.
8.
142
When configure LiveLink, select Yes and click [Next] and go to step 9.
When LiveLink is unnecessary, select No and click [Next] and then go to step 15.
Express5800/R120e-1M, R120e-2M
Installation Guide (Windows)
4. Setting Up Windows Server 2008 R2
Chapter 1 Installing Windows
9. You can use the default setting for Probe interval and Probe maximum retries. If you change these
values, select a value from each drop-down list, click the target probe (Probe Target xx), and then click
[Edit Target IP Address…].
Tips
• The setting range of Probe interval (link packet transmission interval) is 1 to 60
(units: seconds).
• The setting range of Probe maximum retries (link packet retry count) is 1 to 10
(times).
• Switching a path upon detection of a communication path error by LiveLink
takes (Probe maximum retries + 1) x Probe interval (seconds) at maximum.
If a link is down is detected, failover occurs immediately after the link goes
down. It takes the time specified for Probe interval (seconds) to recover from the
link going down.
• When using Tagged VLAN, input VLAN ID to "Probe VLAN ID".
10. In the Target xx text box, enter the IP address of the alive monitoring server, and then click [OK].
Note
• Target xx must be the same broadcast domain as that specified for the data
communication IP and LiveLink communication IP (described in step 13). Specify
an IP address that exists on the network and with which communication is
possible.
• If communication with the IP address specified in Target xx is not possible, the
team will also be unable to communicate. It is therefore recommended that you
specify multiple IP addresses using Probe Target. Up to four IP addresses can
be specified.
Express5800/R120e-1M, R120e-2M
Installation Guide (Windows)
143
4. Setting Up Windows Server 2008 R2
Chapter 1 Installing Windows
11. Click [Next].
12. Select an adapter from the Team Members area, and then click [Edit Member IP Address…].
13. Enter the IP address used for LiveLink communication, and then click [OK].
Note
• Be sure to specify an IP address for LiveLink communication for all the adapters
that compose the team. The address specified here is the IP address for LiveLink
communication. Specify a different IP address for data communication.
• For Target xx, specify an IP address that is unique on the network and with which
communication is possible.
144
Express5800/R120e-1M, R120e-2M
Installation Guide (Windows)
4. Setting Up Windows Server 2008 R2
Chapter 1 Installing Windows
14. Click [Next].
15. Make sure that Skip manage VLAN is selected under Manage VLAN, and then click [Next].
It is an example of if you do not want to use the VLAN.
16. Make sure that Commit changes to system and Exit the wizard is selected under Commit changes,
and then click [Finish].
Note
When the message below appears, select [Yes].
“Applying the changes will temporarily interrupt the network
connection. The process may take several minutes and the
connection will resume afterwards.”
Express5800/R120e-1M, R120e-2M
Installation Guide (Windows)
145
4. Setting Up Windows Server 2008 R2
Chapter 1 Installing Windows
Tips
After creating a team, if the teaming adapter displays like the following image,
perform steps 8 through 14 again and correct the LiveLink settings.
17. Restart the system.
18. After the system starts, start Broadcom Control Suite by clicking the Broadcom Control Suite icon in
Control Panel, and confirm that a team has been created. Confirm the team settings on the Information
window to the right.
− Smart Load Balancing and Failover (without Standby Member)
− Smart Load Balancing (Auto-Failback Disable) (with Standby Member)
146
Express5800/R120e-1M, R120e-2M
Installation Guide (Windows)
4. Setting Up Windows Server 2008 R2
Chapter 1 Installing Windows
− FEC/GEC Generic Trunking
Team setup is now complete.
Express5800/R120e-1M, R120e-2M
Installation Guide (Windows)
147
4. Setting Up Windows Server 2008 R2
Chapter 1 Installing Windows
(4)
Procedure for deleting team
Note
You must delete teams from Broadcom Control Suite.
You cannot delete the team from the team adapter displayed in the Device
Manager.
1. Double-click the Broadcom Control Suite icon on the Control Panel window.
Broadcom Advanced Control Suite starts.
2. Set a Filter in a TEAM VIEW, right-click the adapter to be used for the team, and then select Delete
Team from the short-cut menu.
Note
When the message below appears, select [Yes].
“The selected team will be deleted from system, do you want to
proceed?
NOTE:
Applying the changes will temporarily interrupt the
network connection. The process may take several
minutes and the connection will resume afterwards.”
3.
Insert EXPRESSBUILDER DVD into the optical disk drive.
If Autorun Menu appears, close the menu.
Tips
You do not have to insert EXPRESSBUILDER DVD if Starter Pack was installed
from Internal Flash Memory. Proceed to the next step.
4.
Double-click addlvlanstats.vbs in the following folder.
− When using EXPRESSBUILDER DVD:
EXPRESSBUILDER DVD:\002\win\winnt\ws2008x64\r2\lan\bcom\ws2008x64_r2\lan
− If Starter Pack was installed from Internal Flash Memory:
System drive:\StartPKG\ws2008x64\r2\lan\bcom\ws2008x64_r2\lan
148
Express5800/R120e-1M, R120e-2M
Installation Guide (Windows)
4. Setting Up Windows Server 2008 R2
Chapter 1 Installing Windows
5.
When the following message appears, click [OK].
6.
Eject EXPRESSBUILDER DVD from the optical disk drive, and then restart the system.
Team deletion is now complete.
4.5.4
(1)
Setting up team (PROSet)
Team types
The following team types are supported.
Adapter Fault Tolerance (AFT) is a feature that creates a group containing and automatically converts
the process of the working adapter to the other adapter in the group when any trouble occurred on that
adapter.
Adaptive Load Balancing (ALB) is a feature that creates a group containing more than one adapter and
enhances the throughput by operating packet transmission from the server by all the adapters. This
feature includes AFT feature.
Switch Fault Tolerance (SFT) is a feature that provides a failover relationship between two ports when
each port is connected to a separate switch. SFT supports two ports per team.
Static Link Aggregation (SLA) accounts for the GEC and 802.3ad static protocols. SLA is a
switch-assisted teaming mode and requires configuring ports at both ends of the link: server interfaces
and switch ports.
Important
•
The adapters specified as a group of Adaptive Load Balancing (ALB)
can be connected to only Switching Hub.
•
When exchange the mother board or option network card, make sure
to remove the adapter team before exchanges and recreate the
adapter team after exchange complete.
•
Confirm the port setting of switching hub (L2) matches the server
network adapter Teaming mode.
•
All the adapters specified as a group of Adapter Teaming must exist
on the same LAN. If they are connected to the separate switches, they
will not work normally.
Express5800/R120e-1M, R120e-2M
Installation Guide (Windows)
149
4. Setting Up Windows Server 2008 R2
Chapter 1 Installing Windows
(2)
Setting up team
Important
Possible combinations of network adapters that compose the team are as
follows.
When the number of adapters that composes the team is up to four:
-
Between N8104-145 adapters.
1. Open the Device Manager.
2. Open Network adapters → [Intel(R) xxx] properties.
3. Click Teaming tab and check the Team this adapter with other adapters check box.
Click New Team.
4. Fill the name of the team in Specify a name for the team and click Next.
5. Include the adapter to the team and click Next.
6. Select a team mode, and then click Next.
7. Click Finish.
8. Click TEAM: "Team name" from Device manager → Network adapters to modify the team.
Click Settings tab and click Modify Team button.
9. Refer to the following procedure to set the team member adapter priority status.
Note
Adapter priority config can be confirmed by the following procedure:
1. Click [TEAM: "Team name"] from [Device manager] → [Network adapters].
2. Click [Settings] and confirm Adapters in team list.
10. Click Test Switch → Run test to confirm the adapter team is properly setup.
11. Confirm the result in [Test results].
12. Restart the system.
(3)
Procedure for deleting team
1. Open the Device Manager.
2. Click Network adapters, and open [TEAM: "Team name"] properties.
3. Click Setting tab.
4. Click Remove Team button.
5. Click Yes to the message.
6. Confirm [TEAM: "Team name"] adapter is not existing in [Network adapters] tree and restart the system.
150
Express5800/R120e-1M, R120e-2M
Installation Guide (Windows)
4. Setting Up Windows Server 2008 R2
Chapter 1 Installing Windows
4.5.5
Graphics accelerator driver
The graphics accelerator driver for standard configurations is installed when Starter Pack is installed from
EXPRESSBUILDER.
Tips
The graphics accelerator driver is only enabled in Full installations. Standard VGA
is used in the case of Server Core installation.
To reinstall drivers separately, complete the following steps.
1.
Insert EXPRESSBUILDER DVD into the optical disk drive.
If Autorun Menu appears, close the menu.
Tips
You do not have to insert EXPRESSBUILDER DVD if Starter Pack was installed
from Internal Flash Memory.
2.
From the Start menu, point to All programs, Accessories, and then select Explorer.
3.
Double-click the install.bat icon in the following folder.
—
When using EXPRESSBUILDER DVD:
EXPRESSBUILDER DVD:\002\win\winnt\ws2008x64\video
—
If Starter Pack was installed from Internal Flash Memory:
System drive:\StartPKG\ws2008x64\video
You will be prompted to confirm the End User License Agreement during this process. Click the
[ACCEPT] button and continue.
4.
Eject EXPRESSBUILDER DVD from the optical disk drive, and then restart the system.
Graphic accelerator driver installation is now complete.
4.5.6
When using a SAS controller (N8103-142)
The driver for SAS controller N8103-142 is automatically installed by Windows Plug-and-Play.
4.5.7
When using a RAID Controller (N8103-161)
The driver for RAID Controller N8103-161 is automatically installed by Windows Plug-and-Play.
4.5.8
When using a Fibre Channel controller (N8190-153/154)
The driver for Fibre Channel controller N8190-153/154 is automatically installed by Windows Plug-and-Play.
Express5800/R120e-1M, R120e-2M
Installation Guide (Windows)
151
4. Setting Up Windows Server 2008 R2
Chapter 1 Installing Windows
4.6
License Authentication
To use Windows Server 2008 R2, confirm whether the license has been authenticated, and if it has not, perform
the license authentication procedure.
The following describes the license authentication procedure.
(1) Full installations
1.
Open the Control Panel from the Start menu, click System and Security, and then select System.
If the following message appears, Windows has already been activated on your system. You do not
need to complete this procedure.
2.
152
For installation from Backup DVD-ROM, replace the product key.
When the following window appears, click Change product key.
Express5800/R120e-1M, R120e-2M
Installation Guide (Windows)
4. Setting Up Windows Server 2008 R2
Chapter 1 Installing Windows
3.
When the following window appears, enter the product key found on the COA label, and then click
[Next].
4.
Follow the instructions in the following message to start the license authentication process.
Windows activation is now complete.
(2) Server Core installations
1.
At the command prompt, enter the following, and then press <Enter> key.
slmgr –dli
Express5800/R120e-1M, R120e-2M
Installation Guide (Windows)
153
4. Setting Up Windows Server 2008 R2
Chapter 1 Installing Windows
If the following message appears, Windows has already been activated on your system. You do not
need to complete this procedure. Click [OK] to finish.
2. For installation from Backup DVD-ROM, replace the product key.
At the command prompt, enter the following, and then press <Enter> key. Set the product key found on
the COA label in PID.
slmgr –ipk PID
3. Obtain an installation ID for Windows activation.
At the command prompt, enter the following, and then press <Enter> key.
slmgr –dti
4.
Reference %systemroot%\system32\sppui\phone.inf for the telephone number of the license
authentication customer service.
5.
Call the above number, inform the representative of the installation ID which you obtained in step 3,
and receive a confirmation ID.
6.
Type the confirmation ID you received in step 5.
At the command prompt, enter the following, and then press <Enter> key. CID is the confirmation ID
that you received from customer service.
slmgr –atp CID
Windows activation is now complete.
154
Express5800/R120e-1M, R120e-2M
Installation Guide (Windows)
4. Setting Up Windows Server 2008 R2
Chapter 1 Installing Windows
4.7
Applying Service Pack
When applying Service Pack 1, refer to "About Windows Server 2008 R2 and Windows 7 Service Pack 1".
http://www.58support.nec.co.jp/global/download/w2008r2/sp1.html
4.8
Installing the Applications
EXPRESSBUILDER contains applications including NEC ESMPRO Agent and NEC ESMPRO Manager. Some
applications stored in EXPRESSBUILDER can be installed collectively by performing the procedures described
below. When installing these applications individually, see Chapter 2 (Installing Bundled Software).
This feature is only available on the Full installations.
1.
Log on to the system with the built-in administrator, which has administrative privileges.
2.
Insert the EXPRESSBUILDER DVD into the optical disk drive.
3.
Click Integrated Installation on the menu.
4.
On the following screen, make sure that the Applications option is selected.
Select the check boxes corresponding to the applications to install, and then click Install.
Express5800/R120e-1M, R120e-2M
Installation Guide (Windows)
155
4. Setting Up Windows Server 2008 R2
Chapter 1 Installing Windows
Note
• If Starter Pack is already installed, the Applications option is selected by
default.
• Applications available for installation are selected by default.
• An application that has been already installed need to be uninstalled before
installing it again.
• If your system environment does not satisfy the prerequisite for an application,
you cannot install it. (For details, refer to the on-screen information and the
relevant page of each application.)
The selected applications are automatically installed.
5.
When a message appears, click Restart, and then remove the EXPRESSBUILDER disk from the
optical disk drive.
Now installation of applications is completed.
156
Express5800/R120e-1M, R120e-2M
Installation Guide (Windows)
4. Setting Up Windows Server 2008 R2
Chapter 1 Installing Windows
4.9
Installation When Multiple Logical Drives Exist
Before starting installation, backup data for future use in case of data loss.
(1)
Installation process
− Setup with EXPRESSBUILDER
Important
Before starting setup, be sure to disconnect hard disk drives from the RAID
Controller that is not to be setup. Install those hard disk drives after setup
has completed. Conducting setup with hard disk drives being connected
with RAID Controller may cause existing data to be erased unintentionally.
Refer to Chapter 1 (4.2 Setup with EXPRESSBUILDER), and proceed with setup.
In this case, EXPRESSBUILDER installs the Windows on the first detected hard disk drive or logical drive.
− Setup with Windows standard installer
1.
Refer to Chapter 1 (4.3 Setup with Windows Standard Installer), and start setup.
2.
When the following message appears, select the partition to which you want to install the operating
system.
Select the location to which Windows will be installed
The order and numbers of the disks displayed on the screen might not match the server’s slot of the
hard disk drives. Distinguish between the hard disk drives by viewing the hard disk drive
capacity and partition size displayed on the screen, and then select a drive to install the Windows
system.
Selecting an improper drive might cause an unintentional corruption of the existing data. Be careful
when selecting a hard disk drive on which to install the system.
Important
• For details, refer to the following Microsoft website:
http://support.microsoft.com/kb/937251/en-us
• You cannot edit the drive letters for the system volume or boot volume
after setup is complete. Make sure that the drive letters assigned in this
window are correct, and then proceed with setup.
3.
Refer to Chapter 1 (4.3 Setup with Windows Standard Installer), and proceed to setup Windows with
Windows standard installer and the instructions.
Tips
The drive letter might change after installation. If you want to change the drive
letter, use the procedure shown in Changing drive letter assignments below.
Express5800/R120e-1M, R120e-2M
Installation Guide (Windows)
157
4. Setting Up Windows Server 2008 R2
Chapter 1 Installing Windows
(2)
Changing drive letter assignments
To change the drive letter, follow the steps below. But these steps cannot change drive letter assignments for
the system volume or boot volume. If you want to change them, re-install the Windows.
1.
From the Start menu, right-click Computer and then select Management. Next, launch Server
Manager.
2.
From the window on the left, select Storage and then Disk Management.
3.
Right-click the volume whose drive letter you want to change, and then select Change drive letter and
path.
4.
Click [Change].
5.
Click [Assign next drive letter], and then select the drive letter you want to assign.
6.
Click [OK].
7.
When the following message appears, read the contents and then click [OK].
Some programs are dependent on drive letters, and may
not run properly. Continue?
8.
158
Close the Server Manager.
Express5800/R120e-1M, R120e-2M
Installation Guide (Windows)
5. Setting Up Windows Server 2008
Chapter 1 Installing Windows
5.
Setting Up Windows Server 2008
Set up Windows Server 2008.
5.1
Before Starting Setup
Read through the cautions explained here before starting setup.
: Confirm during Setup with EXPRESSBUILDER
: Confirm during Setup with Windows standard installer
Hardware configuration
The following hardware configurations require special procedures.
Reinstalling to a mirrored volume
When you install Windows Server 2008 in an environment with a mirrored volume created using
Windows, disable mirroring before installing the operating system and enable it again after the
installation. Use [Computer Management] – [Disk Management] to create, disable, or remove
the mirrored volume.
Peripheral devices such as RDX/MO
Remove an MO device before installing an OS. Some peripheral devices need to be halted
before installation. Refer to the manual provided with the peripheral devices for how to set a
device appropriate to installation.
DAT, LTO, and similar media
Do not set media that is unnecessary to installation during setup.
Connecting to multiple hard disk drives (logical drives)
For details on installing operating systems to a system in which multiple logical drives exist, refer to
Chapter 1 (5.10 Installation When Multiple Logical Drives Exist).
Reinstalling to hard disk drives that have been upgraded to dynamic disks
If the hard disk drive has been upgraded to a dynamic disk, the operating system cannot be
reinstalled to it with the existing partitions.
Set up the operating system with the Windows standard installer.
Express5800/R120e-1M, R120e-2M
Installation Guide (Windows)
159
5. Setting Up Windows Server 2008
Chapter 1 Installing Windows
Setup when mass memory is installed
If mass memory is installed in your system, the large size of paging file is required at installation.
Thus, the partition size for storing debug information (dump file) may not be secured.
If you fail to secure the dump file size, use Windows standard installer for setup, and allocate the
required file space to multiple disks by performing the following steps.
1. Set the system partition size to a size sufficient to install the OS and paging file.
2. Specify another disk as destination to store the debug information (required dump file size)
by referring to Chapter 1 (6. Setup for Solving Problems).
If the hard disk drive does not have enough space to write the debug information, set the partition
size to a size sufficient to install the OS and paging file, and then add another hard disk drive for
the dump file.
Note
If the partition size for installing Windows is smaller than the recommended
size, expand the partition size or add another hard disk drive.
― Specify a drive other than the system drive for "Dedicated Dump File".
Create the registry shown below by using the Registry Editor and specify the name of
Dedicated Dump File.
<When specifying the file named "dedicateddumpfile.sys" in drive D>
Key:
HKEY_LOCAL_MACHINE\SYSTEM
\CurrentControlSet\Control\CrashControl
Name:
DedicatedDumpFile
Type:
REG_SZ
Data:
D:\dedicateddumpfile.sys
Note the following when specifying Dedicated Dump File:
•
Pay strict attention to edit the registry.
•
The setting is applied after restarting the system.
•
Specify a drive that has free space of "installed memory size + 300 MB" or more.
•
Dedicated Dump File cannot be placed in dynamic volumes.
•
To collect memory dump by using Dedicated Dump File, a paging file is required in
any drive.
•
Dedicated Dump File is only used for collecting memory dump, and is not used as
virtual memory. Specify the paging file size so that sufficient virtual memory can be
allocated in the entire system.
160
Express5800/R120e-1M, R120e-2M
Installation Guide (Windows)
5. Setting Up Windows Server 2008
Chapter 1 Installing Windows
System partition size <Windows Server 2008 64-bit Edition>
The system partition size can be calculated by using the following formula.
Size required to install the OS + paging file size + dump file size + application size
Full installations
Size required to install the OS
= 16,720 MB
(Windows Server 2008 + Service Pack 2 DVD-ROM)
= 12,300 MB
(Windows Server 2008 with Service Pack 2)
= 11,600 MB
(Windows Server 2008)
Paging file size (recommended)
= installed memory size × 1.5
Dump file size
= installed memory size + 300MB
Application size
= as required by the application
Server Core installations
Size required to install the OS
=
9,300 MB
(Windows Server 2008 + Service Pack 2 DVD-ROM)
= 12,300 MB
(Windows Server 2008 with Service Pack 2)
=
4,100 MB
(Windows Server 2008)
Paging file size (recommended)
= installed memory size × 1.5
Dump file size
= installed memory size + 300MB
Application size
= as required by the application
For example, if the installed memory size is 1 GB (1,024 MB) and Full installations is selected, the
partition size is calculated as follows:
11,600 MB + (1,024MB × 1.5) + 1,024MB+ 300MB+ application size
= 14,460MB + application size
The above mentioned partition size is the minimum partition size required for system installation.
Ensure that the partition size is sufficient for system operations.
Note
The above paging file sizes are recommended for collecting debug
information (dump file). The initial size of the Windows partition paging file
must be large enough to store dump files.
Make sure you set a sufficient paging file size. If the paging file is insufficient,
there will be a virtual memory shortage that may result in an inability to
collect correct debug information.
Regardless of the sizes of internal memory and write debug information, the
maximum size of the dump file is "size of internal memory + 300 MB".
When installing other applications or other items, add the amount of space
needed by the application to the partition.
If the partition size for installing Windows is smaller than the recommended size, expand the
partition size or add another hard disk drive.
Express5800/R120e-1M, R120e-2M
Installation Guide (Windows)
161
5. Setting Up Windows Server 2008
Chapter 1 Installing Windows
System partition size <Windows Server 2008 32-bit Edition>
The system partition size can be calculated by using the following formula.
Size required to install the OS + paging file size + dump file size + application size
Full installations
Size required to install the OS
=
9,400 MB
=
9,300 MB
=
6,300 MB
(Windows Server 2008 + Service Pack 2)
(Windows Server 2008 with Service Pack 2)
(Windows Server 2008)
Paging file size (recommended)
= installed memory size × 1.5
Dump file size
= installed memory size + 300MB
Application size
= as required by the application
Server Core installations
Size required to install the OS
=
5,300 MB
(Windows Server 2008 + Service Pack 2)
=
9,300 MB
(Windows Server 2008 with Service Pack 2)
=
2,200 MB
(Windows Server 2008)
Paging file size (recommended)
= installed memory size × 1.5
Dump file size
= installed memory size + 300MB
Application size
= as required by the application
For example, if the installed memory size is 1GB (1,024 MB) and Full installations is selected, the
partition size is calculated as follows:
6,300 MB + (1,024 MB × 1.5) + 1,024 MB + 300 MB + application size = 9,160 MB +
application size
The above mentioned partition size is the minimum partition size required for system installation.
Ensure that the partition size is sufficient for system operations.
Note
• The above paging file sizes are recommended for collecting debug
information (dump file). The initial size of the boot volume paging file must
be large enough to store dump files. Make sure you set a sufficient paging
file size. If the paging file is insufficient, there will be a virtual memory
shortage that may result in an inability to collect correct debug information.
• A paging file size of 4096 MB or greater cannot be specified for one
partition in some system configurations.
If the message prompting you to specify a value smaller than 4096 MB
appears, specify 4095 MB.
• If the mounted memory size is 2 GB or greater, the maximum size of the
dump file is "2048 MB + 300 MB".
• When installing other applications or other items, add the amount of space
needed by the application to the partition.
If the partition size for installing Windows is smaller than the recommended size, expand the
partition size or add another hard disk drive.
162
Express5800/R120e-1M, R120e-2M
Installation Guide (Windows)
5. Setting Up Windows Server 2008
Chapter 1 Installing Windows
Using BitLocker
If using BitLocker, note the following.
Before installing an OS, be sure to create the following two partitions in the hard
disk drive:
—
System partition (to store the loader)
—
Boot partition (to store the OS)
For details, refer to the following document provided in Microsoft TechNet:
Note
BitLocker Drive Encryption Step-by-Step Guide
Be sure to keep the recovery password secure. Do not keep it near a server running
BitLocker.
Important
If the recovery password is not entered, the OS cannot be started, and
the content of the partition encrypted by BitLocker cannot be
referenced any more.
The recovery password might be required at startup of the OS after
the following:
−
Replacement of motherboard
−
Initialization of trusted platform module (TPM)
−
Change of BIOS setting
To reinstall the operating system into a partition that is encrypted with BitLocker, delete the
BitLocker-encrypted partition prior to reinstallation.
Installing Service Pack
If the OS installation media contains Service Pack 2, you need not apply the service pack
again.
You can install the Service Pack on the server. When the Service Pack is not attached to your
system, prepare it by yourself.
License authentication
License authentication is required depending on the installation of Windows.
For details, refer to Chapter 1 (5.7 License Authentication).
Note
• Activate within 30 days following installation.
• A virtual product key is used when installing in a virtual environment. It is not
used when directly installing an operating system to a physical server.
Express5800/R120e-1M, R120e-2M
Installation Guide (Windows)
163
5. Setting Up Windows Server 2008
Chapter 1 Installing Windows
5.2
Setup with EXPRESSBUILDER
This section describes how to install Windows with EXPRESSBUILDER.
This feature automatically recognizes the RAID controller connected to the server and configures the RAID
system. Therefore the hardware installation of the server needs to be finished by following "User’s Guide ".
• Setup with EXPRESSBUILDER may delete all data of the hard disk drive
Important
depending on the settings. Pay attention to input parameters. You must
be especially careful when configuring the following:
− RAID settings
− Partition Settings
Backing up user data, as needed, is recommended.
• Before starting setup, be sure to disconnect hard disk drives from the
RAID Controller that is not to be setup. Install those hard disk drives after
setup has completed. Conducting setup with hard disk drives being
connected with RAID Controller may cause existing data to be erased
unintentionally. It is recommended to make backup copy of user data
before starting setup.
• The Scalable Networking Pack (SNP) function is disabled on systems that have
Note
been installed by using EXPRESSBUILDER.
The setting of SNP function may affect the system performance.
Contact your sales representative for details.
Tips
•
Setup with EXPRESSBUILDER allows you to use a prespecified parameter file
or save the parameters specified in setup as a parameter file on removable
media or Internal Flash Memory (if purchased optionally).
•
For details on creating a parameter file, refer to Chapter 1 (7. Windows OS
Parameter File).
164
Express5800/R120e-1M, R120e-2M
Installation Guide (Windows)
5. Setting Up Windows Server 2008
Chapter 1 Installing Windows
5.2.1
Setup flow
Configure the RAID system.
Set EXPRESSBUILDER in the optical disk drive.
Copy the selected applications and setup modules.
Insert the OS installation media into the optical disk drive.
The OS is installed automatically.
The Starter Pack and the selected applications are installed.
Agree the license terms and Log on.
Installation completes.
Process that requires input or selection
Process that proceeds automatically
Express5800/R120e-1M, R120e-2M
Installation Guide (Windows)
165
5. Setting Up Windows Server 2008
Chapter 1 Installing Windows
5.2.2
Requirements for Setup
Prepare the following media and instruction manuals before starting setup.
Either of the following OS installation media
•
NEC operating system installation media (hereafter referred to as Backup DVD-ROM)
•
Microsoft operating system installation media (hereafter referred to as Windows Server 2008
DVD-ROM)
First Steps Guide
Either of the following EXPRESSBUILDER
•
EXPRESSBUILDER DVD
•
Internal Flash Memory (optional)
Prepare if needed:
•
Removable media for Windows OS parameter file
•
Service Pack
(If the OS installation media contains Service Pack 1, you need not apply the service pack again.)
Tips
• EXPRESSBUILDER may be distributed in Internal Flash Memory.
EXPRESSBUILDER can be run from Internal Flash Memory if it is installed in
the server.
• If you are using a server with Internal Flash Memory installed, you can install the
OS without using EXPRESSBUILDER DVD.
166
Express5800/R120e-1M, R120e-2M
Installation Guide (Windows)
5. Setting Up Windows Server 2008
Chapter 1 Installing Windows
5.2.3
Setup procedure
During Setup with EXPRESSBUILDER, parameters are specified through the wizard. You can also save the
parameters as one file (a parameter file) to removable media.
Note
Read through the items in Chapter 1 (5.1 Before Starting Setup) prior to installing
Windows.
1.
Turn peripheral device (such as a display) power on, and then turn the server power on.
2.
Start EXPRESSBUILDER according to Chapter 1 (1.1 Starting EXPRESSBUILDER).
3.
Select Os installation *** default ***.
You will automatically advance to step 4, with no need for further input.
The following window appears.
Express5800/R120e-1M, R120e-2M
Installation Guide (Windows)
167
5. Setting Up Windows Server 2008
Chapter 1 Installing Windows
The server starts from EXPRESSBUILDER.
4.
Select English on the language selection window, and then click [OK].
5. Click Setup.
6. On the OS selection menu, select the OS to install or specify the parameter file.
When not using parameter file
: Go to Step 7.
When using a parameter file
: Go to Step 8.
Note
When setting up again, parameter input via the wizard can be omitted by loading
the saved parameter file.
168
Express5800/R120e-1M, R120e-2M
Installation Guide (Windows)
5. Setting Up Windows Server 2008
Chapter 1 Installing Windows
7. When not using a parameter file, select an OS by either of the following two ways:
To automatically detect the OS on the OS installation media:
(1) Click Automatic Detection.
Insert the OS installation media, and then click OK.
Express5800/R120e-1M, R120e-2M
Installation Guide (Windows)
169
5. Setting Up Windows Server 2008
Chapter 1 Installing Windows
(2) Click
on the right side of the screen.
→ Go to step 9.
To select an OS from the menu:
(1) Click Manual Selection.
(2) From the Windows list, select the OS to install and then click OK.
170
Express5800/R120e-1M, R120e-2M
Installation Guide (Windows)
5. Setting Up Windows Server 2008
Chapter 1 Installing Windows
(3) Click
on the right side of the screen.
→ Go to step 9.
8. When using the parameter file, click Load Settings.
Follow the on-screen instruction to load the parameter file (*.tre).
Tips
For the removable media in which the parameter file is saved, see
"/mnt/usr_connect/usb*" (* indicates a number).
Express5800/R120e-1M, R120e-2M
Installation Guide (Windows)
171
5. Setting Up Windows Server 2008
Chapter 1 Installing Windows
Click
on the right side of the screen.
When the parameter file is correctly loaded, the setting is determined.
Click Custom to check and modify the setting in the wizard.
Click
on the right side of the screen.
→ Go to step 10.
9.
172
Specify the setup parameters by using either of the following methods:
Express5800/R120e-1M, R120e-2M
Installation Guide (Windows)
5. Setting Up Windows Server 2008
Chapter 1 Installing Windows
Use Default:
(1) Click Default.
(2) Select the edition of the OS to install from the Edition list.
Type the password, and then click Finish.
(3) Click
on the right side of the screen.
→ Go to step 10.
Express5800/R120e-1M, R120e-2M
Installation Guide (Windows)
173
5. Setting Up Windows Server 2008
Chapter 1 Installing Windows
Use Custom:
(1) Click Custom.
(2) Use this menu to configure the RAID system with the RAID controller detected automatically.
When creating new logical drives
With the Skip a RAID Configuration check box cleared, click Next. Set up the logical drives
according to the wizard.
Important
If you proceed with wizard, the existing RAID system is destructed and the
contents of hard disk drive will be erased.
When skipping the creation of new logical drives
Select the Skip a RAID Configuration check box, and then click Next.
174
Express5800/R120e-1M, R120e-2M
Installation Guide (Windows)
5. Setting Up Windows Server 2008
Chapter 1 Installing Windows
(3) Check the settings specified for Basic Settings.
Select [Install Windows using EXPRESSBUILDER], modify the settings as needed, and then click
Next.
(4) Check the settings specified for Partition Settings.
Modify the settings as needed, and then click Next.
Important
• Backing up user data, as needed, is recommended.
• Partition size
− Specify a partition size larger than the minimum required for installing
the operating system. (Refer to Chapter 1 (5.1 Before Starting Setup).)
− The maximum partition size is 2,097,152 MB.
• If you select Create a new partition under Partition Settings, the entire
contents of the hard disk drive will be deleted.
Express5800/R120e-1M, R120e-2M
Installation Guide (Windows)
175
5. Setting Up Windows Server 2008
Chapter 1 Installing Windows
(5) Enter the user information, and then click Next.
Note
Computer name and Administrator Password are required parameters.
Enter Administrator Password that satisfies the following conditions:
− Contains 6 or more characters
− Contains characters from at least three of the following categories: numbers,
uppercase letters, lowercase letters, and symbols.
Tips
• The Computer name has been assigned by automatic assignment function. If
you need to assign another computer name, remove the checkmark from "Auto",
and enter the desired computer name.
• If a parameter file is used for setup or if you return to a previous screen, •••••• is
displayed in the Administrator password and Reenter Administrator password
text boxes.
(6) Check the settings specified for Network Protocols.
Modify the settings as needed, and then click Next.
Tips
The order of entry in Custom settings may differ from the numbering of LAN ports.
Note
Even when an optional network board is connected, Custom settings lonly shows
standard network boards.
After finishing Setup with EXPRESSBUILDER, specify the optional network
settings again.
176
Express5800/R120e-1M, R120e-2M
Installation Guide (Windows)
5. Setting Up Windows Server 2008
Chapter 1 Installing Windows
(7) Specify the domain or workgroup.
Check the settings, modify them as needed, and then click Next.
(8) Check the settings of Windows components.
Modify the settings as needed, and then click Next.
Full installations
Server Core installations
Express5800/R120e-1M, R120e-2M
Installation Guide (Windows)
177
5. Setting Up Windows Server 2008
Chapter 1 Installing Windows
(9) Check the settings of applications.
Modify the settings as needed, and then click Finish.
On the following screen, click
on the right side of the screen.
10. Check the parameter settings.
To save the settings, click Save.
Click
178
on the right side of the screen.
Express5800/R120e-1M, R120e-2M
Installation Guide (Windows)
5. Setting Up Windows Server 2008
Chapter 1 Installing Windows
11. The setup process starts.
Click Start to continue setup.
If you need to suspend setup due to reasons such as backing up data, restart the setup process from the
beginning.
12. If the server has started from the EXPRESSBUILDER DVD, insert the EXPRESSBUILDER disk into the
optical disk drive, and then click OK.
13. Insert the OS installation media into the optical disk drive, and then click OK.
Express5800/R120e-1M, R120e-2M
Installation Guide (Windows)
179
5. Setting Up Windows Server 2008
Chapter 1 Installing Windows
Windows Server 2008 is installed automatically.
14. The Starter Pack and the selected applications are automatically installed.
Screen displayed when Starter Pack is being installed
Screen displayed when an application is being installed
15. When the software license agreement window appears, select I accept the license terms, and then
click [Next].
180
Express5800/R120e-1M, R120e-2M
Installation Guide (Windows)
5. Setting Up Windows Server 2008
Chapter 1 Installing Windows
16. When the message "Thank you" appears, click [Start].
Tips
It may take several minutes until the logon window appears. Wait until it appears,
even though nothing changes on the screen.
17. When the following message appears, press <Ctrl> + <Alt> + <Del> keys.
Full installations:
When the following screen appears, enter your password into the text box, and then click
.
Server Core installations:
When the following screen appears, click Other User.
Express5800/R120e-1M, R120e-2M
Installation Guide (Windows)
181
5. Setting Up Windows Server 2008
Chapter 1 Installing Windows
When the following screen appears, enter administrator into User text box and the specified
.
password into Password text box, and then click
18. Click OK.
19. Follow the instructions described in Chapter 1 (5.5 Setting Up Device Drivers) to set up the device
drivers supplied with this server as standard.
20. For optional devices whose driver has not been installed, install the device drivers according to the
instructions supplied in the driver manual.
21. Apply Service Pack as needed according to Chapter 1 (5.8 Applying Service Pack).
22. Execute setup by following the instructions described in Chapter 1 (6. Setup for Solving Problems).
Setup with EXPRESSBUILDER is now complete.
182
Express5800/R120e-1M, R120e-2M
Installation Guide (Windows)
5. Setting Up Windows Server 2008
Chapter 1 Installing Windows
5.3
Setup with Windows Standard Installer
This section describes how to install Windows with Windows Standard Installer.
This feature automatically recognizes the RAID controller connected to the server and configures the RAID
system. Therefore the hardware installation of the server needs to be finished by following "User’s Guide".
Important
Setup with Windows standard Installer may delete all data of the hard disk
drive depending on the settings. Pay attention to input parameters. You
must be especially careful when configuring the following:
− RAID settings
Backing up user data, as needed, is recommended.
Tips
• Setup with Windows Standard Installer allows you to use a pre-specified
parameter file or save the parameters specified in setup as a parameter file on
removable media or Internal Flash Memory (if purchased optionally).
• For details on creating a parameter file, refer to 7. Windows OS Parameter File.
Express5800/R120e-1M, R120e-2M
Installation Guide (Windows)
183
5. Setting Up Windows Server 2008
Chapter 1 Installing Windows
5.3.1
Setup flow
Configure RAID System
Insert the OS installation media
Restart (automatically)
Installation
Agree the license terms and Log on
Install Starter Pack
End of installation
Process that requires input or selection
Process that proceeds automatically
184
Express5800/R120e-1M, R120e-2M
Installation Guide (Windows)
5. Setting Up Windows Server 2008
Chapter 1 Installing Windows
5.3.2
Requirements for Setup
Prepare the following media and instruction manuals before starting setup.
Either of the following OS installation media
•
NEC operating system installation media (hereafter referred to as Backup DVD-ROM)
•
Microsoft operating system installation media (hereafter referred to as Windows Server 2008
DVD-ROM)
First Steps Guide
Either of the following EXPRESSBUILDER
•
EXPRESSBUILDER DVD
•
Internal Flash Memory (optional)
Prepare if needed:
• Removable media for Windows OS parameter file
• Service Pack
(If the OS installation media contains Service Pack 1, you need not apply the service pack again.)
Tips
• EXPRESSBUILDER may be distributed in Internal Flash Memory.
EXPRESSBUILDER can be run from Internal Flash Memory if it is installed in
the server.
• If you are using a server with Internal Flash Memory installed, you can install the
OS without using the EXPRESSBUILDER DVD.
Express5800/R120e-1M, R120e-2M
Installation Guide (Windows)
185
5. Setting Up Windows Server 2008
Chapter 1 Installing Windows
5.3.3
Setup procedure
Note
Before starting setup, refer to Chapter 1 (5.1 Before Starting Setup). It describes
how to make partitions.
1. Turn peripheral device (such as a display) power on, and then turn the server power on.
2. Start EXPRESSBUILDER according to Chapter 1 (1.1 Starting EXPRESSBUILDER).
3. Select Os installation *** default ***.
You will automatically advance to step 4, with no need for further input.
The following window appears.
186
Express5800/R120e-1M, R120e-2M
Installation Guide (Windows)
5. Setting Up Windows Server 2008
Chapter 1 Installing Windows
The server starts from EXPRESSBUILDER.
4. Select English on the language selection window, and then click [OK].
5.
Click Setup.
6.
On the OS selection menu, select the OS to install or specify the parameter file.
When not using parameter file: Go to Step 7.
When using a parameter file: Go to Step 8.
Note
When setting up again, an already saved parameter file can be read, so that you
can skip inputting parameters in the wizard.
Express5800/R120e-1M, R120e-2M
Installation Guide (Windows)
187
5. Setting Up Windows Server 2008
Chapter 1 Installing Windows
7.
When not using a parameter file, select an OS by either of the following two ways:
To automatically detect the OS on the OS installation media:
(1) Click Automatic Detection.
Insert the OS installation media, and then click OK.
188
Express5800/R120e-1M, R120e-2M
Installation Guide (Windows)
5. Setting Up Windows Server 2008
Chapter 1 Installing Windows
(2) Click
on the right side of the screen.
→ Go to step 9.
To select an OS from the menu:
(1) Click Manual Selection.
(2) From the Windows list, select the OS to install and then click OK.
Express5800/R120e-1M, R120e-2M
Installation Guide (Windows)
189
5. Setting Up Windows Server 2008
Chapter 1 Installing Windows
(3) Click
on the right side of the screen.
→ Go to step 9.
8.
When using the parameter file, click Load Settings.
Follow the on-screen instruction to load the parameter file (*.tre).
Tips
For the removable media in which the parameter file is saved, see
"/mnt/usr_connect/usb*" (* indicates a number).
190
Express5800/R120e-1M, R120e-2M
Installation Guide (Windows)
5. Setting Up Windows Server 2008
Chapter 1 Installing Windows
Click
on the right side of the screen.
When the parameter file is correctly loaded, the setting is determined.
Click Custom to check and modify the setting in the wizard.
Click
on the right side of the screen.
→ Go to step 10.
9.
Click Custom.
Express5800/R120e-1M, R120e-2M
Installation Guide (Windows)
191
5. Setting Up Windows Server 2008
Chapter 1 Installing Windows
(1) Use this menu to configure the RAID system with the RAID controller detected automatically.
When creating new logical drives
With the Skip a RAID Configuration check box cleared, click Next. Set up the logical drives
according to the wizard.
Important
If you proceed with wizard, the existing RAID system is destructed and the
contents of hard disk drive will be erased.
When skipping the creation of new logical drives
Select the Skip a RAID Configuration check box, and then click Next.
(2) Check the settings specified for Basic Settings.
Modify the settings as needed, and then click Next.
192
Express5800/R120e-1M, R120e-2M
Installation Guide (Windows)
5. Setting Up Windows Server 2008
Chapter 1 Installing Windows
(3) Click
on the right side of the screen.
10. Check the parameter settings.
To save the settings, click Save.
Click
on the right side of the screen.
11. The setup process starts.
Click Start to continue setup.
If you need to suspend setup due to reasons such as backing up data, restart the setup process from
the beginning.
Express5800/R120e-1M, R120e-2M
Installation Guide (Windows)
193
5. Setting Up Windows Server 2008
Chapter 1 Installing Windows
12. When the following screen appears, insert the OS installation media into the disk drive, and then click
OK.
13. The server reboots automatically.
If you use Internal Flash Memory, press <F3> key when the following message appears during POST.
Press <F2> Setup, <F3> Internal Flash Memory, <F4> ROM Utility, <F12> Network
Note
Since the OS installation media is set in the optical disk drive in Step 12, boot the
system from the optical disk drive having higher boot priority, not from Internal
Flash Memory.
14. Run from the OS installation media.
If a bootable operating system is already installed on the hard disk drive, press <Enter> key while the
message "Press any key to boot from CD or DVD…" is displayed on the top of the screen.
The boot sequence proceeds and the message "Windows is loading files…" appears.
Note
If “Windows is loading files...” message does not appear, <Enter> key was not
pressed correctly. Reboot and retry.
This step is unnecessary if no bootable operating system exists.
15. When the following window appears, click [Next] at default settings.
194
Express5800/R120e-1M, R120e-2M
Installation Guide (Windows)
5. Setting Up Windows Server 2008
Chapter 1 Installing Windows
].
16. Click [Install Now
Windows Server 2008 installation starts.
17. When the following window appears, enter the product key and then click [Next].
Note that this window does not appear if you use Backup DVD-ROM for installation.
18. When the following window appears, select the Windows edition you have purchased.
Select I have selected the edition of Windows that I purchased check box, and then click [Next].
If the product key was entered, only the corresponding editions are displayed.
Tips
The Windows versions that appear on the screen differ depending on the OS
installation media used.
Express5800/R120e-1M, R120e-2M
Installation Guide (Windows)
195
5. Setting Up Windows Server 2008
Chapter 1 Installing Windows
19. When the following window appears, confirm the content of the license agreement. If you agree, select
I accept the license terms and then click [Next].
20. When the following message appears, select the installation type.
Select Custom (advanced) in this case.
21. "Where do you want to install Windows?" window appears.
Note
If not using a RAID Controller, go to step 24.
Click Load Driver.
If the following message appears, replace the OS installation media and EXPRESSBUILDER DVD in
the optical disk drive, and then click [Browse]. Next, go to step 22.
Load Driver
To install the driver needed to access your hard drive, insert
the installation media containing the driver files, and then
click OK.
Note: The installation media can be a floppy disk, CD, DVD, or
USB flash drive.
Browse
196
OK
Express5800/R120e-1M, R120e-2M
Cancel
Installation Guide (Windows)
5. Setting Up Windows Server 2008
Chapter 1 Installing Windows
Tips
• If using Internal Flash Memory, you do not need to remove the OS installation
media.
• At this time, the message "The Installation media can be a floppy disk, CD,
DVD, or USB flash drive." appears on the screen, use the supplied
EXPRESSBUILDER DVD or Internal Flash Memory.
22. Specify one of the following locations, and then click [OK].
(When using EXPRESSBUILDER, select the optical disk drive. When using Internal Flash Memory,
select the volume of INTER-FLASH.)
When using the N8103-172/173/174 RAID Controller:
− Windows Server 2008 64-bit Edition
\002\win\winnt\oemfd\ws2008x64\megasas2
− Windows Server 2008 32-bit Edition
\002\win\winnt\oemfd\ws2008\megasas2
When using the N8103-168 RAID Controller:
− Windows Server 2008 64-bit Edition
\002\win\winnt\oemfd\ws2008x64\megasas2
− Windows Server 2008 32-bit Edition
\002\win\winnt\oemfd\ws2008\megasas2
23. Select the necessary driver from the driver list shown, and then click [Next].
When using the N8103-172/173/174 RAID Controller:
[LSI MegaRAID SAS 9272-8i]
When using the N8103-168 RAID Controller:
[LSI MegaRAID SAS 9265CV-8i]
Tips
When N8103-168 is used, the name of the RAID controller that appears on a
screen is different from one that is showed on WebBIOS and Universal RAID
Utility. But it is not a problem.
24. If you used EXPRESSBUILDER DVD, remove it and then insert the OS installation media.
25. Select the disk in which the partition will be created, and then click Drive options (advanced)
If a partition has already been created, go to step 28.
26. Click [New], enter the partition size into the size input box, and then click [Apply].
Note
When installing the OS to a disk of over 2,097,152 MB (2 TB), the partition size can
only be set to 2,097,152 MB or less.
27. Select the partition created in step 26, and then click [Format].
Express5800/R120e-1M, R120e-2M
Installation Guide (Windows)
197
5. Setting Up Windows Server 2008
Chapter 1 Installing Windows
28. In the window below, select the created partition, and then click [Next].
When the following message appears, Windows installation starts automatically.
Tips
At this time, if EXPRESSBUILDER DVD is still in the optical disk drive, the
message prompting you to replace it with an OS installation media appears.
Remove EXPRESSBUILDER DVD and then insert the OS installation media.
Install Windows – Insert Disc
Please insert Windows installation disc 1.
OK
Cancel
29. The content displayed differs depending on what you selected in step 18. Confirm the following, and
then proceed.
Full installations:
(1) After setup of Windows Server 2008 is completed, the following window appears, prompting you
to change your password before logging on. Click [OK].
198
Express5800/R120e-1M, R120e-2M
Installation Guide (Windows)
5. Setting Up Windows Server 2008
Chapter 1 Installing Windows
(2)
Change your password, and then click the [
Tips
] button.
Passwords must fulfill the following requirements in Windows Server 2008.
− Contains 6 or more characters
− Contains characters from at least three of the following categories: numbers,
uppercase letters, lowercase letters, and symbols.
(3) When the following message appears, click [OK].
(4) When the Initial Configuration Tasks window appears after you log on, enter the user information.
Express5800/R120e-1M, R120e-2M
Installation Guide (Windows)
199
5. Setting Up Windows Server 2008
Chapter 1 Installing Windows
Server Core installations:
(1) If the following message appears after Windows Server 2008 setup has completed,
press <Ctrl> + <Alt> + <Del> keys.
(2) When the following message appears, click Other User.
(3)
When the following window appears, enter administrator into the User text box and then
click
(4)
200
. Password entry is not required at this time.
The following window appears, prompting you to change your password before logging on.
Click OK.
Express5800/R120e-1M, R120e-2M
Installation Guide (Windows)
5. Setting Up Windows Server 2008
Chapter 1 Installing Windows
(5)
Change your password, and then click [
Tips
].
Passwords must fulfill the following requirements in Windows Server 2008.
− Contains 6 or more characters
− Contains characters from at least three of the following categories: numbers,
uppercase letters, lowercase letters, and symbols.
(6) When the following message appears, click [OK].
(7)
The command prompt will appear. Set the user information.
Tips
For detailed setup procedures, refer to the Microsoft "Step by Step Guide".
30. Install Starter Pack by referring to Chapter 1 (5.4 Installing Starter Pack).
31. Install drivers and specify detailed settings by referring to Chapter 1 (5.5 Setting Up Device Drivers).
32. For optional devices whose driver has not been installed, install the device drivers according to the
instructions supplied in the driver manual.
33. Apply Service Pack as needed according to Chapter 1 (5.8 Applying Service Pack).
34. Install the applications as needed by referring to Chapter 1 (5.9 Installing the Applications).
35. Execute setup by following the instructions described in Chapter 1 (6. Setup for Solving Problems).
Setup with Windows standard installer is now complete.
Express5800/R120e-1M, R120e-2M
Installation Guide (Windows)
201
5. Setting Up Windows Server 2008
Chapter 1 Installing Windows
5.4
Installing Starter Pack
Starter Pack contains drivers customized for this server. Be sure to apply Starter Pack before running the
system.
Important
Also install Starter Pack in the following cases.
− The system configurations have changed
(If an internal optional device is installed or removed, apply the Starter
Pack. If a dialog box prompting system reboot is displayed, reboot the
system according to on-screen instructions, and then apply the Starter
Pack.)
− If the system was restored using a restore process
− If a system has been restored using the backup tool
Note
The Scalable Networking Pack (SNP) function is disabled upon Starter Pack
installation is complete.
The setting of SNP function may affect the system performance.
Contact your sales representative for details.
Tips
If the OS is installed by using EXPRESSBUILDER, Starter Pack is already applied.
If the configuration is not changed, you do not need to apply Starter Pack again.
5.4.1
When using EXPRESSBUILDER DVD
1. Log on to the system with the built-in administrator, which has administrative privileges.
2. Insert EXPRESSBUILDER DVD into the optical disk drive.
3. Start the installer of Starter Pack according to the installation type.
Full installations
Click Integrated Installation on the menu.
202
Express5800/R120e-1M, R120e-2M
Installation Guide (Windows)
5. Setting Up Windows Server 2008
Chapter 1 Installing Windows
When the following screen appears, make sure that the Starter Pack option is selected, and then click
Install.
Tips
If Starter Pack is already installed, the Applications option is selected by default.
To install Starter Pack again, select the Starter Pack option.
Server Core installations
(1) Enter the following command at the command prompt, and then specify the optical disk drive
letter (for example, D drive).
cd /d D:\002\win\winnt\bin
C:\Users\administrator>cd /d D:\002\win\winnt\bin
(2) Enter the following, and then press <Enter> key.
pkgsetup.vbs
D:\002\win\winnt\bin>pkgsetup.vbs
Wait for several minutes without attempting any further operation until the following window appears.
On Full Installation, the following progress message appears while the Starter Pack is installed.
Express5800/R120e-1M, R120e-2M
Installation Guide (Windows)
203
5. Setting Up Windows Server 2008
Chapter 1 Installing Windows
4.
Read the message, and then click [OK].
Starter Pack installation starts.
Wait until installation completes (about 3 to 4 minutes).
On Full Installation, the following progress message appears while the Starter Pack is installed.
5. When the following message appears, Starter Pack installation is complete. Follow the instructions in the
message, and remove EXPRESSBUILDER DVD.
6. Click [OK] and then restart the system.
Installation of Starter Pack is now complete.
204
Express5800/R120e-1M, R120e-2M
Installation Guide (Windows)
5. Setting Up Windows Server 2008
Chapter 1 Installing Windows
5.4.2
When using Internal Flash Memory
(Optional "Internal Flash Memory" is required)
1.
After installing the operating system, restart the server.
2.
When "Press <F2> Setup, <F3> Internal Flash Memory, <F4> ROM Utility, <F12> Network" appears
during POST, press <F3> key.
Note
3.
At this time, be sure to remove the DVD from the optical disk drive.
When the following message appears, select Os installation *** default ***.
You will automatically advance to the next window, with no need for further input.
The following window appears
Express5800/R120e-1M, R120e-2M
Installation Guide (Windows)
205
5. Setting Up Windows Server 2008
Chapter 1 Installing Windows
The server starts from EXPRESSBUILDER.
4. Select English on the language selection window, and then click [OK].
5.
206
Click Utilities.
Express5800/R120e-1M, R120e-2M
Installation Guide (Windows)
5. Setting Up Windows Server 2008
Chapter 1 Installing Windows
6.
Click Starter Pack Installation.
7. Read the contents, and then click Yes.
8. When files are copied, click Close on the following screen.
The server then restarts.
Note
You do not need to press <F3> key at this time.
Express5800/R120e-1M, R120e-2M
Installation Guide (Windows)
207
5. Setting Up Windows Server 2008
Chapter 1 Installing Windows
9. Proceed application step according to the installation type.
Tips
During setup, a virtual floppy disk drive is temporarily connected. Follow the
instructions below to reference the virtual floppy disk drive.
Full installations
Click app_pkg.bat of Floppy disk drive (usually A drive).
Server Core installations
(1) Enter the following command at the command prompt, and then specify the drive letter of
Floppy disk drive (usually A drive).
Cd /d A:\
C:\Users\administrator>cd /d A:\
(2) Enter the following, and then press <Enter> key.
app_pkg.bat
A:\>app_pkg.bat
Wait until the file copy is complete. (About 1-3minute(s).)
On Full Installation, the following progress message appears while the Starter Pack is installed.
10. Read the message, and then click [OK].
Starter Pack installation starts.
Wait until the installation of the Starter Pack is complete. (About 3-5 minutes)
208
Express5800/R120e-1M, R120e-2M
Installation Guide (Windows)
5. Setting Up Windows Server 2008
Chapter 1 Installing Windows
On Full Installation, the following progress message appears while the Starter Pack is installed.
11. Click [OK] to restart the system.
Installation of Starter Pack is now complete.
Express5800/R120e-1M, R120e-2M
Installation Guide (Windows)
209
5. Setting Up Windows Server 2008
Chapter 1 Installing Windows
5.5
Setting Up Device Drivers
Install and set up device drivers provided for the standard configuration.
For details regarding the installation and setup of a driver that is not described here, refer to the manual
supplied with the driver.
5.5.1
(1)
Installing the LAN drivers and BACS (teaming utility)
LAN drivers and BACS
If EXPRESSBUILDER is used for setup, the LAN driver and BACS will automatically be installed.
If the Windows standard installer is used for setup, install Starter Pack to install the LAN driver and BACS.
Important
Note
WOL is supported by the standard network adapters only.
• To change the LAN driver and BACS settings, log on to the system from a local
console using an administrator's account. Remotely changing the settings by
using the operating system’s remote desktop feature is not supported.
• Be sure to select the Internet Protocol (TCP/IP) check box when specifying an
IP address.
(2)
Optional LAN board
This server supports the following optional LAN boards.
The drivers for LAN boards are automatically installed using the OS plug-and-play function.
Optional LAN boards: N8104-128/132/133/138
The drivers for LAN boards are automatically installed using the OS plug-and-play function.
The LAN driver is not installed if N8104-145 is not installed at the time of installation of the OS by using
EXPRESSBUILDER or at installation of Starter Pack.
Perform the steps below to install the N8104-145 LAN driver manually.
1.
Insert EXPRESSBUILDER DVD into the optical disk drive.
If Autorun Menu appears, close the menu.
Tips
EXPRESSBUILDER DVD is unnecessary if Starter Pack was installed from
Internal Flash Memory. Proceed to the next step.
2.
Open Command Prompt, and execute install.bat in the following folder.
When using EXPRESSBUILDER DVD:
EXPRESSBUILDER DVD:\002\win\winnt\ws2008\lan\intel
If Starter Pack was installed from Internal Flash Memory:
System Drive:\StartPKG\ws2008\lan\intel
210
Express5800/R120e-1M, R120e-2M
Installation Guide (Windows)
5. Setting Up Windows Server 2008
Chapter 1 Installing Windows
3.
When the following message appears, remove the EXPRESSBUILDER DVD from the optical disk drive,
and then restart the system.
Installation Completed
Setup is now completed.
Note
• If the LAN driver has been installed in N8104-145, PROSet (Teaming utility) is
also installed.
• Using an optional LAN board, perform procedure "4.4.2 Setting up LAN drivers"
for each optional LAN board.
(3)
Network adapter name
After installing the LAN drivers, the following network adapter names will be displayed by the Device Manager or
BACS.
Network adapters for the standard configuration
Broadcom NetXtreme Gigabit Ethernet #xx*
If connecting with an optional LAN board:
[N8104-128] Broadcom BCM57711 NetXtreme II 10 GigE (NDIS VBD Client) #xx*
[N8104-132/133/138] Broadcom NetXtreme Gigabit Ethernet #xx *
[N8104-145] Intel(R) Ethernet Server Adapter I340-T2 #xx*
* If there are adapters with the same name, a different identification number will be assigned to xx.
Tips
The ID for N8104-128 might be a number of two or more digits. This is due to the
LAN driver specifications and not an error. This number cannot be changed.
5.5.2
(1)
Setting up LAN drivers
Setting link speed
The transfer rate and duplex mode of the network adapter must be the same as those of the switching hub.
Follow the procedure below to specify the transfer rate and duplex mode.
1. Open the Device Manager.
2. Expand Network Adapters, and then double-click the name of the network adapter you want to set.
The properties of the network adapter will be displayed.
3. Select the Advanced or Link Spped tab, and then set the Speed & Duplex values to the same as those of
the switching hub.
4. Click [OK] in the Network Adapter Properties dialog box.
5. Restart the system.
The link speed setting is now complete.
Express5800/R120e-1M, R120e-2M
Installation Guide (Windows)
211
5. Setting Up Windows Server 2008
Chapter 1 Installing Windows
(2)
Using N8104-128
Using N8104-128 with the server, iSCSI Offload Engine and EnablePMTUBHDetect must be disabled.
Follow the procedure below to set it.
1.
Double-click the Broadcom Control Suite icon on the Control Panel window.
Broadcom Advanced Control Suite starts.
2.
Set Filter to ALL VIEW, select Broadcom BCM57711 NetXtreme II 10 GigE # xx under
Explorer View the Adapter xx (BCM57711 A0) - Port x.
3.
Tab on Configurations at the right side screen and then expand Resource Reservations.
4.
Click the [Configure] button on the Click the button to configure.
The Hardware and Resource Configuration Wizard appears.
5.
Remove a checkmark from [iSCSI] under Protocols, if checked.
Select [Next], and then click the [Apply] button.
6.
When the following message appears, select [Yes].
Applying the changes will temporarily interrupt the network connection.
The process may take several minutes and the connection will resume
afterwards.
Do you want to continue?
7.
Complete steps 2 to 6 for each N8104-128 network adapter.
Then, close the Broadcom Advanced Control Suite.
8.
Insert EXPRESSBUILDER DVD into the optical disk drive.
If Autorun Menu appears, close the menu.
Tips
EXPRESSBUILDER DVD is unnecessary if Starter Pack was installed from
Internal Flash Memory. Proceed to the next step.
9.
Double-click BhdDisabled.vbs in the following folder.
•
When using EXPRESSBUILDER DVD:
EXPRESSBUILDER DVD:\002\win\winnt\ws2008\lan\bcom\ws2008x86\lan
•
If Starter Pack was installed from Internal Flash Memory:
System drive:\StartPKG\ws2008\lan\bcom\ws2008x86\lan
10. When the following message appears, click [OK].
Black Hole Router Detect Disable Completed, Reboot the system
11. Eject EXPRESSBUILDER DVD from the optical disk drive, and then restart the system.
Setup is now complete.
212
Express5800/R120e-1M, R120e-2M
Installation Guide (Windows)
5. Setting Up Windows Server 2008
Chapter 1 Installing Windows
(3)
Using N8104-132/133/138
Using N8104-132/133/138 with the server, follow the procedure below to set it.
1. Insert EXPRESSBUILDER DVD into the optical disk drive.
If Autorun Menu appears, close the menu.
Tips
EXPRESSBUILDER DVD is unnecessary if Starter Pack was installed from
Internal Flash Memory. Proceed to the next step.
2.
Double-click to the following file.
− When using EXPRESSBUILDER DVD:
EXPRESSBUILDER DVD:\002\win\winnt\ws2008\lan\pgdyavd_Disable.vbs
− If Starter Pack was installed from Internal Flash Memory:
System drive:\StartPKG\ws2008\lan\pgdyavd_Disable.vbs
3.
When the following message appears, click [OK].
Configuration Completed
[Option:PopUp RLV Disabled(Action:Done)]
Reboot the system
Tips
4.
The message “Action:Non” indicates that the LAN driver is already set.
Eject EXPRESSBUILDER DVD from the optical disk drive, and then restart the system.
Setup is now completed.
Express5800/R120e-1M, R120e-2M
Installation Guide (Windows)
213
5. Setting Up Windows Server 2008
Chapter 1 Installing Windows
5.5.3
Setting up team/LiveLink (BACS)
Important
• When using Smart Load Balancing and Failover (without Standby Member),
be sure to setup LiveLink at creation of team.
When using Smart Load Balancing and Failover (with Standby Member),
setup for LiveLink is not essential.
• When deleting the team, refer to Chapter 1 (5.5.3 Setting up team/LiveLink)
- (4) Procedure for deleting team. When replacing the motherboard or a
LAN board, follow these steps to remove the team and create it again after
replacement.
• Be sure to specify the same Jumbo Mtu (Jumbo Packet) setting to all the
adapters that compose a team.
• Using Server Core installations, Not supporting setting up team/LiveLink
by the BACS.
(1)
Team types
The following team types are supported.
• Smart Load Balancing and Failover (without Standby Member)
All adapters that compose the team perform communication.
If a communication failure occurs on an adapter, other adapters that compose the team continue the
communication.
When the adapter on which the communication failure occurred recovers, it joins the team again and
resumes the communication.
• Smart Load Balancing (Auto-Failback Disable) (with Standby Member)
Among the adapters that compose the team, primary adapters except the standby member perform
communication.
If a communication failure occurs, the standby member continues the communication.
When the adapter on which the communication failure occurred recovers, it joints the team again and
the standby adapter returns to the standby state.
• FEC/GEC Generic Trunking
The combination of multiple adapters into a single channel to provide greater bandwidth.
Important
• LiveLink is not available for this team mode.
• FEC/GEC modes require switch support.
(2)
LiveLink
LiveLink is a function that detects communication route failures of adapters.
It periodically investigates the communication status of specified destinations (IP address).
Link packets are sent from each adapter within a team.
If a response to the transmission of a link packet within the specified range is not detected, it is identified as a
communication route failure and adapter communication is stopped.
When a response to the submission of a link packet is detected, communication LiveLink identifies
communication as having been recovered, and communication using that adapter automatically resumes.
Note
214
You must set up LiveLink when you create a team.
Express5800/R120e-1M, R120e-2M
Installation Guide (Windows)
5. Setting Up Windows Server 2008
Chapter 1 Installing Windows
(3)
Setting up team/LiveLink
Important
Possible combinations of network adapters that compose the team are as
follows.
When the number of adapters that composes the team is up to four:
− Between standard network adapters
− Between LAN cards excluding N8104-128
− A standard network adapter and LAN card N8104-128
When the number of adapters that composes the team is up to two:
− Between N8104-128 adapters.
Teaming with another N8104-128 on different board is not supported.
Tips
To edit a team, right-click on the BACS team, and then select Edit Team.
Then refer to step 3 and the subsequent steps to edit the team.
1. Double-click the Broadcom Control Suite icon on the Control Panel window.
Broadcom Advanced Control Suite starts.
2. Set a Filter in a TEAM VIEW, right-click the adapter to be used for the team, and then select Create a
Team from the short-cut menu.
The Broadcom Teaming wizard appears.
Express5800/R120e-1M, R120e-2M
Installation Guide (Windows)
215
5. Setting Up Windows Server 2008
Chapter 1 Installing Windows
3. Click [Next].
Note
Do not use Expert Mode.
4. Enter any name into the team name entry column, and then click [Next].
5. Team Type select the type of team you want to create, and then click [Next].
Note
•
802.3ad Link Aggregation using Link Aggregation Control Protocol(LACP) is
not supported.
•
.When the FEC/GEC Generic Trunking selected.
The following message will appears, select [OK].
”Verify that the network switch connected to the team members is
configured correctly for the team type.”
216
Express5800/R120e-1M, R120e-2M
Installation Guide (Windows)
5. Setting Up Windows Server 2008
Chapter 1 Installing Windows
6. Select the adapters that compose the team, click [Add] to add them to the Team Members area, and
then click [Next].
Note
When selecting FEC/GEC Generic Trunking, skip to step 15.
7. Proceed according to your desired team type.
− Smart Load Balancing and Failover (without Standby Member)
(1)
Select Do not configure a standby member.
(2)
Click [Next].
①
Express5800/R120e-1M, R120e-2M
Installation Guide (Windows)
217
5. Setting Up Windows Server 2008
Chapter 1 Installing Windows
− Smart Load Balancing (Auto-Failback Disable) (with Standby Member)
(1)
Select Use the following member as a standby member.
(2) Select the adapter that is to be a standby member from the drop-down list.
(3)
Select Enable Auto-Failback Disable mode.
(4)
Click [Next].
Note
Enable Auto-Failback Disable mode is cleared while editing the team. Select it
again.
8. When configure LiveLink, select Yes and click [Next] and go to step 9.
When LiveLink is unnecessary, select No and click [Next] and then go to step 15.
218
Express5800/R120e-1M, R120e-2M
Installation Guide (Windows)
5. Setting Up Windows Server 2008
Chapter 1 Installing Windows
9. You can use the default setting for Probe interval and Probe maximum retries. If you change these
values, select a value from each drop-down list, click the target probe (Probe Target xx), and then click
[Edit Target IP Address…].
Tips
• The setting range of Probe interval (link packet transmission interval) is 1 to 60
(units: seconds).
• The setting range of Probe maximum retries (link packet retry count) is 1 to 10
(times).
• Switching a path upon detection of a communication path error by LiveLink
takes (Probe maximum retries + 1) x Probe interval (seconds) at maximum.
If a link is down is detected, failover occurs immediately after the link goes
down. It takes the time specified for Probe interval (seconds) to recover from the
link going down.
• When using Tagged VLAN, input VLAN ID to "Probe VLAN ID".
10. In the Target xx text box, enter the IP address of the alive monitoring server, and then click [OK].
Note
• Target xx must be the same broadcast domain as that specified for the data
communication IP and LiveLink communication IP (described in step 13). Specify
an IP address that exists on the network and with which communication is
possible.
• If communication with the IP address specified in Target xx is not possible, the
team will also be unable to communicate. It is therefore recommended that you
specify multiple IP addresses using Probe Target. Up to four IP addresses can
be specified.
Express5800/R120e-1M, R120e-2M
Installation Guide (Windows)
219
5. Setting Up Windows Server 2008
Chapter 1 Installing Windows
11. Click [Next].
12. Select an adapter from the Team Members area, and then click [Edit Member IP Address…].
13. Enter the IP address used for LiveLink communication, and then click [OK].
Note
• Be sure to specify an IP address for LiveLink communication for all the adapters
that compose the team. The address specified here is the IP address for LiveLink
communication. Specify a different IP address for data communication.
• For Target xx, specify an IP address that is unique on the network and with which
communication is possible.
220
Express5800/R120e-1M, R120e-2M
Installation Guide (Windows)
5. Setting Up Windows Server 2008
Chapter 1 Installing Windows
14. Click [Next].
15. Make sure that Skip manage VLAN is selected under Manage VLAN, and then click [Next].
It is an example of if you do not want to use the VLAN.
16. Make sure that Commit changes to system and Exit the wizard is selected under Commit changes,
and then click [Finish].
Note
When the message below appears, select [Yes].
"Applying the changes will temporarily interrupt the network
connection. The process may take several minutes and the
connection will resume afterwards."
Express5800/R120e-1M, R120e-2M
Installation Guide (Windows)
221
5. Setting Up Windows Server 2008
Chapter 1 Installing Windows
Tips
After creating a team, if the teaming adapter displays like the following image,
perform steps 8 through 14 again and correct the LiveLink settings.
17. Restart the system.
18. After the system starts, start Broadcom Control Suite by clicking the Broadcom Control Suite icon in
Control Panel, and confirm that a team has been created. Confirm the team settings on the Information
window to the right.
− Smart Load Balancing and Failover (without Standby Member)
− Smart Load Balancing (Auto-Failback Disable) (with Standby Member)
222
Express5800/R120e-1M, R120e-2M
Installation Guide (Windows)
5. Setting Up Windows Server 2008
Chapter 1 Installing Windows
− Smart Load Balancing (Auto-Failback Disable) (with Standby Member)
Team setup is now complete.
(4)
Procedure for deleting team
Note
You must delete teams from Broadcom Control Suite.
You cannot delete the team from the team adapter displayed in the Device
Manager.
1.
Double-click Broadcom Control Suite in the Control Panel window.
Broadcom Advanced Control Suite starts.
2.
Set a Filter in a TEAM VIEW, right-click the adapter to be used for the team, and then select Delete
Team from the short-cut menu.
Express5800/R120e-1M, R120e-2M
Installation Guide (Windows)
223
5. Setting Up Windows Server 2008
Chapter 1 Installing Windows
Note
When the message below appears, select [Yes].
"The selected team will be deleted from system, do you want to
proceed?
NOTE:
Applying the changes will temporarily interrupt the
network connection. The process may take several
minutes and the connection will resume afterwards."
3.
Insert EXPRESSBUILDER DVD into the optical disk drive.
If Autorun Menu appears, close the menu window.
Tips
You do not have to insert EXPRESSBUILDER DVD if Starter Pack was installed
from Internal Flash Memory. Proceed to the next step.
4. Double-click addlvlanstats.vbs in the following folder.
− When using EXPRESSBUILDER DVD:
Optical disk drive:\002\win\winnt\ws2008\lan
− If Starter Pack was installed from Internal Flash Memory:
System drive:\StartPKG\ws2008\lan
5. When the following message appears, click [OK].
6. Eject EXPRESSBUILDER DVD from the optical disk drive, and then restart the system.
Team deletion is now complete.
5.5.4
(1)
Setting up team (PROSet)
Team types
The following team types are supported.
Adapter Fault Tolerance (AFT) is a feature that creates a group containing and automatically converts
the process of the working adapter to the other adapter in the group when any trouble occurred on that
adapter.
Adaptive Load Balancing (ALB) is a feature that creates a group containing more than one adapter and
enhances the throughput by operating packet transmission from the server by all the adapters. This
feature includes AFT feature.
Switch Fault Tolerance (SFT) is a feature that provides a failover relationship between two ports when
each port is connected to a separate switch. SFT supports two ports per team.
Static Link Aggregation (SLA) accounts for the GEC and 802.3ad static protocols. SLA is a
switch-assisted teaming mode and requires configuring ports at both ends of the link: server interfaces
and switch ports.
224
Express5800/R120e-1M, R120e-2M
Installation Guide (Windows)
5. Setting Up Windows Server 2008
Chapter 1 Installing Windows
Important
•
The adapters specified as a group of Adaptive Load Balancing (ALB)
can be connected to only Switching Hub.
•
When exchange the mother board or option network card, make sure
to remove the adapter team before exchanges and recreate the
adapter team after exchange complete.
•
Confirm the port setting of switching hub (L2) matches the server
network adapter Teaming mode.
•
All the adapters specified as a group of Adapter Teaming must exist
on the same LAN. If they are connected to the separate switches, they
will not work normally.
(2)
Setting up team
Important
Possible combinations of network adapters that compose the team are as
follows.
When the number of adapters that composes the team is up to four:
-
Between N8104-145 adapters.
1.
Open the Device Manager.
2.
Open Network adapters → [Intel(R) xxx] properties.
3.
Click Teaming tab and check the Team this adapter with other adapters check box.
Click New Team.
4.
Fill the name of the team in Specify a name for the team and click Next.
5.
Include the adapter to the team and click Next.
6.
Select a team mode, and then click Next.
7.
Click Finish.
8.
Click TEAM: "Team name" from Device manager → Network adapters to modify the team.
Click Settings tab and click Modify Team button.
9.
Refer to the following procedure to set the team member adapter priority status.
Note
Adapter priority config can be confirmed by the following procedure:
1. Click [TEAM: "Team name"] from [Device manager] → [Network adapters].
2. Click [Settings] and confirm Adapters in team list.
10. Click Test Switch → Run test to confirm the adapter team is properly setup.
11. Confirm the result in [Test results].
12. Restart the system.
(3)
Procedure for deleting team
1.
Open the Device Manager.
2.
Click Network adapters, and open [TEAM: "Team name"] properties.
3.
Click Setting tab.
4.
Click Remove Team button.
5.
Click Yes to the message.
Express5800/R120e-1M, R120e-2M
Installation Guide (Windows)
225
5. Setting Up Windows Server 2008
Chapter 1 Installing Windows
6.
5.5.5
Confirm [TEAM: "Team name"] adapter is not existing in [Network adapters] tree and restart the
system.
Graphics accelerator driver
The graphics accelerator driver for standard configurations is installed when Starter Pack is installed from
EXPRESSBUILDER.
If you completed Setup with EXPRESSBUILDER, then the graphics accelerator driver has been
automatically installed.
Tips
The graphics accelerator driver is only enabled in Full installations. Standard VGA
is used in the case of Server Core installation.
To reinstall drivers separately, complete the following steps.
1. Insert EXPRESSBUILDER DVD into the optical disk drive.
If Autorun Menu appears, close the menu window.
Tips
You do not have to insert EXPRESSBUILDER DVD if Starter Pack was installed
from Internal Flash Memory.
2. From the Start menu, point to All programs, Accessories, and then select Explorer.
3. Double-click the install.bat icon in the following folder.
- When using EXPRESSBUILDER DVD:
Windows Server 2008 64-bit Edition
EXPRESSBUILDER DVD:\002\win\winnt\ws2008x64\video
Windows Server 2008 32-bit Edition
EXPRESSBUILDER DVD:\002\win\winnt\ws2008\video
- If Starter Pack was installed from Internal Flash Memory:
System drive:\StartPKG\ws2008\video
Continue installation according to the onscreen messages.
You will be prompted to confirm the End User License Agreement during this process. Click the
[ACCEPT] button and continue.
4. Eject EXPRESSBUILDER DVD from the optical disk drive, and then restart the system.
Graphic accelerator driver installation is now complete.
226
Express5800/R120e-1M, R120e-2M
Installation Guide (Windows)
5. Setting Up Windows Server 2008
Chapter 1 Installing Windows
5.5.6
When using a SAS controller (N8103-142)
The driver for SAS controller N8103-142 is automatically installed by Windows Plug-and-Play.
5.5.7
When using a RAID Controller (N8103-161)
The driver for RAID Controller N8103-161 is automatically installed by Windows Plug-and-Play.
5.5.8
When using a Fibre Channel controller (N8190-153/154)
The driver for Fibre Channel controller N8190-153/154 is automatically installed by Windows Plug-and-Play.
Express5800/R120e-1M, R120e-2M
Installation Guide (Windows)
227
5. Setting Up Windows Server 2008
Chapter 1 Installing Windows
5.6
Specifying PAE Option
If the server can mount a memory of more than 4 GB in a 32-bit system, specify the PAE option settings to use
that memory.
Important
The PAE option is not supported by Windows Server 2008 Standard.
For Windows Server 2008, the PAE option can be specified by using the Bcdedit.exe file. Follow the
procedure below to specify the PAE option.
1. Select Run from the Start menu.
2. Enter cmd.exe in the Open text box, and then click [OK] to start the command prompt.
3. Execute the following command at the command prompt:
bcdedit /set pae forceenable
4. Restart the system.
The above setting is applied after restart.
5. Execute the following command at the command prompt:
bcdedit
Make sure that pae ForceEnable is added to Windows Boot Loader.
Specification of the PAE option settings is now complete.
For details about Bcdedit.exe, refer to the following:
Boot Configuration Data Editor Frequently Asked Questions
http://technet.microsoft.com/en-us/library/cc721886(WS.10).aspx
228
Express5800/R120e-1M, R120e-2M
Installation Guide (Windows)
5. Setting Up Windows Server 2008
Chapter 1 Installing Windows
5.7
License Authentication
To use Windows Server 2008, confirm whether the license has been authenticated, and if it has not, perform
the license authentication procedure.
The following describes the license authentication procedure.
(1)
Full installations
1. Select Run from the Start menu.
Enter the following, and then press <Enter> key.
slui
If the following message appears, Windows has already been activated on your system. You do not
need to complete this procedure. Click [Close] to exit.
Express5800/R120e-1M, R120e-2M
Installation Guide (Windows)
229
5. Setting Up Windows Server 2008
Chapter 1 Installing Windows
2. For installation from Backup DVD-ROM, replace the product key.
When the following window appears, click Change product key.
3. When the following window appears, enter the product key found on the COA label, and then click [Next].
4. Follow the instructions in the following message to start the license authentication process.
Windows activation is now complete.
230
Express5800/R120e-1M, R120e-2M
Installation Guide (Windows)
5. Setting Up Windows Server 2008
Chapter 1 Installing Windows
(2)
Server Core installations
1. At the command prompt, enter the following, and then press <Enter> key.
slmgr -dli
If the following message appears, Windows has already been activated on your system. You do not
need to complete this procedure. Click [OK] to finish.
2. For installation from Backup DVD-ROM, replace the product key.
At the command prompt, enter the following, and then press <Enter> key. Set the product key found on
the COA label in PID.
slmgr -ipk PID
3. Obtain an installation ID for Windows activation.
At the command prompt, enter the following, and then press <Enter> key.
slmgr -dti
4. Reference %systemroot%\system32\slui\phone.inf for the telephone number of the license
authentication customer service.
5. Call the above number, inform the representative of the installation ID which you obtained in step 3, and
receive a confirmation ID.
6. Type the confirmation ID you received in step 5.
At the command prompt, enter the following, and then press <Enter> key. CID is the confirmation ID that
you received from customer service.
slmgr -atp CID
Windows activation is now complete.
Express5800/R120e-1M, R120e-2M
Installation Guide (Windows)
231
5. Setting Up Windows Server 2008
Chapter 1 Installing Windows
5.8
Applying Service Pack
When applying Service Pack 2, refer to the following Microsoft website:
http://support.microsoft.com/kb/948465/en-us
5.9
Installing the Applications
EXPRESSBUILDER contains applications including NEC ESMPRO Agent and NEC ESMPRO Manager. Some
applications stored in EXPRESSBUILDER can be installed collectively by performing the procedures described
below. When installing these applications individually, see Chapter 2 (Installing Bundled Software).
1.
Log on to the system with the built-in administrator, which has administrative privileges.
2.
Insert the EXPRESSBUILDER DVD into the optical disk drive.
3.
Click Integrated Installation on the menu.
4.
On the following screen, make sure that the Applications option is selected.
Select the check boxes corresponding to the applications to install, and then click Install.
232
Express5800/R120e-1M, R120e-2M
Installation Guide (Windows)
5. Setting Up Windows Server 2008
Chapter 1 Installing Windows
Note
• If Starter Pack is already installed, the Applications option is selected by
default.
• Applications available for installation are selected by default.
• An application that has been already installed need to be uninstalled before
installing it again.
• If your system environment does not satisfy the prerequisite for an application,
you cannot install it. (For details, refer to the on-screen information and the
relevant page of each application.)
The selected applications are automatically installed.
5.
When a message appears, click Restart, and then remove the EXPRESSBUILDER disk from the
optical disk drive.
Now installation of applications is completed.
Express5800/R120e-1M, R120e-2M
Installation Guide (Windows)
233
5. Setting Up Windows Server 2008
Chapter 1 Installing Windows
5.10 Installation When Multiple Logical Drives Exist
Before starting installation, backup data for future use in case of data loss.
(1)
Installation process
− Setup with EXPRESSBUILDER
Important
Before starting setup, be sure to disconnect hard disk drives from the RAID
Controller that is not to be setup. Install those hard disk drives after setup
has completed.
Conducting setup with hard disk drives being connected with RAID
Controller may cause existing data to be erased unintentionally.
Refer to Chapter 1 (5.2 Setup with EXPRESSBUILDER), and proceed with setup.
In this case, EXPRESSBUILDER installs the Windows on the first detected hard disk drive or logical drive.
− Setup with Windows standard installer
1. Refer to Chapter 1 (5.3 Setup with Windows Standard Installer), and start setup.
2. When the following message appears, select the partition to which you want to set up the operating
system.
Select the location to which Windows will be installed
The order and numbers of the disks displayed on the screen might not match the server’s slot of the
hard disk drives. Distinguish between the hard disk drives by viewing the hard disk drive capacity
and partition size displayed on the screen, and then select a drive to install the Windows system.
Selecting an improper drive might cause an unintentional corruption of the existing data. Be careful when
selecting a hard disk drive on which to install the system.
Important
• For details, refer to the following Microsoft website:
http://support.microsoft.com/kb/937251/en-us
• You cannot edit the drive letters for the system volume or boot volume
after setup is complete. Make sure that the drive letters assigned in this
window are correct, and then proceed with setup.
3. Refer to Chapter 1 (5.3 Setup with Windows Standard Installer), and proceed to setup Windows with
Windows standard installer and the instructions.
Tips
The drive letter might change after installation. If you want to change the drive
letter, use the procedure shown in Changing drive letter assignments below.
234
Express5800/R120e-1M, R120e-2M
Installation Guide (Windows)
5. Setting Up Windows Server 2008
Chapter 1 Installing Windows
(2)
Changing drive letter assignments
To change the drive letter, follow the steps below. But these steps cannot change drive letter assignments for
the system volume or boot volume. If you want to change them, re-install the Windows.
1. From the Start menu, right-click Computer and then select Management. Next, launch Server Manager.
2.
From the window on the left, select Storage and then Disk Management.
3.
Right-click the volume whose drive letter you want to change, and then select Change drive letter and
path.
4.
Click [Change].
5.
Click [Assign next drive letter], and then select the drive letter you want to assign.
6.
Click [OK].
7.
When the following message appears, read the contents and then click [OK].
Some programs are dependent on drive letters, and may
not run properly. Continue?
8.
Close the Server Manager.
Express5800/R120e-1M, R120e-2M
Installation Guide (Windows)
235
6. Setup for Solving Problems
Chapter 1 Installing Windows
6.
Setup for Solving Problems
We recommend installing the following features for solving the server failure quickly.
6.1 Specifying Memory Dump Settings (Debug Information)
This section explains the procedures for collecting a memory dump (debug information) in the server.
Important
• Memory dumps must be collected by a serviceman. You only specify the
settings for the memory dump.
• When you restart the system to save the memory dump, a message
informing you that the system is short of virtual memory might appear.
Ignore this message and proceed with the restart. If you reset or restart the
system again, the memory dump might not be saved normally.
6.1.1
For Windows Server 2012
Follow the procedure below to specify the memory dump settings.
1. On the Charms bar, click Settings.
To go to step 5 directly, right-click the left bottom of the screen, and then click System.
<Select Settings>
236
Express5800/R120e-1M, R120e-2M
<Select System>
Installation Guide (Windows)
6. Setup for Solving Problems
Chapter 1 Installing Windows
2. In Settings, click Control Panel.
3. In Control Panel, click System and Security.
4. In System and Security, click System.
Express5800/R120e-1M, R120e-2M
Installation Guide (Windows)
237
6. Setup for Solving Problems
Chapter 1 Installing Windows
5. In System, click Advanced system setting.
The System Properties appears.
6. In Startup and Recovery, click Settings….
238
Express5800/R120e-1M, R120e-2M
Installation Guide (Windows)
6. Setup for Solving Problems
Chapter 1 Installing Windows
7. Type a file name to save the debug information, and then click OK.
Fig. For example: <Save information in drive D: with the file name "MEMORY.DMP">
Note the following when specifying a dump file:
We recommend specifying Kernel memory dump of Write debugging information.
Specify a drive that has a free space of at least "the memory capacity mounted on the server +
400 MB".
The size of the debug information (memory dump) changes if DIMM is added. Make sure that
the free space of the drive to store the debug information (memory dump) is sufficient.
Express5800/R120e-1M, R120e-2M
Installation Guide (Windows)
239
6. Setup for Solving Problems
Chapter 1 Installing Windows
8. In Performance, click Settings.
The Performance Options window appears.
9. Click the Advanced tab on the Performance Options window.
240
Express5800/R120e-1M, R120e-2M
Installation Guide (Windows)
6. Setup for Solving Problems
Chapter 1 Installing Windows
10. In Virtual memory, click Change….
11. Clear the Automatically manage paging file size for all drivers check box, and then click Custom
size.
Express5800/R120e-1M, R120e-2M
Installation Guide (Windows)
241
6. Setup for Solving Problems
Chapter 1 Installing Windows
12. In Paging file size for each drive, enter the value equal or larger than the recommended value for
Initial size, and the value larger than Initial size for Maximum size, and then click Set.
Note the following when specifying a paging file size:
The paging file is used to collect debug information (dump file). The boot volume must have a
paging file of its initial size (Total capacity of physical memory mounted + 400MB or larger) is
enough to store the dump file. If the paging file size is insufficient, correct debug information
cannot be collected due to a shortage of virtual memory. Make sure to set a sufficient paging
file size (recommended size: Total capacity of physical memory mounted * 1.5).
See "System Partition" in Chapter 1 (3.1 Before Starting Setup) for recommended value.
When DIMM is added, re-specify the paging file according to the increased memory size.
13. Click OK.
If a message to restart Windows appears, restart the system according to on-screen message.
Specification of the memory dump settings is now complete.
242
Express5800/R120e-1M, R120e-2M
Installation Guide (Windows)
6. Setup for Solving Problems
Chapter 1 Installing Windows
6.1.2
For Windows Server 2008 R2
Follow the procedure below to specify the memory dump settings.
1. On the Start menu, click Control Panel.
The Control Panel window appears.
2. On the Control Panel window, click System and Security.
Tips
If View by is not Category, select System from Control Panel directly.
3. Click System.
4. Click Advanced system settings.
The System Properties dialog box appears.
5. Click the Advanced tab, and then click Settings in Startup and Recovery.
6. Type a file name to store the debug information in the Dump file text box.
For example: To store the debug information in D drive under the file name MEMORY.DMP:
D:\MEMORY.DMP
Note the following when specifying a dump file.
•
For the Write debugging information drop-down list, we recommend specifying Complete
memory dump. If the mounted memory size is greater than 2 GB, Complete memory dump
cannot be specified because it is not displayed on the drop-down list. In this case, specify
Kernel memory dump instead.
•
Specify a drive that has a free space of at least "the memory capacity mounted on the
server + 300 MB".
•
The size of the debug information (memory dump) changes when DIMM is added. Make
sure that the free space of the drive to store the debug information is sufficient. If the
mounted memory exceeds 2GB, specify Kernel memory dump.
7. In Performance, click Settings.
The Performance Options dialog box appears.
8. Click the Advanced tab in the Performance Options dialog box.
9. In Virtual memory, click Change.
10. Clear the Automatically manage paging file size for all drives check box, and then click Custom
size.
11. In Paging file size for each drive, specify as follows:
For the Initial size text box, type a value equal to or greater than the Recommended value shown in
Total paging file size for all drives.
For the Maximum size text box, type a value equal to or greater than the value specified in Initial
size.
After specifying the above values, click Set.
Note the following when specifying a paging file size.
•
The above paging file sizes are recommended for collecting debug information (dump file).
The initial size of the Windows partition paging file must be large enough to store dump files.
Make sure to set a sufficient paging file size. If the paging file size is insufficient, correct
debug information cannot be collected due to a shortage of virtual memory.
•
For details about the Recommended value in the Total paging file size for all drives area,
see System partition size in Before Starting Setup.
•
When DIMM is added, re-specify the paging file according to the increased memory size.
Express5800/R120e-1M, R120e-2M
Installation Guide (Windows)
243
6. Setup for Solving Problems
Chapter 1 Installing Windows
12. Click OK.
The message to restart the system appears depending on the modifications made.
In this case, restart the system.
Specification of the memory dump settings is now complete.
6.1.3
For Windows Server 2008
Follow the procedure below to specify the memory dump settings.
1. On the Start menu, clickt Control Panel, and then click System.
The System dialog box appears.
2. Click Advanced system settings.
The System Properties dialog box appears.
3. Clickt the Advanced tab, and then click Settings in Startup and Recovery.
4. Type a file name to store the debug information in the Dump file text box.
For example: To store the debug information in D drive under the file name MEMORY.DMP:
D:\MEMORY.DMP
Note the following when specifying a dump file.
For Windows Server 2008 64-bit Edition
•
For the Write debugging information drop-down list, we recommend specifying Complete
memory dump. If the mounted memory size is greater than 2 GB, Complete memory dump
cannot be specified because it is not displayed on the drop-down list. In this case, specify Kernel
memory dump instead.
•
Specify a drive that has a free space of at least "the memory capacity mounted on the server +
300 MB".
•
The size of the debug information (memory dump) changes when DIMM is added. Make sure
that the free space of the drive to store the debug information is sufficient. If the mounted
memory exceeds 2GB, specify Kernel memory dump.
For Windows Server 2008 32-bit Edition
•
For the Write debugging information drop-down list, we recommend specifying Complete
memory dump. If the mounted memory size is greater than 2 GB, Complete memory dump
cannot be specified because it is not displayed on the drop-down list. In this case, specify
Kernel memory dump instead.
•
Specify a drive that has a free space of at least "the memory capacity mounted on the
server + 300 MB" (or 2048 MB + 300 MB if the memory size exceeds 2 GB).
•
The size of the debug information (memory dump) changes when DIMM is added. Make
sure that the free space of the drive to store the debug information is sufficient. If the
mounted memory exceeds 2GB, specify Kernel memory dump.
5. In Performance, click Settings.
The Performance Options dialog box appears.
6. Click the Advanced tab on the Performance Options dialog box.
244
Express5800/R120e-1M, R120e-2M
Installation Guide (Windows)
6. Setup for Solving Problems
Chapter 1 Installing Windows
7. In Virtual memory, click Change.
8. Clear the Automatically manage paging file size for all drives check box, and then click Custom
size.
9. In Paging file size for each drive, specify as follows:
For the Initial size text box, type a value equal to or greater than the Recommended value shown in
Total paging file size for all drives.
For the Maximum size text box, type a value equal to or greater than the value specified in Initial size.
After specifying the above values, click Set.
Note the following when specifying a paging file size.
•
The above paging file sizes are recommended for collecting debug information (dump file).
The initial size of the boot volume paging file must be large enough to store dump files.
Make sure to set a sufficient paging file size. If the paging file size is insufficient, correct
debug information cannot be collected due to a shortage of virtual memory.
•
For details about the Recommended value in the Total paging file size for all drives area,
see System partition size in Before Starting Setup.
•
When DIMM is added, re-specify the paging file according to the increased memory size.
10. Click OK.
The message to restart the system appears depending on the modifications made.
In this case, restart the system.
Specification of the memory dump settings is now complete.
Express5800/R120e-1M, R120e-2M
Installation Guide (Windows)
245
6. Setup for Solving Problems
Chapter 1 Installing Windows
6.2 How to Create a User-mode Process Dump File
The user-mode process dump file records information when an application error occurs.
If an application error occurs, get user-mode process dump information using the following procedures
without closing the pop-up window that reported the error:
6.2.1
For Windows Server 2012
1. Right-click an empty area of the taskbar and then click Task Manager or press <Ctrl> + <Shift> + <Esc>
keys to start Task Manager.
2.
Click More details.
3. Click the Processes tab.
4. Right-click the name of the process that you want to get dump information for, and then click
Create Dump File.
5. A dump file for the process is created in the following folder:
C:\Users\user name\AppData\Local\Temp
Tips
If the folder is not displayed, open Explorer, select Hidden items in the View tab.
Once the user-mode process dump file has been created, get the file from the folder shown in step 5.
246
Express5800/R120e-1M, R120e-2M
Installation Guide (Windows)
6. Setup for Solving Problems
Chapter 1 Installing Windows
6.2.2
For Windows Server 2008 R2 and Windows Server 2008
1. Right-click an empty area of the taskbar and then click Task Manager or press <Ctrl> + <Shift> + <Esc>
keys to start Task Manager.
2. Click the Processes tab.
3. Right-click the name of the process that you want to get dump information for, and then click Create
Dump File.
4. A dump file for the process is created in the following folder:
C:\Users\user name\AppData\Local\Temp
Tips
If the folder is not displayed, perform the following:
• For Windows Server 2008 R2:
Open Explorer, click Organize and then Folder and search options. Click the
View tab and then select Show hidden files, folders, and drives.
• For Windows Server 2008:
Open Explorer, click Folder and search options on the Tools menu. Click the
View tab and then select Show hidden files and folders.
Once the user-mode process dump file has been created, get the file from the folder shown in step 4.
For details about how to create a user-mode process dump file, refer to the following Microsoft Support
web page:
How to create a user-mode process dump file in Windows Server 2008
http://support.microsoft.com/kb/949180/en-us
User-mode process dump file creation is now complete.
Express5800/R120e-1M, R120e-2M
Installation Guide (Windows)
247
6. Setup for Solving Problems
Chapter 1 Installing Windows
6.3 Installing Network Monitor
Utilizing Network Monitor helps you investigate and manage network troubles.
(This feature is not supported in Windows Server 2012 or later operating systems.)
(1)
Setting up Network Monitor
Tips
Windows Server 2008 R2 and Windows Server 2008 do not provide Network
Monitor.
To capture network traces on Windows Server 2008 R2 or Windows Server 2008,
Microsoft Network Monitor must be installed using the procedure described below.
1. Download Network Monitor from the following Microsoft web page:
http://support.microsoft.com/kb/933741/en-us
2. Run the downloaded file to start the installer.
Follow the onscreen instructions to install Network Monitor.
Tips
If the Security Alert message appears, click Run.
In the setup format selection window, select Complete.
Network Monitor installation is now complete.
Tips
(2)
To uninstall Network Monitor, use Programs and Features.
Capturing network traces
1.
Click Microsoft Network Monitor on the Start menu to start Network Monitor.
2.
Click Create a new capture tab... in the Start Page tab or click New on the File menu, click Capture….
A new tab for capturing network traces is created.
3.
In Select Networks, select the network whose traces are to be captured.
4.
Click Start on the Capture menu to start capturing the network traces.
5.
Click Stop on the Capture menu to stop capturing the network traces.
6.
Click Save As… on the File menu.
The Save As dialog box appears. Click All captured frames in Frame selection, and then type a folder and
file names.
Tips
The default folder is as follows:
C:\Users\<User name>\Documents\Network Monitor 3\Captures
7. Click Save.
The network trace file is created in the folder specified in step 6.
The setup for capturing network traces is now complete.
248
Express5800/R120e-1M, R120e-2M
Installation Guide (Windows)
7. Windows OS Parameter File
Chapter 1 Installing Windows
7.
Windows OS Parameter File
This section describes a parameter file for Windows OS.
7.1 Creating Windows OS Parameter File
If a parameter file is used when performing Setup with EXPRESSBUILDER, a series of setup procedures from
installing of the OS to installing several utilities can be executed automatically just by pressing keys for
confirmation.
The settings from the previous installation can also be used when re-installing the system.
It is therefore recommended to use a parameter file to set up the server.
7.1.1
How to create a parameter file
This section describes how to specify the setup information necessary for OS installation and how to create
a parameter file.
Follow the procedure described below.
Important
Do not remove EXPRESSBUILDER DVD from the drive while creating a
parameter file.
Tips
You can create a parameter file on Internet Explorer 7 or later.
1.
Start Windows.
2.
Insert the supplied EXPRESSBUILDER DVD into the optical disk drive.
3.
Click Applications.
Express5800/R120e-1M, R120e-2M
Installation Guide (Windows)
249
7. Windows OS Parameter File
Chapter 1 Installing Windows
4.
Click Create a parameter file for Windows OS.
The following window appears.
5. On the OS selection menu, select the OS to install or specify the parameter file.
When not using parameter file : Go to Step 6.
When using a parameter file
: Go to Step 7.
6. Click Manual Selection.
250
Express5800/R120e-1M, R120e-2M
Installation Guide (Windows)
7. Windows OS Parameter File
Chapter 1 Installing Windows
From the Windows list, select OS, and then click OK.
on the right side of the screen.
Click
→ Go to step 8.
7. When using the parameter file, click Load Settings.
Express5800/R120e-1M, R120e-2M
Installation Guide (Windows)
251
7. Windows OS Parameter File
Chapter 1 Installing Windows
Follow the on-screen instruction to load the parameter file (*.tre).
Click
on the right side of the screen.
→ Go to step 9.
8. Specify the setup parameters by using either of the following methods:
252
Express5800/R120e-1M, R120e-2M
Installation Guide (Windows)
7. Windows OS Parameter File
Chapter 1 Installing Windows
Use Default:
(1) Click Default.
(2) Select an edition of the OS in the Edition list.
Type the password, and then click Finish.
(3) Click
on the right side of the screen.
Express5800/R120e-1M, R120e-2M
Installation Guide (Windows)
253
7. Windows OS Parameter File
Chapter 1 Installing Windows
(4) Check the settings, and then click Save.
Save the file according to the on-screen instructions.
→ Go to step 10.
Use Custom:
(1) Click Custom.
(2) Use this menu to configure the RAID system with the RAID controller detected automatically.
254
Express5800/R120e-1M, R120e-2M
Installation Guide (Windows)
7. Windows OS Parameter File
Chapter 1 Installing Windows
When creating new logical drives
With the Skip a RAID Configuration check box cleared, click Next. Set up the logical drives in
accordance with the wizard.
Important
If you proceed with wizard, the existing RAID system is destructed and the
contents of hard disk drive will be erased.
When skipping the creation of new logical drives
Select the Skip a RAID Configuration check box, and then click Next.
(3) Check the settings specified for Basic Settings.
Modify the settings as needed, and then click Next.
(4) Check the settings specified for Partition Settings.
Modify the settings as needed, and then click Next.
Important
• Backing up user data, as needed, is recommended.
• Partition size
− Specify a partition size larger than the minimum required for installing
the operating system. (Refer to Chapter 1 (Before Starting Setup).)
− The maximum partition size is 2,097,152 MB.
• If you select Create a new partition under Partition Settings, the entire
contents of the hard disk drive will be deleted.
Express5800/R120e-1M, R120e-2M
Installation Guide (Windows)
255
7. Windows OS Parameter File
Chapter 1 Installing Windows
(5)
Enter the user information, and then click Next.
Note
Computer name and Administrator Password are required parameters.
Enter Administrator Password that satisfies the following conditions:
− Contains 6 or more characters
− Contains characters from at least three of the following categories: numbers,
uppercase letters, lowercase letters, and symbols.
Tips
The Computer name has been assigned by automatic assignment function. If
you need to assign another computer name, remove the checkmark from
"Auto", and enter the desired computer name.
If a parameter file is used for setup or if you return to a previous screen, ••••••
is displayed in the Administrator password and Reenter Administrator
password text boxes.
(6) Check the settings specified for Network Protocols.
Modify the settings as needed, and then click Next.
Tips
256
The order of entry in Custom settings may differ from the numbering of LAN ports.
Express5800/R120e-1M, R120e-2M
Installation Guide (Windows)
7. Windows OS Parameter File
Chapter 1 Installing Windows
(7) Specify the domain or workgroup.
Check the settings, modify them as needed, and then click Next.
(8) Check the settings of Windows components.
Modify the settings as needed, and then click Next.
(9) Check the settings of applications.
Modify the settings as needed, and then click Finish.
Express5800/R120e-1M, R120e-2M
Installation Guide (Windows)
257
7. Windows OS Parameter File
Chapter 1 Installing Windows
On the following screen, click
9.
on the right side of the screen.
Check the settings, and then click Save.
Save the file according to the on-screen instructions.
10. Click [OK].
258
Express5800/R120e-1M, R120e-2M
Installation Guide (Windows)
7. Windows OS Parameter File
Chapter 1 Installing Windows
11. When the following message appears, click [Yes] to complete parameter file creation.
Parameter file creation is now complete.
.
Express5800/R120e-1M, R120e-2M
Installation Guide (Windows)
259
NEC Express5800 Series
Express5800/R120e-1M, R120e-2M
Installing Bundled Software
This chapter explains the bundled software and how to install them.
1. Bundled Software for the server
Describes the bundled software to be installed in the server.
2. Bundled software Applied to PC for Management
Describes the bundled software to be installed in “PC for Management” that is used to monitor and manage
the server.
260
Express5800/R120e-1M, R120e-2M
Installation Guide (Windows)
Chapter 2 Installing Bundled Software
1.
1. Bundled Software for the Server
Bundled Software for the Server
This section explains the software bundled in the server.
1.1
NEC ESMPRO Agent (for Windows)
NEC ESMPRO Agent (for Windows) is an application used to monitor the server.
You can install it automatically when Windows OS is installed by using EXPRESSBUILDER.
When installing NEC ESMPRO Agent (for Windows) individually, see “NEC ESMPRO Agent Installation Guide
(Windows)” in EXPRESSBUILDER.
Express5800/R120e-1M, R120e-2M
Installation Guide (Windows)
261
Chapter 2 Installing Bundled Software
1.2
1. Bundled Software for the Server
NEC ESMPRO Agent Extension
You can manage the server remotely by using NEC ESMPRO Agent Extension with NEC ESMPRO Manager
monitoring the server’s BMC.
For details about NEC ESMPRO Agent Extension, see "NEC ESMPRO Agent Extension Installation Guide" in
EXPRESSBUILDER.
1.3
BMC Configuration
You can specify configuration data to the BMC of the server by using BMC Configuration.
For details about BMC Configuration, see "BMC Configuration User’s Guide" in EXPRESSBUILDER.
1.4
NEC ExpressUpdate Agent
You can easily download, manage and update the firmware or the software installed in this server by using
NEC ExpressUpdate Agent.
For details about NEC ExpressUpdate Agent, see "NEC ExpressUpdate Agent Installation Guide" in
EXPRESSBUILDER.
Important
Updates are available for some firmware and software that do not support
NEC ExpressUpdate. Refer to the following website to install these
packages.
http://www.nec.com/global/prod/express/index.html
262
Express5800/R120e-1M, R120e-2M
Installation Guide (Windows)
Chapter 2 Installing Bundled Software
1.5
1. Bundled Software for the Server
Universal RAID Utility
Universal RAID Utility is an application used to manage and monitor the following RAID Controllers:
•
•
•
•
•
N8103-161 RAID Controller (1GB, RAID 0/1/5/6)
N8103-168 RAID Controller (1GB, RAID 0/1/5/6)
N8103-172 RAID Controller (512MB, RAID 0/1)
N8103-173 RAID Controller (512MB, RAID 0/1/5/6)
N8103-174 RAID Controller (1GB, RAID 0/1/5/6)
For details about Universal RAID Utility, see "Universal RAID Utility User’s Guide" in EXPRESSBUILDER.
If the system requirements for Universal RAID Utility described in Universal RAID Utility User’s Guide differ
from User’s Guide of the server, follow User’s Guide of the server.
1.5.1
Setup of Universal RAID Utility
This section describes setup of Universal RAID Utility.
(1)
Setup for BTO (Built To Order) models
If you purchased a BTO model configured with a RAID System, Universal RAID Utility is already installed. You
do not need to install Universal RAID Utility for such models.
(2)
Setup with EXPRESSBUILDER
You can easily install Universal RAID Utility by using EXPRESSBUILDER. Universal RAID Utility is installed
along with Windows when using EXPRESSBUILDER.
(3)
Setup using Universal RAID Utility installer
The Universal RAID Utility installer can be launched from Autorun Menu of EXPRESSBUILDER. Choose
Integrated Installation and then follow the dialog box. If you want to uninstall Universal RAID Utility or install it
individually, click Applications on Autorun Menu.
•
Microsoft .NET Framwork
To use the RAID Viewer and Log Viewer, “Microsoft .NET Framework Version 2.0 to 3.5” is required.
Windows Server 2008 and Windows Server 2008 R2 include “Microsoft .NET Framework 2.0 to 3.5”.
Install “Microsoft .NET Framework Versions 2.0 to 3.5” from the following web site when using
Universal RAID Utility on Windows 2012 Server.
http://msdn.microsoft.com/en-us/library/vstudio/hh506443.aspx
(The web site explains for Windows 8, but the modules can be used for Windows 2012 Server)
1.5.2
Management by NEC ESMPRO Manager
NEC ESMPRO Manager Ver. 5.5 or later is used to remotely reference and monitor the RAID System that is
managed by Universal RAID Utility.
For details about NEC ESMPRO Manager, see “NEC ESMPRO Manager Installation Guide”.
Express5800/R120e-1M, R120e-2M
Installation Guide (Windows)
263
Chapter 2 Installing Bundled Software
1.6
1. Bundled Software for the Server
Express Report Service / Express Report Service(HTTPS)
To avoid system failures or to maintain the server quickly, Express Report Service / Express Report
Service(HTTPS) informs the support center of the failure information, preventive maintenance information by
E-Mail or modem. If you want to use this service, contact your sales representative and install NEC ESMPRO
Agent before using this service.
You can install this service with Windows OS installation when using EXPRESSBUILDER.
For details about Express Report Service / Express Report Service(HTTPS), see “Express Report Service /
Express Report Service(HTTPS) Installation Guide” in EXPRESSBUILDER.
264
Express5800/R120e-1M, R120e-2M
Installation Guide (Windows)
Chapter 2 Installing Bundled Software
1. Bundled Software for the Server
1.7 NEC Product Info Collection Utility
NEC Product Info Collection Utility can collect various information related to the server all at once. You can
collect the server information (Product Info) for maintenance by using this utility.
1.7.1
Installation
Follow the steps below to install this utility.
1.
Log on to Windows, and then insert EXPRESSBUILDER into the optical disk drive. Autorun
Menu appears automatically.
2.
Click Applications from the menu and then click Product Info Collection Utility.
The installation starts. Follow the instructions in the dialog boxes until installation is complete.
This utility is usually installed to the C:\ezclct folder.
Tips
• Log on to Windows with an account that has administrator privilege.
• The installation drive requires a free space of at least 2.5 GB.
1.7.2
Uninstallation
Uninstall the utility depending on the Windows installation type:
• Full installation :
Choose Add/Remove Programs from Control Panel and then click Product Info Collection Utility
(Vx.x.x). Follow the instructions in the dialog boxes.
• Server Core installation:
Run the following command at the command prompt:
Wmic product where name="Product Info Collection Utility" call uninstall
Express5800/R120e-1M, R120e-2M
Installation Guide (Windows)
265
Chapter 2 Installing Bundled Software
2.
2. Bundled Software Applied to PC for Management
Bundled Software Applied to PC for Management
This section describes the bundled software required to configure “PC for Management” used to manage the
server system.
2.1
NEC ESMPRO Manager
NEC ESMPRO Manager can remotely control and monitor the hardware and the RAID system of the server.
To use these features, install the bundle software for the server such as NEC ESMPRO Agent.
For details about NEC ESMPRO Manager, see NEC ESMPRO Manager Installation Guide or online help.
266
Express5800/R120e-1M, R120e-2M
Installation Guide (Windows)
Chapter 2 Installing Bundled Software
2.2
2. Bundled Software Applied to PC for Management
Express Report Service(MG)
To avoid system failures or to maintain the server quickly, Express Report Service(MG) informs the support
center of the failure information or preventive maintenance information by E-Mail or Modem.
To use this feature, NEC ESMPRO Agent is required because Express Report Service usually works with it.
If NEC ESMPRO Agent cannot be installed to the server, you can install Express Report Service(MG) into
NEC ESMPRO Manager instead of it.
For details about Express Report Service(MG), see “Express Report Service(MG) Installation Guide” in
EXPRESSBUILDER.
Express5800/R120e-1M, R120e-2M
Installation Guide (Windows)
267