1
Windows 2008
Entreprise/Standard
Installation Guide
REFERENCE
86 A1 44FA 02
NOVASCALE
NovaScale
T850 E1, T860 E1,
R440 E1, R460 E1
and R480 E1
NOVASCALE
NovaScale T850 E1,
T860 E1, R440 E1,
R460 E1 and R480 E1
Windows 2008 Entreprise/Standard
Installation Guide
Hardware
2008
BULL CEDOC
357 AVENUE PATTON
B.P.20845
49008 ANGERS CEDEX 01
FRANCE
REFERENCE
86 A1 44FA 02
Proprietary Notice and Liability Disclaimer
The information disclosed in this document, including all designs and related materials, is the valuable property of
NEC Computers and/or its licensors. NEC Computers and/or its licensors, as appropriate, reserve all patent,
copyright and other proprietary rights to this document, including all design, manufacturing, reproduction, use, and
sales rights thereto, except to the extent said rights are expressly granted to others.
To allow for design and specification improvements, the information in this document is subject to change at any
time, without notice. Reproduction of this document or portions thereof without prior written approval of NEC
Computers is prohibited.
The Bull product(s) discussed in this document are warranted in accordance with the terms of the Warranty Statement
accompanying each product. However, actual performance of each product is dependent upon factors such as
system configuration, customer data, and operator control. Since implementation by customers of each product may
vary, the suitability of specific product configurations and applications must be determined by the customer and is
not warranted by Bull.
Trademarks
NEC ESMPRO, NEC DianaScope, NEC MWA, and ExpressBuilder are trademarks or registered trademarks of NEC
Corporation.
NovaScale is a registered trademark of Bull SAS.
Adobe, and Adobe Acrobat are registered trademarks of Adobe Systems, Incorporated.
Microsoft, Microsoft Windows, Windows NT, Windows 95, Windows 98, Windows2000 and Windows Server
2003 are all registered trademarks of Microsoft Corporation.
MS-DOS is a registered trademark of Microsoft Corporation.
Intel and Xeon are registered trademarks of Intel Corporation.
All other product, brand, or trade names used in this publication are the trademarks or registered trademarks of their
respective trademark owners.
Copyright © NEC Computers SAS 2006
Suggestions and criticisms concerning the form, content, and presentation of this manual
are invited. A form is provided at the end of this manual for this purpose.
The information in this document is subject to change without notice. Bull will not be liable for errors contained herein, or for
incidental or consequential damages in connection with the use of this material.
User Guide
www.bull.com
Table of Contents
Table of Contents
. . . . . . . . . . . . . . . . . . . . . . . . . . . . . . . . . . . . . . . . . . . . .5
Introduction . . . . . . . . . . . . . . . . . . . . . . . . . . . . . . . . . . . . . . . . . . . . . . . . . . . . . . . . . . . . . . . . . . 7
Microsoft® Windows Server® 2008 ............................................................................... 7
Text Conventions ............................................................................................................ 7
Overview . . . . . . . . . . . . . . . . . . . . . . . . . . . . . . . . . . . . . . . . . . . . . . . . . . . . .8
Before You Start
. . . . . . . . . . . . . . . . . . . . . . . . . . . . . . . . . . . . . . . . . . . . . .9
Prerequisites for Installing Microsoft® Windows Server® 2008 . . . . . . . . . . . . . . . . . . . . . . . . 9
Important Instructions . . . . . . . . . . . . . . . . . . . . . . . . . . . . . . . . . . . . . . . . .10
Windows Activation . . . . . . . . . . . . . . . . . . . . . . . . . . . . . . . . . . . . . . . . . . . . . . . . . . . . . . . . . . 10
Understanding Activation and Registration .................................................................. 10
Supported Optional Boards . . . . . . . . . . . . . . . . . . . . . . . . . . . . . . . . . . . . . . . . . . . . . . . . . . . . 11
BULL NovaScale T850 E1
BULL NovaScale T860 E1
BULL NovaScale R440 E1
BULL NovaScale R460 E1
BULL NovaScale R480 E1
........................................................................................... 11
........................................................................................... 11
........................................................................................... 11
........................................................................................... 11
........................................................................................... 12
Updating Your System . . . . . . . . . . . . . . . . . . . . . . . . . . . . . . . . . . . . . . . . . . . . . . . . . . . . . . . . 12
Reinstalling an Operating System in a Dynamic Disk . . . . . . . . . . . . . . . . . . . . . . . . . . . . . . . 12
Installing on the Mirrored Volume . . . . . . . . . . . . . . . . . . . . . . . . . . . . . . . . . . . . . . . . . . . . . . . 12
Magneto-Optical Drive . . . . . . . . . . . . . . . . . . . . . . . . . . . . . . . . . . . . . . . . . . . . . . . . . . . . . . . . 13
Tape Media . . . . . . . . . . . . . . . . . . . . . . . . . . . . . . . . . . . . . . . . . . . . . . . . . . . . . . . . . . . . . . . . . 13
Additional Peripheral Devices (such as RDX) . . . . . . . . . . . . . . . . . . . . . . . . . . . . . . . . . . . . . 13
BIOS Update . . . . . . . . . . . . . . . . . . . . . . . . . . . . . . . . . . . . . . . . . . . . . . . . . . . . . . . . . . . . . . . . 14
RAID Configuration . . . . . . . . . . . . . . . . . . . . . . . . . . . . . . . . . . . . . . . . . . . . . . . . . . . . . . . . . . . 14
System Partition Size . . . . . . . . . . . . . . . . . . . . . . . . . . . . . . . . . . . . . . . . . . . . . . . . . . . . . . . . . 14
Microsoft® Windows Server® 2008 64-bit (x64) Edition ............................................ 14
Microsoft® Windows Server® 2008 32-bit (x86) Edition ............................................ 15
BitLocker . . . . . . . . . . . . . . . . . . . . . . . . . . . . . . . . . . . . . . . . . . . . . . . . . . . . . . . . . . . . . . . . . . . 16
NEC ESMPRO . . . . . . . . . . . . . . . . . . . . . . . . . . . . . . . . . . . . . . . . . . . . . . . . . . . . . . . . . . . . . . . 17
Installing Microsoft® Windows Server® 2008 . . . . . . . . . . . . . . . . . . . . . .18
Updating the System . . . . . . . . . . . . . . . . . . . . . . . . . . . . . . . . . . . . . . . . . .22
Installing Drivers and Configuring Driver Settings
. . . . . . . . . . . . . . . . .24
LAN Driver and PROSet . . . . . . . . . . . . . . . . . . . . . . . . . . . . . . . . . . . . . . . . . . . . . . . . . . . . . . . 24
Using the Intel® Pro/1000 PT Server Adapter after a System Update ........................ 24
For a server running a full installation ...................................................................... 24
For a server running a Server Core installation ........................................................ 25
Optional Network Boards . . . . . . . . . . . . . . . . . . . . . . . . . . . . . . . . . . . . . . . . . . . . . . . . . . . . . . 25
Adapter Fault Tolerance (AFT)/ Adaptive Load Balancing (ALB) . . . . . . . . . . . . . . . . . . . . . 26
Creating a Team ............................................................................................................ 26
Removing a Team ......................................................................................................... 27
5
User Guide
Network Driver
www.bull.com
. . . . . . . . . . . . . . . . . . . . . . . . . . . . . . . . . . . . . . . . . . . . . . . . . . . . . . . . . . . . . . 28
Changing a link speed ................................................................................................... 28
SCSI Controller . . . . . . . . . . . . . . . . . . . . . . . . . . . . . . . . . . . . . . . . . . . . . . . . . . . . . . . . . . . . . . 28
Adaptec SCSI Card 29320ALP
Adaptec SCSI Card 29160LP
Adaptec SCSI card 29320LPE ...................................................................................... 28
Disk Array Controller . . . . . . . . . . . . . . . . . . . . . . . . . . . . . . . . . . . . . . . . . . . . . . . . . . . . . . . . . 28
LSI Logic MegaRAID SAS 8480E .............................................................................. 28
Fibre Channel Controller . . . . . . . . . . . . . . . . . . . . . . . . . . . . . . . . . . . . . . . . . . . . . . . . . . . . . . 28
Emulex LightPulse® LPe1150
Emulex LightPulse® LPe11002 ................................................................................... 28
Graphics Accelerator . . . . . . . . . . . . . . . . . . . . . . . . . . . . . . . . . . . . . . . . . . . . . . . . . . . . . . . . . 29
Fault Recovery Settings . . . . . . . . . . . . . . . . . . . . . . . . . . . . . . . . . . . . . . .30
Memory Dump (Debug Information) . . . . . . . . . . . . . . . . . . . . . . . . . . . . . . . . . . . . . . . . . . . . . 30
User Mode Process Dump . . . . . . . . . . . . . . . . . . . . . . . . . . . . . . . . . . . . . . . . . . . . . . . . . . . . . 33
Network Monitor Setup . . . . . . . . . . . . . . . . . . . . . . . . . . . . . . . . . . . . . . . . . . . . . . . . . . . . . . . . 34
Network Trace Capture ................................................................................................. 34
Activating Windows . . . . . . . . . . . . . . . . . . . . . . . . . . . . . . . . . . . . . . . . . . .35
For a server running a full installation . . . . . . . . . . . . . . . . . . . . . . . . . . . . . . . . . . . . . . . . . . . 35
For a server running a Server Core installation . . . . . . . . . . . . . . . . . . . . . . . . . . . . . . . . . . . . 36
Troubleshooting
. . . . . . . . . . . . . . . . . . . . . . . . . . . . . . . . . . . . . . . . . . . . .37
Upgrading to Microsoft® Windows Server® 2008 . . . . . . . . . . . . . . . . . . .40
Overview . . . . . . . . . . . . . . . . . . . . . . . . . . . . . . . . . . . . . . . . . . . . . . . . . . . . . . . . . . . . . . . . . . . 40
Before You Upgrade . . . . . . . . . . . . . . . . . . . . . . . . . . . . . . . . . . . . . . . . . . . . . . . . . . . . . . . . . . 41
Important Instructions ................................................................................................... 41
Graphic Accelerator Driver . . . . . . . . . . . . . . . . . . . . . . . . . . . . . . . . . . . . . . . . . . . . . . . . . . . .
PROSet . . . . . . . . . . . . . . . . . . . . . . . . . . . . . . . . . . . . . . . . . . . . . . . . . . . . . . . . . . . . . . . . . . . . .
Upgrading Windows . . . . . . . . . . . . . . . . . . . . . . . . . . . . . . . . . . . . . . . . . . . . . . . . . . . . . . . . . .
Installing Drivers after the Upgrade . . . . . . . . . . . . . . . . . . . . . . . . . . . . . . . . . . . . . . . . . . . . .
42
42
43
45
Installing a driver for the RAID Controller .................................................................. 45
LSI Logic MegaRAID SAS 8708EM2 RAID Controller ......................................... 45
LSI Logic MegaRAID SAS PCI EXPRESS ROMB (on the mother board) ............ 45
Installing a driver for the ATA/ATAPI Controller ....................................................... 46
For the BULL NovaScale/T850 E1, BULL NovaScale R440 E1, or R460 E1 ........ 46
Installing a driver for the SCSI controller .................................................................... 46
Adaptec SCSI card 29320LPE / 29320ALP ............................................................. 46
Installing a SCSI Controller .......................................................................................... 47
Adaptec SCSI Card 29160LP ................................................................................... 47
Installing a Fibre Channel controller ............................................................................ 47
Emulex LightPulse® LPe1150 , Emulex LightPulse® LPe11002 .......................... 47
6
User Guide
www.bull.com
Introduction
This document provides step-by-step guidance for installing Microsoft ®
Windows Server ® 2008 Standard Edition and Microsoft ® Windows Server® 2008
Enterprise Edition ("Microsoft® Windows Server® 2008") on the BULL NovaScale
T850 E1, T860 E1, R440 E1, R460 E1 and R480 E1 servers.
Before you install Microsoft® Windows Server® 2008, read this document carefully.
Microsoft® Windows Server® 2008
■ Microsoft® Windows Server® 2008 Standard 64-bit (x64) Edition
■ Microsoft® Windows Server® 2008 Enterprise 64-bit (x64) Edition
■ Microsoft® Windows Server® 2008 Standard 32-bit (x86) Edition
■ Microsoft® Windows Server® 2008 Enterprise 32-bit (x86) Edition
Caution
For the beta version of Microsoft ® Windows Server ® 2008
Hyper-V, no support service is available.
Text Conventions
The following conventions are used throughout this manual.
Warning
Warnings alert you to situations that could result in serious personal injury or loss of life.
Caution
Cautions indicate situations that can damage the system hardware or software.
Note: give important information about the material being
described.
7
User Guide
www.bull.com
Overview
The Microsoft® Windows Server® 2008 installation flow is provided below. Be sure to
select "clean installation" when you install Microsoft® Windows Server® 2008 on your
system.
1. See “Before You Start” on page 9 and “Important Instructions” on page 10.
2. See “BIOS Update” on page 14.
3. “Installing Microsoft® Windows Server® 2008” on page 18.
■ “If you have selected a full installation” on page 20: After login, initial
configuration tasks appear. Enter user information.
■ “If you have selected a Server Core installation” on page 21: After login,
enter user information when prompted to do so.
4. “Installing Drivers and Configuring Driver Settings” on page 24.
5. Configuring “Fault Recovery Settings” on page 30.
The installation is complete.
8
User Guide
www.bull.com
Before You Start
Before installing Microsoft® Windows Server® 2008, make sure of your hardware
configuration, including the RAID configuration according to the User's Guide or the
other manuals of the server stored in ExpressBuilder.
Prerequisites for Installing Microsoft®
Windows Server® 2008
To install Microsoft® Windows Server® 2008, you need the following:
■ Microsoft® Windows Server® 2008 Standard /Microsoft® Windows Server® 2008
Enterprise Installation Guide (this manual).
■ The Microsoft® Windows Server® 2008 installation medium ("Microsoft®
Windows Server® 2008 DVD-ROM")
- The User's Guide
(Start the ExpressBuilder disc, and open → Read Document on the menu.)
- The User’s Guide, available on the ExpressBuilder.
Notes: to access the User’s guide, proceed as follows:
■ Insert
the
ExpressBuilder
autorun_menu.exe
disc,
click
Run
■ Click Read documents,
■ In the Documents for each model section, click the
requested model.
9
User Guide
www.bull.com
Important Instructions
Before you install Microsoft® Windows Server® 2008, read this chapter carefully.
Windows Activation
Understanding Activation and Registration
Activation is mandatory and completely anonymous. It ensures that the product is not
installed on more than the limited number of computers allowed in the software’s end
user license agreement.
If you are prompted to activate Microsoft® Windows Server® 2008, please do so by
entering the physical product key that can be found on your Certificate of Authenticity
(COA) label.
Registration is optional, and it ensures that you receive product support, product update
information, and other benefits. Personal information (for example, «contact»
information such as an email address) is required if you decide to register.
Note: To use the on-line registration process, an active
Internet connection must be available.
For more details, see “Activating Windows”, page 35.
Caution
■ Activate Microsoft® Windows Server® 2008 within 30 days
after installation, or the system may be locked after these initial 30 days.
■ Use the Virtual Product Key to activate Microsoft®
Windows Server® 2008 in a virtual operating system envir o n m e n t . Yo u c a n n o t u s e i t t o i n s t a l l M i c r o s o f t ®
Windows Server® 2008 on a physical server.
10
User Guide
www.bull.com
Supported Optional Boards
The Driver Set contains the drivers for the following optional boards:
BULL NovaScale T850 E1
■ LSI Logic MegaRAID SAS 8708EM2 RAID Controller (128 MB, RAID 0/1) and
equivalent
■ LSI Logic MegaRAID SAS 8708EM2 RAID Controller (128 MB, RAID 0/1/5/6)
■ LSI Logic MegaRAID SAS 8708EM2 RAID Controller (256 MB, RAID 0/1/5/6)
■ Adaptec SCSI Card 29320ALP
■ Adaptec SCSI Card 29160LP
■ Adaptec SCSI card 29320LPE
BULL NovaScale T860 E1
■ LSI Logic MegaRAID SAS 8708EM2 RAID Controller (128 MB, RAID 0/1) and
equivalent
■ LSI Logic MegaRAID SAS 8708EM2 RAID Controller (128 MB, RAID 0/1/5/6)
■ LSI Logic MegaRAID SAS 8708EM2 RAID Controller (256 MB, RAID 0/1/5/6)
■ Adaptec SCSI Card 29320ALP
■ Adaptec SCSI Card 29160LP
■ Adaptec SCSI card 29320LPE
■ Emulex LightPulse® LPe1150 Fibre Channel controller
■ Emulex LightPulse® LPe11002 Fibre Channel controller (2ch)
BULL NovaScale R440 E1
■ LSI Logic MegaRAID SAS 8708EM2 RAID Controller (128 MB, RAID 0/1) or
equivalent
■ LSI Logic MegaRAID SAS 8708EM2 RAID Controller (128 MB, RAID 0/1/5/6)
■ LSI Logic MegaRAID SAS 8708EM2 RAID Controller (256 MB, RAID 0/1/5/6)
■ Adaptec SCSI Card 29320ALP
■ Adaptec SCSI Card 29160LP
■ Adaptec SCSI card 29320LPE
■ Emulex LightPulse® LPe1150 Fibre Channel controller
■ Emulex LightPulse® LPe11002 Fibre Channel controller (2ch)
BULL NovaScale R460 E1
■ LSI Logic MegaRAID SAS 8708EM2 RAID Controller (128 MB, RAID 0/1) and
equivalent
■ LSI Logic MegaRAID SAS 8708EM2 RAID Controller (256 MB, RAID 0/1/5/6)
■ Adaptec SCSI Card 29320ALP
11
User Guide
■
■
■
■
www.bull.com
Adaptec SCSI Card 29160LP
Adaptec SCSI card 29320LPE
Emulex LightPulse® LPe1150 Fibre Channel controller
Emulex LightPulse® LPe11002 Fibre Channel controller (2ch)
BULL NovaScale R480 E1
■
■
■
■
■
LSI Logic MegaRAID SAS PCI Express ROMB, on the mother board
LSI Logic MegaRAID SAS 8480E RAID Controller
Emulex LightPulse® LPe1150
Emulex LightPulse® LPe11002
Intel® Pro/1000 PT Server Adapter
Updating Your System
After Microsoft® Windows Server® 2008 has been installed, you need to update your
system using the Driver Set. To update your system, see “Updating the System”,
page 22.
Reinstalling an Operating System in a Dynamic Disk
A basic disk that has been upgraded to a dynamic disk may contain an additional
partition other than the partition where you reinstall the operating system. To reinstall
the operating system in the dynamic disk without removing the old partition(s):
■ Choose the partition where an old operating system was located.
■ To format the partition, choose Use the current File System.
Installing on the Mirrored Volume
When re-installing the OS to a hard disk drive which has been upgraded to Dynamic
Disk, only the simple dynamic volume is available for installation.
To install the OS on a volume that is mirrored using Disk Management, proceed as
follows:
1. Invalidate the mirroring.
2. Reset to the basic disk before the installation.
3. Validate the mirroring again after the installation.
Note: You can create, invalidate, or delete the mirror
volume by using Disk Management in Computer Management.
12
User Guide
www.bull.com
Magneto-Optical Drive
If you try to set the current file system to NTFS on your system with MO drives
connected, you may fail to format the file system.
To format correctly, disconnect the MO drives from your system and repeat the
installation procedure.
Tape Media
Remove all tapes from the tape drives before you install.
Additional Peripheral Devices (such as RDX)
Some peripheral devices need to be removed or disabled before starting setup. Refer to
the instruction manual delivered with the peripheral device for pertinent information,
and proceed accordingly.
13
User Guide
www.bull.com
BIOS Update
To install Microsoft® Windows Server® 2008, you may need to update your BIOS.
To check if your system needs the BIOS update, go to:
http://support.bull.com
For the update procedure, refer to the Readme.txt available on the above website.
RAID Configuration
To use the hard disk drives in RAID configuration, configure the RAID system before
installing Microsoft® Windows Server® 2008.
To use the RAID controller (LSI MegaRAID SAS PCI EXPRESS ROMB) embedded
on the motherboard, refer to "RAID System Configuration" in the User's Guide of the
server.
To use the optional RAID controller, refer to the manual delivered with the controller.
System Partition Size
Use the following formula to calculate the total partition size required for Microsoft®
Windows Server® 2008:
Microsoft® Windows Server® 2008 64-bit (x64) Edition
Required partition size = size required to install OS + paging file size + dump file size
+ application size
Size required to install OS = 11,600MB (Full Installation)
or = 4,100MB (Server Core Installation)
Paging file size (recommended) = Installed memory size x 1.5
Dump file size = Installed memory size + 300MB
Application size = Required size
Caution
■ The above paging file size is recommended to collect debug
information (memory dump). The initial size of the paging file
must be large enough to save dump files in the boot volume,
14
User Guide
www.bull.com
or the lack of virtual memory may result in a failure to collect
debug information. Ensure that your system has a sufficient
paging file size.
■ Regardless of the mounted memory size and the Write
debugging information (type of memory dump), the maximum size of the dump file is the mounted memory size + 300
MB".
■ To install additional applications, add a disk volume for the
applications.
Example:
A partition size required for a system with an installed memory size of 512 MB and a
full installation of the operating system:
11,600MB + (512MB x 1.5) + (512MB + 300MB) + application size = 13,180MB +
application size.
If the provided partition size is smaller than the sum of size required to install the OS
and paging file size, expand the partition size or provide a larger disk. If your system
does not have a sufficient dump file size, divide the required file space into multiple
disks by performing the steps below:
1. Set the system partition to a sufficient size to install the OS and paging file.
2. See “Fault Recovery Settings”, page 30 to write the debug information of the
dump file into another disk.
If there is not enough disk space to write the debug information, add another disk for
Dump file.
Microsoft® Windows Server® 2008 32-bit (x86) Edition
Required partition size = size required to install OS + paging file size + dump file size
+ application size
Size required to install OS = 6,300MB (Full Installation)
or = 2,200MB (Server Core Installation)
Paging file size (recommended) = Installed memory size x 1.5
Dump file size = Installed memory size + 300MB
Application size = Required size
Caution
■ The above paging file size is recommended to collect debug
information (memory dump). The initial size of the paging file
must be large enough to save dump files in the boot volume,
15
User Guide
www.bull.com
or the lack of virtual memory may result in a failure to collect
debug information. Ensure that your system has a sufficient
paging file size.
■ The maximum paging file size allowed per partition is
4095 MB. If the value of the installed memory size x 1.5
exceeds 4095 MB, set the paging file size to 4095 MB.
■ When the installed memory size exceeds 2GB, the maximum dump file size 2048MB + 300MB.
■ To install additional applications, add a disk volume for the
applications.
Example:
A partition size required for a system with an installed memory size of 512 MB and a
full installation of the operating system:
6,300MB + (512MB x 1.5) + 512MB + 300MB + application size = 7,880MB +
application size.
If the partition where the operating system is installed is smaller than the sum of
necessary size to install OS and paging file size", expand the partition size or provide a
larger disk. If your system does not have a sufficient dump file size, divide the required
file space into multiple disks by performing the steps below:
1. Set the partition size to the sum of size required to install OS and paging file
size".
2. See “Fault Recovery Settings”, page 30 to write the debug information of the
dump file into another disk.
If there is not enough disk space to write the debug information, add another disk for
Dump file.
BitLocker
If you use BitLocker, note the following:
■ Before you install Microsoft® Windows Server® 2008, create the two partitions:
- System partition for a loader
- Boot partition for the operating system
Note: For more information, see the documentation in
Microsoft TechNet: Windows BitLocker Drive Encryption Stepby-Step Guide.
16
User Guide
www.bull.com
■ Be sure to keep the recovery password secure. Do not keep it around a server
running BitLocker.
Caution
Without the recovery password, you cannot start the operating
system and see the partition content encrypted by BitLocker.
The recovery password may be needed when you start the
operating system after performing the following:
- – Replace the motherboard
- – Initialize the TPM
- – Change the BIOS setting
■ Microsoft® Windows Server® 2008 is not installed in the partition encrypted by
BitLocker.
NEC ESMPRO
W h e n M i c r o s o f t ® Wi n d o w s S e r v e r ® 2 0 0 3 i s u p g r a d e d t o M i c r o s o f t ®
Windows Server® 2008, the WDT (watch dog timer) and shutdown monitor settings
will be changed back to the default. See the current settings in the NEC ESMPRO
Agent control panel and change the settings, if necessary.
To use NEC ESMPRO Agent on a server running Microsoft® Windows Server® 2008,
see the NEC ESMPRO support information.
17
User Guide
www.bull.com
®
Microsoft
®
Installing
Windows Server 2008
This chapter provides the steps to install Microsoft® Windows Server® 2008.
1. Turn on your system.
Caution
To install Microsoft® Windows Server® 2008, you may need to
update BIOS. To check if your system needs a BIOS update, go
to: http://support.bull.com
2. Insert the Microsoft® Windows Server® 2008 DVD-ROM into your DVDROM drive.
3. Restart the system.
To restart the system, press Ctrl + Alt + Del or turn off the system once, and
turn it on again.
Caution
When prompted to press any key to boot from CD or DVD, click
Enter while the message is displayed. If the Windows installation screen (shown in step 4) does not appear, turn off the system, and turn it on again.
4.
5.
6.
7.
8.
The DVD-ROM starts.
Select the Language to install, the Time and currency format, and the Keyboard
or input method from the drop-down lists, and click Next.
When prompted to read the Licence agreement, take and read the document
delivered with your computer, and click Yes.
Click the Install now button.
The installation starts.
If prompted to do so, enter your product key, and click Next.
Click on the edition of the Windows operating system that you want to install,
and check I have selected the edition of Windows that I purchased. Click Next.
The list is dynamically generated based on the Product Key.
18
User Guide
www.bull.com
9. Read the license terms carefully. If you agree, check I accept the license terms,
and click Next.
10. Click Custom (Advanced). The Upgrade installation is not available at this
time.
11. The "Where do you want to install Windows?" screen is displayed.
If you are using the LSI Logic MegaRAID SAS 8708EM2 RAID Controller,
go to step 12. If not, go to step 13.
12. Insert the ExpressBuilder disc, click Load Driver, Browse the disc to display
the following paths, and click OK.
■ Microsoft® Windows Server® 2008 64-bits (x64) Editions:
\00x\W2K8\DRIVERS\DRIVERSET\winnt\oemfd\ws2008x64\fd1
■ Microsoft® Windows Server® 2008 32-bits (x86):
\00x\W2K8\DRIVERS\DRIVERSET\winnt\oemfd\ws2008\fd1
Note: in \00x\, x is a variable.
13. Select the disk where the installation partition will be created, and click Drive
options (advanced).
Note: If the partition is already created, go to step 16.
14. Click New, enter a partition size, and click Apply.
15. Select the partition created in step 14, and click Format.
16. Select the partition created, and click Next.
The installation starts automatically.
Note: Please wait until the installation is complete, do not
shutdown or press any key on your system. The system may
automatically reboot several times during the process.
19
User Guide
www.bull.com
17. When prompted to do so, log on to the system. The steps vary depending on the
edition you selected in step 8.
If you have selected a full installation
a.
You will be prompted to set or change the password before you log on.
Click OK.
b.
Change the password, and click
.
Note: your password must be composed of 10 characters,
containing lower cases, upper cases and one complex
character.
c.
d.
Once the password has been changed, click OK to log on.
In the Initial Configuration Tasks window, enter the relevant user
information.
20
User Guide
www.bull.com
If you have selected a Server Core installation
b.
c.
d.
Once the Server Core installation of Microsoft® Windows Server® 2008
is complete, press Ctrl + Alt + Del to log on.
Click Other User.
In place of User name, enter Administrator.
Keep the word Password as it is. Do not change it at this step.
e.
f.
g.
Click .
When prompted to change the password, click OK.
Keep the word Password, and in place of New password, enter your new
a.
password, enter it again in Confirm Password, and click
.
Note: your password must be composed of 10 characters,
containing lower cases, upper cases and one complex
character.
h.
i.
Once the password has been changed, click OK.
At the command prompt, enter user information.
Note: For more information, refer to the Microsoft®
Windows Server® 2008 Help.
18. See “Installing Drivers and Configuring Driver Settings”, page 24.
19. See “Fault Recovery Settings”, page 30.
The installation is complete.
21
User Guide
www.bull.com
Updating the System
After installing Microsoft® Windows Server® 2008, we recommend you to update your
system by following the steps in this chapter.
Caution
You should update your system if you have:
■ Changed the system configuration (Added or removed
optional built-in devices: If you are prompted to restart the
system after the system configuration has been changed,
click No, and update the system.)
■ Recovered the system by using a recovery process
■ Restored the system by using a backup tool
1. Log on to the system using an administrator account and insert the
ExpressBuilder disc into your drive.
2. Depending on your Windows 2008 installation:
- Full installation:
Run
\00x\W2K8\drivers\driverset\winnt\bin\oschk\oschk.bat", and click OK.
- Server Core installation:
1. Enter the following command from the command prompt:
cd ‘Optical disc drive letter ’:\00x\W2K8\DRIVERS\DRIVERSET\winnt\bin\oschk.\
2. Enter the following command and click Enter: oschk.bat.
Note: in \00x\, x is a variable.
22
User Guide
www.bull.com
3. The following box appears.
4. Read the message, and then click OK
The update starts.
Note: The following box appears during the update if you
have
deployed
a
full
installation
of
Microsoft®
®
Windows Server 2008. Wait until the update completes.
5. When the following message appears, click OK to restart the system.
The system has been updated.
6. Restart your computer.
23
User Guide
www.bull.com
Installing Drivers and
Configuring Driver Settings
This chapter provides the procedures for installing the drivers for the optional boards
supported by the servers.
For other options that are not described in this chapter, see the User's Guide attached to
these options.
LAN Driver and PROSet
Note: To change the LAN driver and PROSet settings, log
on to the system from a local console using an administrator
account. Remotely changing the settings by using the operating
system’s remote desktop feature is not supported.
Using the Intel® Pro/1000 PT Server Adapter after a System Update
To use the Intel® Pro/1000 PT Server Adapter after updating your system, you must
first uninstall the LAN driver and PROSet, and update your system while the Intel®
Pro/1000 PT Server Adapter connected.
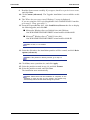
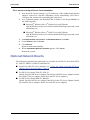
For a server running a full installation
1. Remove a team of network adapters.
Before you remove, note down the current settings (e.g. IP addresses) of the
standard and optional adapters teamed for network redundancy. Configure the
settings after reinstalling the LAN driver and PROSet.
To remove the team, see “Adapter Fault Tolerance (AFT)/ Adaptive Load
Balancing (ALB) ”, page 26.
2. In Control Panel, click Uninstall Program.
3. Double-click Intel(R) Network Connections 12.4.38.0.
Intel(R) Network Connections (RemoveOptions) appears.
4. In Remove Options, click Remove.
Intel(R) Network Connections - Remove Software appears.
5. Select Yes.
The removal starts automatically.
6. When InstallShield Wizard complete appears. Click Finish.
Restart the system.
24
User Guide
www.bull.com
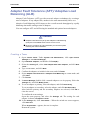
For a server running a Server Core installation
1. Note down the current settings (e.g. IP addresses) of the standard and optional
adapters teamed for network redundancy before uninstalling LAN driver.
Configure the settings after reinstalling the LAN driver.
2. At a command prompt, run DxSetup.EXE available on the ExpressBuilder at
the following path:
■ Microsoft® Windows Server® 2008 64-bit (x64) Editions:
\00x\W2K8\drivers\driverset\winnt\ws2008x64\dl5\apps\prosetdx\vistax
64\DxSetup.exe
■ Microsoft® Windows Server® 2008 32-bit (x86) Editions:
\00x\W2K8\drivers\driverset\winnt\ws2008x64\dl5\apps\prosetdx\vista3
2\DxSetup.exe
3. In Intel(R) Network Connections - InstallShield Wizard, click Next.
4. Select Remove, and click Next.
5. Click Remove.
Removal starts automatically.
6. When InstallShield Wizard Completed appears, click Finish.
Restart the system.
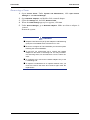
Optional Network Boards
The following optional network boards are available for the BULL NovaScale/T850
E1, T860 E1, R440 E1, R460 E1 and R480 E1.
■ Intel® Pro/1000 PT Server Adapter, see “Using the Intel® Pro/1000 PT Server
Adapter after a System Update”, page 24.
■ For BULL NovaScale/T860 E1,T850 E1:
[Intel® Pro/1000 MF Server Adapter/ Intel® Pro/1000 MT Server Adapter/ Intel®
Pro/1000 GT Server Adapter/ Intel® Pro/1000 PT Server Adapter]
■ For BULL NovaScale/R440 E1, R460 E1:
[Intel® Pro/1000 MT Server Adapter/ Intel® Pro/1000 GT Server Adapter/ Intel®
Pro/1000 PT Server Adapter/ Intel® Pro/1000 PT Server Adapter]
25
User Guide
www.bull.com
Adapter Fault Tolerance (AFT)/ Adaptive Load
Balancing (ALB)
Adapter Fault Tolerance (AFT) provides network adapter redundancy by creating a
team of adapters. If any adapter fails, another in the team automatically takes over.
Adaptive Load Balancing (ALB) improves the overall network throughput by equally
balancing data traffic among a team of adapters.
You can configure AFT and ALB using the standard and optional network adapters.
Caution
■ Adapter Fault Tolerance (AFT) and Adaptive Load Balancing
(ALB) are not available when Server Core is in use.
■ Be sure to configure AFT and ALB after you boot the system
following the driver installation.
Creating a Team
1. Open Control Panel. Under System and Maintenance, click Open Device
Manager to start Device Manager.
2. Open Network adapters, and double-click Intel(R)~.
3. Select the Teaming tab, select Team adapter with other adapters, and click New
Team….
4. Type a team name, and click Next.
5. Confirm the adapters to include in the team, and click Next.
6. Select Adapter Fault Tolerance or Adaptive Load Balancing as a team mode, and
click Next.
7. Click Finish.
8. In Device Manager, double-click a teamed adapter to see its property. Select the
Settings tab, and click Modify Team….
9. To set an adapter to primary, select the adapter, and click Set Primary.
To set an adapter to secondary, select the adapter, and click Set Secondary.
After both the primary and the secondary adapters are selected, click OK to
close the screen.
To confirm the team settings:
Open the team property, and select the Settings tab. The setting for each
adapter is shown in Adapters in team.
10. In the Settings tab, click Test Switch.... When the switch test screen appears,
click Run Test.
When No problems ∼ appears, the test is complete.
Restart the system.
26
User Guide
www.bull.com
Removing a Team
1. Open Control Panel. Under System and Maintenance, click Open Device
Manager to start Device Manager.
2. Open Network adapters, and double-click a teamed adapter.
3. Select the Settings tab, and click Remove Team.
4. When the Team Settings pop-up box appears, click Yes.
5. Under Device Manager, go to Network adapters. Make sure that no adapter is
teamed.
Restart the system.
Caution
■ Adapter Fault Tolerance (AFT) and Adaptive Load Balancing
(ALB) are not available when ServerCore is in use.
■ Be sure to configure AFT and ALB after you boot the system
following the driver installation.
■ To use AFT, we recommend you to connect the network
adapters to the same L2 switching hub. You may use different switching hubs, but cascade them over the same network.
■ To configure ALB, connect the network adapters only to the
L2 switching hub.
■ To replace a motherboard or an optional network card, you
must first remove the team and create it again after the
replacement.
27
User Guide
www.bull.com
Network Driver
Changing a link speed
Follow the steps below to set a link speed and duplex mode. To set an IP address, make
sure that the Internet Protocol Version (TCP/IP) box is checked.
1. Open Control Panel. Under System and Maintenance, click Open Device
Manager to start Device Manager.
2. Open Network adapters, and double-click Intel(R)~.
3. Click Link Speed, and set the same values for Speed and Duplex as those for the
switching hubs.
4. In the Property dialog box, click OK.
SCSI Controller
Adaptec SCSI Card 29320ALP
Adaptec SCSI Card 29160LP
Adaptec SCSI card 29320LPE
You do not need to install the driver manually, it is automatically installed by Windows
Plud-and-Play.
Disk Array Controller
LSI Logic MegaRAID SAS 8480E
You do not need to install the driver manually, it is automatically installed by Windows
Plug-and-Play.
Fibre Channel Controller
Emulex LightPulse® LPe1150
Emulex LightPulse® LPe11002
You do not need to install the driver manually, it is automatically installed by Windows
Plud-and-Play.
28
User Guide
www.bull.com
Graphics Accelerator
The driver for the standard graphics accelerator is installed automatically during the
system update.
Note: The graphics accelerator driver is supported only on
a server running a full installation. Use VGA on a server running
a Server Core installation.
To reinstall only the driver, perform the steps below:
1. Go to Start, select Programs, select Accessories, and click Windows Explorer.
Insert your Driver Set into your drive.
2. Double-click the SETUP.EXE icon in the following directory:
\00x\W2K8\drivers\driverset\winnt\ws2008\video
For the Microsoft® Windows Server® 2008 64-bit (x64) Edition, double-click
the SETUP.EXE icon in the following directory:
\00x\W2K8\drivers\driverset\winnt\ws2008x64\video
3. Follow the messages to proceed with the reinstallation.
If the message "Digital Signature could not been found". appears, click OK to
continue the installation.
4. The installation is complete.
Restart the system.
29
User Guide
www.bull.com
Fault Recovery Settings
This chapter provides the procedures for configuring fault recovery settings.
Memory Dump (Debug Information)
This section describes the procedures for collecting memory dump (debug information)
in the server.
Caution
The maintenance service representative is in charge of collecting memory dump. Customers need only to specify the memory
dump.
If any problem occurs after specifying the memory dump
according to the process below, a message informing you that
the system is short of virtual memory may appear. In this case,
do not restart the system. If you restart the system, the memory
dump may not be stored correctly.
Follow the steps below to configure the memory dump setting.
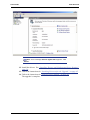
1. Go to Start, select Control Panel, and click System.
The System dialog box appears.
2. Click Advanced system Settings.
The System Properties dialog box appears.
3. On the Advanced tab, in the Startup and Recovery section, click Settings….
4. In the "Dump file" box, enter the path to save the debug information.
Example: If you name the debug information MEMORY.DMP and save it in
the D drive:
D: \MEMORY.DMP
Caution
■ Windows Server 2008 64-bit (x64) Edition
- We recommend you to select Complete Memory
Dump in the Write debugging information box. When
the installed memory exceeds 2GB, Complete Memory
Dump is not displayed in the box. In this case, select
Kernel Memory Dump.
30
User Guide
www.bull.com
- Select a drive with a size of the installed memory + 300
MB.
- When the installed memory exceeds 2GB due to
added memory, change the Write debugging information to Kernel Memory Dump before you add memory.
After you add memory, the memory dump size may
change. Make sure that the drive to save the memory
dump still has enough space.
■ Windows Server 2008 32-bit (x86) Edition
- We recommend you to specify "Complete Memory
Dump" to write the debug information. If the mounted
memory size is larger than 2GB, "Complete Memory
Dump" cannot be specified; in this case, specify "Kernel Memory Dump" instead.
- Select a drive with a size of the installed memory +
300MB". In case of the memory capacity is more than
2GB, select a free area of "2048+300MB" or more).
- When the installed memory exceeds 2GB due to the
added memory, change the write debugging information to
Kernel Memory Dump before you add memory. After you
add memory, the memory dump size may change. Make
sure that the drive to save the memory dump still has
enough space.
5.
6.
7.
8.
On the Advanced tab, in the Performance section, click Settings....
On the Performance Options window, click the Advanced tab.
In the Virtual memory section, click Change….
Uncheck the Automatically manage paging file size for all drives box, and check
Custom size.
31
User Guide
www.bull.com
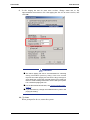
9. In the Paging file size for each drive section, change Initial size to the
Recommended size shown in the Total paging file size for all drives section, and
click OK.
Caution
■ The above paging file size is recommended for collecting
debug information (memory dump). The boot volume
requires the initial paging file size that is large enough to
save dump files, or the lack of virtual memory may result in a
failure to collect debug information. Ensure that your system
has a sufficient paging file size.
■ For the Recommended file size, see “System Partition Size”,
page 14.
■ If you add memory, change the installed memory size in the
paging file setting.
10. Click OK.
When prompted to do so, restart the system.
32
User Guide
www.bull.com
User Mode Process Dump
The user mode process dump provides application error information.
In the event of an application error, perform the steps below to obtain the user mode
process dump without closing the pop-up error message.
1. Right-click an empty space on the taskbar, and click Task Manager or press
Ctrl + Shift + Esc to start Task Manager.
2. Select Processes.
3. Right-click the name of the process whose dump is to be acquired, and click
Create Dump File.
4. The user mode process dump will be created in the following folder:
C:\Users\(user-name)\AppData\Local\Temp
Note: If the folder does not appear, run Explorer and select
Tools - Folder Options... - View, and check to Show hidden
files and folders.
For more details about obtaining the user mode process dump from the above folder, go
to: http://support.microsoft.com/kb/949180/en-us
Note: On Microsoft® Windows Server® 2008, Dr. Watson
has been changed to "Reports and Solutions of Problems", and
thus crash dump files are no longer generated by Dr. Watson.
To obtain similar information, perform the steps above.
33
User Guide
www.bull.com
Network Monitor Setup
Microsoft Network Monitor allows you to examine and troubleshoot network failures.
Note: Microsoft® Windows Server® 2008 does not provide
Network Monitor. To use Network Monitor on Microsoft®
Windows Server® 2008, install Network Monitor by following the
steps below.
1. Download Microsoft Network Monitor at:
http://support.microsoft.com/kb/933741/en-us
2. Run the downloaded file to start the installer.
Follow the on-screen instructions to install Network Monitor.
Note: If a Security Alert appears, click Run. Select
Complete as a setup format.
Network Monitor has been installed.
Note: To remove Network Monitor, go to Programs and
Features.
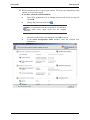
Network Trace Capture
1. In the Start menu, start Microsoft Network Monitor.
2. In Start Page, select Create a new capture tab... or select New in the File menu,
and click Capture....
A new tab for capturing a network trace is created.
3. In the Select Networks window, select a network whose trace is captured.
4. In the Capture menu, click Start to start capturing a network trace.
5. In the Capture menu, click Stop to stop capturing a network trace.
6. In the File menu, select Save As....
The Save As window appears. Select All captured frames from Frame selection,
and enter the names of a folder and a file.
Note: The default folder name is:
C:\Users\<User
name>\Documents\Network
3\Captures
Monitor
7. Click Save to create the file in the folder selected in step 6.
34
User Guide
www.bull.com
Activating Windows
To continue using the Windows features, you must activate Windows on your system.
Make sure that you have already activated Windows. If not, follow the procedure
below to activate.
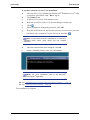
For a server running a full installation
1. Go to the Start menu, and in the Run dialog box, type slui, and click OK.
2. Follow the on-screen instructions.
Notes:
■ Windows may have been factory-activated. In this case, stop
the process when prompted to do so.
■ The Product Key can be found on the Certificate of Authenticity (COA) label.
35
User Guide
www.bull.com
For a server running a Server Core installation
1. At a command prompt, type Slmgr –dli, and click OK.
Notes:
■ Windows may have been factory-activated. In this case, stop
the process when prompted to do so.
■ The Product Key can be found on the Certificate of Authenticity (COA) label.
2. Type slmgr –ipk <PID>, and click OK.
*PID is your product key on the COA label.
3. Type slmgr –dti to obtain an installation ID for Windows activation, and click
OK.
4. See %systemroot%\system32\slui\phone.inf for the phone number of the
Microsoft customer service.
5. Call the above number, inform your installation ID gained in step 3, and
receive a confirmation ID.
6. At a command prompt, type slmgr –atp <CID>, and click OK.
*CID is the confirmation ID that you received from the call center.
The Windows activation is complete.
36
User Guide
www.bull.com
Troubleshooting
This chapter provides instructions to troubleshoot system problems that you might
encounter when using Microsoft® Windows Server® 2008. If you are experiencing the
same problem as listed in this chapter, perform the resolution first before you contact
your sales agent. If your system still does not operate normally, provide your sales
agent with the error messages on the screen.
This chapter only lists the events that might occur in Microsoft®
Windows Server® 2008. For other events, see your User's Guides.
The following system events are logged when Microsoft® Windows Server® 2008 is
installed.
Event ID:
134
Source:
Microsoft-Windows-Time-Service
Level:
Warning
Description:
NtpClient was unable to set a manual peer to use as a time source
because of DNS resolution error on 'time.windows.com,0x9'. NtpClient
will try again in 15 minutes and double the reattempt interval
thereafter.
The error was: No such host is known. (0x80072AF9)
Event ID:
63
Source:
PlugPlayManager
Level:
Warning
Description:
The service 'ShellHWDetection' may not have unregistered for device
event notifications before it was stopped.
Event ID:
7000
Source:
Service Control Manager
Level:
Error
Description:
The Parallel port driver service failed to start due to the following
error: The service cannot be started, either because it is disabled or
because it has no enabled devices associated with it.
37
User Guide
www.bull.com
Event ID:
15016
Source:
Microsoft-Windows-Http
Level:
Error
Description:
Unable to initialize the security package Kerberos for server
sideauthentication. The data field contains the error number.
Resolution:
These events do not affect system operation. Ignore these messages.
The following application events are logged when Microsoft® Windows Server® 2008
is installed.
Event ID:
63
Source:
Microsoft-Windows-WMI
Level:
Warning
Description:
A provider, Ncs2, has been registered in the Windows Management
Instrumentation namespace Root\cimv2 to use the LocalSystem
account. This account is privileged and the provider may cause a
security violation if it does not correctly impersonate user requests.
A provider, IntelEthernetDiag, has been registered in the Windows
Management Instrumentation namespace Root\CIMv2 to use the
LocalSystem account. This account is privileged and the provider may
cause a security violation if it does not correctly impersonate user
requests.
A provider, WmiPerfClass, has been registered in the Windows
Management Instrumentation namespace root\cimv2 to use the
LocalSystem account. This account is privileged and the provider may
cause a security violation if it does not correctly impersonate user
requests.
Resolution:
These events do not affect system operation. Ignore these messages.
The following errors or warnings are logged when I start the system.
Event ID:
11
Source:
IANSMiniport
Level:
Warning
Description:
Adapter link down: Intel(R) ∼
Event ID:
13
Source:
IANSMiniport
38
User Guide
www.bull.com
Level:
Warning
Description:
Intel(R) ∼ has been deactivated from the team.
Event ID:
16
Source:
IANSMiniport
Level:
Warning
Description:
[Team Name]: The last adapter has lost link. Team network connection
has been lost.
Resolution:
If you have created a team of network adapters, the above events may
be logged when you start the system. These events do not affect the
LAN driver operation. Ignore these messages.
The following system event is logged when Microsoft® Windows Server® 2008 is
installed.
Event ID:
10
Source:
VDS Dynamic Provider
Description:
The provider failed while storing notifications from the driver.The
Virtual Disk Service should be restarted. hr=80042505
Resolution:
Go to the Microsoft website:
http://support.microsoft.com/kb/948275/en-us/
The memory mirroring or online spare memory feature is enabled in the BULL
NovaScale R480 E1, and the available memory capacity has been changed. However,
the memory information shown in System and System Information on Microsoft®
Windows Server® 2008 do not change.
The Memory (RAM) shows the total capacity of mounted memory when you select
Start - Control Panel - System.
Similarly, the Installed Physical Memory (RAM) shows the total capacity of mounted
memory when you select Start - All Program - Accessories - System Tools - System
Information.
To know the physical memory currently available on the system, select Windows Task
Manager - Performance - Physical Memory(MB) - Total.
39
User Guide
www.bull.com
®
Microsoft
®
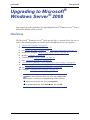
Upgrading to
Windows Server 2008
This chapter describes guidelines for upgrading Microsoft® Windows Server® 2003 to
Microsoft® Windows Server® 2008.
Overview
The Microsoft® Windows Server ® 2008 upgrade flow is shown below. Be sure to
remove the installed graphics accelerator driver and PROSet before you upgrade.
1.
2.
3.
4.
5.
6.
7.
8.
9.
10.
11.
“Before You Upgrade” on page 41.
See “Important Instructions” on page 41.
See“Before You Start” on page 9 and “Important Instructions” on page 10.
Remove the installed “Graphic Accelerator Driver” on page 42.
Remove “PROSet” on page 42.
Install and setup “BIOS Update” on page 14.
Start “Upgrading Windows” on page 43.
“On the Server Manager screen, confirm your user settings.” on page 43.
See “Installing Drivers and Configuring Driver Settings” on page 24.
See “Installing Drivers after the Upgrade” on page 45.
Configure “Fault Recovery Settings” on page 30.
Notes: the instructions below are given with a Start menu
configuration. To check your configuration proceed as follows:
■ Right click on the task bar ,and click Properties
■ In the Start Menu tab, check Start Menu, and click OK.
40
User Guide
www.bull.com
Before You Upgrade
Important Instructions
■ Microsoft® Windows Server® 2003 requires Service Pack 1 or later.
■ Upgrading
from
Microsoft® Windows Server® 2003
Windows Server® 2008 is not recommended.
to
Microsoft®
■ Microsoft® Windows Server® 2008 supports the following upgrade paths:
For Microsoft® Windows Server® 2003 Standard x64 Edition:
- Microsoft® Windows Server® 2008 Standard 64-bit (x64) Edition
- Microsoft® Windows Server® 2008 Enterprise 64-bit (x64) Edition
For Microsoft® Windows Server® 2003 Enterprise x64 Edition:
- Microsoft® Windows Server® 2008 Enterprise 64-bit(x64)Edition
For Microsoft® Windows Server® 2003 Standard Edition:
- Microsoft® Windows Server® 2008 Standard 32-bit(x86)Edition
- Microsoft® Windows Server® 2008 Enterprise 32-bit(x86)Edition
For Microsoft® Windows Server® 2003 Enterprise Edition:
- Microsoft® Windows Server® 2008 Enterprise 32-bit(x86)Edition
■ To use Microsoft® Windows Server® 2008, you must first perform a backup of
necessary user information by following the instructions in “Installing Microsoft®
Windows Server® 2008” on page 18.
■ Upgrading between different architectures i.e. upgrading from Microsoft®
Wi n d o w s S e r v e r ® 2 0 0 8 3 2 - b i t ( x 8 6 ) E d i t i o n t o M i c r o s o f t ®
Windows Server® 2008 64-bit (x64) Edition and vice versa is not supported.
■ Upgrading from a full installation of Microsoft® Windows Server® 2008 to a
Server Core installation is not supported.
■ The system partition must have sufficient capacity available to install the system.
See “System Partition Size” on page 14.
41
User Guide
www.bull.com
Graphic Accelerator Driver
To u p g r a d e f r o m M i c r o s o f t ® Wi n d o w s S e r v e r ® 2 0 0 3 t o M i c r o s o f t ®
Windows Server ® 2008 on a server in use, you must first uninstall the graphics
accelerator driver.
To uninstall the driver:
1. Navigate to Control Panel, and in Programs click uninstall a Program.
2. Select Matrox Graphics Software (remove only) from the program list, and click
Uninstall/Change.
3. Follow the on-screen messages to uninstall the driver.
4. Restart the system.
PROSet
To u p g r a d e f r o m M i c r o s o f t ® Wi n d o w s S e r v e r ® 2 0 0 3 t o M i c r o s o f t ®
Windows Server® 2008 on a server with PROSet installed, you must first uninstall
PROSet.
To uninstall PROSet:
1. Remove the network adapters team.
First note down the current settings (e.g. IP addresses) of the standard and
optional adapters teamed for network redundancy. You will have to reconfigure
the team settings after the upgrade.
To remove the team, see “Adapter Fault Tolerance (AFT)/ Adaptive Load
Balancing (ALB) ” on page 26.
2. Navigate to Control Panel, in Programs click Uninstall a program.
3. Select Intel (R) PRO Network Connections xx.xx.xx.xx from the program list, and
click Uninstall/Change.
*xx.xx.xx.xx is a version of PROSet and varies depending on servers.
4. Click Remove, click Yes, then click Finish.
5. Follow the on-screen messages to uninstall PROSet.
6. Restart the system.
42
User Guide
www.bull.com
Upgrading Windows
This section provides the procedure for upgrading from Microsoft®
Windows Server® 2003 32-bit (x86) to Microsoft® Windows Server® 2008 32-bit
(x86) Edition.
Caution
Before you upgrade, you must first uninstall the graphics accelerator driver and PROSet.
1. When Microsoft® Windows Server® 2003 is running, insert the Microsoft®
Windows Server® 2008 DVD-ROM into the optical disk drive.
2. Click
when prompted to Install now.
3. Choose to download the latest update program, or proceed with the one on the
Microsoft® Windows Server® 2008 DVD-ROM.
4. Enter your product key, and click Next.
5. Select the Windows edition you wish to install, and click Next.
Caution
Select the same edition as your prev ious Microsoft ®
Windows Server® 2003. For more details, see
Upgrade”, page 41.
“Before You
6. Read the license terms carefully. If you agree, check I accept the license terms,
and click Next.
7. Select the Upgrade type of intallation.
8. Read the Compatibility Report, and click Next.
9. The upgrade process starts.
10. When prompted to do so, log on to the system.
If you had set a password in Microsoft® Windows Server® 2003, enter the
same password, and click .
11. On the Server Manager screen, confirm your user settings.
43
User Guide
www.bull.com
Note: If the message Ask me again later appears. Click
Cancel.
12. Install the drivers. See “Installing Drivers and Configuring Driver Settings”,
page 24.
13. Follow the instructions in “Installing Drivers after the Upgrade” on page 45.
14. Follow the instructions in “Fault Recovery Settings” on page 30.
The upgrade is complete.
44
User Guide
www.bull.com
Installing Drivers after the Upgrade
This section provides the procedures for installing the driver(s) for optional
controller(s) after the upgrade.
Caution
You may need to install multiple drivers, depending on your
environment.
Installing a driver for the RAID Controller
LSI Logic MegaRAID SAS 8708EM2 RAID Controller
LSI Logic MegaRAID SAS PCI EXPRESS ROMB (on the mother board)
1. Start > Administrative Tools > Server Manager.
2. Diagnostics > Device Manager.
■ Under Storage Controllers, right-click LSI Logic MegaRAID SAS
8708EM2 RAID Controller, and click Update Driver Software.
■ For BULL NovaScale R480 E1, Under Storage Controllers, right-click
LSI Logic MegaRAID SAS PCI Express ROMB, and click Update
Driver Software.
3.
4.
5.
6.
Click Browse my computer for driver software.
Click Let me pick from a list of device drivers on my computer, and click Next.
Click Have Disk....
Select the path to the folder in which the driver is stored (e.g. your storage
media storing the Driver Set) and click Open.
■ Microsoft® Windows Server® 2008 64-bits (x64) Editions:
\00x\W2K8\drivers\driverset\winnt\oemfd\ws2008x64\fd1
■ Microsoft® Windows Server® 2008 32-bits (x86):
\00x\W2K8\drivers\driverset\winnt\oemfd\ws2008\fd1
7. On the Install From Disk screen, click OK.
8. Back to the Select the device driver you want to install for this hardware
screen, click Next.
The driver installation starts.
9. Click Close, and restart the computer if prompted to do so.
The driver update is complete.
45
User Guide
www.bull.com
Installing a driver for the ATA/ATAPI Controller
An ATA/ATAPI controller driver must be installed on all BULL NovaScale series
servers, except for the T860 E1 and R480 E1.
Caution
The installation procedures vary by server model.
For the BULL NovaScale/T850 E1, BULL NovaScale R440 E1, or R460 E1
1. Start > Administrative Tools > Server Manager.
2. Diagnostics > Device Manager.
Under IDE ATA/ATAPI Controllers, right-click Intel(R) 631xESB/632xESB
SATA AHCI Controller, and click Update Driver Software.
3. Click Browse my computer for driver software.
4. Click Let me pick from a list of device drivers on my computer, and click Next.
5. Select the device driver you want to install for this hardware", select Standard
AHCI 1.0 Serial ATA Controller, and click Next.
The driver installation starts.
6. After the driver installation is complete, the message "Windows has
successfully updated your driver software" is displayed. Click Close.
7. When the message "Do you want to restart your computer now?" appears,
select Yes.
The system restarts
Note: Restart your system when prompted by a pop-up
window.
The driver update is complete.
Installing a driver for the SCSI controller
Adaptec SCSI card 29320LPE / 29320ALP
1. Start > Administrative Tools > Server Manager.
2. Diagnostics > Device Manager.
Under Storage Controllers, right-click the card to update and click Update
Driver Software.
3. Click Browse my computer for driver software.
4. Click Let me pick from a list of device drivers on my computer, and click
Next.
46
User Guide
www.bull.com
5. Click Have Disk....
6. Select the path to the folder in which the driver is stored (e.g. your storage
media storing the Driver Set) and click Open.
7. On the Install From Disk screen, click OK.
8. Back to the Select the device driver you want to install for this hardware
screen, click Next.
The driver installation starts.
9. Click Close, and restart the computer if prompted to do so.
The driver update is complete.
Installing a SCSI Controller
Adaptec SCSI Card 29160LP
You do not need to install the driver manually, it is automatically installed by Windows
Plud-and-Play.
Installing a Fibre Channel controller
Emulex LightPulse® LPe1150 , Emulex LightPulse® LPe11002
You do not need to install the driver manually, it is automatically installed by Windows
Plud-and-Play.
47
Vos remarques sur ce document
Titre :
NovaScale T850 E1, T860 E1, R440 E1, R460 E1 and R480 E1 Windows
2008 Entreprise/Standard Installation Guide
Référence :
86 A1 44FA 02
Date:
October 2008
ERREURS DETECTEES
AMELIORATIONS SUGGEREES
Vos remarques et suggestions seront examinées attentivement.
Si vous désirez une réponse écrite, veuillez indiquer ci-après votre adresse postale complète.
NOM : __________________________________________________________ DATE : _____________
SOCIETE : _____________________________________________________________________________
ADRESSE : _____________________________________________________________________________
_______________________________________________________________________________________
Remettez cet imprimé à un responsable BULL ou envoyez-le directement à :
Bull - Documentation Dept.
1 Rue de Provence
BP 208
38432 ECHIROLLES CEDEX
FRANCE
[email protected]
Bon de commande de documents techniques
Pour commander des documents techniques, remplissez une copie de ce formulaire et envoyez-la à :
BULL CEDOC
357 AVENUE PATTON
B.P.20845
49008 ANGERS CEDEX 01
FRANCE
Référence
+33 (0) 2 41 73 72 66
+33 (0) 2 41 73 70 66
[email protected]
Désignation
_ _
_ _
_ _ _ _
_
[ _ _ ]
_ _
_ _
_ _ _ _
_
[ _ _ ]
_ _
_ _
_ _ _ _
_
[ _ _ ]
_ _
_ _
_ _ _ _
_
[ _ _ ]
_ _
_ _
_ _ _ _
_
[ _ _ ]
_ _
_ _
_ _ _ _
_
[ _ _ ]
_ _
_ _
_ _ _ _
_
[ _ _ ]
_ _
_ _
_ _ _ _
_
[ _ _ ]
_ _
_ _
_ _ _ _
_
[ _ _ ]
_ _
_ _
_ _ _ _
_
[ _ _ ]
_ _
_ _
_ _ _ _
_
[ _ _ ]
_ _
_ _
_ _ _ _
_
[ _ _ ]
[ _ _ ]
Téléphone :
FAX :
Courriel :
Qté
: La révision la plus récente sera fournie si aucun numéro de révision n'est indiqué.
NOM : __________________________________________________________ DATE : _____________
SOCIETE : _____________________________________________________________________________
ADRESSE : _____________________________________________________________________________
_______________________________________________________________________________________
TELEPHONE : _______________________________________ FAX : _____________________________
COURRIEL : ____________________________________________________________________________
Pour les Filiales Bull :
Identification : _________________________________________________________________________
Pour les Clients Affiliés Bull :
Code Client : __________________________________________________________________________
Pour les Clients Internes Bull :
Section Budgétaire : ____________________________________________________________________
Pour les autres : Merci de demander à votre contact Bull.
BULL CEDOC
357 AVENUE PATTON
B.P.20845
49008 ANGERS CEDEX 01
FRANCE
REFERENCE
86 A1 44FA 02