1
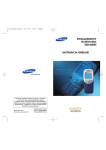
miro P17F86i Manual
miro Displays GmbH · TRIFORUM · Haus A1 · Frankfurter Str. 233 · D-63263 Neu-Isenburg · Tel.0180-5 22 35 26 (0,24 DM/Min) · Fax 06102-3667-77 · e-mail:[email protected]
TABLE OF CONTENTS
INTRODUCTION
FCC Compliance Statement...............................................................i
Safety Instructions............................................................................iii
General Information...........................................................................1
Equipment Checklist..........................................................................2
Monitor Features................................................................................3
GETTING STARTED
Installation..........................................................................................4
Control Buttons................................................................................. 6
ON-SCREEN CONTROLS
OSD-Menu Descriptions................................................................... 7
REFERENCE
Power Management........................................................................ 10
Plug & Play......................................................................................10
Timing Guide................................................................................... 11
Pin Assignment................................................................................12
Specifications.................................................................................. 13
Troubleshooting...............................................................................14
FCC C OMPLIANCE S TATEMENT
Note:
This equipment has been tested and found to comply with the limits for a
Class B digital device, pursuant to Part 15 of FCC Rules. These limits
are designed to provide reasonable protection against radio frequency
interference in a residential installation. This equipment generates, uses
and can radiate radio frequency energy. If not installed and used in
accordance with the instructions, it may cause interference to radio communications. However, there is no guarantee that interference will not
occur in a particular installation. If this equipment does cause interference to radio or television reception (this can be determined by turning this
equipment off and on), the user is encouraged to try to correct the interference by one or more of the following measures:
• Reorient or relocate the receiving antenna.
• Increase the separation between the equipment and receiver.
• Connect the equipment to an outlet on a circuit different from that to
which the receiver is connected.
• Consult the dealer or an experienced radio/TV technician for help.
CAUTION:
To comply within the limits for an FCC Class B computing device, always
use the shielded signal cord supplied with this unit.
CAUTION TO THE USER:
The Federal Communications Commission warns that changes or modifications to the unit not expressly approved by the party responsible for
compliance could void the user’s authority to operate the equipment. If
necessary, the user should contact the dealer or an experienced
radio/television technician for additional suggestions. The user may find
the Federal Communications Commission booklet, How to Identify and
Resolve Radio-TV Interference Problems, helpful. This booklet is
available from the U.S. Government Printing Office, Washington, D.C.,
Stock No. 004-000-00345-4.
NOTICE OF COMPLIANCE WITH CANADIAN
INTERFERENCE-CAUSING EQUIPMENT
REGULATIONS
i
FCC C OMPLIANCE S TATEMENT
S AFETY I NSTRUCTIONS
DDC COMPLIANCE NOTICE:
This digital apparatus does not exceed the Class B limits for radio noise
emissions from digital apparatus set out in the Radio Interference
Regulations of the Canadian Department of Communications.
1.
Read these instructions. Save these instructions for later use.
2.
Follow all warnings and instructions marked on the product.
3.
Unplug this product from the wall outlet before cleaning. Do not
use liquid cleaners or aerosol cleaners. Use a damp cloth for
cleaning.
4.
Do not use this product near water.
5.
Do not place this product on an unstable cart, stand, or table. The
product may fall, causing serious damage to the product.
6.
Slots and openings in the cabinet and the back or bottom are
provided for ventilation;to ensure reliable operation of the product
and to protect it from overheating, these openings must not be
blocked or covered. The openings should never be blocked by
placing the product on a bed, sofa, rug, or other similar surface. This
product should never be placed near or over a radiator or heat
register, or in a built in installation unless proper ventilation is provided.
7.
This product should be operated from the type of power indicated
on the marking label. If you are not sure of the type of power
available, consult your dealer or local power company.
8.
Do not allow anything to rest on the power cord. Do not locate this
product where persons will walk on the cord.
9.
If an extension cord is used with this product, make sure that the total
of the ampere ratings on the products plugged into the extension
cord does not exceed the extension cord ampere rating. Also make
sure that the total of all products plugged into the wall outlet does not
exceed 15 amperes.
10. Never push objects of any kind into this product through cabinet slots
as they may touch dangerous voltage points or short out parts that
could result in a risk of fire or electric shock. Never spill liquid of any
kind on the product.
ii
iii
S AFETY I NSTRUCTIONS
G ENERAL I NFORMATION
11. Do not attempt to service this product yourself, as opening or
removing covers may expose you to dangerous voltage points or
other risks. Refer all servicing to service personnel.
Congratulations on selecting this high resolution multi-scan color monitor.
12. Unplug this product from the wall outlet and refer servicing to
qualified service personnel under the following conditions:
a.
b.
c.
d.
When the power cord or plug is damaged or frayed.
If liquid has been spilled into the product.
If the product has been exposed to rain or water.
If the product does not operate normally when the operating
instructions are followed. Adjust only those controls that are
covered by the operating instructions since improper adjustment
of other controls may result in damage and will often require
extensive work by a qualified technician to restore the product to
normal operation.
e. If the product has been dropped or the cabinet has been damaged.
This high performance display contains the latest technology of Flat
screen design and micro-processor control. This monitor has been equipped with both automatic and manual adjustments.
The automatic controls are factory preset and feature automatic factory
frequency scanning.
The manual controls feature use digital adjustments to personalize the
display in various applications.
The ergonomic characteristics of the antiglare flat screen, high refresh
rates, and tilt swivel base allow comfortable usage when operating for a
long period of time in high resolutions.
This operating manual describes the functions and features in more detail
so that you may obtain the maximum performance of your monitor.
13. Use only the proper type of power supply cord set (provided in your
manual accessories box) for this unit. It should be a detachable
type: UL listed/CSA certified, type SVT/SJT, rated as 10A
125V minimum, VDE approved or its equivalent.
14. The Socket-Outlet is to be installed near the equipment and is
easily accessible.
iv
1
E QUIPMENT C HECKLIST
M ONITOR F EATURES
Before operating your display, please check to make sure that all of the
items listed are present in your package:
• Multi-scanning at horizontal frequencies of 30 kHz to 86 kHz,
vertical frequencies of 50 Hz to 160 Hz
• 17” Color Monitor (With 15-pin D-SUB cable)
• Accessory Box:
1. AC Power Cord
2. This manual
• 17 inch (16" viewable) CRT-Monitor with FlaTTop picture tube (Pure Flat)
• 0.25mm Dot Pitch
• Microprocessor-based design with digital controls
• Windows® Plug & Play (DDC1/2B)
• 11 Preset modes
• Overscan capability for increased viewable area
• Compatible with standard IBM VGA, extended VGA, Super VGA,
IBM XGA, XGA/2, as well as all VESA® ergonomic standards
Note : If any item(s) are missing or damaged, contact your dealer
immediately.
• Compatible with Apple® Macintosh™ up to 1280 x 1024 @ 75 Hz
Remove the monitor from its shipping carton (see figure 1).
Save the carton and packaging materials in case you need to relocate the monitor.
• VESA® Display Power Management Signaling (DPMSTM) compatible
• Universal power supply
figure 1
2
3
I NSTALLATION
I NSTALLATION
SWIVEL BASE
Follow these steps to install the monitor
1. Switch the power off to both your monitor and computer. The
location of the power switch is on the lower right hand corner
of the monitor.
2. Connect the 15 pin signal cable to the your computer. Lock both
screws to ensure grounding.
3. Connect the female end of the power cable to the power input on the
back of the monitor. Next, plug the male cable to the wall outlet for
power. The adapter may be required for certain Apple Macintosh
computers. Tighten the two screws on the cable connector.
To power input of monitor.
To attach the swivel base to the monitor, do the following:
1. Carefully turn the monitor on its side or upside down. (see figure 2)
2. Locate the cavities at the bottom front of the monitor.
3. Insert the pegs on the swivel base into these cavities.
Push firmly toward the front (CRT direction) of the main unit
until the latch at the bottom of the monitor clicks shut. This
locks the swivel base into place.
4. To remove the swivel base, use your thumb to push the latch to
disconnect the latch properly, push down firmly and pull the
base against the main unit. The base removes from the
attached position.
figure 3
4. Switch ON the power to both your color monitor and computer.
5. The tilt-swivel base can be adjusted for your maximum viewing comfort.
figure 2
figure 4
Note:
Due to the sensitivity of this monitor to earth's magnetic field, you may
experience minor irregularities in the display if you swivel the monitor through
more than 90° while the monitor is ON. If such behavior occurs, please turn
the monitor OFF and ON again. The display should return to normal.
4
5
C ONTROL B UTTONS
OSD-MENU DESCRIPTIONS
The digital control panel is located at the bottom of your color monitor.
If you are not satisfied with the factory settings, use these controls to
program those you prefer in each resolution. Then, these adjusted settings are kept in memory even if you change resolution or turn off the
monitor.
BUTTON DESCRIPTION:
Menu
Power ON/OFF button
Use this button to turn the monitor on and off.
Power Indicator
This light glows green during normal operation and glows
orange during power off. Glows orange and flash during
power saving mode.
Menu button
To push menu button turns on the menu, and it activates the
items you highlight.
Select button
Use this button to move up and down the OSD selection menu
and adjust the attribute of the monitor while in OSD mode.
The OSD menu activates automatically when you press the
Menu button on the front of the monitor. The OSD remains centered on
the screen while you make your adjustments. Use either the
or
select button to move the highlight to your selection. Pressing
menu button the submenu will appear nearby main menu. The status bar
indicates in which direction, from the factory preset, which adjustments
are being made. Use the
or
select button to adjust the control.
When you have finished making adjustments, press the menu button to
save settings and exit back to main menu.
Main Menu
CONTRAST
Adjusts the black level of the display.
BRIGHTNESS
Adjusts the luminosity level of the display
H-POSITION (HORIZONTAL
POSITION )
Select this control to center the image horizontally on the screen.
V-POSITION (VERTICAL POSITION)
Select this control to center the image vertically on the screen.
H-SIZE (HORIZONTAL SIZE)
Select this control to expand or decrease the image width to
horizontally fill the screen.
V-SIZE (VERTICAL SIZE)
Select this control to adjust the image height to vertically fill the screen.
ROTATION
Rotates the image until the sides of the image are parallel to the edge
of the bezel.
6
7
OSD-MENU DESCRIPTIONS
OSD-MENU DESCRIPTIONS
PINCUSHION
COLOR SELECT
Select this control to straighten the sides of the image by pulling them
in opposing directions.
TRAPEZOID
Select this control to even the widths of the top and bottom of the
display (pulling the sides in opposite directions).
This control adjusts the color temperature of the screen image.
9300°K and 6500°K are preset by factory. You can not do adjustment.
9300°K : Which is bluish white light.
6500°K : Which is reddish white light.
USER : You can adjust the inidvidual color gun intensity by yourself.
Increase or decrease red, green or blue depending upon which
is selected.
PARALLELOGRAM
Select this control to center the top and bottom of the display (pulling
the sides in the corresponding direction).
PIN. BALANCE
Select this control to straighten the sides of the image by pulling them
in the corresponding direction.
ADVANCED SELECT
MOIRÉ ADJUSTMENT
The screen image may shake slightly while the moiré cancellation
function is ON. It is normally OFF (H=0, V=0).
OSD ADJUSTMENT
You can choose where you would like OSD image to appear on your screen.
H-POSITION (HORIZONTAL
POSITION)
Select this control to center the OSD menu horizontally on the screen.
V-POSITION (VERTICAL
POSITION)
Select this control to center the OSD menu vertically on the screen.
OSD TIMER
You can select how long the monitor waits after the last adjust of
the knob to shut off the OSD menu. The time setting choises are
from 8 to 60 seconds.
V. M
RESET
Resets the display settings to the original factory reset values. Press
and hold down the Enter button until the progress bar disappears.
LANGUAGE
Select this control to choose from: English, German, Spanish, Italian,
French, Portugal and Chinese.
EXIT
Exits the OSD controls. (Turning off the OSD windows).
DEGAUSS
Eliminates the build-up of stray magnetic fields which alter the correct scan of the
electron beams and affect the purity of the screen colors, focus and convergence.
8
9
POWER MANAGEMENT
TIMING GUIDE
The power management feature of this monitor is comprised of two stages: On or Out Of Range (Green), OFF (Amber blinking).
The 17" color monitor is a multi-frequency monitor. It operates at
horizontal frequencies between 30 kHz and 86 kHz, vertical frequencies
between 50 Hz and 160 Hz. Because of its microprocessor-based
design, it offers auto-synchronization and auto-sizing capabilities.
This monitor offers 11 pre-programmed settings as listed in the table
below.
Power Mode H-Sync
V-Sync
Video
LED Color
Normal
Pulse
Active
Green
Pulse
Out Of Range
Pulse
Pulse
Active
Green
Off
Pulse
No pulse
Blanked
Amber blinked per 1 sec.
Off
No pulse Pulse
Blanked
Amber blinked per 1 sec.
Off
No pulse No pulse
Blanked
Amber blinked per 1 sec.
Timing Table
Resolution
This monitor meets the Green Monitor standards as set by the Video
Electronics Standards Association (VESA). This feature is designed to
conserve electrical energy by reducing power consumption when there is
no video input signal present. When there is no video input signal this
monitor, following a time-out period, will automatically switch to an OFF
mode. This reduces the monitor's internal power supply consumption.
After the video input signal is restored, full power is restored and the
display is automatically redrawn. The appearance is similar to a
"Screen Saver" feature except the display is completely off. The display
is restored by pressing a key on the keyboard, or clicking the mouse.
PLUG & PLAY
This monitor is equipped with VESA DDC1/2B capabilities according to
the VESA DDC STANDARD. It allows the monitor to inform the host
system of its identity and, depending on the level of DDC used,
communicate additional information about its display capabilities. The
communication channel is defined in two levels, DDC1 and DDC2B.
The DDC1 is a unidirectional data channel from the display to the host
that continuously transmits EDID information. The DDC2B is a
bidirectional data channel based on the I²C protocol. The host can request
EDID information over the DDC2B channel.
10
Preset
Frequency
Horizontal
Vertical
Horizontal
Vertical
M1
640
480
31.47kHz
60Hz
M2
720
400
31.47kHz
70Hz
M3
640
480
43.27kHz
85Hz
M4
640
480
50.60kHz
100Hz
M5
800
600
37.88kHz
60Hz
M6
800
600
53.67kHz
85Hz
VESA M7
800
600
63.92kHz
100Hz
M8
1024
768
48.36kHz
60Hz
M9
1024
768
60.02kHz
75Hz
M10
1024
768
68.68kHz
85Hz
M11
1280
1024
79.98kHz
75Hz
VGA
* In addition to 11 factory modes, there are 8 additional user modes.
If more than 8 modes are inputted, it will be overrided in accordance
with saving order of additional modes.
* In case of using Macintosh, you must need Mac adapter.
11
SPECIFICATIONS
PIN ASSIGNMENT
VGA Connector
Pin
Pin
Pin
Pin
Pin
Pin
Pin
Pin
Pin
Pin
Pin
Pin
Pin
Pin
Pin
1
2
3
4
5
6
7
8
9
10
11
12
13
14
15
VGA CONNECTOR
Red
Green
Blue
Ground
Ground
Red Ground
Green Ground
Blue Ground
No Connection
Ground
Ground
DDC SDA
Horizontal Sync.
Vertical Sync.
DDC SCL
1
Picture tube
Type
17” (43.2cm) diagonal (Pure Flat)
Dot Pitch
0.25mm pixel pitch
Glass surface Tinted screen glass non-glare,
black matrix, anti-static
Viewable area
max.
Display size
5
6
10
(factory setting)
11
15
Resolution
max.
rec.
1280 x 1024 @ 75 Hz
1024 x 768 @ 85 Hz
Scan Frequency
horizontal
vertical
30 - 86 kHz
50 - 160 Hz
Dot Clock
max.
145 MHz
Input signal
Video
Sync.
Connector
Analog 0.7Vp-p / 75 Ohms
Separate sync. TTL level
Mini D-Sub 15 Pin
Display
Analog Input
Power Supply
Unlimited Number of colors
(depends upon video card)
Input Voltage
Consumption
AC 100 - 240V, 50/60Hz
On : Less than 100W
User mode Timings
11
8
Operating condition Temperature
Humidity
5°C ~ 40°C
20% ~ 80% (no condensation)
Storage condition
-20°C ~ 60°C
10% ~ 90% (no condensation)
Factory Preset Timings
Temperature
Humidity
Plug & Play
12
16.0” (40.69cm) diagonal
310mm (W) x 230mm (H)
DDC1/2B
Dimension
(W) x (H) x (D)
406mm x 407mm x 417mm
Weight
Net
Gross
19.0kg
21.5kg
13
TROUBLESHOOTING
TROUBLESHOOTING
If your monitor is not performing properly, use the following troubleshooting for quick solutions to common problems. If the problem persists, call
the dealer. Where you purchased the monitor.
Wrong or abnormal colors.
No picture.
ü
ü
Power cord and signal cable are securely connected.
Monitor in power save mode?
Display image is too large or small.
ü
Use the function keys to adjust the image.
ü
ü
ü
ü
Entire screen image rolls (scrolls) vertically.
ü
Power on but no screen image.
ü
ü
Make sure the video cable attached with this monitor is tightly
secured to the video output port on the back of the computer.
Adjust the brightness and contrast.
Image is unstable, unfocused, scrolling.
ü
ü
Signal cable should be completely attached to the computer.
Check whether the resolution or refresh rate in windows display
setting is beyond supported range (please refer to the specification
of supported mode).
If any colors (Red, Green, or Blue) are missing, check the video
cable to make sure it is securely connected. Loose pins in the
cable connector could cause a bad connection.
Connect the miro P17F86i Monitor to another computer.
Check the graphics card for proper sync scheme (or sync
polarities) to match the miro P17F86i Monitor’s specifications.
Magnetic objuct nearby.
ü
ü
Make sure the input signals are within the CRT monitor’s specified
frequency range.
(Maximum: VESA, MAC 1280 x 1024 @ 75Hz)
Connect the video cable securely.
Try the miro Monitor with another power source.
Image is not correctly shaped.
ü
ü
A new video mode is selected.
User control has not yet been adjusted. Use the function keys
to adjust image.
Flickering.
ü
ü
Not enough power is being supplied to the miro P17F86i Monitor.
Connect the miro P17F86i Monitor to a different outlet. If a surge
protector is being used, there may be too many devices plugged in.
See Timing Guide in this manual with a list of refresh rates and
frequency settings showing the recommended setting for the
miro P17F86i Monitor.
Double (split) screen image.
ü
14
Make sure your graphics card is set to Non-Interlaced mode.
15
INHALTSVERZEICHNIS
EINFÜHRUNG
Sicherheitsrichtlinien...........................................................................i
Allgemeine Informationen..................................................................1
Prüfliste Zubehör...............................................................................2
Gerätemerkmale................................................................................3
INSTALLATION
Installation des Monitors....................................................................5
Bedienung......................................................................................... 6
OSD-BILDSCHIRM
OSD-Menü Erläuterungen................................................................ 7
SONSTIGES
Stromsparsystem.............................................................................10
Plug & Play......................................................................................10
Einstellungsrichtlinien (Timing Guide)............................................. 11
Timing Table....................................................................................12
Pinbelegung.....................................................................................13
Spezifikationen................................................................................14
Im Störungsfalle.............................................................................. 15
S ICHERHEITSRICHTLINIEN
1.
Lesen Sie diese Bedienungsanleitung gründlich durch. Heben Sie sie
zum Nachschlagen auf.
2.
Befolgen Sie alle an dem Gerät angebrachten Warnungen und
Hinweise.
3.
Ziehen Sie vor dem Reinigen des Gerätes immer den Netzstecker ab.
Verwenden Sie keine flüssigen Reinigungsmittel oder Sprays.
Verwenden Sie einen angefeuchteten, weichen Lappen zur
Reinigung.
4.
Verwenden Sie dieses Gerät nicht in der Nähe von Wasser.
5.
Stellen Sie dieses Gerät nicht auf einen instabilen Wagen, Ständer
oder Tisch auf. Das Produkt kännte herunterfallen und schwer
beschädigt werden.
6.
Schlitze und Öffnungen im Gehäuse und an der Vorder- und Rückseite dienen zur Lüftung. Um richtige Lüftung zu gewährleisten und
Überhitzung zu vermeiden, dürfen diese Öffnungen nicht verdeckt
werden. Die Öffnungen dürfen auch nicht blockiert werden, indem
das Produkt auf einem Bett, Sofa, Teppich oder einer ähnlichen
Oberfläche aufgestellt wird. Das Produkt darf nicht neben oder auf
Heizkörpern aufgestellt oder verdeckt installiert werden, es sei denn,
es ist für ausreichende Lüftung gesorgt.
7.
Dieses Produkt muß mit der Netzspannung betrieben werden, die auf
dem Typenschild angegeben ist. Wenn Sie sich über die örtliche
Netzspannung nicht im Klaren sind, fragen Sie bei Ihrem
Fachhändler oder bei der Elektrizitätsgesellschaft nach.
8.
Stellen Sie keine Gegenstände auf das Netzkabel. Verlegen Sie das
Netzkabel so, daß niemand darauf tritt.
9.
Wenn dieses Produkt mit einem Verlängerungskabel verwendet wird,
stellen Sie sicher, daß die Gesamtstromaufnahme der über das
Verlängerungskabel betriebenen Geräte nicht die Zulassung des
Verlängerungskabels überschreitet. Auf jeden Fall sollen alle an einer
Steckdose angeschlossenen Geräte insgesamt nicht mehr als
15 Ampere aufnehmen.
i
S ICHERHEITSRICHTLINIEN
A LLGEMEINE I NFORMATIONEN
10. Stecken Sie niemals Gegenstände durch die Öffnungen in das
Gehäuse. Im Inneren des Gerätes befinden sich Bauteile die mit
Hochspannung arbeiten. Es besteht die Gefahr von elektrischen
Schlägen oder Kurzschlüssen mit Feuer- oder Verletzungsgefahr.
Schütten Sie niemals Flüssigkeiten jeglicher Art in das Gerät.
Wir gratulieren Ihnen zur Wahl dieses Multiscanning-Monitors.
11. Versuchen Sie nicht, Reparatur\oder Wartungsarbeiten selbst
auszuführen. Im Inneren des Gerätes befinden sich Teile, die mit
Hochspannung arbeiten. Es besteht Gefahr von elektrischen
Schlägen und anderen Risiken. Überlassen Sie alle
Wartungsarbeiten dem Kundendienst.
12. In den folgenden Fällen müssen Sie sofort den Stecker aus der
Steckdose ziehen und das Gerät zur Prüfung beim Kundendienst
einreichen:
a. Wenn das Netzkabel oder der Netzstecker beschädigt oder
geöffnet ist.
b. Wenn Flüssigkeiten in das Gerät geschüttet wurden.
c. Wenn das Gerät Regen oder Wasser ausgesetzt worden ist.
d. Wenn das Gerät nicht normal arbeitet, obwohl die Bedienungsanweisungen befolgt werden. Betätigen Sie nur die Bedienungselemente, die in der Bedienungsanleitung beschrieben werden.
Unsachgemäße Betätigung anderer Bedienungselemente kann
Schäden verursachen, die häufig umfangreiche Reparaturarbeiten von Seiten des Kundendienstes erforderlich machen.
e. Wenn das Gerät fallengelassen wurde oder das Gehäuse
beschädigt wurde.
Dieser Hochleistungsbildschirm ist mit einer nach modernster
Technologie hergestellten FlaTTop-Bildröhre (Pure Flat) und halbleitergesteuerten Kontrolleinrichtungen ausgestattet. Der Monitor lässt sich auf
die meisten Video-Betriebsarten sowohl bei IBM-kompatiblen PCs als
auch bei Apple Macintosh-Computern synchronisieren und an diese
anpassen.
Der Monitor verfügt sowohl über eine automatische Frequenzabtastung
mit einer vom Hersteller festgelegten Einstellung, als auch über
benutzerfreundliche, digitale Kontrolleinheiten, die eine individuelle
Einstellung der Wiedergabe bei verschiedenen Anwendungen
ermöglichen.
Die anwendergerechten Merkmale, Antireflexbeschichtung, hohe
horizontale Abtastfrequenzen sowie schwenk- und kippbarer Fuß,
garantieren Ihnen Komfort bei der Benutzung, selbst bei langem Einsatz
mit hohem Auflösungsniveau.
Der ergonomisch angepasste Monitor bietet ein erweitertes BildschirmMenü (OSD) mit animierten Befehls-Icons, die eine einfache und
problemlose Einstellung des Monitors ermöglichen. Der Monitor entspricht den strengen ergonomischen Anforderungen der TCO`99.
Das vorliegende Handbuch beschreibt die Funktionen und
Leistungsmerkmale des Monitors ausführlich, damit Sie ihn so effizient
wie möglich einsetzen können.
13. Verwenden Sie nur geeignete Netzkabel (im Zubehörkarton
mitgeliefert) für dieses Gerät. Es soll sich um abnehmbare Typen
handeln: mit VDE oder äquivalenter Zulassung.
14. Die Steckdose ist neben der Anlage zu installieren und sollte leicht
zugänglich sein.
ii
1
P RÜFLISTE Z UBEHÖR
G ERÄTEMERKMALE
Bevor Sie Ihren Monitor in Betrieb nehmen, überprüfen Sie bitte den Inhalt
der Verpackung auf Vollständigkeit. Folgende Komponenten sollten im
Lieferumfang enthalten sein:
QUALITATIV
• 17 Zoll Farbmonitor (mit 15-pin D-SUB Kabel)
• mitgeliefertes Zubehör:
1. Netzkabel
2. Benutzerhandbuch
HOCHWERTIGER
MEHRFREQUENZBILDSCHIRM
• Der 17-Zoll-Mehrfrequenzbildschirm mit FlaTTop-Bildröhre (Pure Flat)
(0.25mm Punktabstand) gewährleistet Antistatik, hohe Auflösung und
starken Kontrast mit Echtfarb-Anzeige (über 16Mio. Farben).
PLUG & PLAY
• Dieses Gerät entspricht der VESA®-Norm (Video Electronics Standards
Association) DDCTM 1/2B (Display Data Channel) gemäß den Windows®
Spezifikationen.
DIGITAL-MULTI-SCAN
• Dieses Gerät arbeitet mit einer Horizontalfrequenz von 30~86kHz, einer
Vertikalfrequenz von 50~160Hz und einer max. Auflösung von 1280 x 1024.
• Der Monitor ist mit IBM® PC-kompatiblen Geräten als auch
Macintosh®-Geräten kompatibel.
Falls ein Artikel fehlt oder beschädigt ist, wenden Sie sich sofort an
lhren Fachhändler. Nehmen Sie den Monitor aus dem Versandkarton.
Bewahren Sie den Karton und das Verpackungsmaterial für den Fall, daß
der Monitor zum Umzug o.ä. wieder verpackt werden muß, auf.
FORMATEINSTELLFUNKTION
• Das Gerät verfügt über eine On-Screen-Display-Kontrolle. Diese ermöglicht über diverse Einstellungspunkte eine problemlose und einfache
Installation des Monitors. Folgende Einstellmöglichkeiten sind gegeben:
Kontrast, Helligkeit, H-/V-Position, H-/V-Size, Rotation, Kissenverzerrung,
Trapez, Parallelogramm, Pin. Balance, H-/V-Moiré, top/bottom corner,
Farbtemperatur (9300°K, 6500°K, User), H-/V-OSD-Position, OSD Timer,
Reset, Language, Exit, Entmagnetisierung.
STROMZUFUHR
• Die Netzspannung beträgt 100 - 240 V bei 50/60 Hz.
• Stromverbrauch des Gerätes: On mode max. 100 Watt
ABMESSUNGEN
• Die Abmessungen des Gerätes betragen 406 x 407 x 417 in mm (B x H x T)
bei einem Nettogewicht von 19.0 kg.
UMWELTFREUNDLICH
Abb. 1
2
• Die Leistungsaufnahme des CRT-Monitors kann bei Anschluss an
einem Computer, der der VESA® DPMSTM (Display Power
Management Signaling) -Norm entspricht, reduziert werden.
• Die Richtlinie TCO`99 (Emission, Energieeinsparung, Ökologie,
Ergonomisches, Sicherheit).
3
I NSTALLATION DES M ONITORS
I NSTALLATION DES MONITORS
SCHWENKFUSS
Arbeitsschritte zur Installation des Montiors
1. Bevor Sie beginnen, vergewissern Sie sich unbedingt, dass sowohl
der Monitor als auch Computer nicht in Betrieb und von der
Stromzufuhr getrennt sind.
2. Das Ende des analogen Signalkabels an den Mini-D-Sub-Anschluss
(15-pin) der Graphikkarte an Ihrem Computer anschliessen. Die
Schrauben des Signalkabels festziehen, damit sich der Anschluss
nicht lösen kann und der Monitor optimal funktioniert.
3. Den Stecker des Netzkabels an die Netzeingangsbuchse an der
Rückseite des Farbmonitors anschließen. Danach den Netzstecker
an einer Netzsteckdose oder PC-Anschluß einstecken.
Zum Anbringen des Schwenkfusses am Montior gehen Sie wie folgt vor:
1. Drehen Sie den Monitor vorsichtig auf die Seite oder auf den
Kopf (siehe Abbildung 2)
2. Suchen Sie sich auf der Unterseite des Monitors im vorderen
Bereich die Aussparung für den Schwenkfuss.
3. Setzen Sie den Schwenkfuss passend zur Nut an und
drücken Sie dann den Schwenkfuss nach vorne, bis die
Verriegelung an der Unterseite des Monitors einrastet.
4. Zum Entfernen des Schwenkfusses drücken sie die
Verriegelung mit dem Daumen auf und entfernen diesen
entsprechend wieder heraus.
Abbildung 3
4. Schalten Sie nun Ihren Farbmonitor und Computer ein.
5. Für einen optimalen Arbeitskomfort kann der Schwenkfuss individuell
eingestellt werden.
Abbildung 2
Abbildung 4
Hinweis:
Aufgrund der Empfindlichkeit dieses Monitors gegen das Erdmagnetfeld
kann es vorkommen. daß geringe Beeinträchtigungen im Bild auftreten,
wenn der Monitor um mehr als 90° geschwenkt wird, während er eingeschaltet ist. In diesem Fall schalten Sie den Monitor aus und dann wieder
ein. Danach sollte das Monitorbild wieder normal sein.
4
5
B EDIENUNG
OSD-MENÜ ERLÄUTERUNGEN
Das digitale Bedienfeld befindet sich unten auf der Vorderseite an Ihrem
Farbmonitor. Wenn Sie mit den werkseitigen Einstellungen für Größe und
Position nicht zufrieden sind, programmieren Sie mit Hilfe dieser Bedienelemente die von Ihnen für jede Auflösung bevorzugte Einstellung. Anschließend sind diese auf Ihre Wünsche abgestimmten Einstellungen gespeichert, selbst wenn Sie die Auflösung ändern oder den Monitor ausschalten.
BESCHREIBUNG
Menu
DER
FUNKTIONSTASTEN:
Ein-/Aus-Taste
Ein- und ausschalten des Monitors.
LED-Indikator
Während des normalen Betriebes des Monitors leuchtet der
LED Indikator grün; gelb im ausgeschalteten Zustand.
Befindet sich der Monitor im Bereitschafts- bzw. SuspendModus blinkt der LED Indikator gelb.
Menü-Taste
Durch kurzes drücken der Menü-Taste wird das OSD-Menü
aufgerufen bzw. die markierten Einstellungspunkte bestätigt.
Auswahl-Taste
Auswahl des Einstellungspunktes.
Änderung des eingestellten Wertes
Das OSD-Bildschirm-Menü wird durch Betätigen der Menü-Taste des
Montiors aktiviert. Das Einstellungsfenster erscheint dann in der Mitte des
Bildausschnittes. Mit den Auswahl-Tasten
und
wird der gewünschte
Einstellungspunkt gewählt, welcher dann hervorgehoben dargestellt wird.
Um diesen dann auszuwählen, um die aktuelle Einstellung zu ändern,
einfach die Menü-Taste drücken. Das Ändern der Einstellung erfolgt über
die Auswahl-Tasten
und
; mit der Menü-Taste verlassen Sie das
aufgerufene Menü, die Einstellungen werden automatisch gesichert.
Hauptmenü
KONTRAST
Einstellung des Kontrastes des Bildschirms.
HELLIGKEIT
Einstellung des Helligkeitswertes des Bildschirms.
H-POSITION (HORIZONTALE
POSITION)
Einstellung der Horizontalposition des Bildes.
V-POSITION (VERTIKALE POSITION)
Einstellung der Vertikalposition des Bildes.
H-GRÖSSE (HORIZONTALE GRÖSSE)
Einstellung der horizontalen Grösse des Bildes.
V-GRÖSSE (VERTIKALE
GRÖSSE)
Einstellung der vertikalen Grösse des Bildes.
ROTATION
Dreht das Bild entgegen oder mit dem Uhrzeigersinn.
6
7
OSD-MENÜ ERLÄUTERUNGEN
OSD-MENÜ ERLÄUTERUNGEN
KISSENVERZERRUNG
FARBTEMPERATUR
Erhöht oder verringert den seitlichen Kisseneffekt nach innen oder
nach aussen.
Es wird die Farbtemperatur des Bildschirmes geregelt. 9300°K und
6500°K sind vom Hersteller festgelegte unveränderbare Werte.
9300°K : Der Farbe weiss wird ein bläulicher Farbton verliehen.
TRAPEZ
Vergrössert oder verkleinert den unteren Bildschirmabschnitt, um eine
Übereinstimmung zum Oberen zu erzielen.
6500°K : Der Farbe weiss wird ein rötlicher Farbton verliehen.
USER : Der Benutzer kann die Intensität der einzelnen RGB-Farben
individuell einstellen.
PARALLELOGRAMM
Zum Zentrieren des oberen und unteren Bildschirmabschnittes.
OSD EINSTELLUNGEN
Einstellung der Position des OSD-Bildschirm-Menüs.
PIN. BALANCE
Erhöht oder verringert den seitlichen Kisseneffekt nach rechts oder
nach links.
H-POSITION (HORIZONTALE
V-POSITION (VERTIKALE
FÜR DEN FORTGESCHRITTENEN USER
MOIRÉ KORREKTUR
Beim Aktivieren der Moiré Korrektur kann es zu einem leichten
Flimmern kommen. Normalerweise ist diese Funktion deaktiviert
(Horiz. = 0, Vertikal = 0).
V. MOIRÉ (VERTIKALER
MOIRÉ-EFFEKT)
Erhöht oder verringert den vertikalen Moiré-Effekt.
POSITION)
Einstellung der Horizontalposition des OSD-Bildschirm-Menüs.
POSITION)
Einstellung der Vertikalposition des OSD-Bildschirm-Menüs.
OSD TIMER
Einstellung der Anzeigedauer des OSD-Bildschirm-Menüs. Es
kann eine Anzeigedauer zwischen 8 und 60 Sekunden eingestellt
werden.
RESET
Es werden alle Einstellungen auf Werkseinstellung zurückgesetzt.
H. MOIRÉ (HORIZONTALER MOIRÉ-EFFEKT)
Erhöht oder verringert den horizontalen Moiré-Effekt.
CORNER (OPTIONAL)
Wird für die Ausrichtungseinstellung der oberen und unteren
Winkel benötigt.
LANGUAGE
Eine der Sprachen (Deutsch, Englisch, Französisch, Spanisch,
Italienisch, Portugiesisch, Chinesisch) für die Bildschirm-Menüs wählen.
EXIT
Beendet die OSD-Funktion (schliesst das OSD-Fenster).
TOP CORNER
Vergrössert oder verkleinert den oberen Blickwinkel.
BOTTOM CORNER
Vergrössert oder verkleinert den unteren Blickwinkel.
8
DEGAUSS
Beseitigt die Ansammlung von Magnetfeldern, die die korrekte Abtastung der
Elektronenbündel verändern und die Reinheit, die Klarheit und die Übereinstimmung der Bildschirmfarben gefährden. Nach dem Drücken der Taste flattert das
Bild und erscheint wiedern, nachdem der Bildschirm entmagnetisiert ist. Dieser
Vorgang kann einige Augenblicke dauern.
9
STROMSPARSYSTEM
EINSTELLUNGSRICHTLINIEN (TIMING GUIDE)
Dieser Monitor entspricht dem VESA® DPMSTM-Standard. Diese Funktion
kann den Stromverbrauch Ihres Monitors verringern, falls der angeschlossene Computer und die verwendete Videokarte ebenfalls dem
VESA® DPMSTM-Standard entsprechen.
Befindet sich der Monitor im Bereitschafts-, Suspend- oder Active OFF
Modus, so wird der Stromverbrauch des Montiors gedrosselt, um Strom
einzusparen. Wird dann die Maus bewegt oder eine Taste betätigt, schaltet sich der Monitor automatisch wieder an.
Der Monitor ist ein Mehrfrequenz-Bildschirm. Er arbeitet mit horizontalen
Frequenzen zwischen 30 kHz ~ 86 kHz und vertikalen Frequenzen
zwischen 50 Hz ~ 160 Hz. Durch sein Mikroprozessor-Design verfügt er
über die Möglichkeiten einer automatischen Synchronisation und
Größeneinstellung. Dieser Monitor bietet 11 vorprogrammierte
Einstellungen, die in der nachfolgenden Tabelle aufgeführt sind.
APM-Status
H-Sync
V-Sync
Video
LED Color
Ein
Aktiv
Aktiv
Aktiv
Grün
Out Of Range
Aktiv
Aktiv
Aktiv
Grün
Nicht aktiv Schwarz
Aus
Aktiv
Aus
Nicht aktiv Aktiv
Schwarz
Gelb blinkend
Gelb blinkend
Aus
Nicht aktiv Nicht aktiv Schwarz
Gelb blinkend
PLUG & PLAY
Dieser Monitor verfügt über VESA DDC1/2B-Fähigkeiten entsprechend
dem VESA DDC STANDARD. Diese erlauben dem Monitor, das HostSystem auf seine Identität aufmerksam zu machen und, je nach dem
Level des verwendeten DDC, zusätzliche Information über seine
Anzeigefähigkeiten mitzuteilen. Der Kommunikationskanal ist in zwei
Levels aufgeteilt, DDC1 und DDC2B.
DDC1 ist ein Ein-Richtungs-Datenkanal von der Anzeige zum Host, der
permanent EDID Information übermittelt. DDC2B ist ein Zwei-RichtungsDatenkanal, der auf dem I²C Protokoll basiert. Der Host kann EDID
Information über den DDC2B-Kanal abfragen.
10
Diese voreingestellten Betriebsarten decken die meisten der üblichen
Video-Betriebsarten ab, die von den gängigen Graphikkarten unterstützt
werden. Eine jede Graphikkarten-Implementierung dieser VideoBetriebsarten kann jedoch etwas unterschiedlich sein. Wenn Sie es für
erforderlich halten, kleinere Bildschirmeinstellungen (z.B. Horizontal- und
Vertikalposition) vorzunehmen, so lesen Sie bitte den Abschnitt "OSDBildschirm-Menü" dieses Handbuches. Dort finden Sie die entsprechenden Anweisungen.
Bitte beachten Sie, dass der Monitor nicht auf diese in der Fabrik
voreingestellten Einstell-Betriebsarten beschränkt ist. Er kann eigentlich
durch seine Mehrfrequenzeigenschaften jedes Signal innerhalb seines
Frequenzbereiches von 30 kHz ~ 86 kHz horizontal und 50 Hz ~ 160 Hz
vertikal darstellen.
Wenn Sie gern eine der voreingestellten Einstellmöglichkeiten nutzen
möchten, so schlagen Sie im Installationsleitfaden Ihres Graphikkartenherstellers nach, ob Sie dort
Anweisungen finden, wie diese
Veränderungen vorzunehmen sind. Durch die Graphikkarte wird die
Bildwiederholrate gesteuert. Die meisten Graphikkarten verfügen über ein
Software-Hilfsprogramm oder über Hardware-Dip-Schalter, mit dem/
denen Sie die Frequenz ändern können, die bei jeder Auflösung zur
Anwendung kommt.
11
TIMING TABLE
PINBELEGUNG
VGA Anschluss
Preset
VGA
Auflösung
Horizontal Vertikal
Frequenz
Horizontal
Vertikal
M1
640
480
31.47kHz
60Hz
M2
720
400
31.47kHz
70Hz
M3
640
480
43.27kHz
85Hz
M4
640
480
50.60kHz
100Hz
M5
800
600
37.88kHz
60Hz
M6
800
600
53.67kHz
85Hz
VESA M7
800
600
63.92kHz
100Hz
M8
1024
768
48.36kHz
60Hz
M9
1024
768
60.02kHz
75Hz
M10
1024
768
68.68kHz
85Hz
M11
1280
1024
79.98kHz
75Hz
Hinweis: Im Falle, dass Sie den Monitor an einen Macintosh anschließen
möchten, benötigen Sie gegebenenfalls einen zusätzlichen Mac-Adapter.
Pin
Pin
Pin
Pin
Pin
Pin
Pin
Pin
Pin
Pin
Pin
Pin
Pin
Pin
Pin
1
2
3
4
5
6
7
8
9
10
11
12
13
14
15
VGA Anschluss
1
Rot
5
Grün
Blau
6
10
keine Verbindung
Masse
Video Rot Masse
11
15
Video Grün Masse
Video Blau Masse
keine Verbindung
Masse
Masse
DDC SDA
Horizontal Sync.
Vertikal Sync.
DDC SCL
* Zusätzlich zu den 11 voreingestellten Preset-Timings, können Sie weitere 8 User-Modes definieren, die in dem Fall benutzt werden können,
wenn keine Stadardvideomodi verwendet werden. Wenn das
Videoeingangssignal anders ist als bei den Standardmodi des
Herstellers, speichert der Monitor automatisch die neuen
Synchronisierungsdaten. Trotzdem könnte es notwendig sein, dass die
angenommenen Parameter einzustellen sind, die nicht initialisiert werden
können (RESET).
12
13
SPEZIFIKATIONEN
Bildröhre
Typ
IM STÖRUNGSFALLE
17” (43.2cm) Diagonal
Maskenabstand 0.25mm
Sichtbare
Arbeitsfläche
Oberfläche
entspiegelter Bildschirm mit
getöntem Antireflexglas
max.
Bildgrösse
16.0” (40.69cm) Diagonal
310mm (B) x 230mm (H)
Falls sich die Störungen auch nach Durchführung der nachstehenden
Überprüfungen nicht beseitigen lassen, sollten Sie den Netzstecker
abziehen und sich an Ihren Händler wenden.
Beachten Sie bitte die folgenden Punkte
Symptom
(werksseitig)
Auflösung
max.
empf.
1280 x 1024 @ 75 Hz
1024 x 768 @ 85 Hz
Abtastfrequenz
horizontal
vertikal
30 - 86 kHz
50 - 160 Hz
Bandbreite
max.
145 MHz
Eingangssignal
Video
Sync.
Anschluss
Analog 0.7Vp-p / 75 Ohms
Separate sync. TTL level
Mini D-Sub 15 Pin
Analoganschluss
Die BetriebsLED leuchtet
nicht.
Keine Anzeige.
Unbegrenzte Anzahl von Farben
(abhängig von der Videokarte)
Stromversorgung
Eingang
Verbrauch
AC 100 - 240V, 50/60Hz
On : max. 100W
11
8
Factory Preset Timings
User mode Timings
Betriebsumgebung Temperatur
5°C ~ 40°C
Luftfeuchtigkeit 20% ~ 80% (nicht kondensierend)
Lagerungsbedingungen
Abhilfe
Netzkabel/
Stecker
Das Netzkabel korrekt an die
Steckdose anschließen.
Ein- & Austaste
Drücken Sie die Ein- und Austaste.
Signalkabel
Schließen Sie das Signalkabel
richtig an.
Computer (Die
Stromsparfunktion
kann aktiv sein. In
diesem Fall leuchtet die BetriebsLED gelb.)
Schalten Sie die Stromsparfunktion
aus. (Betätigen Sie hierzu die Maus
oder die Tastatur. Einzelheiten lesen
Sie bitte in der Bedienungsanleitung
für die verwendete Hardware nach.)
Kontrast,
Helligkeit und
Hintergrundbeleuchtung
Den Kontrast, die Helligkeit und die
Hintergrundbeleuchtung richtig einstellen.
Steckdose
Überprüfen Sie die Steckdose,
indem Sie testen, ob ein anderes
elektr. Gerät an ihr funktioniert.
Temperatur
-20°C ~ 60°C
Luftfeuchtigkeit 10% ~ 90% (nicht kondensierend)
Plug & Play
DDC1/2B
Abmessungen
(B) x (H) x (D)
406mm x 407mm x 417mm
Gewicht
Netto
Brutto
19.0kg
21.5kg
14
Die BetriebsLED geht nicht
aus.
Überprüfung
15
IM STÖRUNGSFALLE
IM STÖRUNGSFALLE
Beachten Sie bitte die folgenden Punkte
Symptom
Das Bild ist zu
groß oder zu
klein. Es ist von
der richtigen
Position versetzt.
Ein Teil des
Bildes fehlt. Die
Farbe eines Teils
des Bildes ist
verändert.
Auch nach der
Einstellung sind
die Zeichen
noch undeutlich.
Überprüfung
Nehmen Sie die gewünschten
Einstellungen über das OSDBildschirm-Menü vor.
Ist die Betriebsart garantiert?
Lesen Sie in der ComputerBedienungsanleitung nach, und
ändern Sie die Anzeigebetriebsart
Ihres Computers entsprechend.
Überschreitet die
Videotaktfrequenz
des Bildsignals
den Standardpegel (145MHz)?
Symptom
Die Anzeigefarbe ist nicht
normal.
Überprüfung
Signalkabel
Befindet sich das
Bildschirmgröße
Eingangsund -position
synchronsignal
ändern sich nicht.
innerhalb des
Betriebsbereichs?
Abhilfe
Das Signalkabel richtig anschliessen.
Überprüfen Sie die Video-Ausgangsbetriebsart vom Computer
und wählen Sie eine Betriebsart
innerhalb des Monitor-Betriebsbereichs. (Einzelheiten entnehmen
Sie bitte der Bedienungsanleitung
der verwendeten Hardware.)
Überprüfen Sie den Videosignalpegel vom Computer und stellen
Sie ihn richtig ein. Vermindern Sie
die Vertikalfrequenz des Bildsignals,
um die Videotaktfrequenz auf einen
Pegel unter dem Standardpegel
(145 MHz) einzustellen.
Ist die Helligkeit
oder der Kontrast
ganz zurückgedreht?
Den Kontrast, die Helligkeit und die
Hintergrundbeleuchtung richtig einstellen. (Weitere Einzelheiten entnehmen Sie bitte der Bedienungsanleitung für den verwendeten
Computer.)
Ist der Videopegel richtig
eingestellt?
Überprüfen Sie den Videosignalpegel vom Computer und stellen
Sie ihn richtig ein.
M
16
Abhilfe
Ist die Betriebsart nicht gespeichert?
M
Das Bild ist zu
dunkel.
Beachten Sie bitte die folgenden Punkte
Copyright bei miro Displays GmbH© 2002
Dieses Handbuch ist urheberrechtlich geschützt. Alle Rechte sind
vorbehalten. Kein Teil dieses Handbuchs darf ohne vorherige schriftliche
Zustimmung des Herstellers vervielfältigt, übertragen, transkribiert oder
in eine andere Sprache übersetzt werden.
17
Spis tre ci
WST P
Zgodno z normami bezpiecze stwa ...................................................i
Zasady bezpiecznego u ytkowania ......................................................ii
Informacje ogólne ................................................................................. 1
Zawarto opakowania......................................................................... 2
Specyfikacja monitora .......................................................................... 3
Pierwsze uruchomienie ........................................................................ 4
PIERWSZE URUCHOMIENIE
Podł czenie monitora........................................................................... 5
Przyciski kontrolne ............................................................................... 6
WY WIETLANIE FUNKCJI NA EKRANIE
Opis funkcji OSD .................................................................................. 7
Funkcje zarz dzania poborem energii ............................................... 11
Funkcje automatycznego ustawiania Plug&Play................................ 12
Parametry od wie ania ekranu .......................................................... 13
Opis pinów zł cza kabla sygnałowego............................................... 14
Specyfikacja techniczna monitora ...................................................... 15
Eliminacja podstawowych usterek eksploatacji monitora .................. 17
Polish
OPIS PODSTAWOWYCH WŁA CIWO CI
ZGODNO
Z NORMAMI BEZPIECZE STWA
UWAGA:
W celu spełnienia norm dotycz cych radiacji, zawsze nale y stosowa
fabryczny ekranowany kabel sygnałowy dostarczany oryginalnie z
monitorem.
Monitor miro P17F86I został przetestowany na zgodno z norm
bezpiecze stwa „B” Polskiego Centrum Bada i Certyfikacji w
Warszawie.
i
Polish
Polish
Informacja:
Monitor miro P17F86I został przetestowany pod wzgl dem zgodno ci z
normami bezpiecze stwa Polskiego Centrum Bada i Certyfikacji w
Warszawie.
Normy te zostały ustanowione w celu zapewnienia odpowiedniej ochrony
przed zakłóceniami radiologicznymi w miejscu u ytkowania sprz tu oraz
bezpiecznego u ytkowania.
Monitor miro P17F86I wykorzystuje energi elektryczn o
cz stotliwo ciach radiowych i mo e tym samym emitowa j z pewn
dopuszczaln normami amplitud . Je eli monitor nie zostanie
zainstalowany i nie b dzie u ytkowany zgodnie z zasadami opisanymi w
tej instrukcji, mo e spowodowa powstanie zakłóce w urz dzeniach
b d cych odbiornikami energii o cz stotliwo ciach radiowych. Jest
równie mo liwe, e w pewnych sytuacjach mo e wyst pi tak e
wzajemne oddziaływane monitora i sprz tu radiowego.
Je eli Pa stwa monitor spowoduje oddziaływanie na prac urz dze
radiowych lub telewizyjnych, u ytkownik jest proszony o zastosowanie
jednej z metod eliminacji zjawiska interferencji (wzajemnego
oddziaływania) urz dze :
• Zmiana orientacji lub poło enia anteny odbiorczej odbiornika
(radiowego lub telewizyjnego)
• Zwi kszenie odległo ci pomi dzy monitorem i innym sprz tem
radio-elektronicznym
• Podł czenie monitora do innego obwodu zasilaj cego ni ten, z
którego korzysta odbiornik radiowo-telewizyjny
• Skonsultowanie si z dealerem sprz tu komputerowego lub
do wiadczonym technikiem radiowo-telewizyjnym w celu
uzyskania pomocy
ZASADY BEZPIECZNEGO U YTKOWANIA
1. Prosimy o zapoznanie si z niniejsz instrukcj . Instrukcj nale y
zachowa w celu umo liwienia skorzystania z informacji w niej
zawartych w przyszło ci.
2. Nale y przestrzega uwag i ostrze e umieszczonych bezpo rednio
na sprz cie.
3. Nale y odł czy monitor od sieci zasilaj cej pr du zmiennego
(gniazdka zasilaj cego 240V) przed ka dym czyszczeniem monitora.
Nie nale y u ywa płynnych rodków czyszcz cych b d aerozoli.
4. Nie u ywa monitora w pomieszczeniach o du ym zawilgoceniu.
5. Nie stawia monitora na niestabilnych podstawach, stołach,
kartonach. Upadek monitora nawet z małej wysoko ci mo e
spowodowa jego zniszczenie.
6. Otwory w obudowie, zarówno od spodu, z boku jak te z tyłu monitora,
zostały wykonane w celu umo liwienia wentylacji wn trza,
zabezpieczenia przed przegrzaniem monitora i zapewnienia mu
odpowiednich warunków funkcjonowania. Otwory te nigdy nie powinny
by przesłaniane a monitor umieszczany na takich sprz tach, jak
łó ko, sofa, dywanik lub na sprz tach o podobnych powierzchniach.
Monitor nigdy nie powinien by umieszczany nad lub w pobli u
kaloryfera lub innego ródła ciepła. Nie nale y tak e zabudowywa
monitora bez zapewnienia odpowiedniej wentylacji i przepływu
powietrza.
7. Monitor mo e by zasilany wył cznie napi ciem podanym na tabliczce
znamionowej. Je eli nie s Pa stwo pewni co do parametrów
zasilania wyst puj cego w Pa stwa sieci lub na wyj ciu urz dzenia
zasilaj cego – prosimy o kontakt z dealerem lub miejscowym
zakładem energetycznym.
8. Nie nale y kła
adnych przedmiotów na kablu zasilaj cym. Nie
nale y kła kabla w miejscu, przez które ktokolwiek mógłby
przechodzi .
9. Je eli u ywamy dodatkowego przedłu acza do kabla zasilaj cego
monitor, nale y upewni si , e przedłu acz ten spełnia wymagania
obci alno ci pr dowej odpowiadaj cej maksymalnemu pr dowi
pobieranemu przez monitor. Ponadto zalecane jest, aby całkowita
warto pr du pobieranego przez wszystkie urz dzenia podł czone
wraz z monitorem do tego samego gniazdka sieciowego nie
przekraczała 15 amperów.
10.Nigdy nie nale y wsuwa adnych przedmiotów poprzez otwory w
obudowie monitora, poniewa mog one dotkn elementów
znajduj cych si pod wysokim napi ciem wewn trz monitora lub
spowodowa zwarcie elektryczne, a w konsekwencji po ar. Nigdy nie
nale y rozlewa adnej cieczy na obudow monitora.
11.Nigdy nie nale y dokonywa samodzielnych lub nieautoryzowanych
napraw, poniewa otwarcie obudowy wi e si z ryzykiem pora enia
pr dem wysokiego napi cia wyst puj cego na niektórych
komponentach wewn trz monitora. Zalecamy dokonywanie napraw w
autoryzowanych serwisach firmy MIRO.
12.Prosimy odł czy monitor od zasilania sieciowego a nast pnie o
kontakt z autoryzowanym personelem w nast puj cych przypadkach:
a) Nast piło uszkodzenie przewodu zasilaj cego.
b) Do wn trza obudowy przedostała si ciecz.
c) Podejrzewamy, e monitor wystawiony był na opad deszczu lub
nara ony na zalanie wod .
d) Je eli mimo post powania zgodnego z instrukcj obsługi
zauwa amy, e monitor działa nieprawidłowo. Generalnie
zalecane jest regulowanie we własnym parametrów pracy
monitora dost pne jedynie za pomoc dost pnych na panelu
czołowym przycisków. U ycie nieopisanych w tej instrukcji
obsługi metod mo e doprowadzi do uszkodzenia monitora lub
co najmniej wymaga b dzie bardzo pracochłonnych zabiegów
serwisie autoryzowanym serwisie w celu odtworzenia
pierwotnych ustawie .
e) Je eli monitor został upuszczony z wysoko ci lub obudowa
została uszkodzona mechanicznie.
13.Nale y stosowa wył cznie kabel zasilaj cy dostarczany wraz z
monitorem (w opakowaniu zbiorczym) lub kabel analogiczny,
spełniaj cy nast puj ce warunki techniczne: pr d minimum 10A dla
napi cia 240V, typ UL z certyfikatami CSA, typu SVT/SJT,
zaaprobowany przez VDE (odpowiednie markery powinny by
widoczne na powierzchni osłony kabla).
14.Gniazdko sieciowe powinno znajdowa si w pobli u monitora i by
łatwo dost pne.
ii
iii
Polish
Polish
ZASADY BEZPIECZNEGO U YTKOWANIA
INFORMACJE O GÓLNE
ZAWARTO
Gratulujemy zakupu monitora kolorowego miro P17F86I.
Przed przyst pieniem do eksploatacji monitora, prosimy o sprawdzenie,
e wszystkie elementy znajduj si w kartonie zbiorczym:
• 17 calowy monitor miro P17F86I (wraz z doł czonym do niego 15
zł czowym kablem typu D-SUB)
• Sieciowy kabel zasilaj cy.
• Poni sza instrukcja obsługi.
• Karta gwarancyjna.
Monitor ten został wykonany z wykorzystaniem najnowszych osi gni w
konstruowaniu kineskopów w technologii FST oraz mikroprocesorowych
metod kontroli parametrów wy wietlanego obrazu. Monitor P17F86I
posiada zarówno automatyczny, jak te r czny tryby regulacji.
Tryb automatyczny został wst pnie zaprogramowany i odpowiada
ustawieniom fabrycznym.
Tryb r czny umo liwia indywidualne ustawienia wła ciwo ci ekranu za
pomoc cyfrowej regulacji, odpowiednio do rodzaju stosowanej aplikacji
lub programu.
UWAGA: je eli którykolwiek z wymienionych elementów zagin ł lub uległ
uszkodzeniu, prosimy o kontakt z Pa stwa Sprzedawc .
Monitor nale y wyj z kartonowego opakowania post puj c zgodnie z
instrukcj podan na.
Nale y zachowa karton oraz pozostałe elementy opakowania na
wypadek konieczno ci dalszego transportu.
Polish
Polish
Ergonomiczne wła ciwo ci antyodblaskowej powierzchni ekranu, wysokie
cz stotliwo ci od wie ania ekranu oraz ruchoma podstawka monitora
umo liwiaj komfortow , długotrwał prac przy wysokich
rozdzielczo ciach wy wietlanego obrazu.
OPAKOWANIA
Instrukcja obsługi opisuje kolejno bardziej szczegółowo funkcje i
mo liwo ci monitora tak, i mo liwe jest osi gni cie optymalnych,
najwy szych parametrów jego funkcjonowania.
1
2
SPECYFIKACJA MONITORA
•
•
•
•
•
•
•
•
•
•
Ruchoma podstawa monitora
Aby podł czy ruchom podstaw monitora, nale y wykona
nast puj ce czynno ci:
1. Bardzo ostro nie poło y monitor na jego boku lub ekranem do
dołu (zgodnie z rys.1)
2. Prosimy zwróci uwag na rowek prowadz cy w spodniej cz ci
obudowy monitora
3. Wsun wystaj cy trzpie w podstawie monitora w ten rowek, a
nast pnie przesun podstaw ku przodowi (w kierunku
powierzchni ekranu) a usłyszymy lekkie klikni cie. Oznacza to
b dzie, e podstawa znajduje si we wła ciwym, bezpiecznym
poło eniu.
4. Aby w razie potrzeby odł czy podstaw od monitora, nale y
uło y go w pozycji opisanej w punkcie 1, a nast pnie wysun
podstaw z rowka przesuwaj c j ku tyłowi monitora.
rys. 1
3
4
Polish
Polish
•
Pozioma cz stotliwo skanowania w zakresie od 30 kHz do 86
kHz, od wie anie pionowe w zakresie od 50 Hz do 160 Hz
17 calowy płaski kineskop typu FlaTTop Pure Flat (16 calowa
powierzchnia widoczna ekranu)
plamka 0.25 mm
Cyfrowa regulacja z mikroprocesorowym systemem OSD
Zgodno z systemem Windows® Plug & Play (DC 1/2B)
11 zapami tywanych trybów ustawie
Zapas wydajno ci w celu zwi kszenia zakresu regulacji
powierzchni widocznej ekranu
Kompatybilny ze standardami VGA IBM, rozszerzonego VGA,
Super VGA, XGA IBM, XGA/2, a tak e zgodny z wszystkimi
standardami ergonomii VESA
Zgodny ze standardem Apple® Macintosh™ a do rozdzielczo ci
1280 x 1024 @ 75 Hz
Uniwersalny zasilacz pr du zmiennego
Zgodny z systemem zarz dzania energi DPMS™ (Display
Power Management Signaling) specyfikacji VESA®
PIERWSZE URUCHOMIENIE
PRZYCISKI KONTROLNE
Aby podł czy monitor do komputera i sieci zasilaj cej, nale y wykona
nast puj ce czynno ci:
1. Wył czy zasilanie zarówno monitora, jak te komputera.
Wył cznik sieciowy monitora znajduje si w dolnym prawym rogu
na panelu czołowym.
2. Poł czy monitor 15 pinowym kablem sygnałowym z kart
graficzn komputera. Nale y dokr ci oba wkr ty w celu
zapewnienia wła ciwego ekranowania przewodu i zabezpieczy
go przed wypadaniem.
3. Poł czy e sk wtyczk kabla zasilaj cego do wej cia zasilania
na tylnej ciance monitora. Nast pnie nale y podł czy drug
wtyczk do gniazdka sieciowego. W przypadku komputerów typu
Apple-Macintosh niezb dne mog by specjalne przej ciówki.
4. Wł czy zasilanie monitora i komputera.
5. Monitor na ruchomej podstawce nale y ustawi tak, aby uzyska
maksymalny komfort ogl dania obrazu na powierzchni ekranu.
Przycisk wył cznika sieciowego
Nale y nacisn przycisk w celu wł czenia lub wył czenia monitora.
Prosimy o uwzgl dnienie, e wyst pi krótkie opó nienie, zanim na
ekranie pojawi si obraz po wł czeniu monitora.
rys. 2
Uwaga:
Ze wzgl du na podatno
monitora na wpływ zewn trznego
magnetycznego pola Ziemi, na ekranie mog wyst pi nieznaczne
zniekształcenia obrazu, je eli obracali my monitorem na podstawce
o k t wi kszy ni 90º w czasie, gdy monitor był wł czony. Je eli takie
zjawisko wyst piło, prosimy o wył czenie i ponowne wł czenie
monitora. Obraz na ekranie powinien wróci do stanu bez
zniekształce .
5
Wska nik zasilania
Wska nik wieci kolorem zielonym, je eli monitor działa normalnie. Je eli
monitor przechodzi w tryb oszcz dzania energii – wska nik wieci
impulsowo.
Ustawienie parametrów obrazu
Monitor posiada regulacj parametrów obrazu za pomoc menu
ekranowego (OSD). Ikony OSD zaprojektowano, aby ułatwi wła ciwe
ustawienia. Gdy wybrana ikona mruga impulsowo, wskazuje to na
parametr, który chcieliby Pa stwo regulowa . Generalnie, nale y
zachowa nast puj c kolejno :
1. Nacisn i pu ci pokr tło regulatora OSD.
2. Pokr ci regulatorem a pod wietli si wła ciwa ikona na menu
ekranowym OSD.
3. Nacisn i pu ci pokr tło w celu aktywowania danej funkcji
OSD. W tym momencie kolor wewn trznej powierzchni menu
powinien zmieni si z niebieskiego na zielony.
4. W celu ustawienia wymaganej warto ci wybranego parametru
obrazu nale y przekr ci pokr tło w kierunku zgodnym z ruchem
wskazówek zegara (zwi kszaj c w ten sposób warto danego
parametru) lub w kierunku przeciwnym (aby zmniejszy warto
parametru).
5. Nacisn i pu ci pokr tło raz jeszcze w celu zatwierdzenia
ustawionej warto ci. Kolor menu powróci wówczas ponownie do
niebieskiego. Nast pnie mo na wybra kolejne ikony w celu
zmiany odpowiadaj cych im funkcji ekranowych. Mo na równie
wybra ikon EXIT, aby po naci ni ciu pokr tła opu ci menu
OSD.
6
Polish
Polish
PODŁ CZENIE MONITORA
OPIS FUNKCJI OSD
OPIS FUNKCJI OSD
Pincushion (Zniekształcenia poduszkowe)
Regulacja zniekształce poduszkowych.
Trapezoid (Zniekształcenia trapezowe)
Umo liwia zmian szeroko ci dołu obrazu w celu dopasowania jej do
szeroko ci góry.
Główne menu ekranowe
UWAGA: podano nazwy funkcji w j zyku angielskim. Istnieje mo liwo
wyboru innego j zyka menu.
Birigtness (Jasno )
Regulacja jasno ci obrazu wraz z tłem.
H-Position (horizontal position) (Poło enie poziome)
Przesuni cie obrazu w prawo lub w lewo.
V-Position (vertical position) (Poło enie pionowe)
Przesuni cie obrazu w gór lub w dół.
H-Size (horizontal size) (Szeroko )
Zwi kszenie lub zmniejszenie szeroko ci obrazu.
V-Size (vertical size) (Wysoko )
Zwi kszenie lub zmniejszenie wysoko ci obrazu.
Rotation (Obrót)
Obrót obrazu a
monitora.
7
do ustawienia kraw dzi równolegle do podstawy
Pin. Balance (Wypukło )
Ustawia równolegle kraw dzie boczne obrazu poprzez ich wygi cie w
tym samym kierunku.
Edvanced Select (Ustawienia zaawansowane)
Moire Adjustement (Regulacja efektu mory)
Obraz na ekranie mo e lekko drga , je eli ta funkcja jest wł czona
(ON). Standardowo redukcja mory jest wył czona (OFF) (H=0, V=0).
V. Moire
Zwi ksza lub zmniejsza zbie no
w pionie (Mora pionowa).
H. Moire
Zwi ksza lub zmniejsza zbie no
w poziomie (Mora pozioma).
Corner (Rogi – funkcja opcjonalna)
Słu y do niezale nego ustawiania obrazu w rogach górnych i dolnych.
Top Corner (Rogi górne)
Zmniejsza lub zwi ksza wielko
górnych rogów ekranu.
Bottom Corner (Rogi dolne)
Zmniejsza lub zwi ksza wielko
dolnych rogów ekranu.
8
Polish
Polish
Contrast (Kontrast)
Regulacja intensywno ci obrazu w stosunku do tła.
Parallelogram (Równoległobok)
Umo liwia centrowanie dolnej i górnej kraw dzi obrazu poprzez
przesuwanie ich w przeciwnych kierunkach (przez co nast puje te
zmiana pochylenia kraw dzi ekranu).
OPIS FUNKCJI OSD
OPIS FUNKCJI OSD
Color Select (Ustawienie temperatury kolorów)
Pozwala na ustawienie temperatury kolorów obrazu na ekranie.
Temperatury 9300K i 6500K s ustawiane fabrycznie i nie podlegaj
regulacji przez u ytkownika.
Exit (Wyj cie)
Pozwala wyj z menu OSD (wył czy je).
9300K: biel o odcieniu niebieskawym.
6500K: biel o odcieniu czerwonawym.
Degauss (Rozmagnesowanie)
Eliminuje skutki wpływu zewn trznych pól magnetycznych, powoduj cych
zakłócenia czysto ci kolorów, ostro ci i zbie no ci obrazu. Po naci ni ciu
regulatora, obraz przej ciowo drga a do zako czenia rozmagnesowania.
User (Ustawienia u ytkownika)
Pozwalaj
na indywidualne ustawianie intensywno ci bieli.
Zwi kszanie lub zmniejszanie składowej czerwonej, zielonej lub
niebieskiej zale y od aktualnego wyboru okre lonej składowej.
Polish
Polish
OSD Adjustment (Poło enie OSD)
Słu y do okre lania poło enia menu na ekranie monitora
H-Position (horizontal position)
Pozwala na przesuwanie menu OSD w poziomie.
V-Position (vertical position)
Pozwala na przesuwanie menu OSD w pionie.
OSD Timer (Czas wy wietlania menu OSD)
Okre la czas, przez jaki menu OSD jest wy wietlane na ekranie po
ostatnim naci ni ciu regulatora (czas mo e by zadawany w zakresie
8 do 60 sekund).
Reset (Przywołanie ustawie fabrycznych)
Przywraca ustawienia fabryczne obrazu na ekranie monitora. Nale y
przytrzyma regulator a zniknie wska nik przebiegu przywracania
ustawie .
Language (J zyk menu OSD)
Pozwala wybra jeden z nast puj cych j zyków menu OSD: angielski,
niemiecki, hiszpa ski, włoski, francuski, portugalski lub chi ski.
9
10
FUNKCJE ZARZ DZANIA POBOREM ENERGII
FUNKCJE AUTOMATYCZNEGO USTAWIANIA PLUG & PLAY
Funkcja zarz dzania energi tego monitora pozwala na dwa stany
poboru mocy: gdy monitor jest w stanie działania (ON) lub przekroczonej
amplitudy (Out Of Range) sygnału video – wówczas dioda wieci kolorem
zielonym – oraz gdy monitor jest w stanie u pienia (OFF) – wówczas
dioda pulsuje kolorem pomara czowym.
Monitor miro P17F86I jest zgodny ze standardem VESA DDC1/2B.
Pozwala mu to na komunikowanie si z jednostk centraln komputera.
Dzi ki temu komputer dokonuje automatycznej identyfikacji monitora i,
zale nie od standardu DDC, uzyskuje szereg dodatkowych informacji o
parametrach funkcjonowania monitora. Kanał informacyjny jest
definiowany dwupoziomowo: jako DDC1 i DDC2B. DDC1 jest
jednokierunkowym kanałem od monitora do jednostki centralnej, w
sposób ci gły przekazuj cym informacje EDID na temat funkcjonowania
monitora. DDC2B jest dwukierunkowym kanałem danych bazuj cym na
2
protokole I C. Komputer mo e za da informacji EDID poprzez kanał
DDC2B.
Pobór mocy
Synch. Poz.
Kolor diody
On
Out Of
Range
Off
Aktywne
Aktywne
Zielony
Zielony
Działa
Nie działa
Martwe
Off
Nie działa
Działa
Martwe
Off
Nie działa
Nie działa
Martwe
Pulsuj cy
pomara czowy
Pulsuj cy
pomara czowy
Pulsuj cy
pomara czowy
Polish
Polish
Video
Działa
Działa
Synch.
Pionowa
Działa
Działa
Monitor miro P17F86I jest zgodny ze standardem VESA (Green Monitor).
Jego wła ciwo ci pozwalaj na oszcz dzanie energii elektrycznej, gdy na
wej cie nie jest podawany sygnał video. Wówczas monitor po pewnym
czasie automatycznie przeł cza si w tryb OFF (u pienia). Wówczas
pobór mocy przez monitor ulega znacznej redukcji. Je eli sygnał video
zostanie ponownie podany na wej cie monitora, pobór mocy ulega
automatycznemu zwi kszeniu a na ekranie pojawia si
obraz.
Odtwarzanie obrazu nast puje po naci ni ciu dowolnego klawisza na
klawiaturze lub myszy komputera. Ta wła ciwo jest podobna do funkcji
„Screen Saper”, za wyj tkiem przypadku, gdy monitor jest całkowicie
wył czony.
11
12
PARAMETRY OD WIE ANIA EKRANU
OPIS PINÓW ZŁ CZA KABLA SYGNAŁOWEGO
miro P17F86I jest 17” monitorem kolorowym funkcjonuj cym przy
wykorzystaniu wielu trybów cz stotliwo ci od wie ania ekranu. Działa on
w zakresie cz stotliwo ci poziomych od 30 kHz do 86 kHz oraz
cz stotliwo ci pionowych od 50 Hz do 160 Hz. Dzi ki układom
mikroprocesorowym umo liwia automatyczn
synchronizacj
oraz
automatyczne dostosowanie rozdzielczo ci.
Monitor oferuje 11 ustawie fabrycznych o parametrach podanych w
poni szej tabeli.
Zł cze VGA
Tabela ustawie fabrycznych
•
•
13
Rozdzielczo
Pozioma
Pionowa
640
480
720
400
640
480
640
480
800
600
800
600
800
600
1024
768
1024
768
1024
768
1280
1024
Cz stotliwo
Pozioma
Pionowa
31.47kHz
60Hz
31.47kHz
70Hz
43.27kHz
85Hz
50.60kHz
100Hz
37.88kHz
60Hz
53.67kHz
85Hz
63.92kHz
100Hz
48.36kHz
60Hz
60.02kHz
75Hz
68.68kHz
85Hz
79.98kHz
75Hz
Czerwony
Zielony
Niebieski
Masa
Masa
Masa koloru czerwonego
Masa koloru zielonego
Masa koloru niebieskiego
Nie poł czony
Masa
Masa
DDC SDA
Synchronizacja pozioma
Snchronizacja pionowa
DDC SCL
Polish
Ustawienie
VGA
M1
M2
M3
M4
M5
M6
VESA
M7
M8
M9
M10
M11
Pin 1
Pin 2
Pin 3
Pin 4
Pin 5
Pin 6
Pin 7
Pin 8
Pin 9
Pin 10
Pin 11
Pin 12
Pin 13
Pin 14
Pin 14
Poza 11 ustawieniami fabrycznymi, mo liwe jest 8
zapami tywanych dodatkowych ustawie u ytkownika. Je eli
zadano powy ej 8 indywidualnych ustawie , b d one kolejno
nadpisywane na poprzednio zarejestrowane.
W przypadku współpracy z komputerami typu Macintosh,
niezb dne jest stosowanie specjalnej przej ciówki na kabel
sygnałowy.
14
SPECYFIKACJA TECHNICZNA MONITORA
Kineskop
Powierzchnia
widoczna
Rozdzielczo
Typ
17” (43.2 cm) po przek tnej,
idealnie płaski (typu Pure Flat)
Plamka
0.25 mm
Powierzchnia Typu black matrix, pokryta
warstw antyodblaskow
i antystatyczn
max.
16.0” (40.69 cm) po przek tnej
Wymiary ekranu 310 mm (W) x 230 mm (H)
(dane fabryczne)
max.
zalecana
Pasma przenoszenia
poziome
pionowe
Pasmo procesora sygn. max.
Ekran
Wej cie analogowe
Zasilanie
1280 x 1024 @ 75 Hz
1024 x 768 @ 100 Hz
30 – 86 kHz
50 – 160 Hz
145 MHz
Video
Analogowy 0.7 V p-p/75 Ohm
Synchronizacja Oddzielna, poziom TTL
Zł cze
Mini D-Sub 15 pinowe
Niesko czona liczba kolorów
(zale ne od wła ciwo ci karty video)
Napi cie
Pobór mocy
Ustawienia fabryczne
Ustawienia u ytkownika
Warunki pracy
Temperatura
Wilgotno
Warunki przechowania Temperatura
Wilgotno
Plug & Play
Zmienne 100 – 240 V, 50/60 Hz
W stanie ON – poni ej 110W
11
8
o
5 – 40 C
20 – 80 % (nie skondensowana)
o
-20 – 60 C
10 – 90 % (nie skondensowana)
DDC1/2B
Wymiary
(W) x (H) x (D) 406 mm x 407 mm x 417 mm
Waga
Netto
Brutto
19.0 kG
21,5 kG
Polish
Polish
Sygnał wej ciowy
15
ELIMINACJA PODSTAWOWYCH USTEREK EKSPLOATACJI MONITORA
ELIMINACJA PODSTAWOWYCH USTEREK EKSPLOATACJI MONITORA
Je eli Pa stwa monitor nie działa prawidłowo, prosimy o zapoznanie si
z poni szymi sposobami szybkiego usuwania najcz ciej wyst puj cych
usterek. Je eli problemu nie mo na usun
za pomoc jednego z
opisanych sposobów, prosimy o skontaktowanie si z dealerem lub
autoryzowanym serwisem.
Podwójny (podzielony) obraz na ekranie
Sprawdzi , czy w ustawieniach karty graficznej nie zastosowano trybu z
przeplotem lub rozszerzonym na dwa ekrany pulpitem.
Brak obrazu
Sprawdzi , czy kabel sygnałowy oraz kabel zasilaj cy s prawidłowo
podł czone.
Sprawdzi , czy monitor nie znajduje si aktualnie w stanie oszcz dzania
energii.
Zasilanie jest wł czone, ale nie ma obrazu
Upewni si , e kabel sygnałowy jest dokładnie doł czony do wyj cia
karty graficznej w komputerze.
Ewentualnie ustawi wła ciwy poziom jasno ci i kontrastu.
Obraz jest niestabilny, nieostry, drgaj cy
Sprawdzi , czy kabel sygnałowy jest ci le doł czony do komputera.
Sprawdzi , czy rozdzielczo oraz od wie anie ekranu mieszcz si
zakresie dopuszczanych warto ci (zgodnie ze specyfikacj ).
w
Obraz przesuwa si pionowo
Nale y sprawdzi , czy sygnał wej ciowy mie ci si w zakresie
dopuszczalnych warto ci (maksymalnie 1280 x 1024 @ 75 Hz).
Ewentualnie sprawdzi poł czenie kabla sygnałowego z komputerem.
Podł czy monitor do innego gniazdka sieciowego.
Obraz nie ma wła ciwego kształtu kraw dzi
Prawdopodobnie wybrano nowe ustawienia karty graficznej i nale y
dokona ponownej regulacji obrazu za pomoc menu ekranowego OSD.
Migotanie obrazu
Moc ródła zasilania mo e by zbyt mała. Nale y spróbowa podł czy
monitor do innego gniazdka sieciowego.
Je eli u ywany jest zewn trzny zasilacz typu UPS, nale y sprawdzi , czy
nie jest podł czone do niego zbyt wiele urz dze .
Sprawdzi , czy zastosowana cz stotliwo
od wie ania ekranu
odpowiada warto ciom rekomendowanym dla monitora P17F86I wg
specyfikacji.
17
18
Polish
Polish
Wy wietlany obraz jest zbyt du y lub zbyt mały
Zastosowa pokr tło regulacyjne w celu ustawienia wła ciwego rozmiaru
obrazu.
Niewła ciwe kolory
Je eli zanikł który z kolorów (czerwony, zielony lub niebieski) nale y
sprawdzi , czy kabel sygnałowy jest ci le doł czony do karty graficznej.
Pomini cie lub uszkodzenie którego z pinów w kablu sygnałowym mo e
spowodowa brak jednego z kolorów.
Na wszelki wypadek, je eli to mo liwe, nale y spróbowa podł czy
monitor do innego komputera.
Ewentualnie nale y sprawdzi , czy w pobli u monitora nie znajduj si
urz dzenia emituj ce pole magnetyczne.