1
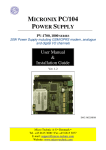
MICRONIX PC/104
POWER SUPPLY
PV-1800 SERIES
20W Power Supply including GSM/GPRS modem, analogue
and digital I/O channels
User Manual
&
Installation Guide
VER. 1.0
DOC: M5258DM
Micro Technic A-S • Denmark •
Tel. +45 6615 3000 • Fax +45 6615 3077
E-mail: [email protected]
Website: www.micro-technic.com
Users Manual & Installation Guide
PV- 1800: Power supply module with GSM MODEM
Table of contents
GENERAL INFORMATION.......................................................................................................................................... 3
ORDERING CODES ........................................................................................................................................................... 3
ANALOGUE CONFIGURATIONS ........................................................................................................................................ 3
ACCESSORIES.................................................................................................................................................................. 3
DESCRIPTION ................................................................................................................................................................ 4
BLOCK DIAGRAM ............................................................................................................................................................ 4
CONNECTORS.................................................................................................................................................................. 5
POWER SUPPLY ............................................................................................................................................................... 6
MODEM .......................................................................................................................................................................... 6
Modem status LED.................................................................................................................................................... 6
Setting up the module ................................................................................................................................................ 6
SIM card.................................................................................................................................................................... 7
Modem AUX connector CN3..................................................................................................................................... 7
AT commands............................................................................................................................................................ 8
Modem on/off ............................................................................................................................................................ 8
RS232 PORT (CN6)......................................................................................................................................................... 8
Setting up RS232 ....................................................................................................................................................... 8
RS232 connector (CN6) ............................................................................................................................................ 8
ANALOGUE INPUTS (CN5) .............................................................................................................................................. 9
DIGITAL INPUTS (CN 1) ................................................................................................................................................ 10
Counter inputs......................................................................................................................................................... 10
DIGITAL OUTPUTS (CN2).............................................................................................................................................. 11
UPS SIGNALS (CN7) ..................................................................................................................................................... 12
PV-1800 REGISTER INTERFACE ..................................................................................................................................... 12
Base address ........................................................................................................................................................... 12
Internal registers..................................................................................................................................................... 13
TECHNICAL DATA...................................................................................................................................................... 16
MECHANICAL LAYOUT ............................................................................................................................................ 18
INSTALLATION GUIDE.............................................................................................................................................. 19
PRECAUTIONS TO ESD.................................................................................................................................................. 19
SETTINGS AND CONNECTIONS ....................................................................................................................................... 19
FACTORY SETTINGS ...................................................................................................................................................... 19
Page 2 / 19
Users Manual & Installation Guide
PV- 1800: Power supply module with GSM MODEM
General information
Ordering codes
Model
Ordering
number
code
PV-1800-S-1
PV-1800-S-2
PV-1800-S-3
PV-1800-S-4
PV-1800-S-5
PV-1800A-S-1
PV-1800A-S-2
PV-1800A-S-3
PV-1800A-S-4
PV-1800A-S-5
PV-1820-S
PV-1820A-S
PV-1830-S
PV-1830A-S
016.104.088
016.104.115
016.104.116
016.104.117
016.104.101
016.104.109
016.104.118
016.104.119
016.104.120
016.104.121
016.104.089
016.104.123
016.104.096
016.104.106
Description
GSM/GPRS modem, digital I/Os, analogue inputs, an RS232 port, and
20W power supply.
GSM/GPRS modem, digital I/Os, analogue inputs, and an RS232 port.
GSM/GPRS modem, digital I/Os, and 20W power supply.
GSM/GPRS modem and digital I/Os.
GSM/GPRS modem and 20W power supply.
GSM/GPRS modem.
-S = Stack-through PC/104 connector
Analogue configurations
PV-1800-S and PV-1800A-S are available with different analogue configurations.
The configuration is indicated by a digit following the model number, e.g. PV-1800-S-1. It can be:
Digit
-1
-2
-3
-4
-5
Configuration
8AI: AI0-7 = 0-2.5V
8AI: AI0-7 = 0-5.0V
8AI: AI0-7 = 0-10.0V
8AI: AI0-7 = 0-20.0mA
8AI: AI0-3 = 0-2.5V, AI4-7 = 0-20mA
Accessories
These accessories must be ordered separately if needed.
Model no
Ordering code
GSM cable
GSM Antenna
CM-2
CDB-9M
126.033.000
060.302.001
425.104.001
425.104.002
CDB-9F
425.104.003
Page 3 / 19
Description
RG136 cable with MMCX-SMA MALE 140mm
GSM antenna with SMA connector
Mains cable with one crimp connector mating KL1, 30cm
Cable with one DSUB9 male and one 10pin IDC-connector, 30cm
Used for connecting RS232.
Cable with one DSUB9 female and one 10pin IDC-connector, 30cm
Used for connecting Ain, Din, Dout and Modem AUX.
Users Manual & Installation Guide
PV- 1800: Power supply module with GSM MODEM
Description
The PV-1800, the fully equipped model, offers the following features:
• a PC/104 20W power supply +5V, 4A.
• a dual band GSM/GPRS modem (Sony Ericsson GM47)
• 8 isolated analogue inputs, 12 bit
• 8 digital inputs, opto-isolated
• 7 digital outputs, opto-isolated
• one RS232 serial port
• non-isolated simple I/O’s.
Block diagram
% 0
+
.
12
.
%*&$
%-#
'$
+
+
.
,-
%!
%-
,-#
(
&
$/
(
*/'
+
.
.2 ( <
+
5
5
.
39
7
7:&
) $
1! !4
3
3
3
3
+
.
'(
&
1!
6&78
5
5
1! $* $
1! $* $
'(&) $
&
&) $
.
+
*/5
*7 ; $ (
!"
#$
The PV-1800 has an onboard DC/DC converter that converts the incoming mains (+8-35V DC) to
+5V. This power supply delivers +5V, up to 4A, to the PV-1800 and to the PC/104 bus. A mains
fuse F2 (1.6A) is placed on the rear side of the PCB, near KL1. In PV-1800A versions, where the
DC/DC-converter is omitted, the module receives its power from the PC/104 bus.
The GSM modem is placed on the top side of the PCB while the SIM card connector is placed on
the rear side. The locking mechanism is indicated on the top of the SIM card holder. The connector
for the antenna is placed on the GSM modem itself. The base address of the PV-1800 registers and
COM ports, and IRQs for the modem and the COM port on CN6, are set by two jumper blocks.
The analogue section (PV-1800 only) is available in different configurations including pure voltage
inputs (0-2.5V, 0-5V and 0-10V), pure current inputs (0-20mA) and with mixed inputs (0-2.5V and
0-20mA). The configuration must be decided when ordering – see section ordering codes.
The digital I/O section is found on all models except PV-1830 versions.
Page 4 / 19
Users Manual & Installation Guide
PV- 1800: Power supply module with GSM MODEM
The digital inputs are bipolar isolated with a max. input voltage of +/- 30V.
There are 7 isolated digital P-channel outputs each capable of driving up to 0.5A. The load current
must be supplied from an external voltage source not exceeding 30V.
The UPS connector contains control signals that can be used with external UPS circuitry.
Connectors
The PV-1800 is equipped with several I/O connectors:
• One 2 pole pin header (KL1) for mains power in.
• One MMCX connector for GSM antenna.
• One 10-way box header (CN3) with non-isolated simple I/Os.
• One SIM Card connector (CN9) placed one the rear side of the PCB.
• One 10-way box header (CN1) for digital inputs.
• One 10-way box header (CN2) for digital outputs.
• One 10-way box header (CN5) for analogue inputs.
• One 10-way box header (CN6) for RS232.
• One PC/104 connector (CN8) for bus interface.
Furthermore, there are 10 connection pads/holes (CN7) for special UPS functions.
*/'
) $
&
'&*/ ) $
% 0
&
'&*/
) $
%% 0
%% 2 7
7
5
%*
*
.
%-
%-#
'$
+
%*&$
00 $$
$ &'
, $ &'
!"
7
7
1!
Pin numbers of the box headers are shown in this schematic.
Page 5 / 19
,,-#
Users Manual & Installation Guide
PV- 1800: Power supply module with GSM MODEM
)=&6 5> 8 *0
Power Supply
The on-board power supply consists of a synchronous step-down switching regulator with an
efficiency of 85-95%, depending on input voltage and load current. At nominal input voltage (24V
DC) and a load current of 2A the efficiency is 92%. A green status LED, placed on the rear side of
the PCB, is on when the +5V is present.
The connector for the power input is a 2 pole pin header from Molex. The mating part for this
connector is Molex 10-17-3020 with 2 crimp terminals – Molex 2478.
Modem
The modem unit used in the PV-1800 module is a Sony Ericsson GM47 which is a GSM dual band
product for 900/1800 MHz. The unit is placed in a 60pin socket and secured by two M2 screws and
nuts.
Modem status LED
A yellow status LED is connected to the modem. This LED is placed on the rear side of the PCB.
The LED has this function:
% 0
$* $
Modem LED
Off
On, steady
On, flashing
Status
Modem off
Power on, not connected to network
Power on, connected to network
Setting up the module
All communication between the modem and the CPU is done through an on-board 16C550
compatible UART. The COM port and the IRQ used for the modem are set by two jumper blocks.
The address is set by one to three jumpers in positions 1 to 3 in section COM_A.
The table shows how different COM ports can be configured.
Page 6 / 19
Users Manual & Installation Guide
ST1
2
0
0
1
1
0
0
1
1
3
0
1
0
1
0
1
0
1
Base address
COM_A
Disabled
2C8
2D8
2E8 (COM4)
2F8 (COM2)
3D8
3E8 (COM3)
3F8 (COM1)
.
%-
%-#
'$
+
1
0
0
0
0
1
1
1
1
PV- 1800: Power supply module with GSM MODEM
,,-#
This table is also printed on the board.
The IRQ used for the modem is set in section IRQ_A. Place one jumper in this section to select an
IRQ number in the interval IRQ3 to IRQ15.
SIM card
The SIM card connector (CN9) is placed on the rear side of the module. A SIM card must be placed
in this connector in order to establish a wireless communication.
Modem AUX connector CN3
The modem has a built-in interface for simple non-isolated digital and analogue channels. This
includes:
• Four digital inputs
• Three 8-bit ADC inputs
• One 8-bit DAC output
The table shows the connector layout:
Pin no
1
2
3
4
5
6
7
8
9
10
Name
GND
DAC
ADC #3
ADC #2
ADC #1
Digital input #4
Digital input #3
Digital input #2
Digital input #1
NC
Signal name in modem
DAC
ADC3
ADC2
ADC1
IO4
IO3
IO2
IO1
Pin no CDB-9F
1
6
2
7
3
8
4
9
5
The protection circuitry between the modem and CN3 is shown here.
(
<
&
'&*/? * */'
% 0
(
8
These I/Os are operated by AT commands in the modem.
Page 7 / 19
&) $
Users Manual & Installation Guide
PV- 1800: Power supply module with GSM MODEM
AT commands
All functions of the modem are carried out by AT commands from a computer application. For
documentation of the AT command set please see “Integrators Manual” for GM47 from Sony
Ericsson, at http://www.eurodis.com/wireless/htm/suppliers_sonyericsson.asp
Modem on/off
The PV-1800 has circuitry that automatically turns the modem on after a system reset, by activating
its ON/OFF input. From software, you can later activate the ON/OFF input, please see section PV1800 register interface.
RS232 port (CN6)
The PV-1800 is equipped with a 16C550 compatible RS232 port which can be accessed through a
10pin boxheader (CN6).
Setting up RS232
The setup of the serial port is configured by two jumper blocks.
The address is set by placing one or more jumpers in the positions 4 to 6 in section COM_B.
The table shows how different COM ports can be configured:
ST1
5
0
0
1
1
0
0
1
1
6
0
1
0
1
0
1
0
1
Base address
COM_B
Disabled
2C8
2D8
2E8 (COM4)
2F8 (COM2)
3D8
3E8 (COM3)
3F8 (COM1)
.
%-
%-#
'$
+
4
0
0
0
0
1
1
1
1
,,-#
This table is also printed on the board.
The IRQ used for the RS232 is set in section IRQ_B. Place one jumper in this section to select an
IRQ number in the interval IRQ3 to IRQ15.
RS232 connector (CN6)
The serial connector is a 10pin 2.54mm boxheader placed on the edge of the PV-1800 module.
This pinout is chosen so that a 10-wire ribbon cable with a 10-pin connector in one end and a DB9
male connector in the other end can be used. In this way, the DB9 male connector acts like a serial
port in a PC.
Function
GND
RI
DTS
CTS
TxD
RTS
RxD
DSR
CD
N.C.
Page 8 / 19
Pin no CN9
1
2
3
4
5
6
7
8
9
10
Pin no CDB-9M
5
9
4
8
3
7
2
6
1
I/O
I
O
I
O
O
I
I
I
.
1#+ % 5
+
=&6
Users Manual & Installation Guide
PV- 1800: Power supply module with GSM MODEM
Analogue inputs (CN5)
The PV-1800 has 8 isolated analogue inputs accessible in a 10pin box header (CN5). Beside these
inputs, there is also a +3.3V isolated voltage with common ground reference as the analogue inputs.
This voltage can be used to power external conditioning circuitry.
Depending on the model – see section ordering codes – each input will have a full scale of 2.5V,
5.0V, 10V, or 20mA. The table shows the connector layout:
Pin no
1
2
3
4
5
6
7
8
9
10
Name
Analogue GND
Analogue input#7
Analogue input#6
Analogue input#5
Analogue input#4
Analogue input#3
Analogue input#2
Analogue input#1
Analogue input#0
+3.3V Isolated
Pin no CDB-9F
1
6
2
7
3
8
4
9
5
+
.
1#+ @5
=&6
The input circuitry looks like this:
&)
<
! %!
(
)@
The analogue inputs on PV1800 are factory configured by choosing proper values for R1 and R2. In
the table the values are shown for the different models. The input resistance is 1M on all voltage
input channels. The software interface is explained in section PV-1800 register interface.
Configuration
0 - 2.5V
0 - 5 .0V
0 - 10.0V
0 - 20mA
R1
0 ohm
449 Kohm
741 Kohm
0 ohm
R2
1 Mohm
449 Kohm
246 Kohm
125 ohm
Differential measurement
The analogue inputs can two by two be used for differential measurement. Inputs, which can make
up a pair, are defined in the software. One of the wires, in each pair, is inside the ADC connected as
a ‘negative’ input; the other as a ‘positive’ input. The common mode voltage on the ‘negative’ input
must not exceed 0.5V in a 0 – 2.5V configuration and 1V in a 0 - 5V configuration. The
combinations of the actual inputs used for differential measurement are shown in section - PV-1800
register interface. Also here it is described which input that is used as the ‘negative’.
Page 9 / 19
Users Manual & Installation Guide
PV- 1800: Power supply module with GSM MODEM
Digital inputs (CN 1)
The PV1800 has 8 isolated digital inputs connected to a 10-pin box header (CN1). All the inputs
have ac-couplers with a common ground reference. Because of the ac-couplers, the inputs can be
activated with positive as well as negative input voltages. The table shows the connector layout:
Pin no
1
2
3
4
5
6
7
8
9
10
Name
Digital input #0
Digital input #1
Digital input #2
Digital input #3
Digital input #4
Digital input #5
Digital input #6
Digital input #7
GND
NC
Pin no CDB-9F
1
6
2
7
3
8
4
9
5
+
.
1#+ @5
=&6
The input circuitry looks like this:
<
-
<
-
Counter inputs
The PV-1800 has a 16-bit counter. Besides acting as normal digital inputs, input #0 and #1 can also
be used as counter inputs.
• Input #0: counter input for the 16-bit counter.
• Input #0 together with input #1: counter inputs for a 16-bit quadrature counter.
The counter function can be software programmed to be in one of four modes.
The counter modes are shown here:
&') $&&
=
0' $A
B
Mode
0
1
2
3
Function
Disabled
Increment on rising edges on DI #0
Increment on falling edges on DI #0
DI #0 and DI #1 act as a quadrature counter
)
&'
)
'*&
=
0' $A
B
)
, *0 *
7
)
&'A
B
B
)
)
)
)
The software interface is explained in section PV-1800 register interface.
Page 10 / 19
06
06
06
06
Users Manual & Installation Guide
PV- 1800: Power supply module with GSM MODEM
Digital outputs (CN2)
The PV1800 has 7 isolated digital outputs connected to a 10pin box header (CN2). The outputs are
configured as PNP outputs with their transistors connected to an external supply voltage
(+V_EXT). The table shows the connector layout:
Pin no
1
2
3
4
5
6
7
8
9
10
Name
Digital output #0
Digital output #1
Digital output #2
Digital output #3
Digital output #4
Digital output #5
Digital output #6
-Vext
+Vext
NC
Pin no CDB-9F
1
6
2
7
3
8
4
9
5
+
.
1#+ @5
=&6
The output circuitry looks like this:
@
(
) 7 )/ $
B
CD
5
B
68 /
&'0&0 $
CD
Attention!
The user has to add proper free-wheeling diodes across inductive loads to protect the output
transistors against high voltages.
The software interface is explained in section PV-1800 register interface.
Page 11 / 19
Users Manual & Installation Guide
PV- 1800: Power supply module with GSM MODEM
UPS signals (CN7)
The PV-1800 has signals that, combined with external circuitry, can be used to implement a UPS
function. There is an input for turning off the 20W power supply (SWITCHER_OFF), two status
inputs (UPS_STATUS1 and UPS_STATUS2), and an output (UPS_PWROFF) that can tell the
external circuitry to turn off power after a programmable delay.
Connector layout:
Pin no
1
2
3
4
5
6
7
8
9
10
Name
GND
*
*
*
*
UPS_PWROFF
+5V
UPS_STATUS2
UPS_STATUS1
SWITCHER_OFF
* = do not connect, for internal factory use.
PV-1800 register interface
The PV-1800 has three blocks of I/O ports: the modem UART, the external RS232
UART and the internal registers. The UARTs are 16C550 compatible and use
eight I/O ports each.
The base addresses of the modem UART and external RS232 UART are configured
on configuration jumper 1,2,3 and 4,5,6 respectively, see the table printed
on the board. The IRQ of both UARTs are configured on the IRQ jumpers. You
cannot use the same IRQ for both UARTs.
Base address
Configuration jumper 7, 8 configure the base address of the sixteen internal
registers. This table is also printed on the board.
ST1
7 8
0 0
0 1
1 0
1 1
Page 12 / 19
Base address
Registers
200h
220h
300h
320h
.
%-
%-# '$
Users Manual & Installation Guide
PV- 1800: Power supply module with GSM MODEM
Internal registers
Address
Base+0
Base+1
Base+2
Base+3
Base+4
Base+5
Base+6
Base+7
Base+8
Base+9
Base+0Ah
Base+0Bh
Base+0Ch
Base+0Dh
Base+0Eh
Base+0Fh
Access
Read only
Read only
Read/write
Read only
Read only
Read only
Read/write
Read/write
Read/write
Read/write
Read/write
Read/write
-
Name
REG_SIGN
REG_MODEL
REG_DIGOUT
REG_DIGIN
REG_CNTLO
REG_CNTHI
REG_CNTMODE
REG_MODEM
REG_UPS
REG_UPSSHDN
REG_ADCLO
REG_ADCHI
reserved
reserved
reserved
reserved
Function
Signature (8Ch)
Model
Digital outputs
Digital inputs
Counter LSB
Counter MSB
Counter configuration
Modem status and on/off command
UPS status
Delayed UPS shutdown
ADC command/result LSB
ADC result MSB
REG_SIGN (base+0): Signature (read only)
Always reads 8Ch. Can be used by software to verify the presence of the PV-1800.
REG_MODEL (base+1): PV-1800 firmware model number (read only)
When the firmware is changed to remove, add, or change features, the model number is
changed. Current model number is 00h.
REG_DIGOUT (base+2): Digital outputs (read/write)
Writing to bit 0-6 sets digital output 0-6. 0=off, 1=on.
Reading bit 0-6 returns the current status of digital output 0-6.
Bit 7 is always 0.
REG_DIGIN (base+3): Digital inputs (read only)
Reading bit 0-7 returns the current status of digital input 0-7. 0=off, 1=on.
DI0 and DI1 can also be used as counter inputs. Regardless of this, their current
status can always be read at this register.
REG_CNTLO (base+4): Counter low byte (read only)
Reading this register returns bit 0-7 of the current value of the counter, and
simultaneously stores bit 8-15 of the counter in the REG_CNTHI register.
REG_CNTHI (base+5): Counter high byte (read only)
Reading this register returns the previously stored value of bit 8-15 of the
counter.
Page 13 / 19
Users Manual & Installation Guide
PV- 1800: Power supply module with GSM MODEM
REG_CNTMODE (base+6): Counter configuration (read/write)
The counter starts at 0000h after system reset. It cannot be reset or reloaded from software.
Bits: 000000cc
cc = counter mode (read/write):
00 = counter disabled, DI0 and DI1 are ignored
01 = counts rising edges of DI0
10 = counts falling edges of DI0
11 = quadrature counter on DI0 and DI1
REG_MODEM (base+7): Modem status and on/off control (read/write)
Bits: 00000vlo
v: (read only) 1 = VIO voltage (2.75V) on, 0=off.
l: (read only) Modem LED status. 0=LED off, 1=LED on.
o: (read/write) Force on/off. Writing '
1'to this bit pulls the modem on/off pin
low. To turn the modem on or off, you should write '
1'to this bit, wait at
least two seconds, and then write '
0'to this bit.
The PV-1800 has logic that automatically turns the modem on at system reset.
REG_UPS (base+8): UPS status (read only)
The UPS status inputs have no other function than being readable here.
Bits: ab000000
a: UPS status1 input from external UPS logic
b: UPS status2 input from external UPS logic
REG_UPSSHDN (base+9): UPS delayed shutdown timer (read/write)
This register holds the number of seconds until the external UPS logic is told to
turn off power.
The UPS_PWROFF output is low (0V) when the system should run normally, and high (3.3V)
when external UPS circuitry should turn off power.
FFh: Idle, no delayed shutdown is in progress. UPS_PWROFF is low.
00h: Delay expired, UPS_PWROFF is high.
Other values: Delay in progress, the counter decrements towards 00h. UPS_PWROFF is low.
A delayed shutdown is initiated by writing the desired number of seconds to this
register. A delayed shutdown in progress can be modified (by writing a new value
to this register), cancelled (by writing FFh), or you can turn off immediately by
writing 00h.
Page 14 / 19
Users Manual & Installation Guide
PV- 1800: Power supply module with GSM MODEM
REG_ADCLO (base+0Ah): ADC command, status, and result low byte (read/write)
Writing to this register starts a new A/D conversion. You should only do this
when the ADC is idle.
Command bits: 0000dccc
d: 0:single-ended, 1=differential
ccc: Channel.
d
0
0
0
0
0
0
0
0
1
1
1
1
1
1
1
1
c
0
0
0
0
1
1
1
1
0
0
0
0
1
1
1
1
c
0
0
1
1
0
0
1
1
0
0
1
1
0
0
1
1
c
0
1
0
1
0
1
0
1
0
1
0
1
0
1
0
1
Conversion
AIN0 relative to AGND
AIN1 relative to AGND
AIN2 relative to AGND
AIN3 relative to AGND
AIN4 relative to AGND
AIN5 relative to AGND
AIN6 relative to AGND
AIN7 relative to AGND
Differential AIN0(+) - AIN1(-)
Differential AIN1(-) - AIN0(+)
Differential AIN2(+) - AIN3(-)
Differential AIN3(-) - AIN2(+)
Differential AIN4(+) - AIN5(-)
Differential AIN5(-) - AIN4(+)
Differential AIN6(+) - AIN7(-)
Differential AIN7(-) - AIN6(+)
Reading REG_ADCLO returns status and result bits.
Result bits: rrrr00pb
p: ADC present. If 1, the ADC is available. If 0, the ADC is not mounted, and
you should not write to REG_ADCLO.
b: Busy. 0 = ADC idle. The previous result can be read, and a new conversion can
be started. 1 = conversion in progress. All result bits are invalid when b=1.
rrrr: Four least-significant bits of the conversion result. Only valid when b=0.
REG_ADCHI (base+0Bh): ADC result, high byte (read only)
Reading this register returns the eight most-significant bits of the conversion
result. Only valid when the ADC is idle.
Page 15 / 19
Users Manual & Installation Guide
PV- 1800: Power supply module with GSM MODEM
Technical data
Power supply
Input voltage (nominal)
Input voltage (MAX)
Output voltage
External load
UPS interface:
4 pins in CN7
GSM-modem:
Modem type
SIM card interface
Frequency range
Maximum RF output power
Antenna impedance
Antenna connector type
Supported I/Os (using AT
commands)
3 Analogue inputs *
1 Analogue output *
4 general purpose digital inputs *
COM ports:
Number of ports
Addressing range
IRQs supported
Connector
Analogue inputs:
Resolution
Inputs
Isolation
Input range configurations
(all unipolar)
Input impedance
Accuracy
Conversion time
Connector type
Digital inputs:
Number of channels
Digital logic levels
Page 16 / 19
8 – 27Vdc.
35Vdc.
5Vdc
Up to 4A, depending on configuration and thermal
conditions.
Run/stop, AUX1,AUX2,AUX3 (factory use only).
GM47 (SonyEricsson).
3V or 5V
EGSM 900 MHz
1800 MHz (Dual Band).
2W
1W
50
MMCX RF connector
Available in 10pin connector
8 bit, 0 – 2.75V
8 bit, 0 – 2.475V
0 – 2.75V
Two, one used for GSM modem
2C8h, 2D8h, 2E8h, 2F8h, 3D8h, 3E8h, 3F8h, disabled
3, 4, 5, 7, 9, 10, 11, 12, 15
Port 2 available in 10pin box header.
12 bit
8 ch. single ended or 4 ch. differential – one common
1kV, 1 minute
8 x 0–2.5V (default) or
8 x 0-5V or
8 x 0-10V or
8 x 0-20mA or
4 x 0-20mA + 4 x 0-2.5V
1M (default).
0.5% of FSR, ±3LSB (default)
11us
10 pin box header
8 isolated, one common ground
0 – 24V, non-polarity,
Input low voltage: 0 – 1.5V
Users Manual & Installation Guide
Max input voltage
Counter input
Max counting rate
Connector type
Digital outputs:
Number of channels
Max load current
Max voltage
Protection
Connector type
Environmental specifications:
Operating temperature:
Storage temperature:
Humidity:
Cyclic humidity:
Vibration:
Sustained vibration:
Shock
Size (W x L x H)
Weight:
PV- 1800: Power supply module with GSM MODEM
Input high voltage: 10 – 24V
30V, current limiting resistor = 3.32kohm / 250mW
DI0 can act as a 16-bit up-counter by counting positive or
negative edges (configurable)
DI0 and DI1 can act as a 16-bit quadrature counter.
10kHz
10 pin box header
7 isolated PNP outputs
0.5Adc, load current external delivered,
total current must not exceed 1.5Adc.
30Vdc
Snubber diode at each output
10 pin box header
-20º to +70ºC
-40º to 85ºC
20 to 90% non-condensing
ETS 300 019-2-5 or equal
10-1000 Hz Sinus and random @ 1-1,5G RMS
EN 60068-2-34 & EN 60068-2-36
IEC 60068-2-27 & IEC 60068-2–29
90 x 96 x 14 mm – see next page
116 g (excl. packaging)
*for details refer to SonyEricsson’s documentation:
• GM47_48 Guidelines and
• GM47_48 Integrators Manual
Page 17 / 19
Users Manual & Installation Guide
Mechanical Layout
PV- 1800: Power supply module with GSM MODEM
This schematic shows the dimensions for PV-1800.
All dimensions are in mm.
Page 18 / 19
Users Manual & Installation Guide
PV- 1800: Power supply module with GSM MODEM
Installation guide
Precautions to ESD
Please note that the Micronix PV modules must be handled with respect to ESD (Electrostatic
Discharge). Electrostatic Discharge to the PV modules must be avoided.
Before removing the module from the protection bag, the user must be discharged using a grounded
wrist ribbon.
Settings and connections
A typical setup procedure involves these steps:
1. Perform settings of:
• Base address. (Regs.).
• Port number for COM_A (modem).
• IRQ number COM_A (modem).
• Port number for COM_B (RS232).
• IRQ number for COM_B (RS232).
2.
3.
4.
5.
6.
Place PV1800 in the PC/104 stack.
Connect interface cables: Analogue, digital etc.
Place a SIM card in the SIM card connector.
Connect the antenna cable to the MMCX-connector at the modem.
Connect the power cable (24V DC) at KL1.
Factory settings
The default jumper setting depends on the model you have purchased.
Factory settings, PV-1800:
.
%-
%-#
'$
+
,,-#
Registers base address: 200h
Modem port: 3E8 (COM3)
Modem IRQ: 10
RS232 port: 2E8 (COM4)
RS232 IRQ: 12
Factory settings, PV-1820 / PV-1830:
.
%-
%-#
+
,,-#
Page 19 / 19
'$
Registers base address: 200h
Modem port: 3E8 (COM3)
Modem IRQ: 10