1
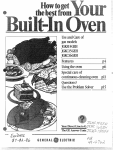
ABOUT YOUR NEW GAS WALL OVEN
Congratulationsonyourchoiceofthisappliance.As you use
your new wall oven,we knowyou will appreciatethe many
features that provide excellent performance, ease of
cleaning, convenience and dependability.
appliancewithoutrevisingthis booklet.As an example,th
knobonyourappliancemaynotlookliketheillustrationinthi
book.
New features have dramatically changed today's cooking
appliances and the way we cook. It is therefore very
important to understand how your new gas wall oven
operates BEFORE you use it for the first time.
Should you have any questions about using your new ga
appliance, please write to us at this address:
In this Owner's Guide, you will find a wealth of information
regarding all aspects of your appliance, By following the
instructions carefully, you will be able to fully enjoy and
properly maintain your new wall oven.
In our continuing effort to improve the quality of our cooking
products, it may be necessary to make changes to the
MA'_IAG CUSTOMER SERVICE
Customer Assistance
P.O.Box 2370
Cleveland, TN 37320-2370
Be sure to include the model and serial numbers of your wal
oven. For your convenience, we have provided space belo_
to record this information.
IMPORTANT INFORMATION
For future reference we suggestyou retainthis
manual after recording the information in the
spaces provided. This information can be
found on the rating data plate located under
the broiler oven bottom. See page 10 for
instructions on removing the broiler bottom.
DEALER FROM WHOM PURCHASED:
ADDRESS:
CITY:
MODEL NUMBER:
PHONE:
SERIAL NUMBER:
AUTHORIZED SERVICER:
DATE OF PURCHASE:
ADDRESS:
CITY:
IMPORTANT: Retain the proof of purchase
documents for warranty service.
PHONE:
L
IMP()RTANTSAFETYINSTRUCTIONS
Read all instructions before using this appliance. The followinginstructionsare based on safety considerationsand must
be strictlyfollowedto eliminatethe potentialrisksof fire, electricshock,or personalinjury.
WARNING:
If the infermation in this manual is not
exactly, a fire or
explosion may
result
causing property damage,
)ersonal injuryor death,
followed
- Do not store or use
gasoline
or
other
flammable vapors and
liquids in the vicinity of
this or any other
appliance,
- WHAT TO DO IF YOU
SMELL GAS:
• DO not try to light any
appliance,
• Do not touch any
electrical switch; do
not use any phone in
your building,
•
• Be sure all packing materiels
are removed from the appliance
beforeoperatingit to preventfire or
smoke damage shouldthe packing
material ignite,
your
gascannot
supplier,reach
call
If you
the fire department,
-installation and service
ABOUTYOURAPPUANGE
• Have the installer show you the
location of the gas shut off valve
and how to shut it off In an
combustion and ventilation air.
Restrictionof air flowto the burner
prevents properperformance.
emergency.
Avoid touching oven vent area
No cooking appliance should be
used as a spaoe heater to heat or
warm a room. This instructionis
based on safety considerationsto
prevent potential hazard to the
consumeras we|l as damage to the
while oven is on and for several
m_utes after oven Is turned off.
Some partsof thevent and
surrounding area becomehot
enough to cause burns.
appliance.
° Do not use the oven as a
storage area for food or cooking
" ,, "
"___.
safety considerationsto prevent
potential hazard to user and to the
appliance.
,
• Misuseof appliance doors,
suchas stepping, leaningor
_.j
_
_
f_
must be performedby a
qualifiedinstaller,service
agency or the gas
supplier,
• Don't attempttorepairor
replace any part of your appliance
unless It is specifically
recommended in this book. A_I
otherservicingshouldbe referredto
a qualifiedservicer.
CAUTION: Some cabinets and
buildingmaterialsare not designedto
withstandthe heat producedby the
normal, safe operationof a cooking
appliance. Discolorationor damage,
such as delarnination, may occur,
Therefore, care should be given to
the location of this appliance,
• Your appliance is vented through
the base of the control panel. Never
block oven vent or air intakes, Do
notobstructtheflowof
•
GENERAL SAFETY
• Many aerosol-type spray cans
are EXPLOSIVE when exposedto
heat and may be highlyflammable.
Avoidtheir use orstoragenear an
appliance.
• Have your appliance installed
and properly grounded by a
qualified installer, in accordance
with the InstallationInstructions.Any
adjustmentorservice shouldbe
performed only by a qualified installer
or servicer,
Immediately call your
gas supplier from a
neighbor's
phone,
Follow
the
gas
suppliers instructions.
materials, gasoline, and other
flammable vapors and materials.
possible
ofand
the
appliance,
sitting ontipping
thedoor,
door,
mayresult
in
breakage
of
serious
injuries.
CAUTION: Do notuse an appliance
as a step stoolto cabinetsabove.
-
fl_l_
J
• Always disconnect power to
appliance before servicing.
• If appliance is installed near a
window, proper precautions
should be taken to prevent
curtains from blowing over
burners creating a RRE HAZARD.
• Keep area around appliance
clear and free from combustible
• Temperaturesin storageareas
above the appliancemay be unsafe
for someitems,such as volatile
liquids,cleanersor aerosolsprays.
IMP(IRTANTSAFETYINSTRUCTIONS
CLEANING SAFETY:
• Turn off all controls and wait
for appliance parts to cool before
touching or cleaning them.
• In the event of a grease fire do
not attempt to move pan.
IMPORTANT SAFETY
NOTICE AND WARNING
The CaliforniaSafe DrinkingWater
and ToxicEnforcementAct of 1986
(Proposition65) requiresthe
If a grease fire occurs in the oven
or in the broiler pan, turnoven off
and keep doorclosedto containfire
untilit extinguishes,
Governorof Californiato publisha
listof substancesknownto the State
of Californiato cause cancer or
reproductive
requires
businesses toharm,
warn and
customers
of
potential exposures to such
substances.
COOKING
SAFETY:
Do not use water on grease fires,
Never pickupa flamingpan. Turnoff
burner,then smotherflamingpan by
coveringpan completelywith a lid,
cookiesheet orflat tray.Or,
extinguish flame by covering with
baking soda or, if available, a
multi-purpose dry chemical or
foam-type fire extinguisher,
• Never heat an unopened
container in the oven, Pressure
build-up may cause containerto
burstresultingin seriouspersonal
injuryor damageto the oven.
Spills or boilovers which contain
grease should be cleaned up as
soon as possible, If they are
allowedto accumulate,they could
create a FIRE HAZARD.
• Always place oven racks in the
desired positions while oven is
cool. Ifa rack mustbe movedwhile
hot, be carefulto avoidcontactof pot
holders withoven burnerflame,
PREPARED
FOODWARNING:
combustionof naturalgasor liquid
petroleum(LP) fuels.Properly
adjustedburnerswillminimize
incompletecombustion.Exposureto
these substances can also be
minimized by properly venting the
burnersto the outdoors.
• Clean appliance with caution. If
a wet spongeor clothis usedto wipe
spillson a hotcookingarea, be
carefulto avoidsteam burns.Some
cleaners can produce noxiousfumes
if applied to a hot surface.
• Touching a hot oven light bulb
with a damp cloth could cause the
bulb to break. Shouldthe bulb
break,disconnectpowerto the oven
before trying to removethe bulb to
avoid electrical shock,
• Slide oven rack out to add or
remove food, using dry, sturdy
pot holders, Alwaysavoidreaching
intoovento placeor removefood.
• Use dry, sturdy pot holders.
Damp pot holdersmay cause burns
fromsteam. Dishtowelsorother
substitutesshouldnever be usedas
potholdersbecausethey can ignite
or get caught on appliance parts,
• Use care when opening oven
door. Lethot air orsteam escape
beforeremovingor replacingfood.
accumulate in or near the
appliance.
• Follow food manufacturer's
instructions. If a plasticfrozenfood
containerand/or itscoverdistorts,
warps,or is otherwisedamaged
duringcooking,immediatelydiscard
thefood and itscontainer.The food
could be contaminated.
UTENSIL SAFETY:
• Use pans with flat bottoms and
handles that are easily grasped
and stay cool. Avoid usingunstable,
warped, easilytippedor loose
handledpans. Do not usepans if
their handles twist and cannot be
tightened. Pans that are heavy to
movewhenfilledwith food may also
be hazardous,
• Many plastics are vulnerable to
heat. Keep plasticsaway fromparts
• Use caution when wearing
garments made of flammable
material to avoid clothing fires,
Loosefittingor longhanging-sleeved
ofthe appliancethat maybecome
warm or hot,
apparel should not be worn while
cooking,Clothingmay igniteor catch
utensilhandles,
• Do not let cooking grease or
other flammable materials
• When using oven cooking bags
in oven, followthe manufactuer's
directions.
Use only glass cookware that is
_ecommendedfor use inthe oven.
Users of thisapplianceare hereby
warnedthat the burningof gas can
result in low-level exposure to some
of the listed substances, including
benzene, formaldehyde and soot,
due primarilyto the incomplete
CHILDSAFETY:
• Do not leave children alone or
unsupervised near the appliance
when it is in use or is still hot.
Children should never be allowed
to sit or stand on any part of the
appliance.
Children must be taught that the
appliance and utensils in it can be
hot. Let hot utensilscoolin a safe
place, out of reach of smallchildren.
Children should be taught that an
appliance is not a toy.
Children should not be allowed to
play with controls or other parts
of the unit.
CAUTION:
Do not store
items of
interest to children
In cabinets
above an appliance or on the
backguard of a appliance.
Children climbing on the
appliance to reach items could be
seriously injured.
SAVE THESE INSTRUCTIONS
CLOCK .ND TIMER
The display will flash when the wall oven is first connectedto power or if power is
interrupted.The displaywillstopflashingoncethetime-of-day clockhas been set.
To set the time-of-day clock:
To set the timer:
1. Pressthe CLOCK pad.
2. Pressand holdthe HOUR pad to set the correct hours.
Tochangethetime by a singlehour,givethe pada short
1. PresstheTIMER pad. 0:59 (or one hour)willappear in
the display.
The timer will automaticallybegin counting clownin
incrementsofone minute.
tap.
3. Press and hold the MINUTE pad to set the correct
minutes. Tochange the time by a single minute,give the
pad a short tap.
2. To setthetimerfor lessthanone hour,pressthe TIMER
pad then press and hold the MINUTE pad until the
desired time appears in the display. To change the time
by a single minute, give the pad a short tap.
For example: To set the clock for 3:15, press and hold the
HOUR pad until 3 appears in the hours display. Then press
and hold the MINUTE pad until 15 appears in the minutes
display,
3. To setthetimer for morethan one hour, presstheTIMER
pad then • Press the HOUR pad, 1:59 (or two hours) will
appear in the display.
• Press the MINUTE pad until the desired minutes
appear in the display.
NOTE: Two hours is the maximum time that can be set.
4. When the time has elapsed, 0:00 will appear in the
display and continuous beeps will sound indicating the
timer has counted down.
5. Press the CLOCK pad to cancel the beeps. The current
time of day will reappear in the display.
Tocancel the timer: Press the CLOCK pad and the display
will return to the current time of day.
USING YOUR OVEN
OVEN CHARACTERISTICS
OVEN THERMOSTAT
HOW TO SET THE OVEN
Everyovenhas its owncharacteristics.
Youmayfindthatthecookingtimesand
temperaturesyou were accustomedto
withyourpreviousappliancemayneed
to be altered slightlywith your new
appliance. It is normalto noticesome
differencesin cookingresultsbetween
this new appliance and your previou§
appliance,
Be sureoven thermostatknobis set in
the OFF positionpriorto supplyinggas
to the appliance.
1. When cool, place the racks in the
desiredrack positions.
PILOTLESS IGNITION
With this type of ignition system, the
oven will not operate during a power
failure or if the oven is disconnected
fromthe wall outlet. No attempt should
be made to operate oven during a
power failure or if the oven is
disconnected from the wall outlet,
2. Pushin and turnthe oventhermostat
The oven thermostatknob is used to
knob to the
desired oven
select and maintain the oven
temperature, Allow the oven to
temperature.The oven temperatureis
preheatfor 10 to 15 minuteswhen
maintained by cyclingthe burneron and
baking.
off. After the oventemperature hasbeen
set, there will be about a 45 second 3. Place the food in the center of the
delay before the burner ignites.This is
oven, allowing a minimum of two
normal and no gas escapes during this
inches between the utensil(s) and the
delay,
oven walls.
Always push in and turn the thermostat
knob just to the desired temperature not to a higher temperature and then
back.Thisprovidesmoreaccurateoven
temperatures.Turn this knob to OFF
whenevertheoven is not in use.
OVEN VENT
The oven vent is located at the base of
the control panel. When the oven is in
use, this area may feel warm or hot to
the touch. To prevent problems, do not
blockthe vent openingor touch the area
nearthe opening.
OFF
OIL
_"
-r
) o:500
o o 450
250 ° o o o _ 400
30o 350
PREHEATING
Preheating is necessary for proper
baking results. Allow the oven to heat
until the desired oven temperature is
reached, approximately 10 to 15
minutes. Selecting a temperature
During some extended oven cooking higherthanthedesiredtemperaturewill
operations, you may hear a "popping" not preheat the oven any faster. In fact,
sound when the burner cycles off. This this may have a negative effect on
i - -;
l
a power failure or if the oven is
disconnected from power supply.
NOTE:The oven can notbe used during
_]_
The size and appearance of a properly
adjusted oven burnerflame shouldbe
as shown:
J_
Cook longer if necessary. Opening
theovendoorfrequentlycausesheat
losswhichmayaffectcookingresults
and increasecookingtime.
5. Turn the oven thermostat knob to
OFF and remove food from the oven.
WAR",,
,_1, I I
2Od'o_,,,_
o
OVEN BURNER
4. Check the food for doneness at the
minimum time given in the recipe.
-q
Conein center
• issmaller
burner.
is a normal operating sound of the
Coneapprox.
1/2-inch
it is not necessaryto preheat for broiling
unless darker browning is desired or if
cooking thin (3/4-inch) steaks. Allow
the
burner
to preheat 2 to 3 minutes,
baking
results.
Preheating is not necessaryfor roasting
operations.
USING YOUR OVEN
OVEN RACKS
pp..-===,..=,.=.__
lock-stop position to keep the racks
fromcomingcompletelyoutof the oven.
heat away from the utensil causing
inadequate browning. Placing a pie
directly on foil may result in a soggy
bottom crust and inadequate browning.
Do not attempt to change the rack
positions when the oven is hot.
To remove: Be sure the rack is cool.
Thetwo
oven racksare
designedwith a
Pulltherackstraight
outtothelock.stop
position.Tiltthe front of the rack up and
continue pullingthe rack out of the oven.
To replace: Place the rack on the rack
supports. Tilt the front end up and slide
it back until it Clears the lock-stop
position,Lower the front and slide the
rackstraightin. Pull the rack outto the
lock-stop position to be sure it is
positionedcorrectly.Then returnit to its
normalpositon.
Rack Positions
Use the following guidelines when
selectingthe properrack positions:
RACK 4 (topof oven) used for some two
rackcookingor bakingoperations.
RACK 3 used for one or two-rack
baking,
RACK2usedformostone-rackbaking,
and roastingsome meats,
RACK I used for one or two-rack
baking; roasting large meats; cooking
larger foods or casseroles and for
bakingangel food cake, pie shells, cake
or cakes in tube or bundt pans.
• Do not use aluminum foil directly
_
Hints:
For optimum baking results of cakes,
cookies or biscuits, bake on one rack.
Position rack so food is in the center of
the oven. Allow 2 inches between the
edgeofthe utensiland theovenwallsor
adjacentutensils,
Ifcookingontwo racks,staggerpansso
one is not directlyoverthe other. Use
rack positions 2 and 4, or I and 4,
depending on baking results, when
cookingon two racks. Use racks1 and
4 when usingtwo cookie sheets.
• Do not place aluminum foil directly
on the oven bottom as this may
under the
Foil A
will
reflect
damage
thecookware.
oven bottom.
piece
of
foil that isslightlylargerthanthe cooking
utensil can be placedon the rack directly
below the rack containing the utensil.
* Do not completely cover an oven
rack with foil, Thisblocksair flow in the
oven, constitutesa safety hazard, and
will adverselyaffectcookingresults.
• Never cover the broiler insert with
aluminum foil as this prevents fat
from draining to the pan below. The
broilerpan can be linedwith foil.
BAKEWARE ACCESSORIES
This appliancehas beentestedfor safe
performance using conventional
cookware. Do not use any devices or
accessories that are not specifically
USE OFALUMINUM
FOIL
recommended in this manual. Do not
UsealuminumfoilONLYasinstructedin
use stove top grills, or add-on oven
thisbook, lmproper use of aluminum foil convectionsystems.Theuseofdevices
may cause damage to the oven, affect or accessories that are not expressly
cooking results, and can also result in recommended in this manual cancreate
shock and/or fire hazards. Foil can be serious safety hazards, and reduce the
used ff these guidelines are followed:
life of the components of the appliance.
Never place two cookie sheets on
one rack and never place aluminum
foil or pans directly on the oven
bottom,
USINGYOUR OVEN
Baking Tips
Use a reliable recipe and accurately measure fresh
ingredients. Carefully follow directions for oven
temperature and cooking time. Preheat oven if
• For optimumbakingresults,bakecookiesand biscuits
on a flat cookiesheet. If the pan has sides,such as a
jettyroll pan, browning may not be even.
recommended.
• If using heatproof glassware, or dark pans such as
Baker's Secret reducethe oventemperatureby 25°F
exceptwhen baking piesor bread. Use the same baking
time as calledfor in the recipe.
Use the correct rack position, Baking results may be
affectedif the wrongrack is used.
Top browningmay be darker if foodislocatedtoward
thetop of the oven.
Bottom browningmay be darker if food is located
towardthe bottomof theoven.
When using two racks for baking, allow enough space
between the racks for proper air circulation. Browning
and cookingresults will be affectedif air flow is blocked.
Cookware material plays an important part in baking
results. Always usethe type and size of pan called for in the
recipe. Cooking times or cooking results may be affected if
the wrong size is used.
Shiny metal pan reflectsheat away from the food,
produceslighterbrowningand a softercrust. Use shiny
pans for baking cakes or cookies,
Dark metal pan or a pan with an anodized (dull)
bottom absorbsheat,producesdarkerbrowninganda
crispercrust.Use thistype ofpan forpies, piecrustsor
bread,
Allow hot air to flow freely through the oven for optimum
baking results.Improperplacementof pansin the ovenwill
block air flow and may result in uneven browning. For
optimumbrowningand even cookingresults:
Do not crowd a rack with pans. Never place more than
one cookie sheet, one 13x9x2-inch cake pan or two
9-inch round cake pans on one rack.
Stagger pans when baking on two racks so one pan is
not directly over another pan.
• Allow two inches between the pans or between the pan
and the oven walls or door.
Check the cooking progress at the minimum time
recommendedintherecipe.Ifnecessary,continuechecking
at intervalsuntilthe food is done. if the oven dooris opened
too frequently, heat will escape the oven; this can affect
baking results and wastes energy.
If you add additional ingredients, use differentpans, or
alter the recipe, expect cooking times to increase or
decreaseslightly.
Roasting Tips
Roastingisthemethodforcookinglarge,tendercutsofmeat
uncovered, without adding moisture. Most meats are
roastedat 325°F. It is not necessaryto preheatthe oven.
Place the roasting pan on either of the two lowest rack
positions,
Use tender cuts of meat weighing three pounds or more.
Some good choices are: Beef rib, ribeye, top round, high
quality tip and rump roast, pork loin roast, leg of lamb, veal
shoulder roast and cured or smoked hams.
fat on top of the roast melts,the meat is basted naturally,
eliminatingthe need foradditionalbasting.
The cooking time is determined by the weight of the meat
and the desired doneness. For more accurate results, use
a meatthermometer. Insert it so the tip is inthe center of the
thickest part of the meat. It should not touch fat or bone.
Remove the roast from the oven when the thermometer
registers approximately 5°F below the desired degree of
doneness. As the meat stands, the temperature will rise.
Season meat, if desired, either before or after roasting. Rub
into the surface of the roast if added before cooking.
Place the meat fat-side-up on a rack in a shallowroasting
pan.Placingthemeaton a rack holdsitout ofthedrippings,
thusallowingbetter heatcirculationfor evencooking.Asthe
NOTE: For more information on cooking meat and
poultry,contact the USDA Meat & Poultry HoUlneat
1-800-535-4555.
Common Baking Problems And Why They Happen
Cakes are uneven,
Pans touchingeach other or
oven walls.
Batter uneven in pans,
Oven temperature too lowor
baking time too short.
Oven not level,
Undermix{ng.
Too much liquid.
Cakes don't brown on top.
Incorrect rack position.
Temperature too low.
Overmixing.
Too much liquid.
Pan size too large or too little
batter in pan.
Oven door opened too often.
Cake high in middle.
Temperaturetoo high.
Excessive shrinkage.
Toolittle
leavening.
Overmixing.
Pan too large.
Temperaturetoo high.
Baking time too tong.
Pans too close to each other
or oven walls,
Too much shortening or sugar.
Too much or too little liquid.
Temperature too low.
Old or too little baking powder.
Pan too small.
Uneven texture.
Too much liquid.
Undermixing.
Temperature too low.
Baking time too short.
Oven door opened frequently.
Added incorrect type of oil to
cake mix,
Added additional ingredients
to cake mix or recipe.
Incorrect rack position.
Cakes have tunnels.
Not enough shortening.
Too much baking powder,
Overmixing or at too high a
speed.
Temperature too high.
Oven door not closed properly.
Door gasket not sealing
properly.
Incorrectuse of aluminumfoil.
Oven not preheated.
Fans darkened, dented or
warped.
Cakes crack on top.
Batter overmixed.
Temperature too high.
Too much leavening.
Incorrect rack position.
Cake not done in middle.
Temperature too high.
Pan too small,
Baking time too short.
Pie crust edges toe brown,
Temperature too high.
Pans touching each other or
oven wails.
Edges of crust too thin.
Incorrect rack position.
Pies or cakes don't brown
on bottom,
Used shiny metal pans.
Temperature too low.
Pies have soaked crust.
Temperature too low at start of
baking.
Filling too juicy.
Used shiny metal pans.
Baking time too long.
Overmixing.
Too much flour.
Pans touching each other or
oven wails,
Incorrect rack position.
Cake falls,
Cakes, cookies, biscuits
don't brown evenlJ_
Cakes, cookies, biscuits
too brown on bottom.
Oven not preheated.
Pans touching each other or
oven walls.
Incorrect rack position.
Incorrect use of a(uminumfoil.
Placed 2 cookie sheets on one
rack.
Used glass, darkened, stained,
warped or dull finish metal
pans. (Use a shiny cookie
sheet,)
USING YOUR OVEN
HOW TO BROIL
To Broil:
NOTE: Broiling is done in the lower
broiler oven.
Broiling isa method of cooking usedfor
tender steaks, chops, hamburgers,
chicken, fish, and some fruits and
vegetables. Foroptimum results, steaks
should be at least 3/4-inches thick.
Broiling Tips
Trimexcessfat toreducespatteringand
smoking.Cutslashesintheouteredges
For a brown exterior and rare interior, 1. Turn the oven Thermostat knob to
the meat should be close to the burner.
BROIL.
Place the pan further down if you wish
the meat well done or if spattering and
It is possible to broil longer cooking
smoking occurs,
foods such as chicken or pork chops
at a lower temperature to prevent
Broiler Pan and Insert
overbrowning. Turn the knob to
Broiling requires the use of the broiler
450°F, rather than BROIL, for low
pan and insert supplied with your
temperature broiling.
appliance.It is designedto drain excess
liquid and fat away from the cooking 2. Preheat for 2 to 3 minutes if desired.
surfaceto preventspatters,smokeand
flareups.
NOTE:are
Cooking
times
Broil
Chart
based on
a 2 in
to the
3 minute
of the meat to preventcurling during Never leave a soiled broiler pan and
cocking,
insert in the oven after broiling.
preheat.
Ifyouplantoseasonthemeat, itisbetter Drippingsmightbecomehot enoughto 3. Place the broiler pan on the
to do so afterthe surface hasbrowned, ignite if exposed directlyto the oven
recommendedrackpositionshownin
Salttendsto delay browningwhichcan burner,
thebroiling
chart.Ifthefoodisplaced
tooclosetothe
burner,overbrownlng
result in overcooking. Salting before Foreasier clean-up, linethebroilerpan
and smokingmay occur. Broilingis
cooking also draws the juices out of the (bottom piece) with aluminum foil and
a_waysdone with the door c_osed.
meat, causing dryness,
spray the insert with a non-stick
vegetable coating. Do not cover the 4. Follow the suggested times in the
The cooking time is determined by the broiler pan insert with aluminum foil as
broiling chart. Meat should be turned
distance between the meat and the this prevents fat from draining into the
onceabouthalfwaythroughwhenthe
burner, the desired degreeof doneness, pan below,
top of the meat begins to brown.
and the thickness of the meat.
5. Check the doneness by cutting a slit
Thin cuts shouldbe placedcloser to the The broiler oven can be preheated for a
in the meat near the center to check
burner. Thicker cuts should be placed few minutes. However, do not preheat
the color.
further away from the burner,
the broiler pan and Insert.
BROILING CHART
Until you become more familiar with your new oven, use the following chart as a guide when broiling foods.
FOOD
BACON
DONENESS
Welt Done
BROIL POSITION
Middle
TOTAL BROIL TIME
Broil at 450°F
6-9 minutes
BROIL POSITION
Middle
TOTAL BROIL TIME
8 - 12 minutes
BEEF PA3q'IES,3/4-inch thick
Well Done
Middle
14-1S minutes
Upper
1S - 18 minutes
STEAKS, t-inch thick
Rare
Medium
Well Done
Middle
Middle
Middle
12-14 minutes
15-18 minutes
18-21 minutes
Upper
Upper
Upper
10 - 12 minutes
12 - 14 minutes
13 - 16 minutes
CHICKEN,
Pieces
Well Done
Bottom
30-35 minutes
Bottom
25 - 30 minutes
FISH,
Fillet, 1/2-inch thick
Steak, 1-inch thick
Flaky
Flaky
Middle
Middle
Broil at 450°F
10-14 minutes
13-16 minutes
Upper
Upper
7 - 10 minutes
12 - 14 minutes
HAM SLICE, 1/2-inch thick
(precooked)
Warm
MiddLe
S-'_Ominutes
Upper
S- 10 minutes
PORK CHOPS, l-inch thick
Well Done
Middle
24-28 minutes
Middle
22 - 26 minutes
* Thebottombroilpositionfer the6-inch broileris thebroilerbottom.Thebottompositionforthe 12-inchbroileris thebottle rackposition.
MAINTENANt;E
OVEN OR BROILER
DOOR
Do not place excessive weight on an
open oven door or stand on an open
oven door as, in some oases, it could
damage thedoor, cause the appliance
to tip overand possiblycause injury,
When openingoven door,allowsteam
and hotair to escapebeforereachingin
ovento check,add or removefood.
Do not attempt to open or close door
until door is completely seated on hinge
arms. Neverturnonoven unless dooris
properlyin place. When baking, be sure
door is completely c(osed. Baking
results will be affected if door is not
OVEN BO'I'I'OM
OVEN LIGHT
Protectoven bottomagainst excessive
spillovers especially acid or sugary
spiltovers as they may discolor the
porcelain.Use the correctsize cooking
utensilto avoidboitovers.Never place
cookwareor aluminum foil directlyon
the oven bottom,
The oven light switchis located on the
controlpanel. Push in rockerswitchto
turn oven_ighton and off,
To remove: When cool, remove the
ovenracks,Pushtheovenbottomtothe
rear of the oven and lift up at front until
thefronted_eofthecvenbottomclears
the oven front frame• Remove oven
bottom from oven.
Before replacing oven light bulb,
DISCONNECT POWER TO OVEN. Be
sure bulband oven parts are cool. Do
nottoucha hotbulbwitha dampclothas
the bulbmay break.
To replace oven light: Use a dry pot
holder, to prevent possible harm to
hands; very carefully remove bulb.
Replace with a 40 watt APPLIANCE
bulb. Reconnect power to the oven.
securely closed.
ELECTRICAL
To remove door: Open door to the
"stop" position (opened about 4 to 6
inches) and graspdoorwithbothhands
at each side. Do not use doorhandle to
lift door. Lift up evenly until door clears
the hinge arms.
Appliances which require electrical
power are equipped with
a
three-prong grounding plug which
must be plugged directly intoa properly
grounded three-hole 120 volt electrical
outlet.
.....
-
CONNECTION
To replace: Fit the rear edge of oven
of the channel on the rear oven wall.
Push toward rear of oven and lower
oven bottom into place.
i_
BROILER BOTTOM
To remove: When cool,removebroiler
pan
andinto
oven
Lift up front
of
bottom
therack.
pin located
at theedge
center
broilerbottom.Then lift rear end up and
removebroilerbottom from oven,
To replace 12-inch broiler bottom:
(_ _
)_2.._)
_
4
disconnectpower to app/iance
before servicing.
Place two slots along rear flange over The three-prong groundingplug offers
two screws in rear wall. Then, lower protectionagainst shock hazards. Do
frontedge intoplace,
not cut or remove the third
To replace 6-inch broiler bottom:
Push bottom to rear and lower into
place.
To replace door: Grasp door at each
side, align slots in the door with the
hingearmsandslidedoordownontothe
hingearms until completelyseated on
hinges,
grounding prong from the power
cord plug.
If an ungrounded, two-hole or other
type electrical outletis encountered, it
is the personal responsibility of the
appliance owner to have the outlet
replaced with a properly grounded
three-hole electrical outlet.
10
CARE AND CLEANING
CLEANING CHART
Baked Enamel
• Oven andbroiler
doors
•
*
•
•
Soap end water
Paste of bakingsoda and water
Mild liquidcleaner
Glasscleaner
Use adrytowel orclothtowipe upspills,especiallyacid(milk,lemonjuice,fruit,mustard,
tomatosauce) or sugaryspills. Surface may discoloror dull if soiris not immediately
removed. This is especiallyimportantfor white surfaces.
Whensurfaceiscool,washwithwarm soapywater,rinseanddry. Forstubbornsoil,use
mirdlyabrasivecleaning agentssuchas bakingsodapasteor Sen AmLIfdesired,a thin
coatof mildappliancewaxcan beusedtoprotectthe sidepanels.Aglass cleanercanbe
used to add "shine"to the surface.
NOTE: Do not use abrasive, caustic or harsh cleaning agents such assteel wool pads or
oven cleaners. These products wirlscratch or permanently damage the surface.
NOTE; Never wipe a warm or hot surface with a damp cloth as this may damage the
surface and may cause a steam burn.
Broiler pan and
insert
, Soap and water
• Plasticscouring pad
• Soap-filled scouringgad
• Dishwasher
Removefromoven after use. Coolthen pouroff grease. Place soapycJothoverinsert
and pan; let soakto loosen soil. Wash in warm soapy water. Use soap-filled scouring
pad to remove stubbornsoil.Clean in dishwasherif desired.
NOTE: For easier cleanup, s_ay insert with a non-stick vegetable coating and _ine
broiler pan with aluminumfoil.
NOTE: Always store clean broiler pan and insert in the broiler compartment,if pan and
insertare notcleaned after each use, the soilmight becomehot enoughto ignite the next
time the oven is used.
Control knob
• Soap and water
To remove knobfor cleaning, gently pull forward.Wash in mild detergentand water. Do
notsoakknobsin water. Do not use abrasivecleaningagents. Theywill scratch finish
and remove markings.Rinsedry and replace,
Glass
• Over}window
• Soap andwater
• Paste of baking soda and water
• Glass cleaner
Wash with soap and water. Use a window cleaner and a soft cloth after cleaning.
Removestubborn soil with pasteof baking sodaand water. Rinse with a cloth wrung out
in clear water. Dry. DOnot use abrasive materials such as scouring pads, steel wool or
powdered cleaning agents.
NOTE: TO avoid inside staining of oven door glass, do not overssturata cloth,
Metal finishes
• Trim parts
• Soap and water
• Paste of baking soda and water
• Glass cleaner
Wash w_thsoapand water, Removestubbornsoil w_thpaste of bakingsoda and water.
Use a windowcleaner and a soft clothto remove fingermarks or smudges. NOTE: {go
not use oven cleaners, abrasive or caustic agents.They will damage the finish.
(continued next page)
CARE AND CLEANING
CLEANING
Oven bottom
• Porcelain enamel
•
•
•
•
Soap and water
Paste of baking soda andwater
Non-abrasive plastic pad
Oven cleaner
CHART
11
(continued)
NOTE: The ovenbottom forthe Continuous CleanOven isporcelain. Followinstructions
below.
Porcelain oven bottom: Clean, when cool, with soap and water, non-abrasive plastic
pad or oven cleaner. Rinse with clear water. To make cleaning easier, protect the oven
bottom by it) using large enough ccokware to prevent boilovers; (2) place a piece of
aluminum foil, thatis slightly largerthan the ccokware, on the lower rack. NEVER place
foil directly on the oven bottom.
Protect oven bottom against acid spills (milk, cheese, tomato, lemon juice, etc.) or
sugary spills (pie filling) as they may pit or discolor the oven bottom.
For easier cleaning, oven bottom can be removed and cleaned at the sink. Do not soak
or immerse oven bottom in water or place under running water.
Oven cavity
• Continuous Clean
Oven, see page
tl.
Cleaning action begins whenever the
ovenis on. The oven muat be used _or
cleaning to take place. Higher oven
teynperaturesand longer baking times
speed the cleaning action.
Brush off heavy soil with a nylon or plastic pad. Do not use paper towels, cloths, or
sponges becausethe oven waUsare porousand par'dolesof these materials wiltrub off
on the walls. Rinse area with clean water only. Do not use any type of oven cleaner
cleanser or detergent on this surface.
Oven cavity
• Porcelain oven
• Oven door liner
•
•
•
•
Clean oven interior with soap and water; rinse, Use cleansing powders or a plastic
scouring padto remove stubborn soil. Wipeacid or sugar stains as soon as the oven is
cool as these stains may discolor or etch the porcelain. Do not use metallic scouring
pads as they will scratch the porcelain. To make cleaning easier, place 1/2 cup
householdammonia ina shallow glass and leave ina cold ovenovernight. The am monia
fumes wilt helploosen the burned on grease andfood. Oven cleanerscan be usedon the
porcelain oven but follow manufacturer's directions. If oven cleaner was used
thoroughly rinse oven cavity and capillary tube which is located at the top of the oven.
Oven cleaners can not be used on the cor_inuous cleaning oven finish.
Oven racks
Plastic finishes
• Door handles
• Trim
• Overlays
• Knob
I Silicone rubber
• Doorgasket
Soap and water
Mild abrasive cleaners
Plastic pad
Oven cleaner
I • Soap and water
• Cleansing powders
• Plastic pad
• Soap fiLLedscouring pad
Clean with soapy water. Remove stubborn soil with cleansing powder or soap filled
securing pad. Rinse and dry.
NOTE: If racks become difficultto slide, a thin coat of vegetable oil onthe undersideof
the rack will make sliding easier.
• Soap and water
• Non-abrasive plastic pad or sponge
When surface is cool, clean with soap andwater; rinse, and dry. Use a window cleaner
and a soft cloth.
NOTE: Never use oven cleaners, abrasive or caustic liquid or powdered cleaning
agents on plastic finishes. These cleaning agents will scratch or marr finish.
NOTE: To prevent staining or discoloration, wipe up fat, grease or acid (tomato, lemon,
vinegar, milk, fruit juice, marinade) immediately with a dry paper towel or cloth.
• Soap and water
HOW TO REMOVE
WALL
Wash with soap and water, rinse and dry. Do not remove door gasket.
OVEN FOR CLEANING
OR SERVICING
Follow these procedures to remove 4, Remove the screwsthat secure the
appliancefor cleaningor servicing:
wall oven to the cabinet, Remove
ovenfromcabinet,
1, Shut-off gas supplyto appliance,
2. Disconnect electrical supply to
appliance,
3. Disconnect gas supply tubing to
appliance,
NOTE: A qualified servicer should
disconnect and reconnect the gas
supply,
WARNING: Possible risks may result
5. Reverseproceduretoreinstall.If gas from abnormal usage, including
line has been disconnected,check excessiveloadingofthe oven doorand
forgasleaksafterreconnection.See of the risk of tip over, should the
Installation Instructionsfor gas leak appliance not be reinstalled according
test method,
to the installation instructions.
12
CONTINUOUS
CARE AND CLEANING
CLEANING
OVEN, if equipped
MANUALLY CLEANING HEAVY
SPILLOVERS
NOTE: The oven door liner and oven The special finish will clean most
bottom are porcelain enamel. For spatters during normal oven use unless
cleaning instructions, refer to the there is a heavy buildup of soil. Heavy
cleaning chart on page 13.
spillovers such as pie or casserole
boilovers will not clean effectively
WHAT IS THE CONTINUOUS
without some manual help. The crusty
CLEANING OVEN?
or varnish-like stains that form from
The finishof the ContinuousCleaning these spillovers clog the pores and
Ovenis identifiedby itsdarkgraycolor, prevent the special finish from being
whitestippleand rough,poroustexture, exposedtothe hotovenair.Thisgreatly
The rough texture prevents grease reduces the cleaning effectivenessof
spatters from formingbeads whichrun the finish.
down the walls leaving unsightly
HINTS
Brittlecrustsor stainscan be loosened
byGENTLYtappingstainwithawooden
or plastic utensil. Brush away any loose
soil that flakes off. Varnish type stains
usually need to be softened with a small
amount of water or damp cloth.
Remaining soil will gradually reduce
with continued oven use at normal
bakingtemperatures.
DO NOT USE ANY TYPE OF OVEN
CLEANER,
POWDERED
CLEANSERS, SOAP, DETERGENT
OR PASTE ON ANY CONTINUOUS
streaks. Rather, the rough texture Thesecrustyorvarnish-likestainsmust CLEANING SURFACE, ALSO, DO
absorbs spatters and allows them to either be removedor broken up before NOT
USE
ANY
ABRASIVE
spread,thus
exposinga
larger
area
to
cleaningcan
effectively
take
place.
the hot oven air. The catalyst, when
MATERIALS, STEEL WOOL, SHARP
exposedto heat, speedsthe oxidation
INSTRUMENTS OR SCRAPERS FOR
of soil.
THEY WILL DAMAGE THE FINISH.
Cleaning action automatically begins
TO MANUALLYCLEAN HEAVY
whenever the oven is turned on for
SPILLOVERS
bakingor roasting.The oven MUST be
on for cleaning to take place. No Brushoff heavy soilwith a nylonbrush
cleaning will occur when the oven isoff, or plastic pad. DO NOT USE paper
The special catalytic finish must be towels, cloths or sponges for the oven
exposed to hot oven air before soil will walls are porous and particles of these
begin to gradually reduce in size.
materials will rub off on the walls. Rinse
area with clear water only.
FACTORS AFFECTING LENGTH OF
CLEANING TIME
The higher the oven temperature, the
faster the cleaning action. The length of
cleaning time will depend on these
factors: Type of soil, amount or size of
soil, oven temperature and length of
time oven is in use. Time may vary from
a few minutes to several hours. Soil
deposited at the end of a cycle may still
be visible. This will usually fade with
continued oven use until the soil
gradually disappears or can be wiped
up manually. The oven will appear
presentably clean, even though some
spatters may be present.
Avoid spillovers by using utensils that
are large enoughto holdfood.A cookie
sheet
or piece
just a
little larger
thanof
thealuminumfoil,
pan, can be placed
on the rack directly below the rack
holding the utensil to catch spills.
Over a period of time, wear marks may
appear on the embossed rack supports.
This is normal and resultsfrom sliding
the racks in and out of the oven. Wear
marks will not affect the cleaning action
of the oven.
SERVICE
13
BEFORE CALLING A SERVICE TECHNICIAN, CHECK THE FOLLOWING:
1. Oven burner fails to light or oven does
not operate
a. power supplynot connected
(pilotless ignition)
b. power failure (pilotless ignition)
a. connectpower,check circuit breakeror
fuse box
b. an oven equipped with pilotless ignition
will not operate during a powerfailure or
if disconnected from power. See page 4
2. Popping sound heard when burner
extinguishes
This is a normal sound that occurs with some types of gas when a hot burner is turned off.
The popping sound is not a safety hazard and will not damage the appliance.
3. Clock and/or oven light does not work
a. power supply not connected
b. bulb may be loose or burned out
c. malfunctioningswitch
d. malfunctioning clock or loosewiring
4. Moisture condensation
window, if equipped
on
oven
5. Oven temperature inaccurate
• food takes too long or cooks too
fast
• pale browning
• food over-done on outside and
under-done in center
• over browning
a. itisnormal'forthewindowtofogdufing
the first few minutes the oven is on
b. cloth saturated with water is used to
clean the window
a. leavedoorajarforoneortwominutesto
allow moisture to escape
b. Use a damp cloth to clean window to
prevent excess water from seeping
between the panels of glass
a.
b.
c.
d.
e.
a.
b.
c.
d.
e.
oven not preheated
incorrect rack position
incorrect use of aluminum foil
oven bottom incorrectly replaced
oven thermostat sensing device out of
holding clip(s)
6. Poor baking results
7. Oven smokes excessively during a
broil operation
preheat oven 10 to 15 minutes
see page 5
see page 5
replace oven bottom correctly
reinstall sensing device securely into
clip(s)
See Problem Chart on page 7
See baking tips on page 6
See pages 4 to 7 for information on
baking
a. food too close to burner
b. meat has too much fat
c. sauce appliedtoo early or marinade not
completely drained
d. soiled broiler pan
e. broiler insert covered with aluminum foil
8. Poor broiling results
a. connect power supply, check circuit
breaker or fuse box
b. tighten or replace light bulb
c. call serviceman to check
d. call serviceman to check
a. oven set incorrectly
b. incorrect rack position
a. move broiler pan down one rack position
b. trim fat
c. apply sauce during last few minutes of
cooking. If meat has been marinated,
drain thoroughly before cooking
d. always clean broiler pan and insert after
each use
e. never cover insert with foil as this prevents fat from draining to pan below
a. turn knob to broil
b. raise or lower rack one position
HOW TO OBTAIN SERVICE
When your appliance requires serv=ce
or replacement parts, contact your
DealerorAuthorized Servicer. Useonly
genuine factory. Consult the Yellow
Pages in your telephone directory
under appliance for the service center
nearest you.
along with the model
numbers of the appliance,
and
serial
Ifyouareunabletoobtainservice,
write
tous. Ouraddressisfoundontherating
plate. See inside front cover for location
of rating plate. Be sure to include your
name, address, and phone number,
If you did not receive satisfactory
servicethr0ughyourservicerorMaytag
Customer Service you may contact the
Major Appliance Consumer Action
Panel. Include your name, address,
If you are not satisfied with the local
response
call
or write
Maytag
Customer
Service,
240 Edwards
Street, S.E., Cleveland, TN 37311,
(615) 472-3500.
and telephone number, as well as the
model and serial numbers of the
appliance. Write to: Major Appliance
Consumer Action Panel, 20 North
WackerDrive, Chicago, Illinois60606.
MACAP (Major Appliance Consumer
Action Program) is an independent
agency sponsored by three trade
associations as a court of appeals on
consumer complaints which have not
been resolved satisfactorily within a
reasonable period of time.