1
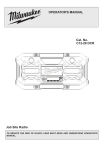
1/3 Day & Night
Color CCD Camera
Model : CAM91
Instruction Guide
MACE Electronic Surveillance Products
3233 SW 2nd Ave. Fort Landerdale, FL 33315 USA
toll-free(877)585-MACE
local(954)585-6223 fax(954)585-6225
www.mace.com
MACE Electronic Surveillance Products
Warning
TO REDUCE THE RISK OF FIRE OR ELECTRIC SHOCK, DO NOT EXPOSE THIS
PRODUCT TO RAIN OR MOISTURE
Caution
CAUTION
RISK OF ELECTRIC SHOCK
DO NOT OPEN
CAUTION:TO REDUCE THE RISK OF ELECTRIC SHOCK,
DO NOT REMOVE COVER (OR BACK).
NO USER-SERVICEABLE PARTS INSIDE.
REFER SERVICING TO QUALIFIED SERVICE PERSONNEL
Explanation of graphical symbols
The lightning flash with arrowhead symbol, within an equilateral
triangle is intended to alert the user to the presence of uninsulated
“dangerous voltage” within the product’s enclosure that may be of
sufficient magnitude to constitute a risk of electric shock to persons.
The exclamation point within an equilateral triangle is intended to
alert the user to the presence of important operating and
maintenance (servicing) instruction in the literature accompanying
the product.
3
Day&Night Color CCD Camera
Features
Warning
Day&Night
The camera provides automatic mode changeover by sensing day or night
conditions. It can change color mode in the day condition for optimal color and
BW mode in night condition for clear identification.
High Resolution
1. The camera needs periodic inspection.
Contact an authorized technician for inspection.
2. Stop using your camera when you find a malfunction
If you use your camera around smoke or unusual heat for a long time, a fire may
be caused.
The horizontal resolution of 480TV lines at color mode and 520TV lines at BW
mode can be achieved by using a high density Sony CCD (410K pixels), which
provides clean, noiseless and reliable pictures.
3. Do not install the camera on a surface that can not support it.
Motion Detection
4. Do not hold plug with wet hands.
The camera transmits an alert signal to the REMOTE jack when it detects
motion of an object. If you connect an optional alarm to the camera, you can
get the effective surveillance. This allows multi observation through several
monitors efficiently.
Controlled by OSD menu and RS-232C
You can control the camera using OSD menu and RS-232 jack at a remote
place.
Unless the surface is suitable, it could cause falling or other hazards.
It could cause an electric shock.
5. Do not disassemble the camera.
It may result in fire, electric shock or other hazards.
6. Do not use the camera close to a gas or oil leak.
It may result in fire or other hazards.
Video/DC Lens Selectable
The camera accepts 2 types of auto iris lens (DC type/VIDEO type) and is set
with the DC/VIDEO selection switch.
Line-Lock Selectable
You can select the Sync. system on OSD.
BLC Function
When the image is in front of strong background lighting, your camera allows
you to get the clear image.
Day&Night Color CCD Camera
4
5
Day&Night Color CCD Camera
Precautions
Do not install the camera in
extreme temperature conditions.
Only use the camera under
conditions where temperatures are
between -10 and 50 .
Be especially careful to provide
ventilation when operating under
high temperatures.
Do not install the camera under
unstable lighting conditions
Severe lighting change or flicker can
cause the camera to work improperly.
Day&Night Color CCD Camera
6
Do not drop the camera or
subject them to physical shocks.
It can cause malfunctions to occur.
Do not touch the front lens of
the camera.
It is one of the most important
parts of the camera. Be careful not
to be stained by fingerprint.
Do not expose the camera to
rain or spill beverage on it.
If it gets wet, wipe it dry immediately.
Liquids can contain minerals that
corrode the electronic components.
Never keep the camera face to
strong light directly.
It can damage the CCD.
7
Day&Night Color CCD Camera
Contents
Name and Function of Each Part
Front
Bottom
Back
Accessories
10
11
12
13
24
26
27
29
31
33
34
- Shutter Speed Control
- Gain Control
- White Balance Control
- Motion Detection
- Color(Day&night)
- Synchronization Mode
- Reset/End
Installation Method
Lens
Installing Auto lris Lens
Installing C/CS Mount Lens
Mounting a CS-Mount Lens
Mounting a C-Mount Lens
Connecting to Monitor
Connecting to Power
14
14
16
16
16
17
17
Using Remote Jack
35
External Connecting Terminal
36
Specifications
37
Troubleshooting
38
Warranty
39
Operating Your Camera
Configuration of The Menu
Setting Up The Menu
- Camera ID
- Back Light Compensation
- Lens Selection
Day&Night Color CCD Camera
8
18
19
20
22
23
9
Day&Night Color CCD Camera
Name and Function of Each Part
Front
Name and Function of Each Part
Bottom
C Mount Adaptor
Attach the C-Mount Adapter when using the C-Mount Lens
Tripod Mounting Bracket Screw Hole
Tripod Mounting Hole
Used to install the camera on an optional tripod
The tripod must be equipped with the screw specified as below
1/4"-20UNC(20 THREAD)
L : 4.5mm 0.2mm(ISO standard) or 0.197"(ASA standard)
Used to fix the Tripod mounting
Bracket on the top of the camera
Auto Iris Lens Connector
Used to connect the auto iris lens plug
You can remove and install this bracket on the top of the camera. You must use
the supplied screw or equivalent(within 4mm). If not, the bracket may not be fixed
properly.
Day&Night Color CCD Camera
10
11
Day&Night Color CCD Camera
Name and Function of Each Part
Back
Name and Function of Each Part
Power LED
Accessories
The LED turns on when power is supplied.
DC/VIDEO Selection Switch
Used to choose DC or VIDEO according to the type of your auto iris lens.
External Terminal
Used to connect external Day/Night input signal.
This also provides the motion detect signal.
Video Out Jack
Used to connect an external video
monitor in jack.
Auto Iris Lens Plug
L-Wrench
C-Mount Adaptor
Instruction Manual
REMOTE Jack
Menu Setup Buttons
Power Terminal
Used to connect AC24V
- Set Button
or DC12V power source.
Used to access menu mode.
(Non-Polarity)
Also used to confirm the setting.
- Up/Down Button
Used to choose the desired menu item.
It also moves the cursor up or down in the menu screen.
- LEFT/RIGHT Button
Used to change the parameter of the selected menu item.
It also moves the cursor to the left or right in the menu screen.
Day&Night Color CCD Camera
12
13
Day&Night Color CCD Camera
Installation Method
Installation Method
Lens
3. Connect the lens plug to the auto iris connector on the right side of the camera.
The lens is not supplied with this camera. Purchase a lens suitable for your
environment.
This camera accepts the auto iris lens and both C- and CS-mount lens.
Installing Auto Iris Lens
1. Remove the cover from the iris lens plug supplied, and solder the lens cable to
the plug as shown below.
Pin No.
Video type
DC type
No.1 Pin
Power(Red)
Damping-
No.2 Pin
N.C
Damping+
No.3 Pin
Video signal(White)
Drive+
No.4 Pin
GND(Black)
Drive-
Cover
4. Set the DC / VIDEO selection switch to DC or VIDEO according to the type of the
lens.
Lens cable
No.3 Pin
No.1 Pin
No.4 Pin
No.2 Pin
2. Attach the lens to the camera by turning clockwise.
Day&Night Color CCD Camera
14
15
Day&Night Color CCD Camera
Installation Method
Installing C/CS-Mount Lens
Before mounting a lens, please check whether it is a C-mount or CS-Mount lens.
The back focus is set for the CS-mount lens at the factory.
Installation Method
Connecting to Monitor
Connect the VIDEO Out jack to the monitor VIDEO in jack
Mounting a CS-Mount Lens
After removing the protecting cap, attach the lens into the camera by turning
clockwise.
Mounting a C-Mount Lens
1.Attach the C Mount lens adaptor by turning clockwise
2.Attach the lens to the camera by turning clockwise.
heavylens
lensmay
maydisturb
disturbthe
thebalance
balancewith
withthe
thecamera
cameraand
andpossibly
possiblyresult
resultinindamage.
damage.
AAheavy
Don't
Don'tuse
uselens
lensheavier
heavierthan
than450g.
450g.
recommendedtotoset
setthe
thelens
lensALC
ALCmode
modetotoAv
Avmode(Average).
mode)Average).Pk
Pkmode
modecan
canbebe
ItItisisrecommended
occurredhunting.
hunting.
occurred
Day&Night Color CCD Camera
16
Connecting to Power
Connect the power plug to a normal, grounded AC/DC outlet
Use AC 24V/300mA or DC 12V/500mA power source.
Be
Be sure
suer to
to connect
connect power
power only
only after
after all
all the
the installation
installation is
is complete
complete
Note
Note that
that power
power adaptor
adaptor is
is not
not supplied
supplied with
with camera
camera
Use
the
UL
listed,
class
2
power
transformer
of
AC
24V
adaptor
Use the UL listed, class 2 power transformer of AC 24V adaptor
Ground
Ground should
should be
be connected
connected to
to the
the FGND
FGND terminal
terminal
DC12V
DC12V power
power is
is non
non polarity
polarity
17
Day&Night Color CCD Camera
Operating Your Camera
Operating Your Camera
Configuration of The Menu
Setting Up The Menu
Use the five Setup Menu buttons on rear of the camera.
Setup Menu
Camera ID
.OFF .ON
BLC
.OFF .ON
Lens
.DC
/ VIDEO .Manual
Shutter
.ESC
.OFF .FLKless .Manual
1. Press the SET button to access the Setup mode over 1sec.
-Setup menu is displayed on the monitor screen.
Gain
.AGC .OFF
White Balance
.ATW .AWC .Manual
Motion Detect
.OFF .ON
Color(Day&Night)
.AUTO
.ON .BW .EXT
Sync
.INT .L/L
Reset
End
For the mode with
Day&Night Color CCD Camera
18
Select the
function with the
UP or DOWN
button
Setup
Camera ID
BLC
Lens
Shutter
Gain
White Balance
Motion Detect
Color
Sync.
Reset
End
OFF
OFF
DC
Manual
AGC
ATW
OFF
AUTO
INT
Select the condition with
the LEFT or RIGHT
button
2. Select the desired feature using the UP or DOWN button.
-Each time you press the UP or DOWN button, the arrow indicator moves up or
down
-Move the arrow indicator to the desired feature item.
3. Change the status of the selected feature using the LEFT or RIGHT button.
4. When completed, move the arrow indicator to ‘End’ and press the SET button.
you can access submenu.
19
Day&Night Color CCD Camera
Operating Your Camera
Operating Your Camera
Camera ID
If you enter a camera ID, the name will be displayed in the screen monitor.
1. Press the SET button to display the setup menu and move the arrow indicator
to ‘Camera ID’ using the UP or DOWN button.
Setup
Camera ID
BLC
Lens
Shutter
Gain
White Balance
Motion Detect
Color
Sync.
Reset
End
ON
OFF
DC
Manual
AGC
ATW
OFF
AUTO
INT
Press SET button
ID Character
ABCDEFGHIJKLM
NOPQRSTUVWXYZ
a b c d e f g h i j k l m
n o p q r s t u v w x y z
- . 0 1 2 3 4 5 6 7 8 9
Clr Pos
End
Day&Night Color CCD Camera
20
Select the status “ON” or “OFF”
using the LEFT or RIGHT
button (If the camera ID feature
is set to OFF, the name will not
be displayed in the monitor.)
2. You can enter up to 15 characters.
1) Move the cursor to character-enter location by 4-directional buttons.
2) Selected character blinks.
ID Character
ABCDEFGHIJKLM
NOPQRSTUVWXYZ
a b c d e f g h i j k l m
n o p q r s t u v w x y z
- . 0 1 2 3 4 5 6 7 8 9
Clr Pos
End
3) Press the SET button to confirm the blinking character. The first character is
saved and the cursor in the bottom of the screen moves to the next position.
4) Repeat steps 1), 2) and 3) until you create the full name you want.
3. If you make a mistake while entering name
Move the cursor to ‘Clr’, press ‘SET’ button. After erasing the character, correct
the character again.
or
in the ID generation
4. To edit existing Camera ID, move the cursor to
screen, and press SET button, After you choose or , each time you press
the SET button, the cursor moves to the left or right in the string of characters.
When the cursor moves to the wrong character, correct the character by using
the 4-directional buttons.
5. Select the position at which the camera ID will be located on the screen.
1) Move the cursor to ‘Pos’ and press SET button.
2) The camera ID is displayed on the top-left of the monitor screen (Default
position)
3) Select the position by using the 4-directional buttons, then press the SET
button to confirm the position.
6. When completed, move the cursor to ‘End’ and press SET button.
21
Day&Night Color CCD Camera
Operating Your Camera
Operating Your Camera
Back Light Compensation (BLC)
Lens Selection
When the image is in front of strong background lighting, that will be presented
dark on the monitor. If you select this function, you can get the clear image.
1. Press the SET button to display the setup menu and move the arrow indicator
to ‘BLC’ using the UP or DOWN button
Setup
Camera ID
BLC
Lens
Shutter
Gain
White Balance
Motion Detect
Color
Sync.
Reset
End
OFF
ON
DC
OFF
AGC
ATW
OFF
AUTO
INT
Select “ON” using the LEFT or
RIGHT button
2. When BLC selected to ‘ON’, press the SET button. You can control the level of
weight.
You can set the type of the lens, and control the brightness of the screen.
1. Press the SET button to display the setup menu and move the arrow indicator
to ‘Lens’ using the UP or DOWN button
Setup
Camera ID
BLC
Lens
Shutter
Gain
White Balance
Motion Detect
Color
Sync.
Reset
End
OFF
OFF
DC
OFF
AGC
ATW
OFF
AUTO
INT
Select the DC/Video or Manual using
the LEFT or RIGHT button
2. When the auto iris lens is mounted, you have to set the DC/Video selection
switch on the back side of the camera. The setup window displays DC or Video
according to status of this selection switch.
Setup
Weight
2
Select the weight number (0~4) using
the LEFT or RIGHT button
Press SET to Return
As the weight level is high, the BLC area is limited to the middle of the
screen, and the sensitivity gets rate.
Day&Night Color CCD Camera
22
3. If you select ‘DC’ mode, you can adjust the desired brightness. For a stable
performance, the level ‘10’ is recommended.
Setup
Iris Level
10
I
Press SET to Return
Select the level using the LEFT or
RIGHT button (0~30)
23
Day&Night Color CCD Camera
Operating Your Camera
Operating Your Camera
Shutter Speed Control
You can control brightness of the screen by the shutter speed. You can select the
automatic control and ‘OFF’ (1/60 or 1/50sec. fixed) mode, Flickerless and manual
control of the shutter.
1. Press the SET button to display the setup menu and move the arrow indicator
to ‘Shutter’ using the UP or DOWN button
Setup
Camera ID
BLC
Lens
Shutter
Gain
White Balance
Motion Detect
Color
Sync.
Reset
End
5. Manual
You can select speed from 1/60 to 1/10,000sec. (NTSC mode), 1/50 to
1/10,000sec. (PAL mode)
Setup
Shutter
OFF
OFF
DC
OFF
AGC
ATW
OFF
AUTO
INT
1/250
Change the range using the LEFT or
RIGHT button. (1/60, 1/50~1/10,000)
Press SET to Return
Select “Shutter” to the desired mode
like ESC, OFF, FLKless or Manual
using the LEFT or RIGHT button
When the shutter speed is increased or decreased using the LEFT or RIGHT
button, you can find the difference by monitoring the brightness of the screen.
2. ESC selected
The electronic shutter can be automatically controlled from 1/60(1/50) to
1/10,000sec.
The brightness can be controlled.
If Auto Iris Lens is mounted and adjusted, ESC mode cannot be selected.
3. OFF selected
The shutter speed is fixed at 1/60(1/50)sec.
4. FLKless selected
The speed is fixed at 1/100sec. in NTSC mode and at 1/120sec. in PAL mode.
This should be selected when flickering is caused by discord of environmental
lighting and frequency
Day&Night Color CCD Camera
24
25
Day&Night Color CCD Camera
Operating Your Camera
Operating Your Camera
Gain Control
White Balance Control
You can see a brighter picture at low light level. Increasing the gain level, you
will see the noise increased although the picture gets brighter.
1. Press the SET button to display the setup menu and move the arrow indicator
to ‘Gain’ using the UP or DOWN button
Setup
Camera ID
BLC
Lens
Shutter
Gain
White Balance
Motion Detect
Color
Sync.
Reset
End
OFF
OFF
DC
OFF
AGC
ATW
OFF
AUTO
INT
Select AGC or OFF using the LEFT or
RIGHT button
2. You can control the Gain level at AGC selected.
Gain Limit
Middle
Low/Middle/High
Press SET to Return
Caution.
When Gain Limit is set to Low, screen noise will decrease but resolution
decrease.
When Gain Limit is set to High, resolution will increase but screen noise will
increase.
Day&Night Color CCD Camera
26
You can use this when the screen color needs to be controlled.
1. Press the SET button to display Setup menu and move the arrow indicator to
‘White Balance’ using the UP or DOWN button
Setup
Camera ID
BLC
Lens
Shutter
Gain
White Balance
Motion Detect
Color
Sync.
Reset
End
OFF
OFF
DC
OFF
AGC
ATW
OFF
AUTO
INT
Select ATW, AWC or Manual
using the LEFT or RIGHT button
2. The three white balance control modes are as follows :
ATW (Auto Trace White Balance )
The camera automatically controls the white balance in any environment
AWC ( Auto White Balance Control )
The white balance is automatically adjusted in a specific environment.
In order to obtain the best result, press the SET button while the camera
focused on white paper.
If the environment including the light source is changed, you have to adjust
the white balance again.
27
Day&Night Color CCD Camera
Operating Your Camera
Operating Your Camera
Manual
To fine adjust, select the Manual mode. You can increase or decrease the red
or blue factor while monitoring the difference on the screen. Set to ‘Manual’
mode and press the ‘SET’ button.
Increase or decrease the value for red(R-Gain) and blue(B-Gain), watching the
color of the picture, and press the SET button when you obtain the best color.
Red
Blue
0
0
Press SET to Return
Change the range using the
LEFT or RIGHT (-20 ~ +20)
Motion Detection
Your camera transmits an alert signal when it detects motion of an object on the
screen. If you connect the camera to an external alarm, you can pay attention to
the screen when the alarm sounds. This feature is useful when you have to
monitor several screens simultaneously.
1. Press the SET button to display the setup menu and move the arrow indicator
to ‘Motion Detect’ using the UP or DOWN button.
Setup
Camera ID
BLC
Lens
Shutter
Gain
White Balance
Motion Detect
Color
Sync.
Reset
End
OFF
OFF
DC
OFF
AGC
ATW
ON
AUTO
INT
Select On using the
LEFT or RIGHT button
SET button pushed
Motion Detection
Top
Bottom
Left
Right
Sensitivity
4
9
3
10
8
Change the zone using the
LEFT or RIGHT button
Zone area is displayed
I
Output Type
POSI
Press SET to Return
Day&Night Color CCD Camera
28
29
Day&Night Color CCD Camera
Operating Your Camera
2. Specify the zone area.
You can specify the zone area by setting a proper value from 0 to 15 with an
increment of 1. Move the arrow indicator to ‘Top’ using the UP or DOWN
button and increase or decrease the value using the LEFT or RIGHT button.
Repeat the procedure for bottom, left, and right.
3. Adjust Sensitivity
Move the arrow indicator to ‘Sensitivity’ using the UP or DOWN button, then
press the LEFT or RIGHT button to decrease or increase the value.
If you decrease the sensitivity, the camera will detect only motion that is
clearly noticeable.If you want to set the camera to detect minor motion,
increase the sensitivity.
You can select the sensitivity from 0 to 15.
Higher sensitivity detects smaller motions at the risk of false detection.
Therefore zone adjustment is recommended rather than sensitivity adjustment.
4. Adjust the output signal.
POSI(Positive) : When a motion is sensed, +5V of Pulse will be output
NEGA(Negative) : When a motion is sensed, 0V of Pulse will be output
ALARM : You can connect external equipment like buzzer or lamp. The output
of alarm is an open collector under DC16V & 100mA capacity.
Tips on using Motion Detection
After selecting zone and sensitivity, perform a test operation to make sure it
works properly.
If the lighting flickers, the motion detection feature might not work properly.
This system does not guarantee prevention of fires or thefts. The manufacturer
is not responsible for any accident or damage.
Day&Night Color CCD Camera
30
Operating Your Camera
Color (Day & Night)
Your camera provides automatic mode changeover by sensing day or night
conditions. It changes to Color mode in day conditions for optimal color and to
B/W mode in night conditions for clear identification.
1. Press the SET button to display the setup menu and move the arrow indicator
to ‘Color’ using the UP or DOWN button.
Setup
Camera ID
BLC
Lens
Shutter
Gain
White Balance
Motion Detect
Color
Sync.
Reset
End
OFF
OFF
DC
OFF
AGC
ATW
ON
AUTO
INT
Select the AUTO, ON, BW, EXT.
using the LEFT or RIGHT button
2. Select a mode using the LEFT or RIGHT button.
ON : Color mode is kept up.
B/W : Black and white mode is kept up.
AUTO : The mode is changed between Color and B/W automatically
depending on the brightness.
Pushing the SET button at Auto mode, you can control the mode
changing point and time and burst existence during the mode
change to B/W mode.
31
Day&Night Color CCD Camera
Operating Your Camera
B/W Change
Color
Color
Color
B/W Point
B/W Time
3
5
Color Time
10
I
B/W
I
BURST
OFF
Operating Your Camera
Change the value using the
LEFT or RIGHT button(1~5)
Change the value using the
LEFT or RIGHT button(1~10)
Change the value using the
LEFT or RIGHT button(2~20)
Press SET to Return
Color
B/W Point : 1~5
1 : around 1 LUX
3 : around 3~4 LUX
5 : around 7~8 LUX
The color changing point above is based on the AGC level to the middle.
You should select the proper value depending on the condition like lens.
Color B/W Time : 1sec.~10sec.(1sec. term)
B/W Color Time : 2sec.~20sec.(1sec. term)
BURST : OFF/ON
EXT : The Color/ BW mode change can be controlled by an external Sensor or
other equipment connected on the DN terminal (D/N IN) on the back side
of camera.
Pressing the SET button at EXT mode, you can control the burst existence
during the mode changing to B/W mode.
BURST : OFF/ON
DN input terminal is pull-up of DC 5V and over 0.2mA.
Open contact : Color mode
Closed contact : B/W mode
1.Under Gain OFF Color/BW does not change over automatically, ON/OFF is only available.
2.If you change ‘Gain’ menu OFF to AGC, ‘Color’ mode change to AUTO automatically.
3.Adjust the focus if the camera is out of focus for changing modes.
Day&Night Color CCD Camera
32
Synchronization Mode
Two synchronization modes are available internal and External linelock. In
linelock mode, it synchronizes the video signal between cameras without a
synchronous generator. The linelock synchronization is only used in the areas of
60Hz(NTSC models)/50Hz(PAL models)
1. Press the SET button to display the setup menu and move the arrow indicator
to 'Sync.' Using the UP or DOWN button.
Setup
Camera ID
BLC
Lens
Shutter
Gain
White Balance
Motion Detect
Color
Sync.
Reset
End
OFF
OFF
DC
OFF
AGC
ATW
OFF
AUTO
L/L
Select ‘L/L’ or ‘INT’ using the
LEFT or RIGHT button.
Press SET button
Phase
45
I
Press SET to Return
Adjust the Phase level using
the LEFT or RIGHT.
button(from 0 to 270°)
When the power frequency is 60Hz, you can use linelock mode(NTSC models).
When the power frequency is 50Hz, you can use linelock mode(PAL models).
33
Day&Night Color CCD Camera
Operating Your Camera
Using Remote Jack
Remote Control on Setup
Reset
This function resets the camera to the default setting preset at the factory.
1. Press the SET button to display the Setup menu and move the arrow indicator
to ‘Reset’ using the UP or DOWN button.
Setup
OFF
Camera ID
OFF
BLC
DC
Lens
OFF
Shutter
AGC
Gain
ATW
White Balance
OFF
Motion Detect
AUTO
Color
L/L
Sync.
Reset
End
Press SET button
Are you sure
YES
If you connect a remote plug to the REMOTE jack on the rear on the camera as
shown below, you can access the menu setup mode from a remote place with an
equipment like computer
1. RS-232C Communication Setting
Mode : Serial
Data bit : 8
Bit/sec.: 9600bps Stop bit : 1
Parity : None
2. Wiring
REMOTE
Select YES or NO using the LEFT
or RIGHT button
GND (Grounding Terminal)
Tx (Transmit Data)
Rx (Receive Data)
2. In the confirmation mode, select ‘YES’ or ‘NO’ If ‘YES’ selected, all modes are
initialized and return to the default status.
End
Press the SET button to display the setup menu and move the arrow indicator to
‘END’ using the UP or DOWN button. Then you are finished on Setup.
If there’s no button control at Menu over 30 sec., the setup is automatically finished with
automatic update of the controlled menu by that time. However there is no time limit at
Subsidiary Menu.
Day&Night Color CCD Camera
34
3. Setup menu Command
Setup menu
SET
UP
DOWN
LEFT
RIGHT
Command
0A, 02, 01, 00, 00, AF
0A, 02, 02, 00, 00, AF
0A, 02, 03, 00, 00, AF
0A, 02, 04, 00, 00, AF
0A, 02, 05, 00, 00, AF
Byte
6
6
6
6
6
35
Day&Night Color CCD Camera
External Connecting Terminal
Specification
Day/Night External Signal Input/Motion Detect Output
The Color/BW mode change can be controlled by an external sensor or other
equipment connected on the DN terminal(Day&Night)on the back side of
camera.(Optional Function)
When you use Motion Detection mode, the appointed signal is output in every
time motion detected.
D/N Input
GND
Motion Detect Output
ITEM
NTSC
PAL
Image Sensor
1/3” SONY SUPER HAD IT CCD
Picture Elements
811(H)
508( V)
795(H)
596( V)
Effective Pixels
768(H)
494( V)
752(H)
582( V)
Scanning System
Resolution
Shutter Speed
2:1 Interlace(NTSC Standard)
525 Line/60Fields/30Frames
480(Color)/520(BW)TV Lines Horizontally
1/60~1/10,000sec
1/50~1/10,000sec
S/N Ratio
Video Output
More than 48dB(AGC OFF)
1.0 Vp~p NTSC composite
Sync. System
0V
No motion appeared
2.5 0.5sec.
Motion appeared
1.0 Vp~p PAL composite
0.5Lux at F1.2(Color)
0.03Lux at F1.2(B/W)
Min. Illumination
1.DN Input Terminal(over Pull-up input of DC 5V,0.2mA)
Open contact: Color mode
Closed contact: B/W mode
2.Motion Detect Output Signal Level
At POSI(Positive)mode
4.0V~5.0V
2:1 Interlace(PAL Standard)
625 Line/50Fields/25Frames
Internal/Line Lock selectable
Back Light
ON/OFF selectable
Iris Mode
DC Iris/Video Iris/ESC selectable
White Balance
Lens Mount
ATW/AWC/MANUAL selectable
CS-mount(or C-mount with the supplied adaptor)
Color
AUTO/ON/BW/EXT.selectable
O.S.D
Built-in
RS-232C comm.
At NEGA(Negative)mode
Power Supply
4.0V~5.0V
No motion appeared
2.5 0.5sec.
Motion appeared
0V
At ALARM :You can connect an extra an equipment like lamp or buzzer on
the external of camera. The output is an open collector under DC
16V/100mA.
OFF : Open
ON : under 100mA
Day&Night Color CCD Camera
36
Available
AC 24V,60Hz/DC 12V(Non polarity)
Power Consumption
Operating Temperature
-10
Operating Humidity
Dimension
AC 24V,50Hz/DC 12V(Non polarity)
MAX. 3.0watt.
~ +50 …
90% RH Max.
62(W)
52(H)
133(L)mm (Without Lens)
37
Day&Night Color CCD Camera
Troubleshooting
Warranty
If you have trouble operating your camera, refer to the following table.
If the guidelines do not enable you to solve the problem, contact an authorized technician.
Problem
Solution
The camera is not
working properly
Check that you have properly connected the camera to an appropriate power source.
Nothing appears
on the screen
Check that the power cord and line connection between the camera and monitor are
fixed properly.
Check that the DC/VIDEO selection switch on the rear of the camera is set to a proper
position according to the type of your auto iris lens.
The image on the
screen is dark
Check that you have set to proper iris level in the setup menu when you use the DC
auto iris lens.
Check that you have set to proper brightness level in the 'ESC' mode when you use the
Manual iris lens.
The image on the
screen is dim
Check if the lens is stained. If dirty, clean the lens with soft, clean cloth.
In the setup menu,
'AUTO' mode does
not activate.
Check that you have properly set the 'Gain' feature under the setup menu. Set the
feature to 'AGC'.
The color of the
picture is not
matched.
Check that you have properly set the 'White Balance' feature under the setup menu.
The contrast on
the screen is too
weak.
Adjust the contrast feature of the monitor.
If the camera is exposed to too strong light, change the camera position.
The image on the
screen flickers
Is the camera facing to direct sunlight or fluorescent lighting?
Change the camera position.
Check that the DC/VIDEO selection switch on the rear of the camera is set to a proper
position according to the type of your auto iris lens.
The image on the
screen is distorted
Check that the power frequency is proper in 'Sync'.
If the power frequency is not proper, the linelock synchronization mode cannot be used
Set the 'Sync' mode to 'INT' mode.
NTSC Model's power frequency in LL mode:60Hz
PAL Model's power frequency in LL mode:50Hz
Day&Night Color CCD Camera
MACE Security Product Warranty
38
Mace will repair or replace, without charge, any merchandise proved
defective in material or workmanship for a period of one year after the date
of shipment.
Exceptions to this warranty are as noted below:
Mace will warrant all replacement parts and repairs for 90 days from the date
of Mace shipment. All goods requiring warranty repair shall be sent freight
prepaid to Mace, Fort Lauderdale. Repairs made necessary by reason of
misuse, alteration, normal wear, or accident are not covered under this
warranty.
Mace assumes no risk and shall be subject to no liability for damages or loss
resulting from the specific use or application made of the Products. Mace’s
liability for any claim, whether based on breach of contract, negligence,
infringement of any rights of any party or product liability, relating to the
Products shall not exceed the price paid by the Dealer to Mace for such
Products. In no event will Mace be liable for any special, incidental or
consequential damages (including loss of use, loss of profit and claims of
third parties) however caused, whether by the negligence of Mace or
otherwise.
If a warranty repair is required, the Dealer must contact Mace at (877) 5856223 or (954) 585-6223 to obtain a Repair Authorization (RA) number, and
provide the following information:
1. Model and serial number
2. Date of shipment, P.O. number, Sales Order number, or Mace invoice
number
3. Details of the defect or problem
39
Day&Night Color CCD Camera