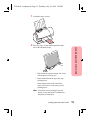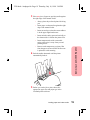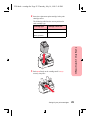
1
5700.book : TITLPAGE.FM Page 1 Thursday, July 16, 1998 3:49 PM
Lexmark Photo
Jetprinter 5770
User Guide
5700.book : EDITION.FM Page 2 Thursday, July 16, 1998 3:49 PM
First Edition (July 1998)
The following paragraph does not apply to any country where such provisions are inconsistent with
local law: LEXMARK INTERNATIONAL, INC. PROVIDES THIS PUBLICATION “AS IS”
WITHOUT WARRANTY OF ANY KIND, EITHER EXPRESS OR IMPLIED, INCLUDING, BUT
NOT LIMITED TO, THE IMPLIED WARRANTIES OF MERCHANTABILITY OR FITNESS FOR A
PARTICULAR PURPOSE. Some states do not allow disclaimer of express or implied warranties in
certain transactions, therefore, this statement may not apply to you.
This publication could include technical inaccuracies or typographical errors. Changes are periodically
made to the information herein; these changes will be incorporated in later editions. Improvements or
changes in the products or the programs described may be made at any time.
A form for reader’s comments is provided at the back of this publication. If the form has been removed,
comments may be addressed to Lexmark International, Inc., Department F95/035-3, 740 New Circle
Road N.W., Lexington, Kentucky 40550, U.S.A. In the United Kingdom and Eire, send to Lexmark
International Ltd., Marketing and Services Department, Westhorpe House, Westhorpe, Marlow Bucks
SL7 3RQ. Lexmark may use or distribute any of the information you supply in any way it believes
appropriate without incurring any obligation to you. You can purchase additional copies of publications
related to this product by calling 1-800-553-9727. In the United Kingdom and Eire, call 0628-481500. In
other countries, contact your point of purchase.
Lexmark, and Lexmark with diamond design are trademarks of Lexmark International, Inc., registered in
the United States and/or other countries.
Color Jetprinter is a trademark of Lexmark International, Inc.
Photo Jetprinter is a trademark of Lexmark International, Inc.
Windows is a registered trademark of Microsoft in the U.S. and other countries.
PCL® is a registered trademark of the Hewlett-Packard Company. PCL 3 is Hewlett-Packard Company's
designation of a set of printer commands (language) and functions included in its printer products. This
printer is intended by Lexmark International, Inc. to be compatible with the PCL 3 language. This means
that the printer recognizes PCL 3 commands used in various application programs, and that the printer
emulates the functions corresponding to the commands.
Other trademarks are the property of their respective owners.
© Copyright Lexmark International, Inc. 1998.
All rights reserved.
UNITED STATES GOVERNMENT RESTRICTED RIGHTS
This software and documentation are provided with RESTRICTED RIGHTS. Use, duplication or
disclosure by the Government is subject to restrictions as set forth in subparagraph (c)(1)(ii) of the Rights
in Technical Data and Computer Software clause at DFARS 252.227-7013 and in applicable FAR
provisions: Lexmark International, Inc., Lexington, KY 40550.
5700.book : 5700.TOC Page iii Thursday, July 16, 1998 3:49 PM
Contents
Chapter 1 - Introducing your printer . . . . . . . . 1
Printer features and specifications . . . . . . . . . . . . . . . . . . . . 2
System requirements . . . . . . . . . . . . . . . . . . . . . . . . . . . . . . 4
Using the printer's light and button . . . . . . . . . . . . . . . . . . . 5
Contents
Chapter 2 - Using the printer software . . . . . . 7
Opening the Control Program . . . . . . . . . . . . . . . . . . . . . . . 8
Opening the Printer Driver . . . . . . . . . . . . . . . . . . . . . . . . . . 8
Chapter 3 - Loading paper and other media . . 9
Recommended paper types . . . . . . . . . . . . . . . . . . . . . . . . . . 9
Loading the automatic feeder . . . . . . . . . . . . . . . . . . . . . . . 14
Loading the manual feeder . . . . . . . . . . . . . . . . . . . . . . . . . 18
Chapter 4 - Caring for your print cartridges . 21
Preserving print cartridges . . . . . . . . . . . . . . . . . . . . . . . . . 21
Installing or replacing print cartridges . . . . . . . . . . . . . . . . 22
Disposing of used cartridges . . . . . . . . . . . . . . . . . . . . . . . 26
Aligning the print cartridges . . . . . . . . . . . . . . . . . . . . . . . 27
Contents
iii
5700.book : 5700.TOC Page iv Thursday, July 16, 1998 3:49 PM
Cleaning the print nozzles . . . . . . . . . . . . . . . . . . . . . . . . . 29
Wiping the print nozzles and contacts . . . . . . . . . . . . . . . . 30
Cleaning print cartridge carrier contacts . . . . . . . . . . . . . . 32
Chapter 5 - Printing from DOS . . . . . . . . . . . . 35
Changing print settings for DOS applications . . . . . . . . . . 35
Printing from DOS applications . . . . . . . . . . . . . . . . . . . . . 36
Chapter 6 - Troubleshooting . . . . . . . . . . . . . . 43
Bidirectional communications problems . . . . . . . . . . . . . . 44
Printhead failure . . . . . . . . . . . . . . . . . . . . . . . . . . . . . . . . . 47
Deleting photo files . . . . . . . . . . . . . . . . . . . . . . . . . . . . . . 49
Error messages on your computer . . . . . . . . . . . . . . . . . . . 50
Error messages on the printer operator panel . . . . . . . . . . . 51
Contents
General printing problems . . . . . . . . . . . . . . . . . . . . . . . . . 52
Paper feed problems . . . . . . . . . . . . . . . . . . . . . . . . . . . . . . 57
Poor print quality . . . . . . . . . . . . . . . . . . . . . . . . . . . . . . . . 59
Printer software problems . . . . . . . . . . . . . . . . . . . . . . . . . 63
Removing the exit tray . . . . . . . . . . . . . . . . . . . . . . . . . . . . 64
Chapter 7 - Ordering Supplies . . . . . . . . . . . . 65
Print cartridges . . . . . . . . . . . . . . . . . . . . . . . . . . . . . . . . . . 65
Parallel cable . . . . . . . . . . . . . . . . . . . . . . . . . . . . . . . . . . . 65
Photo paper . . . . . . . . . . . . . . . . . . . . . . . . . . . . . . . . . . . . . 66
Coated paper . . . . . . . . . . . . . . . . . . . . . . . . . . . . . . . . . . . . 66
Glossy film . . . . . . . . . . . . . . . . . . . . . . . . . . . . . . . . . . . . . 67
Transparencies . . . . . . . . . . . . . . . . . . . . . . . . . . . . . . . . . . 67
Greeting cards with envelopes . . . . . . . . . . . . . . . . . . . . . . 68
Labels . . . . . . . . . . . . . . . . . . . . . . . . . . . . . . . . . . . . . . . . . 68
iv
Contents
5700.book : 5700.TOC Page v Thursday, July 16, 1998 3:49 PM
Iron-on transfers for T-shirts . . . . . . . . . . . . . . . . . . . . . . . 69
Appendix A - Notices . . . . . . . . . . . . . . . . . . . . .71
Appendix B - Statement of Limited Warranty .79
Contents
Contents
v
Contents
5700.book : 5700.TOC Page vi Thursday, July 16, 1998 3:49 PM
vi
Contents
5700.book : ch1intro.fm Page 1 Thursday, July 16, 1998 3:49 PM
Introducing
your printer
Chapter One
Introducing your printer
Your printer is a general purpose color inkjet printer that
provides high quality text and photos. You can use your
printer all by itself to print photos, or connect to your
computer when you want to print on single sheet paper,
envelopes, labels, index cards, coated paper, glossy film,
photo paper, transparencies, greeting cards, and iron-on
transfers.
This User’s Guide describes how to use your printer with
a computer. For information about using your printer all
by itself, refer to the Getting Started booklet that tells
you how to use your printer without a computer.
Introducing your printer
1
5700.book : ch1intro.fm Page 2 Thursday, July 16, 1998 3:49 PM
This illustration shows the parts of the printer.
Paper support
Automatic feeder
Manual feeder
Left paper
guide
Paper status light
Paper feed button
Top camera
card slot
Paper
exit tray
Introducing your printer
Bottom camera
card slot
Operator Panel
Busy light
Printer features and
specifications
Your printer features:
• Multiple print quality options that include High
Quality, Quality, and Normal.
• Direct digital input function which allows you to
download directly from the camera cards into the
printer.
• Camera card support for most digital cameras.
• Index printing of thumbnail images.
• Zip drive compatibility for storage support.
2
Introducing your printer
5700.book : ch1intro.fm Page 3 Thursday, July 16, 1998 3:49 PM
• Superior editing and formatting options.
You can edit your photos to produce panoramic or
cropped prints. You can also print your photos in
multiple photos per page formats.
• On-screen or verbal feedback of printer status.
• Low cost, near laser-quality print.
• Quiet operation.
• Portrait and landscape orientation.
• Low-ink messages when the print cartridge is low
on ink and connected to a computer.
• Superior paper handling in the industry for this
class of printer.
Introducing your printer
Your printer also supports index cards, labels,
envelopes, transparencies, plain paper, coated
paper, and hagaki.
• Support for these new paper types: iron-on
transfers, greeting cards, and glossy film or photo
paper.
• Automatic envelope feeding.
Introducing your printer
3
5700.book : ch1intro.fm Page 4 Thursday, July 16, 1998 3:49 PM
Printer dimensions
Height:
5.0 in. (152 mm)
Width:
17.0 in. (432 mm)
Depth:
8.0 in. (203 mm)
Weight:
9.0 lbs. (4.1 kg)
Temperature and humidity
Print quality can vary depending on air temperature and
relative humidity.
• Operating temperature range: 10° to 40°C
(50° to 104°F)
Introducing your printer
• Optimum print temperature range: 16° to 32°C
(60° to 90°F)
• Operating humidity range: 8% to 80% RH
(non-condensing)
• Optimum humidity range: 20% to 60% RH
System requirements
If you are using your printer with a computer, make sure
you:
• Are running Windows 95 or Windows 98.
• Have a 486 PC system or higher.
• Have at least 8 MB RAM.
• Have at least 20 MB free disk space.
4
Introducing your printer
5700.book : ch1intro.fm Page 5 Thursday, July 16, 1998 3:49 PM
Using the printer's light and
button
Your printer has two sets of lights and buttons:
• One set is located at the bottom left-hand corner of
the printer, on the operator panel. For more
information on the operator panel light and
buttons, refer to the Getting Started booklet that
tells you how to set up and use your printer
without a computer.
• The other set is located at the top of your printer
and includes the Paper Status light and the Paper
Feed button.
Introducing your printer
Paper Status light
Paper Feed button
Paper Status light
If the light is:
Then the printer is:
Off
Ready to print
On solid
Printing or feeding media
through the printer
Blinking
Out of paper or has an error
Introducing your printer
5
5700.book : ch1intro.fm Page 6 Thursday, July 16, 1998 3:49 PM
Paper Feed button
Use the Paper Feed button to feed paper into the printer
when you run out of paper during a print job and the
Paper Status light blinks.
If you run out of paper during a print job:
1
2
Load paper.
Press the Paper Feed button.
Introducing your printer
Note: You do not need to press the Paper Feed button in
order to get the printer to load the paper under
normal conditions.
6
Introducing your printer
5700.book : software.fm Page 7 Thursday, July 16, 1998 3:49 PM
Using the
printer software
Chapter Two
When you installed the software for your printer, several
small applications were installed on your computer. The
following table describes these applications:
Using the printer software
Use this software:
When you want to:
Control Program
• install or replace print
cartridges
• align print cartridges
• monitor print jobs and
print cartridge ink levels
• print a test page
• change DOS settings
• control when and how
the Control Program
appears
Printer Driver
• change printer
properties
• choose the paper source
• choose page orientation
• choose different sizes
and types of media
• adjust the quality of
print jobs
• reset printer defaults
Using the printer software
7
5700.book : software.fm Page 8 Thursday, July 16, 1998 3:49 PM
Opening the Control Program
1
2
3
From the Start menu, click Programs.
Click the Lexmark 5700 Series program group.
Click Lexmark 5700 Ctrl Prog on LPTx.
Opening the Printer Driver
You can open the printer driver from almost any
application. To open the printer driver:
Using the printer software
1
2
3
8
Using the printer software
Open the application's File menu.
Choose Print (or Printer) Setup.
In the Printer Setup dialog box, click the
Properties, Options, or Setup button (depending on
the application).
5700.book : loadpapr.fm Page 9 Thursday, July 16, 1998 3:49 PM
Loading paper
and other media
Chapter Three
Loading paper and other media
Your printer prints on photo paper, coated paper,
envelopes, index cards, labels, transparencies, paper,
iron-on transfers, glossy film, and greeting cards. This
section includes general guidelines for purchasing and
loading print materials.
Recommended paper types
This section describes photo paper, coated paper,
transparency, paper, envelope, index card, label, greeting
card, and iron-on transfer types and sizes you can use
with your printer.
Note:
• Use the Photo print cartridge shipped with your
printer to print on photo paper and glossy film.
• Use a Black print cartridge to print on all other
paper types. (To purchase a Black print cartridge
from Lexmark, use part number 12A1970.)
Loading paper and other media
9
5700.book : loadpapr.fm Page 10 Thursday, July 16, 1998 3:49 PM
Photo paper types and sizes
For best photo print results using Color and Photo print
cartridges, use photo paper designed for an inkjet printer,
such as the following:
Type
Size
Photo paper
Letter
(20-pack)
1372481
A4
(20-pack)
1372208
4x6 cards
(20-pack)
12A0074
*
Part number
Loading paper and other media
* You can purchase other excellent photo papers in both
snapshot sizes (4x6, A6, Hagaki) and letter sizes. Since
the quality of photo paper varies widely, you should test
the print quality before buying large quantities of paper.
Do not use photo paper designed for copiers, laser
printers, or pen plotters.
For best results:
• Handle only on the edges. Do not touch the side
being printed on.
• Store unused paper in the original packaging.
• Do not store in excessively hot or humid areas.
• Feed photo paper one sheet at a time.
• Be careful not to touch the printed surface until the
ink is dry.
• If you are printing several sheets, remove each
sheet as it exits the printer and allow it to dry
before stacking.
• Cover the printed area with plain paper when
storing.
10
Loading paper and other media
5700.book : loadpapr.fm Page 11 Thursday, July 16, 1998 3:49 PM
Coated paper types and sizes
Coated paper gives excellent photo printing results at
lower costs compared to the heavier photo papers. Use a
coated paper designed for inkjet printers, such as
Lexmark's High Resolution Premium Inkjet paper. To
order this paper from Lexmark, use Lexmark part number
1402780 (letter size) or 1402781 (A4 size).
Plain paper
You can get good print quality on many types of plain
paper. Since the quality of plain paper varies widely, you
should test the print quality before buying large
quantities of paper.
Loading paper and other media
You can use letter, legal, A4, A5, A6, B5, executive, and
index card size paper with your printer.
Use paper that meets the following specifications:
• Automatic feeder:
Length
Width
Weight
Thickness
127 to 432 mm
76 to 216 mm
60 to 90 g/sqm
0.071 to 0.18 mm
5.0 to 17.0 in.
3.0 to 8.5 in.
16 to 24 lb.
0.0028 to 0.007 in.
• Manual feeder:
Length
Width
Weight
Thickness
127 to 432 mm
76 to 228 mm
60 to 120 g/sqm
0.071 to 0.18 mm
5.0 to 17.0 in.
3.0 to 9.0 in.
16 to 32 lb.
0.0028 to 0.007 in.
Loading paper and other media
11
5700.book : loadpapr.fm Page 12 Thursday, July 16, 1998 3:49 PM
Envelope types and sizes
The printer supports the following envelope sizes and
card types:
Envelope Sizes
• 6 3/4
• 7 3/4
• #9
• #10
• DL
• C5
Card Types
• C6
• B5
• Baronial
• Postcard
• Index card
Do not use envelopes that have:
Loading paper and other media
• Windows, holes, perforations, cutouts, or deep
embossing
• A metal clasp, a string tie, or metal folding bars
• Peel-off sealing strips
• Contents enclosed
Transparency types and sizes
The printer supports letter and A4-size transparencies.
Use transparencies designed for an inkjet printer, such as
the following:
Type
Size
Part number
Transparency
Letter
(20-pack)
1402797
A4
(20-pack)
1402798
Do not use transparencies designed for copiers, laser
printers, or pen plotters.
For best results:
• Handle only on the edges. Do not touch the side
being printed on.
• Store unused paper in the original packaging.
• Do not store in excessively hot or humid areas.
• Feed transparencies one sheet at a time.
12
Loading paper and other media
5700.book : loadpapr.fm Page 13 Thursday, July 16, 1998 3:49 PM
• Be careful not to touch the printed surface until the
ink is dry.
• If you are printing several sheets, remove each
sheet as it exits the printer and allow it to dry
before stacking.
• Cover the printed area with plain paper when
storing.
Label types and sizes
The printer supports letter and A4 size label sheets. You
can use the automatic feeder or manual feeder to print
labels.
Number of
labels per
sheet
Sheet
size
Part
number
1 x 2 5/8 in.
30
Letter
70X7250
2 x 4 in.
10
Letter
70X7251
63.5 x 38.1 mm
21
A4
70X7252
99.1 x 67.7 mm
8
A4
70X7253
Loading paper and other media
Label size
For best results, labels used in the printer should meet the
following requirements:
• Do not use label sheets with a slick backing
material.
• Be sure the adhesive does not come in contact with
any part of the printer.
• Use full label sheets. Partially used sheets (with
areas exposed by missing labels) can cause labels
to peel off during printing and can damage the
printer.
Loading paper and other media
13
5700.book : loadpapr.fm Page 14 Thursday, July 16, 1998 3:49 PM
Greeting card types and sizes
Use Lexmark Inkjet Greeting Cards, part number
1372482 (letter) or 70X7254 (A4). Each greeting card
comes with an envelope.
Iron-on transfer types and sizes
To create colorful, custom-designed T-shirts, use
Lexmark Iron-On Transfers, part number 1372480
(letter) or 1402519 (A4).
Loading paper and other media
Loading the automatic feeder
Automatic feeder
Depending on the thickness of the media, the printer can
hold approximately:
• 100 sheets of paper
• 25 transparencies, glossy film, or photo paper
• 10 envelopes, thick paper, or card stock
Paper, transparencies, glossy film, and
labels
To load paper, transparencies, glossy film, photo paper,
or labels in the automatic feeder:
14
Loading paper and other media
5700.book : loadpapr.fm Page 15 Thursday, July 16, 1998 3:49 PM
Extend the paper exit tray.
2
Place the paper or other media against the right
side of the automatic feeder.
Loading paper and other media
1
• If the media has a preferred print side, insert
with the print side facing you.
• Insert letterhead with the top of the page
pointing down.
• Insert transparencies with a removable
stripe so the stripe is away from you and
pointing down.
Note: You do not need to push paper into the
printer or press the Paper Feed button for
the printer to load paper!
Loading paper and other media
15
5700.book : loadpapr.fm Page 16 Thursday, July 16, 1998 3:49 PM
3
Squeeze the release tab and the left paper guide
together, and slide the left paper guide to the edge
of the paper.
Paper Guide
Loading paper and other media
ReleaseTab
You are now ready to print.
Loading envelopes or other print media
To load envelopes, thick paper, or other card stock in the
automatic feeder:
1
2
Remove any paper from the automatic feeder.
Place the envelopes or other card stock against the
right edge of the automatic feeder.
• Always place the preferred print side facing
you.
• Insert envelopes so that the stamp location is
in the lower right-hand corner.
16
Loading paper and other media
5700.book : loadpapr.fm Page 17 Thursday, July 16, 1998 3:49 PM
• Insert index cards or postcards vertically so
the shortest side feeds into th printer first.
Loading paper and other media
3
Squeeze the release tab and the paper guide
together, and slide the paper guide to the right until
it rests against the envelopes or card stock.
Paper guide
Release
tab
4
Before you send a job to print, choose the
appropriate paper size and paper type in the
Lexmark printer software.
Loading paper and other media
17
5700.book : loadpapr.fm Page 18 Thursday, July 16, 1998 3:49 PM
Loading the manual feeder
You can print from the manual feeder without removing
paper or envelopes from the automatic feeder. The
manual feeder allows you to print one sheet of print
media at a time.
Loading paper and other media
Loading paper or other print media
1 Extend the paper exit tray.
2
Locate the manual feeder.
Manual feeder
18
Loading paper and other media
5700.book : loadpapr.fm Page 19 Thursday, July 16, 1998 3:49 PM
3
Place one piece of paper or specialty media against
the right edge of the manual feeder.
• Always place the preferred print side facing
you.
• Insert paper or other media against the right
edge of the manual feeder.
• Insert an envelope so that the return address
is in the upper right-hand corner.
• Insert an index card or postcard vertically so
the shortest side is fed into the printer first.
• Insert transparencies with a removable
stripe so the stripe is away from you and
pointing down.
4
Push the media downward until the printer
automatically loads it.
5
Before you send a job to print, choose the
appropriate paper size and paper type in the
Lexmark printer software.
Loading paper and other media
Loading paper and other media
• Remove each transparency or glossy film
from the paper exit area before the next one
is printed to avoid smearing
19
Loading paper and other media
5700.book : loadpapr.fm Page 20 Thursday, July 16, 1998 3:49 PM
20
Loading paper and other media
5700.book : cartrdge.fm Page 21 Thursday, July 16, 1998 3:49 PM
Caring for your
print cartridges
Chapter Four
Caring for your print cartridges
This chapter describes print cartridge maintenance
procedures to help you get the best performance from
your print cartridge and your printer.
Preserving print cartridges
To ensure the longest life from your print cartridge and
optimum performance from your printer:
• Keep a print cartridge in its packaging until you
are ready to install it.
• Do not remove a print cartridge from the printer
except to replace, clean, or store it in a print
cartridge storage unit. The print cartridge will not
print correctly if removed from the printer and left
exposed for an extended period of time.
• If a print cartridge runs out of ink, leave the empty
cartridge in the printer until you are ready to
replace it. Printing with one of the print cartridge
carriers empty may cause printer problems.
• Do not refill print cartridges. Refilling empty print
cartridges invalidates your warranty. Incompatible
inks can cause damage to the printhead or to the
printer. For best results, use Lexmark supplies with
the printer.
Caring for your print cartridges
21
5700.book : cartrdge.fm Page 22 Thursday, July 16, 1998 3:49 PM
Installing or replacing print
cartridges
The following procedures are for installing or replacing a
print cartridge when your printer is connected to a
computer. If you are using your printer without a
computer, you can install or replace print cartridges
through the operator panel. For help, see the Getting
Started booklet that tells you how to use your printer
without a computer.
Perform the entire print cartridge replacement procedure
without interruption.
Caring for your print cartridges
If you are interrupted and leave the print cartridge carrier
in the load position for more than three minutes, the
carrier returns to the far right position. The Cartridges
Tab remains displayed on your screen.
• If you have not inserted the new cartridge, click
Cancel and begin the installation process again.
• If you have inserted the new cartridge, click New
Cartridge Installed.
Removing a print cartridge
If you need to remove a print cartridge before you install
a different one, follow these steps:
1
2
Open the printer front cover.
From the printer’s Control Program, click the
Cartridges Tab.
For help opening the Control Program, see
“Opening the Control Program” on page 8.
3
Click Install Color Cartridge, Install Black
Cartridge, or Install Photo Cartridge.
The print cartridge carrier moves to the load
position and the Change Cartridge dialog box
appears on your computer screen.
22
Caring for your print cartridges
5700.book : cartrdge.fm Page 23 Thursday, July 16, 1998 3:49 PM
If you are installing a Photo or Black cartridge, a
Change Cartridge screen appears. Choose the type
of cartridge you are installing.
4
At the printer, pull the handle of the print cartridge
you are replacing toward you until you hear a snap.
The following table lists the correct position for
each cartridge type.
Cartridge type
Cartridge carrier slot
Color
left
Photo or
right
Black (optional)
Caring for your print cartridges
Caring for your print cartridges
23
5700.book : cartrdge.fm Page 24 Thursday, July 16, 1998 3:49 PM
Caring for your print cartridges
5
Remove the print cartridge by lifting it straight out
of the printer.
Installing or changing a print cartridge
If necessary, follow the steps for “Removing a print
cartridge” on page 22 before proceeding.
1
If you are installing a new print cartridge, remove
it from its packaging.
Carefully remove the sticker and transparent tape
covering the gold contact area from the cartridge.
DO NOT TOUCH OR
REMOVE the gold
contact area!
24
Caring for your print cartridges
5700.book : cartrdge.fm Page 25 Thursday, July 16, 1998 3:49 PM
2
Insert the replacement print cartridge in the print
cartridge carrier.
The following table lists the correct position for
each cartridge type.
Cartridge type
Cartridge carrier slot
Color
left
Photo or
right
Black (optional)
Caring for your print cartridges
3
Push back firmly on the cartridge until it snaps
securely into place.
Caring for your print cartridges
25
5700.book : cartrdge.fm Page 26 Thursday, July 16, 1998 3:49 PM
If the print cartridge moves loosely in the carrier, it
is not locked into place. Repeat this step.
Caring for your print cartridges
4
5
From the Cartridges tab, choose the appropriate
selection for the cartridge you installed.
If you
installed:
Click:
a new Black
cartridge
Black Cartridge, P/N 12A1970
New Cartridge Installed
an old Black
cartridge
Black Cartridge, P/N 12A1970
Old Cartridge Installed
a new Color
cartridge
Color Cartridge, P/N 12A1980
New Cartridge Installed
an old Color
cartridge
Color Cartridge, P/N 12A1980
Old Cartridge Installed
a new Photo
cartridge
Photo Cartridge, P/N 12A1990
New Cartridge Installed
an old Photo
cartridge
Photo Cartridge, P/N 12A1990
Old Cartridge Installed
If you installed an old print cartridge, go to step 6.
If you installed a new print cartridge, align the
print cartridges. For instructions, see “Aligning the
print cartridges” on page 27.
6
Close the printer front cover.
Disposing of used cartridges
Do not shake used print cartridges. The remaining ink
can leak. Before discarding the used print cartridge, put it
in a leak-proof bag.
26
Caring for your print cartridges
5700.book : cartrdge.fm Page 27 Thursday, July 16, 1998 3:49 PM
Aligning the print cartridges
Use the printer software to align the print cartridges
when:
• You install the printer software on your computer.
• You re-connect the printer to your computer - even
if you have aligned them from the operator panel.
• You are using optional Black and Color print
cartridges, and the black portions of a graphic or
text do not align properly with the color portions.
Below are examples of aligned and misaligned print
cartridges:
Caring for your print cartridges
Aligned
Misaligned
To align your print cartridges for best print quality:
1
From the printer’s Control Program, click the
Cartridges Tab.
For help opening the Control Program, see
“Opening the Control Program” on page 8.
2
Click the Align Cartridges button.
Caring for your print cartridges
27
5700.book : cartrdge.fm Page 28 Thursday, July 16, 1998 3:49 PM
The Align Cartridge dialog box appears on your
screen. Depending on the cartridge combination
you have installed in your printer, a test page with
one or more alignment patterns is printed. Each
pattern has a number under it.
Below are example test patterns. If you are
installing a Color and Photo cartridge set, only test
patterns A and B appear on your screen.
A
Caring for your print cartridges
B
C
D
3
From each alignment group on the test page, locate
the number under the alignment pattern that comes
closest to forming a perfectly straight line.
For example, in sample group A above, pattern 5
comes closest to forming a straight line.
28
4
In the Align Cartridges dialog box, enter the
numbers from the printed test page (that you chose
in step 3) as the appropriate alignment settings.
5
After you have entered a number for all of the
patterns, click OK.
6
Repeat steps 2-5 until the patterns print to your
satisfaction.
Caring for your print cartridges
5700.book : cartrdge.fm Page 29 Thursday, July 16, 1998 3:49 PM
Cleaning the print nozzles
The print cartridge nozzle test helps you pinpoint any
clogged nozzles. The nozzle test also cleans the print
cartridge by cleaning (purging) the nozzles. A test line
prints so you can see if the cleaning process was
successful.
Use the nozzle test:
• When you suspect the nozzles are clogged
• When characters are not printing completely
To run the nozzle test:
Make sure there is paper in the automatic feeder.
From the printer’s Control Program, click the
Cartridges Tab.
Caring for your print cartridges
1
2
For help opening the Control Program, see
“Opening the Control Program” on page 8.
3
Click the Clean Print Nozzles button.
The printer feeds a sheet of paper and prints a
nozzle test pattern, similar to the one shown below.
4
Examine the test pattern.
The example above shows a test pattern of all
nozzles functioning correctly.
5
Compare the diagonal line above the printed bars
to the diagonal line below the printed bars.
Caring for your print cartridges
29
5700.book : cartrdge.fm Page 30 Thursday, July 16, 1998 3:49 PM
Look for a break in the diagonal lines. A broken
line indicates clogged nozzles.
If the bottom line has fewer breaks, or better print
quality than the top line, run the test two more
times. If the print quality is satisfactory after
running the test three times, the print nozzles are
clean. You do not need to complete the remaining
steps.
If the print quality of both lines is not satisfactory
after running the test three times, go to step 6.
Caring for your print cartridges
6
7
8
Remove and reinstall the print cartridge.
Repeat the nozzle test.
If the lines are still broken, wipe the print cartridge
nozzles. For instructions, see “Wiping the print
nozzles and contacts”.
Wiping the print nozzles and
contacts
If print quality does not improve after cleaning the print
nozzles (see “Cleaning the print nozzles” on page 29), the
problem may be caused by dried ink on the print
cartridge nozzles.
To wipe the print cartridge’s nozzles and contacts:
1
Remove the print cartridge from the printer.
For help, see “Removing a print cartridge” on page
22.
2
30
Use a clean cloth, dampened with water only, to
gently clean the entire copper colored area,
including the nozzles and contacts.
Caring for your print cartridges
5700.book : cartrdge.fm Page 31 Thursday, July 16, 1998 3:49 PM
When cleaning the color print cartridge, wipe the
nozzles in one direction so the colors do not mix.
Nozzles
Contacts
3
4
Allow the gold-colored area to dry.
5
If the nozzle test line is still broken, clean the print
cartridge carrier contacts. For help, see “Cleaning
print cartridge carrier contacts” on page 32.
Caring for your print cartridges
To dissolve dried ink, hold the damp cloth against
the nozzles for about three seconds. Gently blot
and wipe dry.
Reinstall the print cartridge and repeat the nozzle
test. For help, see “Cleaning the print nozzles” on
page 29.
Caring for your print cartridges
31
5700.book : cartrdge.fm Page 32 Thursday, July 16, 1998 3:49 PM
Cleaning print cartridge carrier
contacts
Clean the print cartridge carrier contacts only if you have
cleaned and wiped the print nozzles and print quality is
still unsatisfactory.
To clean the print cartridge carrier contacts:
1
From the printer’s Control Program, click the
Cartridges Tab.
Caring for your print cartridges
For help opening the Control Program, see
“Opening the Control Program” on page 8.
2
From the Cartridges Tab, click the Install Color
Cartridge button to move the print cartridge carrier
to the load position.
3
Unplug the printer power cord. This forces the
print cartridge carrier to remain in the load
position.
4
5
6
Open the printer front cover.
Remove both print cartridges.
Use a clean, dry cloth to clean the cartridge carrier
contacts inside the printer.
Carrier contacts
7
8
32
Replace the print cartridges.
Close the printer front cover.
Caring for your print cartridges
5700.book : cartrdge.fm Page 33 Thursday, July 16, 1998 3:49 PM
9
Plug the printer power cord into an electrical
outlet.
10 You do not want to reset the ink level counter.
Click Old Color Cartridge to return the cartridge
carrier to the far right position.
11 Test the print cartridge by choosing the Clean Print
Nozzles button on the Cartridges Tab.
If the print quality has not improved after this cleaning
process, replace your print cartridge. If print quality still
does not improve, your printer may require service.
Caring for your print cartridges
Caring for your print cartridges
33
Caring for your print cartridges
5700.book : cartrdge.fm Page 34 Thursday, July 16, 1998 3:49 PM
34
Caring for your print cartridges
5700.book : dos.fm Page 35 Thursday, July 16, 1998 3:49 PM
Printing from
DOS
Chapter Five
You must install the following before you can print from
DOS applications:
• Lexmark 5700 Series printer software
• PCL 3 printer driver for each DOS application
Printing from DOS
Appropriate drivers in order of preference are:
– HP DeskJet 500C
– DeskJet 500
You must use the HP DeskJet 500C for color output. If
your application does not include drivers for the HP
DeskJet 500C or the DeskJet 500, contact the software
manufacturer for a compatible driver replacement.
Changing print settings for
DOS applications
If possible, use options in your DOS application to
change printer settings. Use the steps below only if you
want to change a printer setting that does not exist in your
DOS application. Settings in your DOS application
override settings in the driver.
Printing from DOS
35
5700.book : dos.fm Page 36 Thursday, July 16, 1998 3:49 PM
To change DOS print settings from the printer software:
1
Open the printer's Control Program.
For help opening the Control Program, see
“Opening the Control Program” on page 8.
2
3
4
Click the DOS Printing Tab.
Change settings as needed.
Click OK to save the settings.
Note: When you make changes on the DOS Printing
Tab, they apply to DOS print jobs only. When
you make changes on other tabs, they apply to all
print jobs.
Printing from DOS
Printing from DOS
applications
This section describes how to print from:
• DOS applications in Windows
• native DOS (non-Windows) applications.
DOS applications in Windows
Use these instructions only if your application runs from
the DOS prompt in Windows. This section describes:
• printing from a DOS application
• printing from a DOS application to another printer
• printing to a file
Printing from a DOS application
When you print from a DOS application, your printer
uses PCL 3 emulation. You must install a printer driver
for PCL 3 emulation in each DOS application.
36
Printing from DOS
5700.book : dos.fm Page 37 Thursday, July 16, 1998 3:49 PM
To print from DOS applications that run from the
Windows DOS prompt:
1
2
Make sure you are in Windows, not native DOS.
Open the printer's Control Program.
For help opening the Control Program, see
“Opening the Control Program” on page 8.
3
Click the Options Tab. From the Options tab make
sure Disable CJ5700 DOS Printing (Enable DOS
Printing to other Printers) is not checked.
4
Start your application from DOS.
For help, see your Windows documentation.
5
Install the HP DeskJet 500C as the current printer
in the DOS application from which you are
printing.
6
You can use the printer driver for your Lexmark
Photo Jetprinter™ 5770 to change printer settings
that are not in your application. For help, see
“Changing print settings for DOS applications” on
page 35.
7
Print as you normally would from your
application.
Printing from DOS
Some applications offer a color or black (mono)
version of the HP DeskJet 500C driver. Choose the
black (mono) version if you are printing in black
only. Choose the color version if you are printing
in color and black.
If your application does not offer the HP DeskJet
500C printer driver, install the DeskJet 500 printer
driver. You will not be able to print in color with
the DeskJet 500 printer driver.
For help installing a printer, see your application
user's documentation.
Note: When you make changes to the DOS Printing
Tab, they apply to DOS print jobs only. When
you make changes on other tabs, they apply to all
print jobs.
Printing from DOS
37
5700.book : dos.fm Page 38 Thursday, July 16, 1998 3:49 PM
Printing from a DOS application to
another printer
Follow these steps when you want to send a DOS print
job to a printer other than your Lexmark Photo Jetprinter
5770.
1
Open the printer's Control Program.
For help opening the Control Program, see
“Opening the Control Program” on page 8.
2
From the Options Tab, select the Disable CJ5700
DOS Printing option.
3
4
If prompted, restart Windows.
Send a DOS print job to the other printer.
Printing from DOS
If you select Disable DOS Printing, you cannot print to
your Lexmark Photo Jetprinter 5770 from a DOS
application.
To print to your Lexmark Photo Jetprinter 5770, make
sure this option is not selected. If prompted, restart
Windows before sending a DOS print job to your
Lexmark printer.
Printing to a file
To print a document that has been processed by the driver
and stored in a file (that is, printed to file):
1
2
Make sure you are in Windows, not native DOS.
Start your application from DOS.
For help, see your Windows documentation.
3
Create a print file using the "Print to File" function
of your application. For help printing to a file, see
your application user's documentation.
4
Use this DOS command to copy the print file to
the port where the printer is connected:
copy filename lptn /b
In the command example:
38
Printing from DOS
5700.book : dos.fm Page 39 Thursday, July 16, 1998 3:49 PM
– copy is the DOS copy command.
– filename is the name of the print file you created.
– lptn is the port where your printer is connected.
For example, lpt1 or lpt2.
– /b instructs the computer to send the data in
binary form.
Note: Avoid using the DOS Print command to send a
job to the printer port. The Print command causes
printing delays.
Printing from non-Windows DOS
applications
Follow these steps if your application runs from the
native DOS prompt, but does not run from the DOS
prompt in Windows.
Printing from DOS
1
From Windows, open the printer's Control
Program.
For help opening the Control Program, see
“Opening the Control Program” on page 8.
2
3
Click the Options Tab.
4
5
Exit Windows.
Make sure Disable CJ5700 DOS Printing (Enable
DOS Printing to other Printers) is not checked.
Start your DOS application.
Printing from DOS
39
5700.book : dos.fm Page 40 Thursday, July 16, 1998 3:49 PM
6
Install the HP DeskJet 500C as the current printer
in the DOS application from which you are
printing.
Some applications offer a color or black (mono)
version of the HP DeskJet 500C driver. Choose the
black (mono) version if you are printing in black
only. Choose the color version if you are printing
in color and black.
If your application does not offer the HP DeskJet
500C printer driver, install the DeskJet 500 printer
driver. You will not be able to print in color with
the DeskJet 500 printer driver.
For help installing a printer, see your application
user's documentation.
Printing from DOS
7
Create a print file using the "Print To File"
function of your application. For help on printing
to a file, see your application user's
documentation.
8 Exit the DOS application.
9 Start Windows.
10 Double-click the MS-DOS icon in the Main group
of Windows.
11 Use this DOS command to copy the print file to
the port where the printer is connected:
copy filename lptn /b
In the command example:
– copy is the DOS copy command.
– filename is the name of the print file you created.
– lptn is the port where your printer is connected.
For example, lpt1 or lpt2.
– /b instructs the computer to send the data in
binary form.
Note: Avoid using the DOS Print command to send a
job to the printer port. The Print command causes
printing delays and may corrupt the print job.
40
Printing from DOS
5700.book : dos.fm Page 41 Thursday, July 16, 1998 3:49 PM
Enabling DOS printing to other printers
To enable DOS printing to other printers:
1
Open the printer's Control Program.
For help opening the Control Program, see
“Opening the Control Program” on page 8.
2
From the Options Tab, select the Disable CJ5700
DOS Printing option.
3
If prompted, restart Windows.
Enabling DOS printing to your printer
To enable DOS printing to your printer:
1
Open the printer's Control Program.
2
From the Options Tab, make sure Disable CJ5700
DOS Printing (Enable DOS Printing to other
Printers) is not checked.
3
If prompted, restart Windows.
Printing from DOS
Printing from DOS
For help opening the Control Program, see
“Opening the Control Program” on page 8.
41
Printing from DOS
5700.book : dos.fm Page 42 Thursday, July 16, 1998 3:49 PM
42
Printing from DOS
5700.book : trouble.fm Page 43 Thursday, July 16, 1998 3:49 PM
Troubleshooting
Chapter Six
Use this section to identify and solve problems.
Page
Bidirectional communications problems
44
Printhead failure
47
Deleting photo files
49
Error messages on your computer
50
Error messages on the printer operator panel
51
General printing problems
52
Paper feed problems
57
Poor print quality
59
Printer software problems
63
Removing the exit tray
64
Troubleshooting
Troubleshooting
Section
43
5700.book : trouble.fm Page 44 Thursday, July 16, 1998 3:49 PM
Bidirectional communications
problems
These events indicate bidirectional communications
problems:
• A message displays on your computer screen
indicating your printer cannot establish
bidirectional communications with your computer.
• Print cartridge ink level indicators on the Status or
Cartridges Tabs of the printer's Control Program
are grayed out.
• Job progress information and printer paper feeding
error messages (such as Paper Out) do not display
on your computer screen.
Before proceeding, verify:
Troubleshooting
• The printer is able to send and receive data:
a
Unplug the printer power cord from the
electrical outlet.
b
Make sure the parallel cable is securely
attached to both the computer and the
printer.
c
Plug the printer power cord into a properly
grounded electrical outlet.
• If you have a switch box or other device connected
to the computer's parallel port, make sure it
supports bidirectional communication. You may
need to disconnect your printer from the switch
box or other device and connect the printer directly
to your computer.
44
Troubleshooting
5700.book : trouble.fm Page 45 Thursday, July 16, 1998 3:49 PM
• Bidirectional communications is NOT disabled in
your Lexmark printer software.
a
From the printer's Control Program, click
the Options Tab.
For help opening the Control Program, see
“Opening the Control Program” on page 8.
b
Make sure Disable Bidirectional Communications is not checked.
If you checked all of the items above, and still experience
bidirectional communications problems, continue with
“Solving bidirectional communications problems”.
Solving bidirectional communications
problems
Troubleshooting
Bidirectional communications problems have two
primary causes:
• You are using the wrong parallel cable.
• Your computer system is not configured for
bidirectional communications.
Replacing the parallel cable
You must use an IEEE 1284-compliant parallel cable that
supports bidirectional printing. Verify your printer cable
meets these specifications. To purchase a Lexmark cable,
see “Parallel cable” on page 65.
Computer configuration problems
If you have the correct parallel cable and bidirectional
communications problems persist, you may have a
computer configuration problem. The three configuration
problems usually preventing or disrupting bidirectional
communications are:
• Your computer does not support bidirectional
communications.
Troubleshooting
45
5700.book : trouble.fm Page 46 Thursday, July 16, 1998 3:49 PM
• The parallel port on your computer is not
configured for bidirectional communications.
• The IRQ (Interrupt Request) assigned to your
printer is also assigned to another hardware device,
such as a scanner or sound card. This situation is
commonly called a "hardware configuration
conflict."
Contact your computer manufacturer, or see the
documentation that came with your computer to
determine if your computer supports bidirectional
communications.
With bidirectional communications problems you can
use your printer, but the printer software will not function
to its fullest capability. You can change printer settings,
send print jobs to the printer, and change and align print
cartridges. However, printer status and ink level
information will not display on your computer screen.
Troubleshooting
On most computer systems, the parallel port
configuration and IRQ assignments are changed from the
computer's Configuration or Setup Utility. Check the
documentation that came with your computer for
information on the Configuration or Setup Utility.
Warning! If you are not familiar with configuring
parallel ports or changing IRQ assignments, do not
change these settings in the Setup or Configuration
Utility. Contact your computer manufacturer or an
experienced computer professional for assistance.
Incorrect changes to your computer's configuration can
cause serious problems.
Disabling bidirectional
communications
If you cannot solve the bidirectional communication
problem immediately, you can disable bidirectional
communications. This does not solve the bidirectional
communications problem but allows you to print jobs
without an error message appearing.
46
Troubleshooting
5700.book : trouble.fm Page 47 Thursday, July 16, 1998 3:49 PM
Printhead failure
Any of these problems can cause the Printhead Failure
message to appear:
• The print cartridge carrier contacts are dirty
• The print nozzles on the print cartridge are dirty
• There is a problem with the Color, Black, or Photo
print cartridge
To begin troubleshooting the problem:
1
Clean the print cartridge carrier contacts and wipe
the print cartridge print nozzles of both print
cartridges.
For help, see “Cleaning print cartridge carrier
contacts” on page 32 and “Wiping the print
nozzles and contacts” on page 30.
Reinstall both print cartridges in the printer.
Troubleshooting
2
3
Print a test page.
a
From the printer's Control Program, click
the Status Tab.
For help opening the Control Program, see
“Opening the Control Program” on page 8.
b
Click Print Test Page.
Troubleshooting
47
5700.book : trouble.fm Page 48 Thursday, July 16, 1998 3:49 PM
4
Did the message reappear?
• YES. There may be a problem with one of
the print cartridges. Continue with step 5.
• NO. You have solved the problem.
5
Remove the Photo or Black print cartridge from
the printer. For help, see “Removing a print
cartridge” on page 22.
6
Print a test page.
Did the message reappear?
• YES. Go to step 7.
Troubleshooting
• NO. The problem is with the Photo or Black
print cartridge. Do not go to step 7.
Continue with “Replacing the print
cartridge” on page 49.
7
Reinstall the Photo or Black print cartridge. For
help, see “Installing or changing a print cartridge”
on page 24.
8
9
Remove the Color print cartridge.
Print a test page.
Did the message reappear?
• YES. Go to step 10.
• NO. The problem is with the Color print
cartridge. Do not go to step 10. Continue
with “Replacing the print cartridge” on page
49.
10 Your printer requires service. See your printer registration card for the appropriate telephone number
for your country.
48
Troubleshooting
5700.book : trouble.fm Page 49 Thursday, July 16, 1998 3:49 PM
Replacing the print cartridge
1 Replace the print cartridge that has the problem
with a new print cartridge. For help, see “Installing
or replacing print cartridges” on page 22.
2
Print a test page.
Did the message reappear?
• YES. Your printer requires service. See
your printer registration card for the
appropriate telephone number for your
country.
• NO. You have solved the problem.
Deleting photo files
Troubleshooting
Troubleshooting
If your camera card is full, you can make room for more
photo files by using your camera to delete any unwanted
files. If you use Windows Explorer to delete the files
from your camera card, you must empty the Recycle Bin
before you remove the camera card from the printer.
49
5700.book : trouble.fm Page 50 Thursday, July 16, 1998 3:49 PM
Error messages on your
computer
Message
Solutions
Ink low
Your print cartridge is running out of ink. You need
to purchase a new print cartridge.
Out of memory
Troubleshooting
Out of paper
• Before sending a file to print, close all other
open files in the application you are using. The
printer prints a blank page when too many
files are open in the same application.
• Free memory by closing other open
applications.
• Decrease the print quality of your print job.
• Consider purchasing more memory for your
personal computer.
You may have the wrong paper source selected in
the printer software.
If an Out of Paper message appears and you are
using a non-bidirectional printer cable, follow the
steps below to continue printing:
1 Load paper.
2 Resend your print job.
Your printer software will not function properly
unless you use an IEEE 1284-compliant parallel
cable with your printer.
Paper jam
1 Pull firmly on the paper to remove it. If you
cannot reach the paper because it is too far
into the printer, open the printer front cover
and pull the paper out from the front of the
printer.
2 Close the printer front cover.
3 Resend your print job. Start with the page on
which the paper jam occurred.
Printhead failure
50
Troubleshooting
See “Printhead failure” on page 47.
5700.book : trouble.fm Page 51 Thursday, July 16, 1998 3:49 PM
Error messages on the printer
operator panel
Message
Solutions
Please insert Camera
Card
Make sure a camera card is properly inserted in the
printer. Refer to page 11 of your Getting Started
booklet that tells you how to use your printer
without a computer.
Cannot read Camera
Card or SELECT
PHOTOS photo=0
The printer cannot read the camera card or the
image file on your camera card is not supported.
Remove and re-insert the camera card in the
printer. If the error message still displays, remove
the camera card and check it with the display on
your digital camera. The camera card may be blank
or defective.
Please Load Paper
Make sure:
Please install photo
cartridge
You need to install a Photo cartridge. Refer to page
4 of your Getting Started booklet that tells you
how to use your printer without a computer.
Please insert storage
disk
Insert the storage disk into the optional external
storage drive. See page 26 of you Getting Started
booklet that tells you how to use your printer
without a computer.
Troubleshooting
Troubleshooting
• the printer has paper.
• the paper is properly loaded.
51
5700.book : trouble.fm Page 52 Thursday, July 16, 1998 3:49 PM
General printing problems
Problems
Solutions
Colors on printout
differ from colors on
screen
To more closely match the colors on your printouts
with the colors on your screen, select Natural
Color as the Document Type.
To select Natural Color as the Document Type:
1 Open the application's File menu.
2 Choose Print (or Printer) Setup.
3 In the Printer Setup dialog box, click the
Properties, Options, or Setup button
(depending on the application). The Lexmark
5700 dialog box appears.
Troubleshooting
4 Click the Document/Quality Tab.
5 Make sure Natural Color is selected.
52
DOS print file takes
too long to print
If you are attempting to print a DOS file by
sending it to the port to which the printer is
connected, use the DOS Copy command. Avoid
using the DOS Print command. The DOS Print
command causes printing delays.
Power supply fails
If your power supply fails, replace it with the
Lexmark replacement part or other UL LISTED
Direct Plug-In Power Unit marked “Class 2” and
rated 30 V dc at 500 mA.
Troubleshooting
5700.book : trouble.fm Page 53 Thursday, July 16, 1998 3:49 PM
Problems
Solutions
DOS print job does
not print
Check the following items:
1 From the printer's Control Program, click
Intermittent printing
See “Bidirectional communications problems” on
page 44.
Old document prints
with different fonts
When you print a document formatted for a
different printer, Windows may substitute different
fonts. Line breaks and page breaks may change
also. Use the software application that created the
document to fix these problems, then save your
changes for the next time you print.
Parallel cable
interface problems
See “Bidirectional communications problems” on
page 44.
Troubleshooting
Troubleshooting
the Options Tab.
2 Make sure Disable CJ5700 DOS Printing is
not checked.
• Make sure Spool MS-DOS print jobs is
selected:
1 Open the Printer Driver Properties folder:
a In the Windows Printer Folder, rightclick the Lexmark 5700 Series icon.
b In the sidebar menu, click Properties.
c Choose the Details Tab.
2 Click the Port Settings button.
3 Make sure Spool MS-DOS print jobs is
checked.
4 Click OK.
• If you send a second DOS print job before the
first DOS print job has finished processing,
neither job will print. Normally, a job is
finished processing when the first page of the
job prints.
• Also, make sure the Lexmark 5700 Series is
set as your default printer driver.
53
5700.book : trouble.fm Page 54 Thursday, July 16, 1998 3:49 PM
Problems
Solutions
Paper Status light is
blinking and an error
message appears on
your screen
If the Paper Status light is blinking and an error
message appears on your computer screen, make
sure:
• the printer has paper.
• there is not a paper jam.
If the printer has paper and there is no paper jam,
try the following:
1 Unplug the printer power cord from the
electrical outlet.
2 Remove any paper fragments or objects from
the printer.
3 Plug the printer power cord into an electrical
outlet.
If the light continues to blink, the printer may need
service.
Troubleshooting
If your printer needs service, refer to your printer
registration card or warranty/service information
for the appropriate telephone number for your
country.
Printer has missing
or damaged parts
If your printer has missing or damaged parts,
contact your point of purchase.
Printer pauses
frequently during a
print job
If your printer pauses frequently (every two or
three lines) during a print job, and the printed
pages have alternating bands of light and dark
print, select Enable Buffer Mode from the Options
Tab.
1 From the printer's Control Program, click the
Options Tab.
2 Make sure the Enable Buffer Mode option is
checked.
54
Troubleshooting
5700.book : trouble.fm Page 55 Thursday, July 16, 1998 3:49 PM
Problems
Solutions
Printer is plugged in
but nothing prints
Make sure:
(There is no action
from the printer)
Troubleshooting
Printer prints very
slowly
• the printer has paper.
• you have paper in the correct feeder.
• the printer parallel cable is completely
plugged into the printer.
• the printer is not being held or paused. To
check the printer status:
1 From the Printers folder, double-click the
Lexmark 5700 Series icon.
2 Click the Printer menu and make sure no
checkmark appears next to the Pause
Printing option.
• Print a printer test page. If the test page prints,
the printer is functioning properly. Check your
application.
• If you are trying to print from a DOS-based
application, the problem could be with your
DOS settings. Check your DOS printer port
settings, driver, and your application settings.
Try the following if your printer is printing slowly:
• Decrease the print quality.
• If you are printing a text document, make sure
you are using a Black print cartridge and not a
Photo cartridge.
• If you are printing a text-only document,
change the Halftone method from Air Brush to
Fine Dither Pattern or Line Art Pattern. The
Air Brush setting improves the appearance of
graphics but slows the print time.
• Consider purchasing more memory for your
personal computer.
• Check the document you are printing. If you
are using several graphics, it may take longer
to print than regular text.
Troubleshooting
55
5700.book : trouble.fm Page 56 Thursday, July 16, 1998 3:49 PM
Solutions
Printer seems to be
printing but no
characters appear
Make sure:
Test page does not
print
Make sure:
Troubleshooting
Problems
• The print cartridges are properly installed in
the printer. See “Installing or replacing print
cartridges” on page 22.
• The tape was removed from the print
cartridges before they were installed.
• The printer has paper.
• The parallel cable is properly connected to the
computer and printer. For help, refer to the
printer's setup sheet.
• Paper is loaded in the printer correctly. For
help, see “Loading paper and other media” on
page 9.
• Print cartridges are installed correctly. For
help, see “Installing or replacing print
cartridges” on page 22.
If these suggestions do not solve the problem, your
printer may need service. Refer to your printer
registration card or warranty/service information
for the appropriate telephone number for your
country.
56
Troubleshooting
5700.book : trouble.fm Page 57 Thursday, July 16, 1998 3:49 PM
Paper feed problems
Problems
Solutions
Paper fails to feed
If paper doesn't move through the automatic
feeder:
1
2
3
4
Paper jam
Open the printer front cover.
Remove any obstructions inside the printer.
Close the printer front cover.
Press the Paper Feed button.
1 Pull firmly on the paper to remove it. If you
cannot reach the paper because it is too far
into the printer, open the printer front cover
and pull the paper out from the front of the
printer.
2 Close the printer front cover.
3 Resend your print job. Start with the page on
Troubleshooting
which the paper jam occurred.
Paper skews or
buckles
If paper skews or buckles while moving through
the printer, make sure:
• You do not force the paper down into the
printer when you load it.
• There is not too much paper in the automatic
feeder. Depending on the thickness of your
paper, the automatic feeder can hold up to 100
sheets of paper.
• The left paper guide does not cause the paper
to bow in the automatic feeder.
• You are using the correct type of paper.
• The left paper guide is against the side of the
paper.
• The printer is on a flat, level surface.
Troubleshooting
57
5700.book : trouble.fm Page 58 Thursday, July 16, 1998 3:49 PM
Problems
Solutions
Paper sticks together
If paper sticks together when moving through the
automatic feeder, try the following:
• Make sure there is not too much paper in the
automatic feeder. Depending on the thickness
of your paper, the automatic feeder can hold
up to 100 sheets of paper.
• Make sure you are using the correct type of
paper.
• Remove paper from the automatic feeder and
flex or fan the paper.
• When loading paper, do not force the paper
down into the printer.
Note: Humid conditions may cause some papers
to stick together.
Troubleshooting
Transparencies,
glossy film, or photo
papers stick together
58
Troubleshooting
If transparencies, glossy film, or photo papers stick
together after they exit the printer:
• Use a transparency, glossy film, or photo
paper designed for an inkjet printer.
• Remove each transparency, glossy film, or
photo paper as it exits from the printer.
5700.book : trouble.fm Page 59 Thursday, July 16, 1998 3:49 PM
Poor print quality
Problems
Solutions
Black text is not sharp
Your printer was shipped with a Color print
cartridge and a Photo print cartridge. For better text
and graphics printing, we recommend replacing
the Photo print cartridge with a Black print
cartridge (P/N 12A1970). Make sure a Black print
cartridge is installed and not a Photo print
cartridge.
Characters not
aligned correctly at
left margin
Try the following suggestions to correct this
problem:
Characters with
white lines
Try one (or more) of the following suggestions to
correct this problem:
Troubleshooting
• Make sure you do not have hard-coded (extra)
spaces at the left margin.
• Clean the print cartridge nozzles. See
“Cleaning the print nozzles” on page 29.
• Align the print cartridges. See “Aligning the
print cartridges” on page 27.
• If you aligned the print cartridges from the
printer operator panel, but are now using the
printer connected to a computer, you need to
realign the print cartridges from the computer
using the printer’s Control Program software.
• A print cartridge may be out of ink or low on
ink. If the Ink Low message appears on your
screen, install a new print cartridge. To view
the ink level, check the print cartridge image
shown in the Cartridge Tab.
• Remove and reinstall one of the print
cartridges. See “Installing or replacing print
cartridges” on page 22.
• Clean the print cartridge nozzles. See
“Cleaning the print nozzles” on page 29.
• If you are printing transparencies, try
changing the fill pattern in your application
software.
Troubleshooting
59
5700.book : trouble.fm Page 60 Thursday, July 16, 1998 3:49 PM
Problems
Solutions
General print quality
problems
Try one (or more) of the following suggestions to
correct this problem:
Troubleshooting
• A print cartridge may be out of ink or low on
ink. If the Ink Low message has appeared on
your screen, install a new print cartridge. See
“Installing or replacing print cartridges” on
page 22. To view the ink level, check the ink
level graphic shown on the Cartridges Tab or
the Status Tab of the Control Program.
• Change the Print Quality setting to something
other than Quick Print 600.
• Clean the print cartridge nozzles. See
“Cleaning the print nozzles” on page 29.
• Make sure the print cartridges are installed
correctly. See “Installing or replacing print
cartridges” on page 22.
• Make sure you are using the correct type of
paper.
• Adjust the Brightness and Contrast.
Improperly formed
or misaligned
characters
Clean the print cartridge nozzles. See “Cleaning
the print nozzles” on page 29.
Poor print quality at
left, right, or bottom
edge of page
Like other printers, your printer cannot print in the
extreme left, right, or bottom edges of a page. To
avoid poor print quality at the edges of the page,
we recommend using these minimum margin
settings:
Left and Right Margins
Left and right margin settings must be at least 6.35
mm (0.25 in.) each for all paper sizes except A4.
For A4 size paper, left and right margin settings
must be at least 3.37 mm (0.133 in.) each.
Top and Bottom Margins
The top margin must be set to at least 1.7 mm
(0.067 in.).
The bottom margin setting for all paper sizes must
be 12.7 mm (0.5 in.) for monochrome printing and
19.5 mm (0.75 in.) for color printing.
60
Troubleshooting
5700.book : trouble.fm Page 61 Thursday, July 16, 1998 3:49 PM
Problems
Solutions
Poor print quality at
left, right, or bottom
edge of envelope
Like other printers, your printer cannot print in the
extreme left, right, or bottom edges of an envelope.
To avoid poor print quality at the edges of the
envelope, we recommend using these minimum
margin settings:
Left and Right Margins
Left and right margin settings must be at least 6.35
mm (0.25 in.) each for all envelope sizes.
Top and Bottom Margins
The top margin must be set to at least 1.7 mm
(0.067 in.)
The bottom margin setting for all envelope sizes
must be 12.7 mm (0.5 in.).
Print is too dark or
smudged
Try the following suggestions to correct this
problem:
Photo is too dark or
smudged
Troubleshooting
• Increase the Brightness setting.
• Make sure the Paper Type setting in the printer
software matches the Paper type loaded in the
printer.
• Make sure the paper is straight and
unwrinkled.
• Let the ink dry before handling the paper.
• Change Print Quality to Quick Print 600.
• Clean the print cartridge nozzles. See
“Cleaning the print nozzles” on page 29.
Try the following suggestions to correct this
problem:
• Make sure the Photo cartridge is installed.
• Adjust the printer software settings.
• We recommend using a coated paper or photo
paper for the best print results.
Troubleshooting
61
5700.book : trouble.fm Page 62 Thursday, July 16, 1998 3:49 PM
Problems
Solutions
Print smears on the
page
Print smearing may occur in two ways:
• Print is smeared as the printer prints the page.
• A page prints without smearing, but is
smeared by damp ink on the next page exiting
the printer.
Try the following suggestions to prevent print
smearing:
• Print is smeared as the printer prints the page.
• Change to a higher or lower Print Quality
setting.
• Disable your Windows screen saver. See
your Windows documentation.
Troubleshooting
• Page is smeared by the next page exiting the
printer.
The ink may still be damp when a page
finishes printing. Remove the pages as they
exit the printer and allow them to dry before
stacking.
Printed pages have
alternating bands of
light and dark print
See “Printer pauses frequently during a print job”
on page 54.
Solid black areas on
transparencies
contain white streaks
Try using a different fill pattern in your application
software.
Unexpected or
missing characters
Make sure you have your Lexmark 5700 Series
printer driver selected as the default printer.
Your printer may have bidirectional communications problems. See “Bidirectional communications problems” on page 44.
Vertical straight lines
are not smooth
Try the following suggestions to improve print
quality of vertical straight lines in tables, borders,
and graphs:
• Clean the print cartridge nozzles. See
“Cleaning the print nozzles” on page 29.
• Test the printhead alignment. See “Aligning
the print cartridges” on page 27.
• Change Print Quality to something other than
Quick Print 600.
62
Troubleshooting
5700.book : trouble.fm Page 63 Thursday, July 16, 1998 3:49 PM
Printer software problems
Problems
Solutions
Portions of printer's
Control Program
grayed out
If the ink level indicators of the Cartridges Tab are
grayed out, and printer error messages and job
progress information do not appear on the
computer screen, see “Bidirectional communications problems” on page 44.
Printer software
settings are not in
effect
If the printer settings you choose in the printer
software are not in effect, check the settings in the
software application you are using.
Printer settings in your application may override
settings in the printer software. Make all printer
setting changes in your application if possible. Use
the printer driver to change a setting only if your
application does not have that setting.
Troubleshooting
Troubleshooting
63
5700.book : trouble.fm Page 64 Thursday, July 16, 1998 3:49 PM
Removing the exit tray
If you need to repack the printer in its original box, you
must remove the paper exit tray.
1
2
Remove the paper support.
3
Turn the printer over so you can see the bottom of
the printer.
4
Locate the hooks holding the paper exit tray in
place.
5
Using a ball-point pen, gently pry the hooks
upward until you can pull the exit tray past them.
Pull the paper exit tray as far out of the printer as
possible.
Troubleshooting
Hook
Hooks
6
64
Troubleshooting
Pull the paper exit tray all the way out of the
printer.
5700.book : supplies.fm Page 65 Thursday, July 16, 1998 3:49 PM
Ordering
Supplies
Chapter Seven
To order Lexmark supplies, either contact your point of
purchase or any Lexmark Authorized Supplies Dealer.
Ordering Supplies
You may also order supplies from Lexmark over the
telephone. Check your printer registration card for the
appropriate telephone number for each country.
Print cartridges
To order print cartridges from Lexmark, use these part
numbers:
Cartridge type:
Part number:
Photo
12A1990
Color
12A1980
Black
12A1970
Parallel cable
To order an IEEE 1284-compatible parallel cable, use
Lexmark part number 1329605.
Ordering Supplies
65
5700.book : supplies.fm Page 66 Thursday, July 16, 1998 3:49 PM
Photo paper
To order Inkjet Photo Paper from Lexmark, use these part
numbers:
Size
Number of sheets
Part number
4x6
20
12A0074
Letter
20
1372481
A4
20
1372208
Coated paper
Ordering Supplies
For the best color and black and white printing results,
use a coated paper such as Lexmark's High Resolution
Premium Inkjet paper. To order this paper from
Lexmark, use these part numbers:
66
Ordering Supplies
Size
Number of sheets
Part number
Letter
100
1402780
A4
100
1402781
5700.book : supplies.fm Page 67 Thursday, July 16, 1998 3:49 PM
Glossy film
To print on glossy film, use Lexmark Inkjet Glossy Film.
To order glossy film from Lexmark, use these part
numbers:
Size
Number of sheets
Part number
Letter
10
1402795
Letter
50
1402750
A4
10
1402796
A4
50
1372361
Transparencies
Ordering Supplies
To print on transparencies, use Lexmark Inkjet
Transparencies. To order these transparencies from
Lexmark, use these part numbers:
Size
Number of sheets
Part number
Letter
20
1402797
A4
20
1402798
Ordering Supplies
67
5700.book : supplies.fm Page 68 Thursday, July 16, 1998 3:49 PM
Greeting cards with envelopes
Each greeting card comes with an envelope. To order
Inkjet Greeting Cards from Lexmark, use these part
numbers:
Size
Number of sheets
Part number
Letter
20
1372482
A4
20
70X7254
Labels
Ordering Supplies
To order Inkjet Labels from Lexmark, use these part
numbers:
68
Ordering Supplies
Sheet
size
Label
size
Labels
per
sheet
Number
of sheets
Part
number
Letter
1x
2-5/8 in.
30
20
70X7250
Letter
2 x 4 in.
10
20
70X7251
A4
63.5 x
38.1 mm
21
20
70X7252
A4
99.1 x
67.7 mm
8
20
70X7253
5700.book : supplies.fm Page 69 Thursday, July 16, 1998 3:49 PM
Iron-on transfers for T-shirts
To order Inkjet Iron-On Transfers, use these part
numbers:
Size
Number of sheets
Part number
Letter
10
1372480
A4
10
1402519
Ordering Supplies
Ordering Supplies
69
Ordering Supplies
5700.book : supplies.fm Page 70 Thursday, July 16, 1998 3:49 PM
70
Ordering Supplies
5700.book : notices.fm Page 71 Thursday, July 16, 1998 3:49 PM
Notices
Appendix A
promote the introduction of energyefficient products and to reduce air
pollution caused by power generation.
Companies participating in this
program introduce personal
computers, printers, monitors, or fax
machines that power down when they
are not being used. This feature will
cut the energy used by up to 50
percent. Lexmark is proud to be a
participant in this program.
Notices
References in this publication to
products, programs, or services do not
imply that the manufacturer intends to
make these available in all countries
in which it operates. Any reference to
a product, program, or service is not
intended to state or imply that only
that product, program, or service may
be used. Any functionally equivalent
product, program, or service that does
not infringe any existing intellectual
property right may be used instead.
Evaluation and verification of
operation in conjunction with other
products, programs, or services,
except those expressly designated by
the manufacturer, are the user's
responsibility.
As an Energy Star Partner, Lexmark
International, Inc. has determined that
this product meets the Energy Star
guidelines for energy efficiency.
Energy Star
The EPA
ENERGY
STAR
Computers
program is a
partnership
effort with computer manufacturers to
Notices
71
5700.book : notices.fm Page 72 Thursday, July 16, 1998 3:49 PM
Electronic
Emission
Notices
the user is encouraged to try to correct
the interference by one or more of the
following measures:
Federal
Communications
Commission (FCC)
Compliance Information
Statement
• Increase the separation between the
equipment and receiver.
Notices
The Lexmark Photo Jetprinter 5770,
Type 4093-S04, has been tested and
found to comply with the limits for a
Class B digital device, pursuant to
Part 15 of the FCC Rules. Operation
is subject to the following two
conditions: (1) this device may not
cause harmful interference, and (2)
this device must accept any
interference received, including
interference that may cause undesired
operation.
The FCC Class B limits are designed
to provide reasonable protection
against harmful interference in a
residential installation. This
equipment generates, uses and can
radiate radio frequency energy and, if
not installed and used in accordance
with the instructions, may cause
harmful interference to radio
communications. However, there is
no guarantee that interference will not
occur in a particular installation. If
this equipment does cause harmful
interference to radio or television
reception, which can be determined
by turning the equipment off and on,
72
Notices
• Reorient or relocate the receiving
antenna.
• Connect the equipment into an
outlet on a circuit different from
that to which the receiver is
connected.
• Consult your point of purchase or
service representative for
additional suggestions.
The manufacturer is not responsible
for any radio or television interference
caused by using other than
recommended cables or by
unauthorized changes or
modifications to this equipment.
Unauthorized changes or
modifications could void the user's
authority to operate this equipment.
Note: To assure compliance with
FCC regulations on
electromagnetic interference
for a Class B computing
device, use a properly shielded
and grounded cable such as
Lexmark part number
1329605. Use of a substitute
cable not properly shielded
and grounded may result in a
violation of FCC regulations.
5700.book : notices.fm Page 73 Thursday, July 16, 1998 3:49 PM
Any questions regarding this
compliance information statement
should be directed to:
Director of Lab Operations
Lexmark International, Inc.
740 New Circle Road NW
Lexington, KY 40550
(606) 232-3000
Industry Canada
Compliance Statement
A declaration of conformity with the
requirements of the Directive has
been signed by the Director of
Manufacturing and Technical
Support, Lexmark International,
S.A., Boigny, France.
This product satisfies the Class B
limits of EN 55022 and safety
requirements of EN 60950.
Japanese VCCI Notice
This Class B digital apparatus meets
all requirements of the Canadian
Interference-Causing Equipment
Regulations.
Avis de conformité aux
normes d’Industrie
Canada
European Community
(EC) Directives
Conformity
This product is in conformity with the
protection requirements of EC
Council directives 89/336/EEC and
73/23/EEC on the approximation and
harmonization of the laws of the
Member States relating to
electromagnetic compatibility and
safety of electrical equipment
designed for use within certain
voltage limits.
This apparatus is approved under the
approval number NS/G/1234/J/
100003 for the indirect connections to
the public telecommunications
systems in the United Kingdom.
Notices
Cet appareil numérique de la classe B
respecte toutes les exigences du
Règlement sur le matériel brouilleur
du Canada.
The United Kingdom
Telecommunications
Act 1984
Safety
information
• If your product is NOT marked
with this symbol
, it MUST be
connected to an electrical outlet
that is properly grounded.
• The power cord must be connected
to an electrical outlet that is near
the product and easily accessible.
• Refer service or repairs, other than
those described in the operating
Notices
73
5700.book : notices.fm Page 74 Thursday, July 16, 1998 3:49 PM
instructions, to a professional
service person.
• This product is designed, tested and
approved to meet strict global
safety standards with the use of
specific Lexmark components. The
safety features of some parts may
not always be obvious. Lexmark is
not responsible for the use of other
replacement parts.
Consignes de sécurité
• Si le symbole
n'apparaît passur
votre produit, ce dernier DOIT être
branché sur une prise de courant
mise à la terre.
• Le câble d'alimentation doit être
connecté à une prise de courant
placée près du produit et facilement
accessible.
Notices
• L'entretien et les réparations autres
que ceux décrits dans les
instructions d'emploi doivent être
effectués par le personnel de
maintenance qualifié.
• Ce produit a été conçu, testé et
approuvé pour respecter les normes
strictes de sécurité globale lors de
l'utilisation de composants
Lexmark spécifiques. Les
caractéristiques de sécurité de
certains éléments ne sont pas
toujours évidentes. Lexmark ne
peut être tenu responsable de
l'utilisation d'autres pièces de
rechange.
Norme di sicurezza
• Se il prodotto non è contrassegnato
con questo simbolo
74
Notices
deve
essere collegato lo stesso ad una
presa elettrica con messa a terra.
• Il cavo di alimentazione deve
essere collegato ad una presa
elettrica posta nelle vicinanze del
prodotto e facilmente
raggiungibile.
• Per la manutenzione o le
riparazioni, escluse quelle descritte
nelle istruzioni operative,
consultare il personale di assistenza
autorizzato.
• Il prodotto è stato progettato,
testato e approvato in conformità a
severi standard di sicurezza e per
l’utilizzo con componenti
Lexmark specifici. Le
caratteristiche di sicurezza di
alcune parti non sempre sono di
immediata comprensione.
Lexmark non è responsabile per
l’utilizzo di parti di ricambio di
altri produttori.
Sicherheitshinweise
• Falls der Drucker nicht mit diesem
Symbol
markiert ist, muß er an
eine ordnungsgemäß geerdete
Steckdose angeschlossen werden.
• Das Netzkabel muß an eine
Steckdose angeschlossen werden,
die sich in der Nähe des Geräts
befindet und leicht zugänglich ist.
• Wartungsarbeiten und
Reparaturen, mit Ausnahme der in
der Betriebsanleitung näher
beschriebenen, sollten Fachleuten
überlassen werden.
• Dieses Produkt und die
zugehörigen Komponenten
wurden entworfen und getestet,
5700.book : notices.fm Page 75 Thursday, July 16, 1998 3:49 PM
um beim Einsatz die weltweit
gültigen Sicherheitsanforderungen
zu erfüllen. Die
sicherheitsrelevanten Funktionen
der Bauteile und Optionen sind
nicht immer offensichtlich. Sofern
Teile eingesetzt werden, die nicht
von Lexmark sind, wird von
Lexmark keinerlei Verantwortung
oder Haftung für dieses Produkt
übernommen.
Pautas de Seguridad
• Si su producto no tiene este
símbolo, , es
IMPRESCINDIBLE conectarlo a
una toma de corriente eléctrica con
toma de tierra correcta.
gemarkeerd met det symbool
.
• Het netsnoer moet worden
aangesloten op een gemakkelijk
bereikbaar stopcontact in de buurt
van het produkt.
• Neem contact op met een
professionele onderhoudstechnicus
voor onderhoud en reparaties die
niet in de bij het produkt geleverde
instructies beschreven worden.
• Dit product is ontworpen, getest en
goedgekeurd om te voldoen aan
strenge internationale
veiligheidsvoorschriften.
Deveiligheidsvoorzieningen van
bepaalde onderdelen zullen niet
altijd duidelijk zichtbaar zijn.
Lexmark is niet verantwoordelijk
voor het gebruik van andere
vervangende onderdelen.
• Cualquier servicio o reparación
deberá realizarse por parte del
personal cualificado, a menos que
se trate de las averías descritas en
las instrucciones de utilización.
Sikkerhedsoplysninger
• Este producto se ha diseñado,
verificado y aprobado para cumplir
los más estrictos estándares de
seguridad global usando los
componentes específicos de
Lexmark. Puede que las
características de seguridad de
algunas piezas no sean siempre
evidentes. Lexmark no se hace
responsable del uso de otras piezas
de recambio.
• Ledningen skal sluttes til en
stikkontakt, der er tæt på produktet
og som er let tilgængelig.
Veiligheidsvoorschriften
• Zorg ervoor dat uw produkt is
aangesloten op een geaard
Notices
• El cable de alimentación deberá
conectarse a una toma de corriente
situada cerca del producto y de
fácil acceso.
stopcontact als het produkt niet is
• Hvis dit produkt ikke er markeret
med dette symbol
, skal det
sluttes til en stikkontakt med
jordforbindelse.
• Service og reparationer, som ikke
er beskrevet i brugsanvisningen,
skal udføres af en kvalificeret
tekniker.
• Dette produkt er udviklet, testet og
godkendt i overensstemmelse med
Lexmarks verdensomspændende
standarder for sikkerhed. Delenes
sikkerhedsfunktioner kan være
skjulte. Lexmark påtager sig intet
Notices
75
5700.book : notices.fm Page 76 Thursday, July 16, 1998 3:49 PM
ansvar for brugen af uoriginale
reservedele.
Sikkerhetsinformasjon
• Hvis produktet ditt ikke er merket
med dette symbolet, , må det
bare kobles til en stikkontakt som
er jordet.
• Ledningen må være koblet til en
stikkontakt nær produktet.
Stikkontakten må være lett
tilgjengelig.
• La bare kvalifisert personale ta seg
av service og reparasjon som ikke
er direkte beskrevet i
bruksanvisningen.
Notices
• Dette produktet er utviklet, testet
og godkjent i overensstemmelse
med strenge verdensomspennende
sikkerhetsstandarder for bestemte
Lexmark-deler. Delenes
sikkerhetsfunksjoner kan være
skjulte. Lexmark er ikke ansvarlig
for bruk av uoriginale reservedeler.
Säkerhetsanvisningar
• Om produkten INTE är märkt med
denna symbol
MÅSTE den
anslutas till ett jordat vägguttag.
• Nätkabeln måste anslutas till ett
lättåtkomligt vägguttag i närheten
av maskinen.
• Låt endast utbildad
servicepersonal utföra sådan
service och sådana reparationer
som inte beskrivs i handledningen.
• Denna produkt är utformad, testad
och godkänd för att uppfylla
internationella
säkerhetsbestämmelser när den
76
Notices
används tillsammans med andra
Lexmark-produkter.
Säkerhetsegenskaperna för vissa
delar är inte helt uppenbara.
Lexmark frånsäger sig ansvaret om
delar av ett annat fabrikat används.
Informació de Seguretat
• Si el vostre producte no està marcat
amb el símbol
, S’HAURÀ de
connectar a una presa elèctrica de
terra.
• El cable de potència s’haurà de
connectar a una presa de corrent
propera al producte i fàcilment
accessible.
• Si heu de fer una reparació que no
figuri entre les descrites a les
instruccions de funcionament,
confieu-la a un professional.
• Aquest producte està dissenyat,
comprovat i aprovat per tal
d'acomplir les estrictes normes de
seguretat globals amb la
utililització de components
específics de Lexmark. Les
característiques de seguretat
d'algunes peces pot ser que no
sempre siguin òbvies. Lexmark no
es responsabilitza de l'us d'altres
peces de recanvi.
Turvaohjeet
• Jos tuotteessa ei ole tätä tunnusta,
, sen saa kytkeä vain
maadoitettuun pistorasiaan.
• Tuotteen verkkojohto on kytkettävä
sitä lähellä olevaan pistorasiaan.
Varmista, että kulku pistorasian
luo on esteetön.
5700.book : notices.fm Page 77 Thursday, July 16, 1998 3:49 PM
• Muut kuin käyttöohjeissa mainitut
huolto- tai korjaustoimet on
jätettävä huoltoedustajalle.
• Tämä tuote on testattu ja
hyväksytty. Se täyttää korkeat
maailmanlaajuiset
turvallisuusvaatimukset, kun siinä
käytetään tiettyjä Lexmarkin
valmistusosia. Joidenkin osien
turvallisuusominaisuudet eivät
aina ole itsestään selviä. Lexmark
ei vastaa muiden kuin alkuperäisten
osien käytöstä.
Informações de
Segurança
• Se o produto NÃO estiver marcado
com este símbolo, , é necessário
ligá-lo a uma tomada com ligação à
terra.
• Para todos os serviços ou
reparações não referidos nas
instruções de operação, deve
contactar um técnico dos serviços
de assistência.
• Se o produto não estiver marcado
com este símbolo, , ele DEVE
SER conectado a uma tomada
elétrica com ligação à terra.
• O cabo de alimentação deve ser
conectado a uma tomada elétrica
localizada perto do produto e de
fácil acesso.
• Para todos os serviços ou
reparações não descritos nas
instruções de operação, entre em
contato com um técnico dos
serviços de assistência.
• Este produto está projetado, testado
e aprovado para satisfazer os
padrões globais de segurança para
uso de componentes específicos da
Lexmark. Os recursos de segurança
de alguns componentes podem não
ser sempre óbvios. A Lexmark não
é responsável pelo uso de outros
componentes de substituição.
Notices
• O cabo deve ser ligado a uma
tomada localizada perto do produto
e facilmente acessível.
Informações de
Segurança
• Este produto foi concebido, testado
e aprovado para satisfazer os
padrões globais de segurança na
utilização de componentes
específicos da Lexmark. As
funções de segurança de alguns dos
componentes podem não ser
sempre óbvias. A Lexmark não é
responsável pela utilização de
outros componentes de
substituição.
Notices
77
Notices
5700.book : notices.fm Page 78 Thursday, July 16, 1998 3:49 PM
78
Notices
5700.book : warranty.fm Page 79 Thursday, July 16, 1998 3:49 PM
Statement of
Limited Warranty
Appendix B
Lexmark International,
Inc., Lexington, KY
• Conforms to Lexmark’s official
published specifications, and
• Is in good working order.
Lexmark Photo
Jetprinter 5770
This Statement of Limited Warranty
applies to this product if it was
originally purchased for your use, and
not for resale, from Lexmark or a
Lexmark remarketer, referred to in
this statement as “Remarketer.”
Warranty
Lexmark warrants that this product:
• Is manufactured from new parts, or
new and serviceable used parts,
which perform like new parts,
• Is free from defects in material and
workmanship,
Statement of Limited Warranty
This warranty applies to the United
States and Canada. For customers
outside the U.S. and Canada, refer to
the country-specific warranty
information that came with your
printer.
If this product does not function as
warranted during the warranty
period, contact a Remarketer or
Lexmark for repair without charge.
If this product is a feature or option,
this statement applies only when that
feature or option is used with the
product for which it was designed. To
obtain warranty service, you may be
required to present the feature or
option with the product.
If you transfer this product to another
user, warranty service under the terms
of this statement is available to that
user for the remainder of the warranty
period. You should transfer proof of
original purchase and this statement to
that user.
Warranty Service
The warranty period is 12 months and
starts on the date of original purchase
as shown on the purchase receipt.
Statement of Limited Warranty
79
5700.book : warranty.fm Page 80 Thursday, July 16, 1998 3:49 PM
To obtain warranty service you may
be required to present proof of
original purchase. Warranty service
will be provided at a Remarketer or a
Lexmark designated location. You
may be required to deliver your
product to the Remarketer or
Lexmark, or ship it prepaid and
suitably packaged to a Lexmark
designated location. You are
responsible for loss of, or damage to,
a product in transit to the Remarketer
or the designated location.
Statement of Limited Warranty
When warranty service involves the
exchange of a product or part, the
item replaced becomes the property of
the Remarketer or Lexmark. The
replacement may be a new or repaired
item. The replacement item assumes
the remaining warranty period of the
original product.
We do not warrant uninterrupted or
error-free operation of a product.
Warranty service does not include
repair of failures caused by:
• modification or attachments
• accidents or misuse
• unsuitable physical or operating
environment
• maintenance by anyone other than
Lexmark or a Lexmark authorized
servicer
• operation of a product beyond the
limit of its duty cycle
• failure to have installed a
maintenance kit as specified (if
applicable)
Replacement is not available to you if
the product you present for exchange
is defaced, altered, in need of a repair
not included in warranty service, or
damaged beyond repair. Also, such
product must be free of any legal
obligation or restrictions that prevent
its exchange.
• use of printing media outside of
Lexmark specifications
Before you present this product for
warranty service, remove all
programs, data, and removable
storage media.
ALL EXPRESS AND IMPLIED
WARRANTIES, INCLUDING THE
IMPLIED WARRANTIES OF
MERCHANTABILITY AND
FITNESS FOR A PARTICULAR
PURPOSE, ARE LIMITED IN
DURATION TO THE WARRANTY
PERIOD. NO WARRANTIES,
EXPRESS OR IMPLIED, WILL
APPLY AFTER THIS PERIOD.
For further explanation of your
warranty alternatives and the nearest
Lexmark authorized servicer in your
area, please contact Lexmark at 1800-LEXMARK (1-800-539-6275),
or on the World Wide Web at http://
www.lexmark.com.
80
Extent of Warranty
Statement of Limited Warranty
• use of other than Lexmark supplies
(such as toner cartridges, inkjet
cartridges, and ribbons)
• use of other than Lexmark product
or component
5700.book : warranty.fm Page 81 Thursday, July 16, 1998 3:49 PM
Limitation of Liability
Your sole remedy under this
Statement of Limited Warranty is set
forth in this section. For any claim
concerning performance or
nonperformance of Lexmark or a
Remarketer for this product under this
Statement of Limited Warranty, you
may recover actual damages up to the
limit set forth in the following
paragraph.
consequential damages. If such laws
apply, the limitations or exclusions
contained in this statement may not
apply to you.
This warranty gives you specific legal
rights. You may also have other rights
which vary from state to state.
Statement of Limited Warranty
Lexmark's liability for actual damages
from any cause whatsoever will be
limited to the greater of 1) $5,000 or
2) the amount you paid for the product
that caused the damages. This
limitation of liability will not apply to
claims by you for bodily injury or
damage to real property or tangible
personal property for which Lexmark
is legally liable. In no event will
Lexmark be liable for any lost profits,
lost savings, incidental damage, or
other economic consequential
damages. This is true even if you
advise Lexmark or a Remarketer of
the possibility of such damages.
Lexmark is not liable for any claim by
you based on a third party claim.
This limitation of remedies also
applies to any developer of materials
supplied to Lexmark. Lexmark’s and
the developer’s limitations of
remedies are not cumulative. Such
developer is an intended beneficiary
of this limitation.
Additional Rights
Some states do not allow limitations
on how long an implied warranty
lasts, or do not allow the exclusion or
limitation of incidental or
Statement of Limited Warranty
81
Statement of Limited Warranty
5700.book : warranty.fm Page 82 Thursday, July 16, 1998 3:49 PM
82
Statement of Limited Warranty
5700.book : glossary.fm Page 83 Thursday, July 16, 1998 3:49 PM
Glossary
A software product, such as a spreadsheet or
word processing program, that is designed for
use on a personal computer.
Air Brush
Air Brush is a name for a modified FloydSteinberg Error-Diffusion, sometimes called the
diffusion or scatter style of printing.
dithering
When images are printed using the dithering
selections from the halftoning area, the printer
driver uses a matrix of dots to represent the
image. You may need to experiment to find the
halftone best suitable for a particular picture. In
most cases, the Air Brush setting produces the
best results.
driver
see printer driver.
fine dither
A halftone method used for detailed graphics
with limited shading.
font
A set of characters of a given size and style.
halftone
An array in which dots are placed to simulate
colors and shades of gray.
hard drive
A stand-alone hardware unit that offers
additional data storage for your computer and
can read and store data on diskettes. Also called
hard disk or fixed disk drive.
Glossary
Glossary
application software
83
Glossary
5700.book : glossary.fm Page 84 Thursday, July 16, 1998 3:49 PM
84
icon
A representation or symbol.
inkjet
A non-impact printing technology that creates
characters and graphics by the composition of
programmed patterns of ink dots.
interface
A data conversion device that allows
communication between the printer and the
computer. See also parallel interface.
line art
A halftone method used for simple line art and
computer graphics.
MB (megabyte)
A unit of measure for storage capacity. One
megabyte equals 1,048,576 bytes.
parallel interface
A type of connection that links a printer to a
computer, by which all 8 bits of a character are
sent at the same time. See also interface.
print cartridge
The ink reservoir and printhead unit.
printer driver
A program that translates the language of a
software application to the language of the
printer so the two can communicate data.
printer setup
The printer driver is designed to provide the best
print output default setting for your printer.
software application
Any program loaded on your computer used to
perform a specific task; for example, a word
processing or spreadsheet program.
specialty media
Any print media that requires manual feeding.
This includes greeting cards, iron-on transfers,
and index cards.
Glossary
5700.book : 5700.IX Page 85 Thursday, July 16, 1998 3:49 PM
Index
A
from native DOS 39
from Windows 36
to file 38
to other printers 38, 41
to your Lexmark printer 41
aligning printheads 27
automatic feeder
loading 14
location 14
E
bidirectional communications
disabling 46
problems
diagnosing 44
solving 45
electronic emission notices 72
Energy Star 71
envelopes
loading 16, 18
types and sizes 12
error messages 50
exit tray, removing 64
C
camera card
deleting photo files 49
carrier contacts, cleaning 32
cartridges, see print cartridges
coated paper
ordering 66
types and sizes 11
D
disposing of cartridges 26
DOS printing
changing print settings 35
Index
B
F
feeding problems 57
G
glossy film
loading 14, 18
ordering 67
types and sizes 10
greeting cards
loading 16, 18
ordering 68
types and sizes 14
Index
85
5700.book : 5700.IX Page 86 Thursday, July 16, 1998 3:49 PM
I
iron-on transfers
loading 18
ordering 69
types and sizes 14
L
labels
loading 14
ordering 68
types and sizes 13
M
manual feeder
loading 18
location 18
O
Index
opening
Printer Driver 8
ordering supplies 65
P
paper
coated 66
feed problems 57
loading 14, 18
ordering 66
photo 66
types and sizes 11
paper exit tray, removing 64
parallel cable, ordering 65
photo files, deleting 49
photo paper
loading 18
ordering 66
types and sizes 10
86
Index
power supply replacement 52
print cartridges
aligning 27
cleaning 29
cleaning carrier contacts 32
disposing of 26
installing 22
ordering 65
preserving 21
removing 22
replacing 22
wiping nozzles and contacts
30
print nozzles
cleaning 29
testing 29
wiping 30
print quality 59
printer
button 5
dimensions 4
features 2
light 5
parts 2
software
description 7
problems 63
specifications 2
Printer Driver, opening 8
printing problems 52
R
replacing power supply 52
requirements, system 4
S
safety information 73
software
5700.book : 5700.IX Page 87 Thursday, July 16, 1998 3:49 PM
description 7
problems 63
supplies, ordering 65
system requirements 4
T
transparencies
loading 14, 18
ordering 67
types and sizes 10, 12
troubleshooting 43
U
United Kingdom Telecommunications Act 1984 73
W
warranty information 79
Index
Index
87
Index
5700.book : 5700.IX Page 88 Thursday, July 16, 1998 3:49 PM
88
Index
5700.book : rcf.fm Page 89 Thursday, July 16, 1998 3:49 PM
User’s Guide
Lexmark Photo Jetprinter 5770
Part Number 17A0145
7/16/98
Reader’s
Comment
Form
You may use this form to communicate your comments about this
publication, with the understanding that Lexmark may use or
distribute whatever information you supply in any way it believes
appropriate without incurring any obligation to you.
1.
Did you find the book well organized?
Yes ❒
No ❒
2.
Was the content of the book accurate and complete?
Yes ❒
No ❒
3.
Was the book easy to use?
Yes ❒
No ❒
4.
What can we do to improve the book?
5.
What type of digital camera do you own?
_ _____________
6.
How do you plan to use this printer?
_____Without a computer
_____ Connected to a computer
_____Both without a computer and connected to a computer
5700.book : brm.fm Page 90 Thursday, July 16, 1998 3:49 PM
BUSINESS REPLY MAIL
FIRST CLASS MAIL
PERMIT NO. 2659
LEXINGTON, KY
POSTAGE WILL BE PAID BY ADDRESSEE
Lexmark International, Inc.
Department F95, Building 035-3
740 NEW CIRCLE ROAD NW
LEXINGTON KY 40511-9954
—————————————————————————————
Fold Here
Tape
Please Do Not Staple
Tape
Cut Along Line
| || ||| | | ||||| || ||||| | |||| | | || ||| || |||| || ||| ||| ||| || |
—————————————————————————————————————————————————————
NO POSTAGE
NECESSARY
IF MAILED
IN THE
UNITED STATES