1
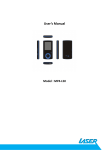
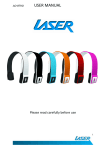
SPK-IPT2000 SNOOZE MASTER
User Manual
SPK-IPT2000 USER MANUAL
IMPORTANT SAFETY INSTRCUTIONS AND PRECATIONS
IMPORTANT SAFETY INSTRUCTIONS AND PRECAUTIONS
•
Read instruction carefully before using this product
•
Observe all warnings and cautions when using this product.
•
Retain all manuals and documentation for future referral.
•
Only use this product in a manner described in this manual.
•
Do not use this device in extremely hot, cold, humid, dusty or sandy environments.
•
Do not use this device in electrical storms or other conditions if the likely hood of
lightning is possible.
•
Do not attempt to clean this product using liquid cleaners or aerosol cleaners. Use
only a damp soft cloth to clean the surface of this device.
•
Extreme Care should be taken when using this product near any body of water such
swimming pools, kitchen sinks, baths and alike.
•
This device is not waterproof. Do not use this device in the open if there is a high
level of moisture in the air.
•
Only place the device on a stable surface and ensure that cables attached to the
device can not cause the device to fall.
•
There are no serviceable parts in this device. Attempts to open this device by
unauthorised personnel may cause further dame and void the warranty.
•
Image quality during web chat may vary depending in internet connection speeds at
both ends.
•
Images of product and accessories are indicative only and may vary slightly from
actual product.
•
We reserve the right to make changes to this document and the product without
notification.
1
SPK-IPT2000 USER MANUAL
TABLE OF CONTENTS
Table of Contents
IMPORTANT SAFETY INSTRUCTIONS AND PRECAUTIONS ........................................................ 1
KNOWING YOUR SPK-IPT2000 SNOOZE MASTER ..................................................................... 3
WHAT’S IN THE BOX .................................................................................................................. 4
INTRODUCTION ......................................................................................................................... 4
Introduction........................................................................................................................... 4
Features ................................................................................................................................. 4
Compatible with .................................................................................................................... 4
GETTING STARTED ..................................................................................................................... 5
Installing the backup batteries (Optional) ............................................................................ 5
Plugging the AC adaptor........................................................................................................ 5
OPERATING THE SNOOZE MASTER ........................................................................................... 5
Setting the Clock.................................................................................................................... 5
Auto Time Sync.................................................................................................................. 5
Manual Time Adjust .......................................................................................................... 5
Turning the Alarm ON or OFF ................................................................................................ 6
Setting the Alarm .................................................................................................................. 6
Snooze Function .................................................................................................................... 7
Nap Function. ........................................................................................................................ 7
Timer (Auto Switch-OFF) Function. ....................................................................................... 7
FM RADIO .............................................................................................................................. 8
Storing FM radio stations .................................................................................................. 8
Listening to your iPhone or iPod ........................................................................................... 8
Charging your iPod or iPhone ............................................................................................... 9
Adjusting the Brightness of the LCD display ......................................................................... 9
Connecting an Auxiliary device ............................................................................................. 9
THE REMOTE CONTROL ........................................................................................................... 10
TROUBLE SHOOTING ............................................................................................................... 11
TECHNICAL SPECIFICATIONS ................................................................................................... 12
FOR OTHER ACCESSORIES AND PRODUCTS ............................................................................ 13
CONTACT INFORMATION ........................................................................................................ 13
2
SPK-IPT2000 USER MANUAL
KNOWNING YOUR SKPK-IPT2000 SNOOZE MASTER
KNOWING YOUR SPK-IPT2000 SNOOZE MASTER
Item
1
2
3
4
5
6
7
8
9
Description
LCD Display
Time Set
Audio/Dimmer
Sounds
Audio Selection
Timer
Set -/+
Snooze/Nap
Alarm Mode
(iPhone Not supplied)
Item Description
10 Alarm Set
11 Alarm 1 / Alarm 2
12 Volume Up/Down
13 FM Antenna
14 3.5mm Stereo Line In
15 DC Input
16 iPod / iPhone Dock
17 Remote Control
18 Back Up Battery Compartment.
3
SPK-IPT2000 USER MANUAL
WHATS IN THE BOX
WHAT’S IN THE BOX
1)
2)
3)
4)
5)
SPK-IPT2000 SNOOZE MASTER BASE
AC Power Adaptor
Remote Control
3.5mm to 3.5mm AUX Input cable
User Manual (this Document)
INTRODUCTION
Introduction
Thank you for purchasing the SKP-IPT2000 SNOOZE MASTER– a docking alarm clock speaker
for iPhone & iPod. It can dock charge play all iPhone and iPod with the universal docking
station as well as providing FM radio and playback from other audio devices for maximum
enjoyment.
The SKP-IPT2000 SNOOZE MASTER has an alarm clock to wake you up from iPhone, iPod,
Buzzer, FM RADIO or 6 natural sound built-in: BIRDS, OCEAN, BROOK, WATERFALL, SUNRISE
and RAIN.
Features
• Integrated universal dock for your iPhone or iPod
•
Digital clock display with dual alarm clock
•
Wake to iPhone or iPod, FM radio, Buzzer, or Natural sound.
•
Sleep to iPhone or iPod, FM radio
•
FM stereo radio
•
PLL digital tuning technology
•
Programmable presets for 8 radio stations
Compatible with
• iPhone 4, iPhone 3GS, iPhone 3G, iPhone, iPod touch 2nd generation, iPod nano 5th
generation, iPod nano 4th generation, iPod touch 1st generation, iPod nano 3rd
generation, iPod classic, iPod nano 2nd generation, iPod with video, iPod nano 1st
generation, iPod 4th generation, iPod mini.
• iPad, Mp3, PSP, Mobile phones(have 3.5mm standard audio jack) are connected to
unit via 3.5mm audio cable(supplied)
iPhone, iPad & iPod are trademark of Apple inc.
4
SPK-IPT2000 USER MANUAL
GETTING STARTED
GETTING STARTED
Installing the backup batteries (Optional)
• Remove the battery compartment lid on the underside of the Snooze Master.
• Insert 2 X AAA batteries (not supplied).
• Replace the compartment lid.
Note: When there’s a power outage, clock setting will be maintained. The Snooze Master
will not fully function when running on the backup batteries. Battery power support is for
maintaining clock only, and does not support music play.
Plugging the AC adaptor
• Turn the switch on the wall power outlet OFF.
•
Plug in the AC adaptor to the wall power out let.
•
Connect the AC adaptor to the SPK-IPT2000 Snooze Master
•
Turn the wall power outlet ON.
OPERATING THE SNOOZE MASTER
Setting the Clock
Auto Time Sync
The SPK-IPT2000 Snooze Master clock feature will automatically sync when an iPhone/iPod
is docked.
Manual Time Adjust
1. Press the TIME SET button for 2 seconds to change the display from 12 to 24Hr.
•
In 12Hr format, AM or PM is shown on the LCD display.
2. Press the TIME SET button briefly so the hour display flashes.
3. While the display is flashing, rotate the SET -/+ wheel to adjust the hour.
4. Press the TIME SET button again so the minute display flashes.
5. While the display is flashing, rotate the SET -/+ wheel to adjust the minute.
6. Press the TIME SET button to confirm and exit clock settings.
7. The LCD display will return to normal after 2 seconds from last change.
5
SPK-IPT2000 USER MANUAL
OPERATING THE SNOOZE MASTER
Turning the Alarm ON or OFF
Press the Alarm 1 / Alarm 2 (AL1/AL2) button on the Snooze Master until the Alarm icon is
displayed.
•
Press once to turn on Alarm 1. Alarm 1 icon is displayed
•
Press twice to turn on Alarm 2. Alarm 2 icon is displayed.
•
Press 3 times to turn on Alarm 1 & 2. Alarm 1 & 2 icons are displayed.
•
Press a 4 time to turn off both alarms. No Alarm icons are displayed.
Setting the Alarm
1. Press the Alarm 1 / Alarm 2 (AL1/AL2) button on the Snooze Master until the Alarm
number to be changed is displayed.
2. Press the ALARM SET button and the Hours display will start flashing.
3. While the display is flashing, rotate the SET -/+ wheel to adjust the hour.
4. Press the ALARM SET button again so the minute display flashes.
5. While the display is flashing, rotate the SET -/+ wheel to adjust the minute.
6. Press the ALARM MODE button to set the type of alarm to be used. Continue
pressing until the correct type is displayed.
• iPhone/iPod
• FM Radio (Ensure that radio is tuned to a station)
• Beep
• Natural Sound (continue pressing for)
o Birds
o Ocean
o Brook
o Waterfall
o Sunrise
o Rain.
7. Press the ALARM SET button to confirm and exit Alarm Settings.
NOTE: Alarms cannot be adjusted if both alarms are activated. Please ensure that only the
Alarm to be set is shown on the LCD display.
6
SPK-IPT2000 USER MANUAL
OPERATING THE SNOOZE MASTER
Snooze Function
The Snooze Function is only available when the alarm is sounding.
•
When the alarm sounds press the SNOOZE/NAP button to postpone the alarm for 9
minutes.
Nap Function.
The NAP function is only available when the Audio is off and no Alarm is sounding. The Nap
function allows you to take a nap and the Snooze Master will alarm at a selected time
period.
•
•
Press the SNOOZE/NAP button to activate the Nap feature.
Keep pressing until the desired time is displayed.
o 15 minutes
o 30 minutes
o 45 minutes
o 60 minutes
o 75 minutes
o 90 minutes
o OFF (turns Nap feature OFF)
Timer (Auto Switch-OFF) Function.
The TIMER function is only available when the Audio is on and no Alarm is sounding. The
TIMER function allows you to set an AUTO OFF time for the Snooze master.
•
•
Press the TIMER button to activate the TIMER function.
Keep pressing until the desired time is displayed.
o 15 minutes
o 30 minutes
o 45 minutes
o 60 minutes
o 75 minutes
o 90 minutes
o OFF (turns TIMER feature OFF)
7
SPK-IPT2000 USER MANUAL
OPERATING THE SNOOZE MASTER
FM RADIO
1. To listen to the FM Radio, press and hold the AUDIO/DIMMER button until an input
is shown on the LCD display.
2. Press the AUDIO SELECTION button until FM is displayed on the LCD display.
3. Use the Set -/+ Wheel to adjust the frequency to tune to the required frequency.
• Press the
and the
button on the remote controller adjust the
frequency.
•
Press the
and the
button on the remote controller for 2 seconds to
scan automatically for stations.
4. Use the Volume Up/Down wheel adjust the volume to the desired level.
• Press the - or + button on the remote controller to adjust the volume up or
down to the desired level.
Storing FM radio stations
Up to 20 FM radio stations can be stored on the Snooze Master for you listening pleasure.
1. Tune to an FM radio station as described above.
2. Press and hold the PRESET button on the remote controller for 2 seconds until the
LCD display starts flashing.
3. Press the
or the
button on the remote controller to select the memory you
wish to store the current station and press PRESET again to confirm
4. Repeat steps 1 through 3 as required.
To listen to preset stations press the PRESET button and use the
select the preset you wish to listen to.
, or the
button to
Listening to your iPhone or iPod
The Snooze Master will automatically detect the connection of and iPod and iPhone and
switch to the input.
To switch manually Press the AUDIO SELCTION button on the Snooze Master or the AUDIO
button on the remote controller until the iPod/iPhone icon is shown on the display.
8
SPK-IPT2000 USER MANUAL
OPERATING THE SNOOZE MASTER
Charging your iPod or iPhone
Your iPod or iPhone will start charging as soon as it is connected to the Snooze Master.
Adjusting the Brightness of the LCD display
Press the AUDIO/DIMMER button on the Snooze Master or the DIMMER button on the
remote controller to adjust the brightness of the LCD display.
4 brightens levels are available OFF>LOW>MID>HIGH brightness.
Connecting an Auxiliary device
You can use the AUX input of the Snooze Master to connect any device that has a 3.5mm
stereo output.
1. Connect the supplied 3.5mm stereo AUX cable to the AUX input on the rear of the
Snooze Master.
2. Connect the other end of the 3.5mm stereo AUX cable to the audio/earphone out of
the device you wish to connect.
3. Press the AUDIO SELCTION button on the Snooze Master or the AUDIO button on
the remote controller until the word AUX is shown on the LCD display.
4. Adjust the volume level on the device and the Snooze Master until the correct level
is reached.
9
SPK-IPT2000 USER MANUAL
THE REMOTE CONTROL
THE REMOTE CONTROL
Button
Label
1
power
2
+
Function
Turns Audio ON/OFF
Volume UP
3
Play/Pause
4
Previous track
5
-
6
enter
7
sounds
8
audio
9
preset
10
al mode
11
set
12
snooze/
dimmer
13
menu
Volume DOWN
Confirm menu item
for iPod/iPhone
Select type of
natural sound
Select audio input
AUX>iPOD>FM
Select and store FM
stations
Operate alarm mode
Set the alarm time
Press to snooze
during alarm or set
LCD brightness
Enter iPod/iPhone
menu
14
Next track
15
Volume UP
16
Volume Down
17
al1/al2
Switch between
alarm options.
10
SPK-IPT2000 USER MANUAL
TROUBLE SHOOTING
TROUBLE SHOOTING
Problem
The stereo speaker system does
not turn on.
Solution
• The AC adapter may not be connected properly.
Check the connection.
Your iPhone or iPod does not fit
into the built-in universal dock.
• The wall outlet may not function. Try another outlet.
• The installed dock adapter is not the correct one.
Check whether a correct dock adapter is installed.
It does not recognise your
iPhone or iPod when docked.
• There might be some obstructions on the dock.
Check whether there are any obstructions on the
connector and on the dock. If everything is
secured, place your IPhone or iPod back into the
dock.
• Your iPhone or iPod may not be properly docked.
Take your iPhone or iPod out of the dock, and
remove any obstructions on the connector from the
dock and on your iPhone or iPod. Place your
iPhone or iPod back into the dock.
• Your iPod is frozen or locked up. Check whether
your iPhone or iPod operates correctly before
placing it back into the dock. Please refer to the
owner’s instruction manual of your iPhone or iPod.
• The software of your iPhone or iPod is outdated.
Upgrade the software on your iPhone or iPod. For
the details on how to upgrade the software on your
iPhone or iPod, please visit the Apple website:
http://www.apple.com.
11
SPK-IPT2000 USER MANUAL
TECHNICAL SPECIFICATIONS
TECHNICAL SPECIFICATIONS
Output CH
Output Max
Driver unit
Impedance
S/O
Connectivity
Aux connection
LCD display
FM Radio frequency
Alarm
Snooze time
Power Adaptor
Remote Control
Backup power (Clock only)
Ambient Sounds
Dimensions
Weight (Snooze Master Only)
2.0
16W
2 x 3” full range
60hm
90dB
iPod, iPhone via dock
3.5mm Stereo input jack (Cable Included)
70 x 35mm
87.5MHz ~ 108.0MHz
2
9 minutes (fixed)
INPUT: 110-240VAC ~50/60Hz 0.3A
OUTPUT: 5VCD @ 2.0A
17 button IR
2 x AAA batteries (Not supplied)
6 Natural Ambient sounds
241mm x 156mm x 82 mm
1.20Kg
12
SPK-IPT2000 USER MANUAL
OTHER ACCESSORIES
FOR OTHER ACCESSORIES AND PRODUCTS
http://www.laserco.net/products/irange
http://www.laserco.net
CONTACT INFORMATION
For more information on this product and technical support please visit
HTTP://WWW.LASERCO.NET
13