1
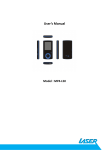
For support visit
http://LASERco.com.au/downloads.htm
Player does not respond
to buttons.
Turn player OFF using the ON/OFF switch. Wait for ten seconds and turn on
again. Check file format is correct.
Please read
carefully before use
declaration
•
Recharging: Recharging the player will take
approximately 2 to 3 hours. When fully charged,
the battery Icon in the top right hand corner of
Previous
Volume Up
> Display the player’s Firmware
edition
Next
F/W
Version
-
Check the storage space
currently used.
Check USB cable, and make sure the player is properly connected to the PC.
Check files are the correct format. Music files must be WMA or MP3 with no
copy protection.
+
Memory
info
Cannot Download Music
•
Return to the system default
Change location to ensure good reception.
Earphone must be connected.
Switch off power appliance nearby
•
Default
FM has bad performance
Charging
First charge: When charging the battery for
the first time it is recommended that the player
be charged for about 8 hours. Connect the
player to an active USB port using the supplied
cable. The computer must remain on during the
charging process.
User Manual
CL30 MP3 Player Clip
Thank you for purchasing the MP3 player. This
manual contains detailed information and
instructions to help get the most out of your
MP3 player.
Please read this manual carefully before using
your new player
Set the LCD contrast, from
1 to 16
Make sure you have chosen the correct language.
•
Set off time and sleep time
Contrast
Strange characters on
display
Do not use this player in extreme hot, cold,
dusty or wet environments or drop the
player.
This player can only play files that are in
the MP3 or WMA format with no copy
protection. Please ensure that all music files
are copy protection free prior to transferring
to the player.
Images shown in this manual may vary
slightly from actual product.
Please respect the Copyright laws in your
area.
Power off
Select “ Tel Book” in main menu , press “ MENU”
to enter , and submenu will be shown:
Browse Tel, Import Tel, Export Tel, Exit
Make sure volume is not on 0 position and the connection to earphone is
valid. Please make sure the earphone is clean.
Damaged MP3 files may appear to play but generate no sound.
Before using the player please get to know the
location of the controls and connections.
Set Required language for
display. 16 choices.
No Sound
On the face of the player is the LCD display.
Below this display are the player control
buttons.
Language
Tel Book
Menu/Select
Set power off logo per
required
M
Power off
logo
Make sure you have switched the player on and ensure that the battery is
charged.
Troubleshooting
the display will cease flashing. This icon will also indicate the capacity of battery during use.
Play/Pause/Exit to previous menu
Set start logo per required
No Power
Exit the present interface
Volume down
Start logo
Use USB cable to down file to the player
E-BOOK
Exit
< Long light and Customize
Set the player time, press
“ Menu” and “ Next” or “
Previous” for the settings
Notice
• Please switch on the player before charging
(Push the ON/OFF switch to “on”). This
player cannot be charged with the ON/OFF
switch in the “off” position.
• When connecting to the computer for file
transfer please leave the ON/OFF switch in
the “off” position to conserve the battery.
• For short periods: Press and hold the “play”
button for longer than 3 seconds to suspend
the player. The player is started again by the
same method and you will be returned to
the last used screen.
• For long Periods: Please switch off the
power if not using the player for long
periods.
Backlight
Time
settings
that different operating systems may require
different means of accessing the player. MP3/
WMA files can then be copied to the player as
they would be copied to other locations on your
computer.
To the Left hand side of the player, as viewed
from the front, is the USB plug. the main ON/
OFF switch and the Microphone.
On the Upright hand panel of the player, as
viewed from the front, is the 3.5mm earphone
socket,
Quick Start
Connect the player to the Computer via the
USB cable. When connected the player will be
detected and the operating system will load
the drivers. The Player will be displayed in the
“My Computer” window as a removable device
and be assigned the next available drive letter.
The player can now be accessed as you would
any other drive on your computer. Please note
1. Insert the earphones into the socket on the
side of the MP3Player.
2. Move the power switch to the “on” position.
If already “on” please see step 3.
3. Press and hold the “Play” button to power
on, use the “Previous” or “Next” Button to
select the “Music” feature. Press the “menu”
button to enter music playback mode.
4. Press the “Play” button to start music
playback of current file. Press “Play” again to
pause playback.
5. Choosing music files:
“Previous”: To choose the previous music file.
“Next”: To choose the next music file.
6. Volume control: Press the “<” or “>“ button
to enter Vol interface, press “<“ to lower the
volume; press”>” to increase the volume. The
display will go revert to playback mode after
Laser CL30
MP3 Player Clip
For technical support please visit
www.LaserCo.com.au
a few seconds from the last button press or
by pressing the “Menu” button.
Play Back Options
These features can be accessed during Playback mode while the track is playing.
1. During playback, press the “menu” button to
access the playback features.
2. Use the “Previous” or “Next” button to select
the feature and the press the “Menu” button
to select. Once the selection is made the
screen will return to playback mode.
3. To exit options menu and return to playback
mode press and hold the “menu” button.
REPEAT
Normal
Plays current music
file only.
Repeat One
Repeats current music
file.
Folder
Plays all music files in
current folder.
Repeat Folder
Plays and repeats all
music files in current
folder.
Repeat Folder
Plays and repeat all
music files.
Random
Plays all the music
files in the current
folder in a random
order.
Intro
Plays only the first 10
second of each music
file in the current
folder.
Equaliser
The following preset Equalizer (EQ) settings are
available
•
•
•
•
Natural
Rock
Pop
Classic
• Jazz
• DBB
• Opera
Use the “Menu” button to select the required
EQ setting.
1. Press “next” to choose “Equalizer”
2. Press “Menu” to enter “Equalizer”
3. Press “next” to choose, press “Menu” to
confirm.
4. When selection is made the display will
return to playback mode.
Replay (A-B mode)
Allows a portion of a track to be repeated.
1. Selected during playback you will be
returned to the playback screen. The “A” of
the “A-B” icon will flash. At the start of the
part of the track to be repeated press the
“Next” Button.
2. Wait for the end of the part of the track to
be repeated and press the “Next” button.
3. The playback will start again at the point set
on step 1 and continue to the point set in
step three and will repeat as many times as
set in Replay Times. (See below).
4. When the selection has been repeated the
set number of times, playback will return to
normal waiting for the next repeat selection
to be marked.
5. Press the “Menu” button to cancel and
resume normal playback.
Exit
Returns to previous Screen.
Play Back Options (File
Management)
These features can be accessed during
Playback mode while the track is paused.
Use this feature with caution as deleted files
cannot be recovered.
1. In playback mode when playback is paused,
press the “menu” button to access the
playback file management feature.
2. Use the “Previous” or “Next” button to select
the required feature and the press the
“Menu” button to select. Once the selection
is made the screen will return to playback
mode.
3. You will be prompted to confirm file deletion.
Please follow on screen prompts.
4. To exit options menu and return to playback
mode press and hold the “menu” button.
Local folder
Choose the folder
containing required tracks.
Delete file
Delete current file.
Delete All
Deletes all files in current
folder.
Voice Playback options
These features can be accessed during Voice
playback mode while the recording is playing.
Use this feature with caution as deleted files
cannot be recovered.
Please use navigation instructions as described
in music playback options.
Exit
Returns to Playback
screen.
Record
From the Main Menu, use the “Previous” or
“Next” Button to select the “Record” feature.
Press the “menu” button to enter Voice Record
mode.
1. Make sure that the Microphone is clear
of obstruction and facing subject to be
recorded.
2. Press the “Play” button to start recording.
Press “Play” again to pause recording.
3. Press “play” to restart recording.
4. When recording is completed, Press and hold
the “Play” button to save the file.
5. The next recording will be saved as a new
file.
Voice Playback
Playback of files recorded in Record mode.
1. Form the Main Menu use the “Previous” or
“Next” Button to select the “VOICE” feature.
Press the “Menu” button to enter Voice
playback mode.
2. Press the “Play” button to start playback
of current file. Press “Play” again to pause
playback.
3. Choosing voice files:
4. “Previous”: To choose the previous Voice file.
5. “Next”: To choose the next Voice file.
Repeat
See options as listed in Music
playback options.
Replay
Please see replay options as
described in Music Play Back
features.
Exit
Returns to Playback screen.
the required direction and will stop when
a station is found; if you want to stop
researching, press “Previous” or “next”.
4. Store the stations searched
Press “Menu” to save the current station and
press “Menu” to confirm.
Repeat scanning and save different stations
as required.
5. With stations saved as previously described,
press “Play” to skip between saved stations.
Submenu for FM radio
Press “ Menu” to enter the submenu during a
FM station is playing,
Voice Playback (file
management)
These features can be accessed during
Playback mode while the track is paused.
Use this feature with caution as deleted files
cannot be recovered.
Please use navigation instructions as described
in music playback options.
Local folder
Choose the folder containing
required files.
Delete file
Delete current file.
Delete All
Deletes all files in current
folder.
Exit
Returns to Playback screen.
FM Radio
This feature requires the earphone to be fitted
to the player. The radio will not work without
them connected. Ensure player is in a good
reception area to tune stations.
Enter the main menu
1. Press “next” to select “FM Radio” mode
2. Press “Menu” to enter FM mode
3. Automatic search:
Press and hold “Previous” or “next” for
two seconds, the player will search in
Save
Save the required FM stations
Delete
Delete current station
Delete All
Deletes all stations in current
folder.
Normal
Band
Frequency from 87.5 to 108
Auto
Search
Auto search the stations
Fine REC
Record the required FM
stations
Exit
Exit to previous menu
Sys setup
The System setup menu is used to set the
player up for use. In most cases the default
settings can be left as is.
1. Enter the Main Menu and use the “Previous”
or “next” to select “System Setup” and then
press “Menu.” To enter the main Setup menu
2. Press the “Previous” or “Next” button to
select the required option.
3. Press “Menu” to enter the System Setup.