1
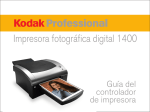
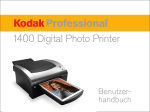
1400 Digital Photo Printer
Printer Driver
Guide
KODAK PROFESSIONAL 1400
Digital Photo Printer
Printer Driver Guide
P/N 4J2025_EN
Eastman Kodak Company
343 State Street
Rochester, New York, 14650
© Eastman Kodak Company, 2004
Kodak, Kodak Professional, and XtraLife are trademarks of Eastman Kodak Company.
Contents
Overview
Printer Driver Guide
Installing the Driver
Overview
About the Printer Driver
Features of the Printer Driver
About the Online Documentation
Getting Help or Additional Information
Using the WINDOWS
Printer Driver
Using the
MACINTOSH
Printer Driver
Installing the Driver
Installing the Driver
Uninstalling the Driver
Using the WINDOWS Printer Driver
Hardware and Software Requirements
Using the Print Options
Using the MACINTOSH Printer Driver
Hardware and Software Requirements
Adding the Printer
Setting up the Page
Printing
Search
Help
Navigating
CONTENTS
USER’S GUIDE
SEARCH
HELP
Printing
Magnifying
Overview
Installing the Driver
Using the WINDOWS
Printer Driver
Using the
MACINTOSH
Printer Driver
CONTENTS
USER’S GUIDE
SEARCH
HELP
Overview
Overview
Welcome to the online manual for the KODAK PROFESSIONAL 1400 Digital
Photo Printer Driver for WINDOWS and MACINTOSH Operating Systems.
You can use the printer driver with the KODAK PROFESSIONAL 1400 Digital
Photo Printer (1400 printer). The printer driver provides access to the printer
features.
Installing the Driver
Using the WINDOWS
Printer Driver
Using the
MACINTOSH
Printer Driver
CONTENTS
USER’S GUIDE
SEARCH
HELP
About the Printer Driver
Overview
The printer driver allows the software applications you use to access the printer
features. For example, your application determines the page breaks, font
selection, and page setup for your print job. The printer driver translates this
information into a printer language and sends the job to the printer. The printer
driver’s graphical user interface gives you access to additional printing options
that are not available from your software application.
USER’S GUIDE
SEARCH
Using the WINDOWS
Printer Driver
Using the
MACINTOSH
Printer Driver
Access the features for the printer driver from the print and page setup
commands in the application you are using.
CONTENTS
Installing the Driver
HELP
Features of the Printer Driver
Overview
The printer driver provides the following printing options that are not available
directly from your software application:
Installing the Driver
Color Management
The printer driver lets you choose how to manage the color in your
prints. You can make prints using the printer default color and then
adjust the color settings in the Color Adjustment dialog box.
System Level Support
The printer driver includes system level support for WINDOWS 2000,
WINDOWS XP and MAC OS X Operating Systems.
CONTENTS
USER’S GUIDE
SEARCH
HELP
Using the WINDOWS
Printer Driver
Using the
MACINTOSH
Printer Driver
About the Online Documentation
Overview
This user guide is comprised of the following sections:
• Installing the Software—gives you instructions on how to install and
remove the printer driver on your computer.
• Using the Printer Driver—describes how to use the printer driver with the
1400 printer.
Click HELP at the bottom of the screen for more information on using and
printing this manual, or click the tabs to the right to learn more about using the
printer driver.
CONTENTS
USER’S GUIDE
SEARCH
HELP
Installing the Driver
Using the WINDOWS
Printer Driver
Using the
MACINTOSH
Printer Driver
Getting Help or Additional Information
Overview
Your dealer of Kodak products is the best source for information about setting
up, operating, and obtaining accessories and supplies for your printer. Contact
your dealer with any questions.
Installing the Driver
For more information, refer to the Troubleshooting section in the KODAK
PROFESSIONAL 1400 Digital Photo Printer User’s Guide.
Using the WINDOWS
Printer Driver
Go to the Kodak Home page (www.kodak.com) and select Pro Photographer /
Lab:
Using the
MACINTOSH
Printer Driver
• for service
• for help setting up or operating the printer
• to download printer drivers
• to obtain supplies
• for warranty information
• for information about other Kodak products
For technical support in the US, call 1-800-23KODAK (1-800-235-6325)
between 9:00 a.m. and 8:00 p.m. Eastern Standard Time on regular business
days.
CONTENTS
USER’S GUIDE
SEARCH
HELP
Getting Help from Outside the United States and Canada
Overview
Help numbers for the Asia/Pacific and European regions are listed below.
Country
CONTENTS
Country
code
Number
Australia
61
3 9350-1222
Hong Kong
85
2 2564-9333
Indonesia
81
3 5488-2001
Korea
82
2 708-5400
Malaysia
60
3 757-2722
Philippines
63
2 815-8851
Singapore
65
473-6611
Thailand
66
2 271-3040
Taiwan
88
6 2 895-1580
USER’S GUIDE
SEARCH
Installing the Driver
Using the WINDOWS
Printer Driver
Using the
MACINTOSH
Printer Driver
HELP
In the European regions a call center will assist you. Help numbers for the call
center’s customer support teams appear below:
Country
CONTENTS
Overview
Number
Installing the Driver
Belgium
2 263-2211
Denmark
8088 2082
Finland
0800 112773
France
0800 903716
Germany
49-(0) 711 406-3434
Hungary
06800 17030
Italy
0800 782764
Netherlands
0800 0228756
Norway
80014898
Poland
0800 4412399
Portugal
0800 880449
Russia
0810 800 21162044
South Africa
0800 990514
Spain
0900 997 116
Sweden
0200 285772
United Kingdom
0800 0158528
USER’S GUIDE
Using the WINDOWS
Printer Driver
SEARCH
Using the
MACINTOSH
Printer Driver
HELP
Installing the Driver
Overview
The printer driver is a KODAK Driver customized for use with the 1400 printer.
The following installation instructions assume that you are familiar with
MICROSOFT WINDOWS or MACINTOSH Operating Systems and
terminology.
Using the WINDOWS
Printer Driver
Installing the Driver
Using the
MACINTOSH
Printer Driver
1. Insert the CD in the CD drive on your computer.
2. Click your language.
3. Click Printer Driver.
4. Follow the instructions to install the appropriate driver for your printer.
5. Connect the printer to the computer.
6. Press the POWER switch to turn on the printer.
7. MACINTOSH Operating System only: Click Adding the Printer to
complete the printer installation.
CONTENTS
USER’S GUIDE
Installing the Driver
SEARCH
HELP
Uninstalling the Driver
Overview
To uninstall the driver from a WINDOWS computer:
1. Start your WINDOWS computer.
Installing the Driver
2. Click Start.
Using the WINDOWS
Printer Driver
3. Select Settings>Printers.
4. Select the icon for the printer.
Using the
MACINTOSH
Printer Driver
5. Select Delete from the File menu.
To uninstall the driver from a MACINTOSH computer:
1. Start your MACINTOSH computer.
2. Open Print Center.
3. Highlight Printer and click the Delete icon.
CONTENTS
USER’S GUIDE
SEARCH
HELP
Using the WINDOWS Printer Driver
Overview
This section describes how to use the printer driver to send print jobs to the
KODAK PROFESSIONAL 1400 Digital Photo Printer (1400 printer) from your
host computer.
NOTE: This section shows WINDOWS 2000 Operating System dialog boxes.
The dialog boxes for WINDOWS XP Operating System look similar and
have identical functionality.
Installing the Driver
Using the WINDOWS
Printer Driver
Using the
MACINTOSH
Printer Driver
CONTENTS
USER’S GUIDE
SEARCH
HELP
Hardware and Software Requirements
Overview
We recommend that you have the following hardware and software to use the
printer driver:
Installing the Driver
• PENTIUM III Processor and 128 MB of RAM minimum
Using the WINDOWS
Printer Driver
• 200 MB of free hard drive space
• Color monitor with a minimum pixel resolution of 800 x 600
Using the
MACINTOSH
Printer Driver
• WINDOWS 2000 or WINDOWS XP Operating System
• Available USB port (USB 2.0 preferred)
The USB interface can be used with:
• Computers pre-installed with WINDOWS 2000 or WINDOWS XP
Operating System
• Computers installed with WINDOWS 2000 or WINDOWS XP Operating
System that are USB-guaranteed by the manufacturer
CONTENTS
USER’S GUIDE
SEARCH
HELP
Using the Print Options
Overview
Use the Printer Properties dialog box to select print options.
Installing the Driver
Changing Printer Properties from an Application
Using the WINDOWS
Printer Driver
1. In your application, select
Print from the File menu.
Using the
MACINTOSH
Printer Driver
2. Click Properties in the Print
dialog box.
NOTE: In some applications, click
Setup to access the
Printer Properties dialog
box.
3. Select options from the tabs in
the dialog box.
4. Click Print in your application.
CONTENTS
USER’S GUIDE
SEARCH
HELP
Options on the Paper Tab
Overview
You can select the following options
on the Paper tab:
Installing the Driver
Paper Size—allows you to select
the paper size for the print job.
Allows you to select from 8.5 x 12
in., 8.5 x 14 in., or A4.
Using the WINDOWS
Printer Driver
Ribbon type—allows you to select
the ribbon to be used for the print
job. Select from Glossy or Matte.
Using the
MACINTOSH
Printer Driver
XtraLife—(recommended) checking
this box adds a protective overcoat
to the print.
NOTE: Refer to Working with Paper
in the KODAK
PROFESSIONAL 1400
Digital Photo Printer User’s
Guide for a complete listing
of paper, ribbon, and image
sizes.
CONTENTS
USER’S GUIDE
SEARCH
HELP
Orientation
Overview
Portrait—vertically orients the print
Installing the Driver
Landscape—horizontally orients the print
Rotate 180°—rotates the print 180°
Using the WINDOWS
Printer Driver
Mirror—reverses the print producing a mirror image
Using the
MACINTOSH
Printer Driver
Option
Copies—allows you to set the number of prints
Sharpness—allows you to select from None, Normal, or High image
enhancement to improve the sharpness of the print
Scaling—scales a print by a specified percentage
Defaults—restores the driver default settings
About—lists the software version of the printer driver
OK—saves your selections, and closes the dialog box
Cancel—cancels your selections, and closes the dialog box
Apply—saves your selections without closing the dialog box
CONTENTS
USER’S GUIDE
SEARCH
HELP
Options on the Color Adjustment Tab
Overview
You can adjust the color of your
print using the Color Adjustment
tab.
Installing the Driver
Brightness—adjusts the relative
lightness or darkness
Using the WINDOWS
Printer Driver
Contrast—adjusts the relationship
between the light areas, midtones,
and dark areas
Using the
MACINTOSH
Printer Driver
Gamma—adjusts the lightness or
darkness of the midtones
Red—adds or subtracts red
Green—adds or subtracts green
Blue—adds or subtracts blue
Reset—resets all the settings to 0
Load—opens a dialog box that allows you to locate a document containing
saved settings that can be applied to the current print
Save—opens a dialog box that allows you to save the settings to a file
OK—saves your selections, and closes the dialog box
CONTENTS
USER’S GUIDE
SEARCH
HELP
Cancel—cancels your selections, and closes the dialog box
Overview
Apply—saves your selections without closing the dialog box
Installing the Driver
Using the WINDOWS
Printer Driver
Using the
MACINTOSH
Printer Driver
CONTENTS
USER’S GUIDE
SEARCH
HELP
Using the Color Management Tab
Overview
You can select Color Profiles using the Color Management tab.
1. In WINDOWS Explorer, navigate to the Printers folder.
Installing the Driver
2. Right-click the driver for the 1400 printer and select Properties.
3. Click the Color Management tab.
Using the WINDOWS
Printer Driver
4. Select from the following options:
Automatic—computer selects the
Color Profiles automatically
Using the
MACINTOSH
Printer Driver
Manual—allows you to select the
Color Profiles manually
Add—adds the Color Profiles
Remove—removes the selected
Color Profile
Set as default—allows manual
selection of the default profile
(Manual mode only)
OK—accepts your changes, and
closes the dialog box
Cancel—discards your changes and closes the dialog box
Apply—saves your selections without closing the dialog box
CONTENTS
USER’S GUIDE
SEARCH
HELP
Using the MACINTOSH Printer Driver
Overview
This section describes how to use the printer driver to send print jobs to the
KODAK PROFESSIONAL 1400 Digital Photo Printer (1400 printer) from your
computer.
Installing the Driver
NOTE: This section shows MAC OS X version 10.3 screens.
Hardware and Software Requirements
Using the WINDOWS
Printer Driver
We recommend that you have the following hardware and software to use the
printer driver:
Using the
MACINTOSH
Printer Driver
• MACINTOSH G3, G4 and 128 MB of RAM minimum
• 200 MB of free hard drive space
• Color monitor with a minimum pixel resolution of 800 x 600
• MAC OS X 10.2.6 or greater
• Available USB port (USB 2.0 preferred)
CONTENTS
USER’S GUIDE
SEARCH
HELP
Adding the Printer
Overview
Before you can use the printer driver, you must add the printer to the list of
available printers.
1. Launch Printer Setup Utility (Applications / Utilities / Printer Setup Utility).
Installing the Driver
Using the WINDOWS
Printer Driver
2. Click the Add button.
Using the
MACINTOSH
Printer Driver
CONTENTS
USER’S GUIDE
SEARCH
HELP
3. Select the USB connection type.
Overview
Installing the Driver
Using the WINDOWS
Printer Driver
Using the
MACINTOSH
Printer Driver
CONTENTS
USER’S GUIDE
SEARCH
HELP
4. Click the printer name, then click the Add button.
Overview
Installing the Driver
Using the WINDOWS
Printer Driver
Using the
MACINTOSH
Printer Driver
The 1400 printer appears in the list of printers installed in Printer Setup
Utility.
CONTENTS
USER’S GUIDE
SEARCH
HELP
Setting up the Page
Overview
1. In your application, select Page Setup from the File menu.
Installing the Driver
Using the WINDOWS
Printer Driver
Using the
MACINTOSH
Printer Driver
2. Next to Format for, select 1400 Digital Photo Printer.
IMPORTANT: Choose the 1400 printer before selecting other options. Initially,
"any printer" is selected.
3. Change options as described. See Page Setup Options.
CONTENTS
USER’S GUIDE
SEARCH
HELP
Page Setup Options
Overview
Settings—Select Page Attributes, Custom Page Size, or Summary. Page
Attributes displays the dialog box shown on the previous page. Summary
displays a list of your current settings. We do not recommend that you use
Custom Page Size.
Format for—Select the 1400 printer here, then select other options.
Initially, "any printer" is selected.
Paper Size—Select the paper size for the print job. Select from 8.5 x 12 in.,
8.5 x 14 in., or A4.
Orientation—Select whether the print is vertical or rotated 90° clockwise or
counterclockwise on the page.
Scale—Specify a percentage to scale the print.
CONTENTS
USER’S GUIDE
SEARCH
HELP
Installing the Driver
Using the WINDOWS
Printer Driver
Using the
MACINTOSH
Printer Driver
Printing
Overview
1. In your application, select Print from the File menu.
Installing the Driver
Using the WINDOWS
Printer Driver
Using the
MACINTOSH
Printer Driver
2. Change options, as described. See Print Options.
The changes will be reflected in the printed document.
3. Select Print.
CONTENTS
USER’S GUIDE
SEARCH
HELP
Print Options
Overview
Options Available on All Print Dialog Boxes
Installing the Driver
Using the WINDOWS
Printer Driver
Using the
MACINTOSH
Printer Driver
Regardless of the option you select, the following options appear:
Printer—Select the 1400 printer.
Presets—You can save and name your preferred print options as a preset.
Select one of the following: Standard (default options), Save As (to save and
name your options as a preset), or a previously saved preset.
Print Options—See below.
CONTENTS
USER’S GUIDE
SEARCH
HELP
Displaying the Print Option Dialog Boxes
Overview
• Select a print option from the Print dialog box.
Installing the Driver
Using the WINDOWS
Printer Driver
Using the
MACINTOSH
Printer Driver
Dialog boxes for the selected options appear, as described on the
following pages.
CONTENTS
USER’S GUIDE
SEARCH
HELP
Copies & Pages
Overview
Installing the Driver
Using the WINDOWS
Printer Driver
Using the
MACINTOSH
Printer Driver
• Select the number of copies, check if you want the pages collated, and
select the pages to be printed.
CONTENTS
USER’S GUIDE
SEARCH
HELP
Layout
Overview
Installing the Driver
Using the WINDOWS
Printer Driver
Using the
MACINTOSH
Printer Driver
• Select the number of pages per sheet, the layout direction, and the type
of border.
CONTENTS
USER’S GUIDE
SEARCH
HELP
Output Options
Overview
Installing the Driver
Using the WINDOWS
Printer Driver
Using the
MACINTOSH
Printer Driver
• Check if you want to save output to a file. Select the file type.
CONTENTS
USER’S GUIDE
SEARCH
HELP
Scheduler
Overview
Installing the Driver
Using the WINDOWS
Printer Driver
Using the
MACINTOSH
Printer Driver
• Select the time for the printer to start printing.
CONTENTS
USER’S GUIDE
SEARCH
HELP
Paper Handling
Overview
Installing the Driver
Using the WINDOWS
Printer Driver
Using the
MACINTOSH
Printer Driver
• Select the print order for a multi-page job.
CONTENTS
USER’S GUIDE
SEARCH
HELP
ColorSync
Overview
Installing the Driver
Using the WINDOWS
Printer Driver
Using the
MACINTOSH
Printer Driver
• Select a Quartz Filter to change the image look.
CONTENTS
USER’S GUIDE
SEARCH
HELP
Printer Options
Overview
Installing the Driver
Using the WINDOWS
Printer Driver
Using the
MACINTOSH
Printer Driver
Choose from the following:
Ribbon type—Select Glossy or Matte ribbon to be used for the print job.
XtraLife—Adds a protective overcoat to the print.
Matte Adjust—Select the matte level. This option is only available when you
have selected the Matte ribbon type. Increase the matte level to decrease
gloss. Decrease the matte level to increase gloss.
CONTENTS
USER’S GUIDE
SEARCH
HELP
Sharpness—Select from None, Normal, or High to improve the sharpness of
the document.
Overview
Adjust Color—See Adjusting Color.
Installing the Driver
Defaults—Restores the driver default settings.
Rotate 180—Rotates the print 180°.
Using the WINDOWS
Printer Driver
Mirror—Reverses the print producing a mirror image.
Using the
MACINTOSH
Printer Driver
CONTENTS
USER’S GUIDE
SEARCH
HELP
Adjusting Color
Overview
The Color Adjustment dialog box appears. Choose from the following options
to adjust the color of your prints:
Installing the Driver
Brightness—adjusts the
relative lightness or darkness.
Using the WINDOWS
Printer Driver
Contrast—adjusts the
relationship between light
areas, midtones, and dark
areas.
Using the
MACINTOSH
Printer Driver
Gamma—adjusts the lightness
or darkness of the midtones.
Red—adds or subtracts red.
Green—adds or subtracts
green.
Blue—adds or subtracts blue.
Reset—resets all settings to 0.
Load—opens a dialog box that allows you to locate a document that
contains saved settings that can be applied to the current print.
Save—opens a dialog box that allows you to save the settings to a file.
OK—accepts your changes, and closes the dialog box.
CONTENTS
USER’S GUIDE
SEARCH
HELP
Summary
Overview
View a summary of current options.
Installing the Driver
Using the WINDOWS
Printer Driver
Using the
MACINTOSH
Printer Driver
CONTENTS
USER’S GUIDE
SEARCH
HELP
Search
Overview
You can search the active manual for desired information. This function is
executed through the search utilities of ADOBE ACROBAT.
To search within the active manual:
1. Click the find tool
in the toolbar to open the Find dialog box.
Installing the Driver
2. Enter the word or phrase you want to find.
Using the WINDOWS
Printer Driver
3. Click Find to begin the search.
The first occurrence of the word or phrase is highlighted.
Using the
MACINTOSH
Printer Driver
CONTENTS
USER’S GUIDE
SEARCH
HELP
Help
Overview
This online manual links you to topics within this manual. You can also print the
manual. Refer to the following procedures for help navigating and printing the
document.
Installing the Driver
Navigating
Using the WINDOWS
Printer Driver
Use the links within the windows as well as standard Adobe Acrobat tools to
navigate the manual. For more information about the tools, see the Adobe
Acrobat documentation.
Identifying the Active Section
The tabs on the right side of your window identify the sections. The active
section is shown as a white tab with a yellow arrow.
Opening Sections
To open a different section, click the desired tab.
Following a Link
Cross-referenced information is identified with blue text. To view the referenced
information, click the blue text.
CONTENTS
USER’S GUIDE
SEARCH
HELP
Using the
MACINTOSH
Printer Driver
Browsing
Overview
You can also browse through the manual using the browse buttons in the
toolbar at the top of the window.
Installing the Driver
Displays the next page
Using the WINDOWS
Printer Driver
Displays the previous page
Using the
MACINTOSH
Printer Driver
Displays the first page of the manual
Displays the last page of the manual
Printing
To print, select Print from the File menu. Complete the dialog box and send the
print request.
CONTENTS
USER’S GUIDE
SEARCH
HELP
Magnifying
Overview
Some of the images are better viewed at a larger magnification. To change the
view magnification, use the controls in the toolbar, or click and drag in the page
with the zoom tool.
Installing the Driver
Use of the Toolbar View Buttons
Using the WINDOWS
Printer Driver
Click one of the three page view buttons on the toolbar to change the
magnification of the page.
Actual size
Fits in window
Fits width of window
Using the Zoom Buttons
You can use the zoom buttons to zoom in or zoom out of an area on the page.
To magnify an area, click the zoom tool
area on the page.
and draw a rectangle around an
To reduce the magnification of an area, click the zoom out tool
the area of the page to zoom out.
CONTENTS
USER’S GUIDE
SEARCH
and click
HELP
Using the
MACINTOSH
Printer Driver
EASTMAN KODAK COMPANY
Rochester, NY 14650
www.kodak.com/go/professional
TM/MC/MF/MR: Kodak, Kodak Professional
' Eastman Kodak Company, 2004.
4J2025_EN