1
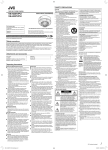
SAFETY PRECAUTIONS
FIXED HD IP DOME CAMERA
VN-H257U
VN-H237U
Instructions (Installation)
For Customer Use:
Enter below the Model No. which is located
on the body.
Retain this information for future reference.
Model No.
Serial No.
* The VN-H237U camera is shown in the illustration.
Thank you for purchasing this product.
Before operating this unit, please read the instructions carefully
to ensure the best possible performance.
The standard camera installation procedure can be found on the back side of this page.
© 2012 JVC KENWOOD Corporation
LST1234-001D
Safety precautions
The power rating is AC 24 V, 50/60 Hz/PoE (VN-H257U) or PoE (VN-H237U). Use the correct voltage.
Always use the AC 24 V power source that is insulated from the primary power supply. (VN-H257U)
A level of supplied power that exceeds the ratings may result in failures, smoke or fire. If the camera breaks
down, turn off the power and contact our service center immediately.
If a level of power that exceeds the ratings is supplied, the internal components may be damaged even if no
abnormalities are observed in the appearance and/or operation of the camera. Contact our service center
immediately to arrange for an inspection (charged separately).
Attachments and accessories
Instructions ....................................................... 2
CD-ROM ........................................................... 1
WARRANTY CARD (For USA) ......................... 1
SCREW (M2) .................................................... 2
Operating Precautions
Storage and Operating Environment
● This camera has been designed for indoor use. It
cannot be used outdoors.
● Do not install the camera in the following
environments.
Doing so may result in malfunctions or failure.
• Hot or cold locations beyond ambient temperature
range (-10 °C to 50 °C).
• Locations beyond the allowable operating humidity
range (20 %RH to 90 %RH) (no condensation
allowed).
• Near equipment that emits strong magnetic fields,
such as transformers or motors.
• Near equipment that emits radio waves, such as
transceivers and mobile phones.
• Locations in which excessive dust or sand exist.
• Locations that are subject to vibration.
• Locations prone to moisture such as sides of
windows.
• Locations that may contain steam or oil, such as
kitchens.
• Locations that are subject to radiation emissions,
X-rays or corrosive gases.
• Locations where chemicals are used, such as
swimming pools.
● Use of this camera and cables connected to this
camera at locations where strong electrical or
magnetic waves are generated (e.g. near a radio, TV,
transformer, monitor, etc.) may result in images being
affected by noise interference or colors being changed.
● Do not install this camera at locations where cold
air is circulated, such as near the air vent of an air
conditioner. The drastic change in temperature may
fog up the dome cover.
● Do not install this camera at a location that traps heat.
This camera discharges heat from the surface of the
main unit. Do not install it at locations that may trap
heat, such as wall corners.
Handling Precautions
● Do not block the vents.
Inadequate heat ventilation may cause this camera to
malfunction. Be sure not to block the vents around the
camera.
Copyright Protection
● With the exception of the user being the copyright
holder or when permission such as for duplication has
been granted by the copyright holder, permission is
required in principle to duplicate, modify or transmit
copyrighted material.
● Unauthorized duplication, modification or transmission
of copyrighted material may constitute a copyright
infringement, and the user may be liable to pay
compensation for damages. When using copyrighted
material, be sure to check the license agreement or
the copyrighted material thoroughly.
● When rights or rights holders are involved with regard
to the targeted subject of duplication, permission may
be required for shooting or using (processing) it. Be
sure to check the licensing conditions thoroughly.
● Use of recorded materials without first gaining the prior
consent of the author is forbidden under copyright law
except in cases of personal use.
Disclaimer
● The motion detection feature is not a feature to prevent
theft or fire. Our company shall not be liable for any
loss or damage resulting from the use of this feature.
● We shall not be responsible for any loss or damage
caused in the event of privacy invasion as a result of
camera footage created by this product.
Maintenance
● Turn off the power before performing maintenance.
● Wipe off dirt on the dome cover with a lens-cleaning
cloth (or soft cloth). For dirt that cannot be easily
removed, wipe using a neutral detergent diluted with
water. Following that, wipe with a dry cloth. Do not use
thinner or benzene. The surface of the dome cover
may dissolve or fog up.
Saving Energy
● If the camera is not going to be used for a long period
of time, turn off the power or the system for safety
reasons and to conserve energy.
Others
● This camera has a built-in AGC circuit. Setting AGC
●
●
●
●
●
●
●
●
●
●
to "Mid" or "High" increases the sensitivity of a dark
image, and the screen may appear grainy. This is not
a malfunction.
When this camera is used with the white balance set to
"ATW" (Auto Tracking White Balance), the color tone
of some objects may differ slightly from the actual color
due to the principle of the automatic tracking white
balance circuit. This is not a malfunction.
For regions with a commercial power frequency of
50 Hz, switch to the Flickerless mode during use
under fluorescent lights (excluding inverter lighting
equipment) to prevent flickers.
When the electronic sensitivity enhancement feature
is enabled, the screen may appear grainy and more
white spots may appear because the sensitivity has
increased. However, this is not a malfunction.
If the power supply voltage is momentarily cut off or
reduced due to lightning or the power supply to the
air conditioner being turned on, the image may be
disrupted or noise interference may occur.
The rotation angle of this camera is increased to
enable installation at a wider variety of locations. When
the lens is at the wide-angle position, and tilted at an
angle close to +/-80 degrees, a part of the camera
may come into view on the screen depending on the
rotation angle. When this occurs, adjust the field angle
accordingly.
When using multicast, make use of an IGMPv2compliant network switch.
Some hubs/switches of products that are equipped
with intelligent features may include a broadcast/
multicast suppression function. If this function is
enabled, viewing of multicast images on this camera
may fail.
It is recommended to use shielded LAN cables for
connection with this camera. The safety and reliability
of this camera has been checked by using shielded
cables.
Under halogen lamps, light bulbs and other light
sources that emit strong infrared light, black objects
may look almost purple in the recording. It is an
inherent characteristic of this camera and not a defect.
During viewing using the Built-in Viewer, the video
and audio may appear out of sync. This is not a
malfunction (VN-H257U).
FOR USA
These are general IMPORTANT SAFEGUARDS and
certain items may not apply to all appliances.
IMPORTANT SAFEGUARDS
1. Read all of these instructions.
2. Save these instructions for later use.
3. All warnings on the product and in the operating instructions
should be adhered to.
4. Unplug this appliance system from the wall outlet before
cleaning. Do not use liquid cleaners or aerosol cleaners. Use a
damp cloth for cleaning.
5. Do not use attachments not recommended by the appliance
manufacturer as they may cause hazards.
6. Do not use this appliance near water - for example, near
a bathtub, washbowl, kitchen sink, or laundry tub, in a wet
basement, or near a swimming pool, etc.
7. Do not place this appliance on an
unstable cart, stand, or table. The
appliance may fall, causing serious
injury to a child or adult, and serious
damage to the appliance. Use only with
a cart or stand recommended by the
manufacturer, or sold with the appliance.
Wall or shelf mounting should follow the
manufacturer’s instructions, and should
use a mounting kit approved by the
manufacturer.
An appliance and cart combination should be moved with care.
Quick stops, excessive force, and uneven surfaces may cause
the appliance and cart combination to overturn.
8. Slots and openings in the cabinet and the back or bottom are
provided for ventilation, and to insure reliable operation of the
appliance and to protect it from overheating, these openings
must not be blocked or covered. The openings should never be
blocked by placing the appliance on a bed, sofa, rug, or other
similar surface. This appliance should never be placed near
or over a radiator or heat register. This appliance should not
be placed in a built-in installation such as a bookcase unless
proper ventilation is provided.
9. This appliance should be operated only from the type of power
source indicated on the marking label. If you are not sure of
the type of power supplied to your home, consult your dealer or
local power company. For appliance designed to operate from
battery power, refer to the operating instructions.
10. For added protection for this product during a lightning storm,
or when it is left unattended and unused for long periods of
time, unplug it from the wall outlet and disconnect the antenna
or cable system. This will prevent damage to the product due to
lightning and power-line surges.
11. Do not allow anything to rest on the power cord. Do not locate
this appliance where the cord will be abused by persons
walking on it.
12. Follow all warnings and instructions marked on the appliance.
13. Do not overload wall outlets and extension cords as this can
result in fire or electric shock.
14. Never push objects of any kind into this appliance through
cabinet slots as they may touch dangerous voltage points or
short out parts that could result in a fire or electric shock. Never
spill liquid of any kind on the appliance.
15. Do not attempt to service this appliance yourself as opening
or removing covers may expose you to dangerous voltage or
other hazards. Refer all servicing to qualified service personnel.
16. Unplug this appliance from the wall outlet and refer servicing to
qualified service personnel under the following conditions:
a. When the power cord or plug is damaged or frayed.
b. If liquid has been spilled into the appliance.
c. If the appliance has been exposed to rain or water.
d. If the appliance does not operate normally by following
the operating instructions. Adjust only those controls that
are covered by the operating instructions as improper
adjustment of other controls may result in damage and will
often require extensive work by a qualified technician to
restore the appliance to normal operation.
e. If the appliance has been dropped or the cabinet has been
damaged.
f. When the appliance exhibits a distinct change in
performance
- this indicates a need for service.
17. When replacement parts are required, be sure the service
technician has used replacement parts specified by the
manufacturer that have the same characteristics as the original
part. Unauthorized substitutions may result in fire, electric
shock or other hazards.
18. Upon completion of any service or repairs to this appliance,
ask the service technician to perform routine safety checks to
determine that the appliance is in safe operating condition.
FOR USA AND CANADA
CAUTION
RISK OF ELECTRIC SHOCK
DO NOT OPEN
CAUTION: TO REDUCE THE RISK OF ELECTRICK
SHOCK. DO NOT REMOVE COVER
(OR BACK). NO USER-SERVICEABLE
PARTS INSIDE. REFER SERVICING TO
QUALIFIED SERVICE PERSONNEL.
The lightning flash wish arrowhead symbol, within
an equilateral triangle is intended to alert the
user to the presence of uninsulated "dangerous
voltage" within the product's enclosure that age"
within the product's enclosure that may be of
sufficient magnitude to constitute a risk of electric
shock to persons.
The exclamation point within an equilateral
triangle is intended to alert the user to
the presence of important operating and
maintenance (servicing) instructions in the
literature accompanying the appliance.
This device complies with Part 15 of the FCC Rules. Operation
is subject to the following two conditions: (1) This device may
not cause harmful interference, and (2) this device must accept
any interference received, including interference that may
cause undesired operation.
INFORMATION (FOR CANADA)
RENSEIGNEMENT (POUR CANADA)
This Class A digital apparatus complies with Canadian
ICES-003.
Cet appareil num rique de la Class A est conforme á la
norme NMB-003 du Canada.
Due to design modifications, data given in this instruction
book are subject to possible change without prior notice.
WARNING
TO REDUCE THE RISK OF FIRE OR ELECTRIC
SHOCK, DO NOT EXPOSE THIS APPLIANCE TO RAIN
OR MOISTURE.
AVERTISSEMENT
POUR EVITER LES RISQUES D'INCENDIE OU
D'ELECTROCUTION, NE PAS EXPOSER L'APPAREIL A
L'HUMIDITE OU A LA PLUIE.
FOR EUROPE
WARNING
This is a Class A product. In a domestic environment this
product may cause radio interference in which case the
user may be required to take adequate measures.
Dear Customer
This apparatus is in conformance with the valid European
directives and standards regarding electromagnetic
compatibility and electrical safety.
European representative of JVC KENWOOD Corporation is:
JVC Technical Services Europe GmbH
Postfach 10 05 04
61145 Friedberg
Germany
Sehr geehrter Kunde, sehr geehrte Kundin, dieses Gerät
stimmt mit den gültigen europäischen Richtlinien und Normen
bezüglich elektromagnetischer Verträglichkeit und electrischer
Sicherheit überein.
Die europäische Vertretung für die JVC KENWOOD
Corporation ist:
JVC Technical Services Europe GmbH
Postfach 10 05 04
61145 Friedberg
Deutschland
Information for Users on Disposal of Old Equipment
[European Union]
This symbol indicates that the electrical and
electronic equipment should not be disposed as
general household waste at its end-of-life.
Instead, the product should be handed over to
the applicable collection point for the recycling
of electrical and electronic equipment for proper
treatment, recovery and recycling in accordance with
your national legislation.
By disposing of this product correctly, you will help
Attention: to conserve natural resources and will help prevent
This symbol potential negative effects on the environment and
is only valid in human health which could otherwise be caused by
the European inappropriate waste handling of this product. For
more information about collection point and recycling
Union.
of this product, please contact your local municipal
office, your household waste disposal service or the
shop where you purchased the product. Penalties
may be applicable for incorrect disposal of this
waste, in accordance with national legislation.
(Business users)
If you wish to dispose of this product, please visit our web
page http://www.jvc.eu to obtain information about the takeback of the product.
[Other Countries outside the European Union]
If you wish to dispose of this product, please do so in
accordance with applicable national legislation or other
rules in your country for the treatment of old electrical and
electronic equipment.
● This installation should be made by a qualified service
person and should conform to all local codes.
● This installation shall be in accordance with the
●
●
●
●
●
Information for USA
This device complies with part 15 of the FCC Rules. Changes
or modifications not approved by JVC could void the user's
authority to operate the equipment. This equipment has
been tested and found to comply with the limits for a Class A
digital device, pursuant to Part 15 of the FCC Rules. These
limits are designed to provide reasonable protection against
harmful interference when the equipment is operated in a
commercial environment. This equipment generates, uses, and
can radiate radio frequency energy and, if not installed and
used in accordance with the instruction manual, may cause
harmful interference to radio communications. Operation of
this equipment in a residential area is likely to cause harmful
interference in which case the user will be required to correct
the interference at his own expense.
●
CAUTION
●
CHANGES OR MODIFICATIONS NOT APPROVED BY JVC
COULD VOID USER’S AUTHORITY TO OPERATE THE
EQUIPMENT.
●
●
●
National Electrical Code, ANSI/NFPA 70. The unit is to
be powered by a Listed Class 2 power supply or using
the PoE.
The AC 24 V power supply should conform to the
following: Class 2 only (For USA), Isolated power
supply only (For Europe and other).
Any Mention in this manual of Alarm inputs have not
been evaluated by UL to be used for Burglar Alarm
Functionality.
Special technique is required when installing this
product.
Please refer to your dealer for installation.
Rating label is pasted at the bottom or top of the
camera unit.
JVC is not liable for any compensation if you drop the
camera due to insecure mounting by not following the
installation description. Pay careful attention during
installation.
When mounting this product to a ceiling or wall, select
a location strong enough to support the weight of this
camera. If the location is not strong enough to support
the weight, be sure to reinforce the ceiling or wall
before installation.
The camera may drop if the mounting screws are
not tightened securely. Check that the screws are
tightened appropriately and securely.
Do not install the camera near lighting fixtures of high
temperature, such as spot lights. It might result in
failure or fires.
It should be noted that it may be unlawful to re-record
pre-recorded tapes, records, or discs without the
consent of the owner of copyright in the sound or video
recording, broadcast or cable program and in any
literary, dramatic musical, or artistic work embodied
therein.
The latest version
Please visit V.NETWORKS web site to check the
latest firmware at
http://www3.jvckenwood.com/english/pro/vnetworks/
index.html
☞ Continued overleaf
EN_VN-H237_001D_Non-Mask.indb 1
1
5/24/2012 2:24:06 PM
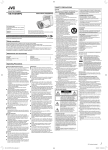
Removing the dome cover
and inner dome
• Turn the dome cover counterclockwise to remove it.
• Turn the inner dome 45 degrees counterclockwise and grasp the
inner dome near the stops (two locations) to remove it.
When mounting the camera with
cables pulled out from the side
If you cannot cut a large enough hole in the ceiling or
walls, connect by pulling the cables out through the
opening in the side of the camera body.
1
Power cable (VN-H257U)
Alarm cable (VN-H257U)
Audio cable (VN-H257U)
LAN cable
Monitor output cable
Dome cover
Approx. Φ 30 mm
2
Inner dome
Knob (two
locations)
Fall prevention wire
(Prepared by customer)
Fall prevention
sheet
Alarm cable (VN-H257U)
Power cable (VN-H257U)
Monitor output cable
Audio cable (VN-H257U)
LAN cable
Side opening for cables
Mounting the Camera
Note Read before starting work.
•
•
•
•
Special skills are required to install this unit.
Install this unit on a location that is strong enough to hold it.
Make sure you turn off the power supply to the device before starting work.
When you attach the camera body to the ceiling, be sure to wear
safety goggles to protect your eyes from falling objects.
Knob
(two
locations)
Camera
body
Opening a hole (approx. Φ 30 mm) on
the ceiling or wall
Note
Note
• Take note of the length, strength and pull of the fall prevention wire.
For the fall prevention wire use the insulation material.
Fastening
screw
Memo
• When you directly mount the camera on the ceiling, use the ceiling
mount bracket (WB-S2205).
• To mount the camera using an electrical box, consult your dealer or
a JVC Service Center near you.
Inner
depression
Open a hole in the ceiling or wall (approx. Φ 30 mm), and
pull out the fall prevention wire and cables from the hole (the
fall prevention wire and cables are not provided).
Inner
dome
• Mounting hole is Φ 4.5 mm.
• Do not use a flat head screw.
• If you use an impact driver, tighten by hand. Otherwise, the case
may be damaged.
• Use the appropriate screws and tighten securely.
• Use a screw with a head between Φ 6.5 mm and Φ 11 mm.
Align the mounting direction mark (
direction, and mount the camera.
) with the shooting
Memo
• When you mount it on the wall, make the mounting direction mark
( ) face up.
Dome cover
setscrews
Cabling
Align the mounting direction mark ( )
with the shooting direction, and mount
the camera body on the ceiling or wall
Mounting hole (Φ 4.5 mm)
LAN cable
Dome
cover
Fall prevention wire
Soldering or crimping
Monitor output
cable
Alarm cable
(VN-H257U)
Power cable
(VN-H257U)
Wrapping insulation
Audio cable
tapes
(VN-H257U)
Attachment screw
(Prepared by
customer)
Dome cover protective sheet
(The VN-H257U camera is shown in the illustration.)
LAN cable
Wire clamp
Connect the AC 24 V power cable, alarm cable, and
audio cable to their respective connectors by crimping
them or soldering them.
Wrap unused connectors and the ends of unused cables
with insulation tape.
Make sure the LAN cable is completely inserted into the
connector.
Note
Memo
• The inner diameter of the ring section of
the fall prevention wire should be between
Φ 3.1 to Φ 5.5 mm
Φ 3.1 mm and Φ 5.5 mm.
• Securely lock the LAN cable so that it will not be disconnected.
• Be sure to properly ground the PoE power sourcing equipment
before use.
• If you use both the AC 24 V power cable and the PoE-based LAN
cable simultaneously, the camera may fail. Always supply power
using either method.
• Secure the dome cover using two dome cover setscrews as
required.
Memo
• Put the cables into the hole that you opened on the ceiling or wall
after connecting.
Securing cables
Securing the fall prevention wire
Securing the LAN cable
Secure the fall prevention wire using the wire setscrew.
Secure the LAN cable using the wire clamp.
Fall prevention wire
setscrew
Fall prevention wire
1 Loosen the attachment screw
of the wire clamp until it is
loose but not disconnected.
Attachment screw of
the wire clamp
2 Roll the wire clamp around
the LAN cable.
Memo
Wire clamp
3 Fasten the free end of
the wire clamp with the
attachment screw of the wire
clamp.
4 Tighten the attachment
screw of the wire clamp and
fix the LAN cable.
• Take note of the length and strength of the fall prevention wire. Use wire
made of insulated material. Make the wire length as short as possible.
☞ Continue to next page
EN_VN-H237_001D_Non-Mask.indb 2
2
5/24/2012 2:24:07 PM
Adjust the field angle and focus
Turn on the power
1 Adjust the zoom ratio.
Loosen the fastening screw of the zoom adjustment ring, then
move the ring to the right and left to adjust the zoom ratio. After
completing the adjustment, tighten the setscrew.
After all connections and installations are completed,
turn on the power of the unit. When the camera is
booting, the [STATUS] indicator lights up orange. It lights
up green after booting.
Note
• Applying force to the zoom adjustment ring while adjusting the
image size may result in damage.
Moving the zoom adjustment ring beyond its adjustable range
may cause the performance of this camera to deteriorate.
2 Roughly adjust the focus.
1 Lift the focusing gear control, release the catch from position A
and insert it into position B to disengage the gear.
Note
• If you open the gear beyond position B, the gear shaft is
released from the bearing (C in the figure on the left) to prevent
it from being damaged. In this case, correctly re-insert the shaft
into bearing A (the original position).
VN-H257U camera
2 Rotate the lens section at the tip to roughly adjust the focus.
Image Adjustment
Lens section
VN-H257U camera
Adjust images by watching them on the monitor.
*The illustration of the camera directly mounted on the ceiling is used.
The same procedures are performed regardless of the camera is
embedded into the ceiling or mounted on the wall with the cables
pulled out.
Knob
VN-H237U camera
Focusing ring
Knob
Catches
Catches
B A Zoom adjustment ring
B A Zoom adjustment ring
Note
• Before touching the camera body, make sure you touch the metal
surface of the [MONITOR] terminal first to discharge any static
electricity from your body.
Otherwise, static electricity may cause the camera to malfunction.
Adjust the shooting direction of the
camera
1 Connect a test monitor to the [MONITOR] terminal.
2 Loosen the focusing ring setscrew and roughly focus the image
by rotating the ring to the right or left.
C
Focus adjustment gear
One base
pitch
C
Focus adjustment gear
[MONITOR] terminal
Dome cover
setscrews
3 Return the catch of the focus adjustment gear B to position A
shown in the diagram, and then return the focus adjustment
gear to its original position.
3 Finely adjust the focus.
VN-H257U camera
1 Connect the camera to a computer, and open the Built-in Viewer.
• For details about computer settings and methods for
connecting the camera to a computer, refer to “Instructions (IP
Address Settings)”.
2 Select “Day Focus Adjust” from the “Focus” page in “Advanced
Settings”.
• The focus position is automatically adjusted.
• For details on focus, refer to “Instructions (Setting)” on the
supplied CD-ROM.
• You can also adjust the focus after mounting the dome cover.
RESET
NTSC
[RESET] button
MONITOR
FOCUS
ASSIST
PAL
Note
• Do not hold the lens section when adjusting the direction of the
camera. The lens section may be damaged if you apply force to
it. Also, exercise care not to leave your finger prints on the lens
when you rotate the lens section.
3 Return the catch of the focus adjustment gear B to position A
shown in the diagram, and then return the focus adjustment
gear to its original position.
VN-H237U camera
[STATUS] indicator
[MONITOR] selection switch
NTSC
PAL
2
[MONITOR] terminal
VN-H237U camera
1 Press the [FOCUS ASSIST] button.
• The camera enters Focus Assist mode, and [STATUS]
indicator flashes green and orange alternately.
• The image is sharpened with the opening of the aperture.
2 Finely adjust the camera focus by rotating the focus adjustment
gear knob to the right or left.
3 Rotate the focus adjustment gear knob for approximately one
base pitch in the direction of the arrow shown in the figure.
• This is to correct the focus shift when mounting the dome cover.
4 Remove the protective sheet of the dome cover, and check the
camera focus by holding the dome cover over the lens.
• After checking, replace the protective sheet on the dome cover.
5 Tighten the setscrew of the focus adjustment ring and fix the focus.
6 Press the [FOCUS ASSIST] button.
• The Focus Assist mode will be released.
• [The STATUS] indicator lights up green.
Tilt fastening
screw
75 Ω
termination
Protruding part
Test monitor
Memo
• The camera has the 16:9 aspect ratio. If the test monitor has the 4:3 aspect
ratio, the camera image is converted into the 4:3 ratio and displayed.
• Set to "NTSC" when connecting to an NTSC monitor, or set to "PAL"
when connecting to a PAL monitor, then hold down the [RESET]
button for approximately three seconds to reboot. While the camera
is rebooting, the [STATUS] indicator lights up orange.
• If you keep pressing the [RESET] button for more than 5s, the camera
enters the Service mode. Do not press this button for more than 5s.
Dome cover
protective sheet
Note
2 Adjust the shooting direction of the camera.
Dome cover
• Before you start, remove the light-blue protection tape.
• Adjust the pan, tilt and rotation controls of the cameras to face
the lens towards the subject.
• After adjusting the field angle, tighten the tilt fastening screw to
secure the camera so that its field angle does not go out of alignment.
Memo
• The focus position can be manually adjusted by using the Builtin Viewer installed on your computer connected to the camera.
(☞ “Instructions (Setting)”) Resort to this method if it is difficult
to acquire focus automatically.
Note
• Moving the pan, tilt or rotation beyond the adjustment range may
damage this unit.
• As the tilt and rotation range of this unit is wide, part of this unit may
be reflected in the shooting screen depending on the field angle and
direction.
• Do not hold the lens section when adjusting the direction of pan, tilt
or rotation. The lens section may be damaged if you apply force to it.
Rotation: ± 100°
Mount the dome cover
When you mount the dome cover, make sure that no cables are connected to the [MONITOR] terminal.
Mount the inner dome
Pan: ± 175°
Engage the inner dome slot with the projection, and
mount the dome by rotating it in the direction of the
arrow. Press the inner dome in until you hear the click of
the catch.
Tilt: ± 80°
Catches
(two locations)
Protection tape
Pan center mark
Rotation
Knob (two locations)
Mount the dome cover and remove
the dome cover protective sheet
Note
• If you remove the dome cover again after installing it, the field angle may
shift. If the field angle has shifted, adjust the focus and the field angle again.
• Check to ensure that the dome cover is firmly mounted. The cover
may fall off if it is not mounted correctly.
Align the position aligning marks (two locations) on the
camera body and the dome cover, mount the dome
cover and secure the dome cover with screws.
Shooting direction mark
Rotation center mark
• It may be difficult to acquire focus automatically when shooting
the following places.
– Too bright places.
– Too dark places.
– Places where brightness always changes. (e.g. a light is
flickering; people are passing by in front of the camera.)
– Places where there is little contrast of brightness.
– Places where there are repeating patterns of vertical stripes.
Position aligning mark
Protruding part
Mounting
position of a
screw (supplied)
Inner
depression
Memo
• Rotate the lens in the pan, rotation and tilt directions ± 175°, ± 100°
and ± 80° respectively from the position aligned with the camera's
shooting direction mark, pan center mark and rotation center mark.
Be sure to hold the rotation control and adjust the rotation without
holding the lens section.
• When you mount the camera body, align the shooting direction mark
within the shooting range.
Inner dome
Dome cover protective sheet
Memo
• Secure the dome cover using two dome cover setscrews as required.
☞ Continued overleaf
EN_VN-H237_001D_Non-Mask.indb 3
3
5/24/2012 2:24:07 PM
Cables
2
3
Cable type
1 Monitor output cable (Common)
2 Power cable
(VN-H257U)
4
3 Alarm I/O cable
(VN-H257U)
Conductor
1.0 mm dia
diameter (mm)
or more
Max cable
90
distance (meters)
(Reference value)
1.6 mm dia
or more
2.0 mm dia
or more
240
370
Note
• For safety reasons, turn on the power only after
confirming that all the connections are completed.
• Be sure to turn off the camera before connecting
cables.
• If you use both the AC 24 V power cable and the
PoE-based LAN cable simultaneously, the camera
may fail. Always supply power using either method.
• To use an AC 24 V power supply, remove the factoryinstalled tape from the power cable, connect to an AC
24 V power supply, and wrap the connector with new
insulation tape.
Signal name
Red
Black
AC 24 V
AC 24 V
INPUT 1 (ALARM)
INPUT 2 (ALARM)
OUTPUT 1 (ALARM)
OUTPUT 2 (ALARM)
GND (ALARM)
MIC IN
GND (MIC IN)
LINE OUT
GND (LINE OUT)
Black
Brown
4 Audio cable
(VN-H257U)
● Connecting the power cable to AC 24 V source
Color
Black
Red
Brown
Orange
Yellow
Black
White
Yellow
White
Yellow
● LAN cable
• When connecting to a switching hub:
Use a straight cable.
• When connecting to a computer:
Use a crossing cable.
• A 100-meter or less length and Category-5 or higher
grade STP (shielded) cable is recommended.
Symptom
Images on the monitor are dark
Movement of network image is not
smooth
No monitor image is output.
The external mic sound is not heard.
Lens is out of focus
Specifications
* The specifications and appearance of this unit are subject to change for purposes of improvement without prior notice.
Note
• The crossing cable may not be used for some
computer models. Check the LAN specifications of
the computer when you directly connect this unit to
the computer.
● Alarm I/O cable
• A 50-meter or less length shielded cable is
recommended.
Image sensor
Effective pixels
Camera
section
Minimum illuminance
of subject
Monitor output
Input
Audio input
Reference voltage
Impedance
Audio output
Image compression format
Audio cable connection (VN-H257U)
Frame size
Connect the audio cable for an audio device.
Audio cable (Brown and White) (MIC IN)
: Connect to a condenser microphone that has a plug-in power
system, etc.
Audio cable (Black and White) (LINE OUT) : Connect to a speaker with a built-in amp, etc.
Network
output
Audio compression
formats
Network interface
Memo
• A shielded audio cable is recommended.
Alarm input
* For the location to connect the audio cable, refer to [Cabling] (☞ page 2).
Alarm output
Alarm I/O cable connection (VN-H257U)
Sensor example (1)
Input 1 or
Input 2 OUT
3.3 V
VCC
● Output conditions
• Equivalent to NPN open collector output
(For details on how to set the output logic, please
refer to “Instructions (Setting)”.)
• Safe excitation voltage: DC16 V or lower
• Allowable surge current: 30 mA
• Momentary (100 ms to 5000 ms) output
(For details on how to set the time, please refer to
“Instructions (Setting)”.)
1 mA
Output 1 or
Output 2
IN
(Alarm input equivalent circuit)
Ambient humidity
Mass
Option (sold separately)
VN-H257U/VN-H237U
External dimensions (unit: mm)
Mounting hole
for a screw
111
4.5
4.5
DC12 V
R
46
4.5
4.5
.5
G
Ambient temperature
87
G
General
Alarm device
example
This
camera
R
LAN
standards
Focal length
Maximum aperture ratio
Aperture range
Zoom ratio
Standards
Communication
protocol
Power supply voltage
Current consumption
SR
This
camera
DC3.3 V
Alarm output
Connect an alarm device, indicator, lighting, buzzer or
other device.
• An alarm output signal is an open collector output.
You can configure the menu to set the alarm to
sound when contacts short circuit (MAKE) or
when the contacts are open (BREAK). (Pressure
resistance lower than 16V, 30 mA)
• This terminal has different polarities. The output
voltage at the positive terminal must always be
higher than the output voltage at the negative
terminal. Otherwise, the circuit may be damaged.
Lens
117
● Input conditions
• Connect non-voltage a contact or open collector
output circuit
(For details on how to set polarities, please refer to
“Instructions (Setting)”.)
• Low level terminal current below 1 mA
• High level terminal current 3.3 V
Alarm record
VN-H257U
VN-H237U
1/3-inch Square-Pixel Progressive Scan CMOS (elementary color filter)
Approximately 2,120,000 pixels
1944 (H) x 1092 (V)
(50 %, AGC High, 1/30 s)
(50 %, AGC High, 1/30 s)
Color: 0.3 lx (typ.)
Color: 0.3 lx (typ.)
Black and White : 0.25 lx (typ.)
Black and White : 0.03 lx (typ.)
75 Ω, 1.0 Vp-p
NTSC or PAL (switch selectable)
Can connect to a microphone that has a
–
plug-in power system
DC 2.47 V(typ.)
–
2.2 kΩ (typ.)
–
Line OUT (200 Ω, Max 1.9 Vp-p)
–
JPEG, H.264 High Profile, H.264 Baseline Profile, MPEG-4
1920 × 1080
1280 × 960
1280 × 720
640 × 480
640 × 360
320 × 240
μ-Law (64 kbps), AD/DA 16 bits,
–
Fs = 8 kHz, monaural
RJ-45
100BASE-TX/10BASE-T/FULL/HALF/Auto-negotiation enabled
No-voltage a contact input, PNP
open collector input, low level, latch/
momentary (500 msec or longer) (1 mA
–
circuit current at low level, and 3.3 VDC
applied voltage at high level)
NPN open collector-output (16 VDC safe
excitation voltage, and 30 mA allowable
–
sink current)
16 MB
f = 3 mm to 9 mm
f = 2.8 to 10.5 mm
F1.2 (f = 3 mm) to F2.1 (f = 9 mm)
F1.2 (f = 2.8 mm) to F2.6 (f = 10.5 mm)
F1.2 to F360
F1.2 to F360
3x
3.75 x
Compliant with IEEE802.3, IEEE802.3u and IEEE802.3af
TCP/IP, UDP/IP, FTP, ICMP, ARP, DHCP, SNTP, HTTP, SMTP, RTP, RTSP, IPv4,
IPv6, DSCP, HTTPS, SNMP
AC24 V 50 Hz/ 60 Hz, or PoE (DC-48 V)
PoE(DC-48 V)
AC24 V 0.5 A, or PoE 150 mA (7.2 W)
120 mA
-10 °C to 50 °C (Operation)
0 °C to 40 °C (Recommended)
20 %RH to 90 %RH (without condensation)
Approx. 480 g
Approx. 450 g
Ceiling mount bracket (WB-S2205)
42
Alarm input
Connect an infrared sensor, door sensor, metal
sensor, a manual switch or other device.
• To avoid noise entering the internal circuit, enter the
non-voltage contact signal in the Alarm IN terminal.
• Do not supply voltage.
• The alarm can be set to be activated during close
contact (MAKE) or during open contact (BREAK)
can be set from the menu.
• The alarm signal should last for at least 500 msec. If
the alarm signal is short, it may not be recognized.
Causes and Countermeasures
• If you connect the monitor output (RCA terminal) inside the dome cover to the test
monitor while the monitor output cable on the bottom is connected to video recording
equipment or another monitor, images may be dark.
• Disconnect the monitor output cable from the video recording equipment or another
monitor. Alternatively, set the terminal of either one of the equipments to “OPEN”.
• After adjusting the image, restore the original condition.
• If the monitor image output is turned ON, a lower frame rate is set for network images.
• If you turned the monitor image output to OFF, set the frame rate again.
(☞ “Instructios (Setting)” - “Internet Explorer Setting” - “Encoding Page”)
The image output may be turned Off on Internet Explorer.
Check the monitor output setting.
• Check the MIC connection.
• Is the audio setting turned off? (☞ “Instructions (Setting)” - “Audio Page”)
Is the focus adjustment gear engaged? Check the location of the catch.
83.5
1
Troubleshooting
Mounting hole for a screw
Sensor example (2)
Relay switch or
other devices
OUT
G
G
G
Hole in the ceiling (unit: mm)
Mounting hole for a screw
(Alarm output equivalent circuit)
Front of the camera
Note
• Connect the G terminal cable of this camera to the
GND of the alarm device.
46
Φ 11
1 (c
ame
ra b
ody
)
* For connecting the Alarm I/O cable, refer to [Cabling] (☞ page 2).
Pan adjustable
range
35
0
20
83.5
Φ 30 (cable hole)
Direction cables were pulled out
7.7
Mounting hole for a screw
10
LST1234-001D
4
EN_VN-H237_001D_Non-Mask.indb 4
5/24/2012 2:24:07 PM