1
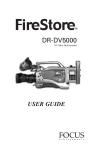
FireStore DR-DV5000 QuickStart Guide
PHYSICAL FEATURES
DR-DV5000
Your FireStore DR-DV5000 features two
main surfaces, the front panel and the rear
connector panel.
QUICKSTART GUIDE
Front Panel
For Operating System Version 1.2
INTRODUCTION
Thank you for choosing the Focus
Enhancements’ FireStore DR-DV5000 DV
Disk Recording Module for JVC Professional
DV Camcorders.
The purpose of this QuickStart document is to
introduce the features and operation of the
FireStore DR-DV5000. The complete User
Guide is available on the CD-ROM that came
with the FireStore unit. It is advised that users
get familiarized with the product by reading
the User Guide before attempting to use
this product. If you are unable to locate the
User Guide or require further assistance,
please visit:
www.focusinfo.com/support
Alternatively, contact your Focus
Enhancements or JVC FireStore
dealer/distributor.
The front panel contains the backlit LCD and
9 buttons for controlling FireStore’s functions.
The top row of buttons act as soft keys and
provide the function displayed on the bottom
of the LCD.
The front panel also features a tally light,
infrared remote sensor and power switch.
PAGE 1
FireStore DR-DV5000 QuickStart Guide
REAR CONNECTOR PANEL
(D)
(B)
2) Ensure that
appropriate
power
connectors are
connected and
that the battery
gasket is
positioned
between DRDV-5000 and
camera.
(A)
(C)
The rear connector panel features a 6-pin
FireWire port for DV video I/O (A), a 6-pin
FireWire port for connection of external
FireWire drives or a computer (B), a 4-pin
XLR DC power input (C) and a 3.5mm
control cable input for RS232C, GPI or wired
remote control (D).
MOUNTING TO A CAMCORDER
The FireStore DR-DV5000 is designed to
mount directly to full size JVC Professional
DV camcorders. When mounted to JVC GYDV5000/ 5000E/ 5001 camcorders, the DRDV5000 “hooks” to the rear of the camcorder
in the usual position of the battery. To mount
to a Professional DV series camcorder, do
the following:
1) Remove and disconnect the attached battery
system from the camcorder (including battery
plate if applicable).
PAGE 2
3) “Hook” the
DR-DV5000
to the rear
of the the
GY-DV5000
camcorder.
4) (If you are using a JVC DV500/550/700
camcorder, first install the supplied “Hook” plate
to the rear of the
camcorder using the
supplied screws).
Once DR-DV5000
is connected to the
“hook” plate, the
52-pin connector
should mount to the
equivalent on the
GY-DV5000 series.
This connector does
not exist on other
camcorders.
FireStore DR-DV5000 QuickStart Guide
DV5000 marked “DV I/O” to the 4-pin
FireWire port on the rear of the camcorder
marked “DV”.
5) Once mounted, secure the two captive
screws at the base of DR-DV5000 to
the camcorder.
(Connection of the 6-pin to 4-pin FireWire
cable may not be necessary on all JVC
camcorders (such as the GY-DV5000U(A).
Check with JVC for information on different
models. A flexible wire clamp located on the
DR-DV5000 base provides restrain for the
cable).
Power Options
6) Re-attach the battery system to the rear
of the DR-DV5000. Ensure to connect all
power cables and utilize the supplied gasket
between DR-DV5000 and the battery system.
7) Finally, connect a 6-pin to 4-pin FireWire
cable from the 6-pin FireWire port on DR-
The DR-DV5000 shares power with the GYDV5000 camcorder no matter which power
source is used. The 4-pin power XLR on DRDV5000, the 4-pin power XLR on GYDV5000 or the battery system can power both
DR-DV5000 and camcorder simultaneously.
INSERTING AND REMOVING
FSHDD-1 FIREWIRE DRIVES
The best way to get to know the FireStore
FSHDD-1 FireWire HDD is by studying the
supplied manual. The manual provides
detailed instructions and illustrations.
INSERTING THE HDD: Insert the drive into
the slot on top of the DR-DV5000 unit.
Ensure that the power switch on the bottom
side of the drive is set to “On” before
inserting. The drive will only insert one way
and features a “key” on one side to prevent
incorrect insertion. Press down on the drive
PAGE 3
FireStore DR-DV5000 QuickStart Guide
handle firmly until the handle meets the top of
DR-DV5000. If power is on, you will observe
the power LED light up green.
Once ready for use, the DR-DV5000 default
Splash Screen will appear as follows:
Use the MENU and SOFT KEYS on the
DR-DV5000 front panel to navigate and
make changes in the menu system.
REMOVING THE HDD: Slide the HDD
release latch on the DR-DV5000 top plate
toward the battery system. Once slid as far as
possible, hold the latch while at the same time
grasping the FSHDD-1 drive handle and
pulling the HDD out from DR-DV5000.
GETTING STARTED
One of the first tasks to perform is to set the
date and time in the DR-DV5000 Setup menu.
This forms the basis of file naming.
DR-DV5000 Menus
To enter the DR-DV5000 menu , press the
MENU soft key. The MENU screen will
display on the DR-DV5000 LCD.
Once DR-DV5000 has been mounted to a
camcorder, a power source has been provided
and the FSHDD-1 FireWire HDD has been
inserted, it is now possible to prepare DRDV5000 for use. When powered up for the
first time, the DR-DV5000 LCD will display
“Welcome to DR-DV5000” and possibly
“Please Wait...” depending on the disk drive
being used.
If a FSHDD-1 FireWire HDD comes from
the factory, it should be configured and ready
to use. If the message “No Disk Detected”
appears, ensure you have a FSHDD-1
FireWire HDD inserted properly. If the
message “No Format Detected” appears, you
will first need to partition and format the
inserted drive. DR-DV5000 will prompt you
through the steps required to perform a
format. WARNING: Formatting will erase
all data on disk!
PAGE 4
By pressing the
soft key, it is possible to
scroll through the MENU items. Pressing the
“SEL” soft key will open a SUB-MENU for
particular menu items that have a right
pointing arrow.
To set DATE and TIME, navigate to SETUP > SET DATE&TIME and then set DATE and
TIME individually.
FireStore DR-DV5000 QuickStart Guide
File Identification Naming and
Scene Marking
DR-DV5000 files are identified by TRACK
and VOLUME (disk drive) number on the
LCD. For instance, a file on the DR-DV5000
LCD identified as 1-043 is clip number 43 on
Volume (disk) 1.
On a computer, files are identified by their
base file name made up of DATE and TIME.
For instance, a clip named 20030615-21094301.mov is a clip that began recording at
9:09:43PM on June 15th. 2003.
Clips can also be organized into pre-named
folders on the disk drive using the Scene
Marking feature. If a clip has been Scene
Marked, it will be displayed in brackets
(e.g. <XXXXXX>) above the soft key labels
on the LCD. Mark clips during REC, STOP
or PLAY modes using the supplied remote
commanders or by pressing SHFT+DISP.
While holding SHFT, press DISP to scroll
through available folders. At the close of a
session, select MENU -> UTILITIES >ORGANIZE FOLDER. See the User Guide
for more information on Scene Marking.
DR-DV5000 Main Features
Spend time navigating through the DRDV5000 MENU System. DR-DV5000’s
MENU has eight main menu categories:
Record Mode, Play Mode, Play From, Control
Mode, HDD Bypass, Record Format, Setup
and Utilities.
Functions in the DR-DV5000 MENU include:
RECORD MODES:
NORMAL RECORD - DR-DV5000 front
panel or remote control trigger of record.
RETRO DISK - Constantly buffers video in a
loop to a determined amount of space on the
HDD so that when record is triggered, a retro
time period can be added to the beginning of
any clip.
RETRO CACHE - Same as above, but utilizes
a 10 second data buffer to cache video instead
of the HDD.
LOOP RECORD- Allows video to be recorded
while in normal record modes as an endless
loop on available HDD space.
SNAP - Any record trigger will result in only
a single frame of video being recorded to disk.
TIME LAPSE - User definable time lapse
setup menu.
DUMP TO DISK - Allows contents of tape in
camcorder to be automatically recorded to HDD.
DUMP TO TAPE - Allows contents of the
HDD to be automatically recorded to tape in
the camcorder.
PLAY MODES:
PLAY CLIP - When play is triggered, the
selected clip will play from start to finish and
then pause.
LOOP CLIP - When play is triggered, the
selected clip will continuously loop play from
start to finish.
LOOP ALL - When play is triggered, the
entire contents of the HDD will loop play
from start to finish.
PLAY ALL - When play is triggered, the
entire contents of the HDD will play from
start to finish and then pause.
PAGE 5
FireStore DR-DV5000 QuickStart Guide
PLAY FROM:
SETUP:
TRACK LIST - Plays all clips from the HDD.
FOLDER LIST - Plays clips from within a
specified folder only.
HDD PORT - Allows DR-DV5000’s HDD
port to switch between HDD connection and
DV I/O loop through.
DATE FORMAT - Sets DR-DV5000 Date
display options.
SET DATE & TIME - Allows for setting date
and time for file naming purposes.
OS VERSION NO. - Displays the current
system software version.
OS UPGRADE - Allows update of system
software.
CAM TYPE - Allows preferences to be set for
different camcorder types.
TC MODE - Allows different timecode modes
to be selected including external TC, record
run TC, Regen TC and Free Run TC.
TC SET - Allows Timecode or User Bit values
to be preset.
IR - Enables or disables the DR-DV5000
infrared sensor.
GPI - Allows selection of GPI port function
including disabled (RS232C), Pause/unpause,
Index/New File and Rec Snapshot.
BACK LIGHT - Allows DR-DV5000 LCD
backlight to be on, off or auto off (backlight
goes off after one minute of no activity).
CLIP PREVIEW - When selected, allows the
first frame of each clip to be displayed on the
DV video out when navigating from one clip
to another.
AUDIO CORRECTION - Allows different
levels of audio correction to be used during
a recording.
DV BYPASS - When enabled, allows external
devices to communicate directly to GYDV5000 camcorder via the DV I/O port.
(contact JVC for details.)
KEEP PREF - Allows the "Keeper" button to
mark clips to a single Keeper folder or
multiple folders.
CONTROL MODES:
LOCAL - DR-DV5000 front panel or remote
control of operation.
AV/C - Control of DR-DV5000 via a
computer connected to the “DV I/O” FireWire
port on the Connector Panel. Not for use with
camcorder recording/playback.
SYNCRO SLAVE - Control of DR-DV5000
Record and Record Pause via camcorder’s
standard tape record trigger.
SERIES RECORD - Triggers HDD recording
to begin 5 minutes prior to tape ending during
recording.
SPLIT SLAVE - Allows control of DRDV5000 Record and Stop via camcorder’s
secondary VTR triggers (separate to tape
transport control).
HDD BYPASS:
Allows the connected FireWire HDD to
be mounted/dismounted to a computer
without removing.
REC FORMATS:
Allows selection of particular DTE
Technology native NLE file format prior to
recording. Choices are RawDV, AVI Type 1,
AVI Type 2, Canopus AVI, Matrox AVI,
QuickTime and Avid OMF (all files are in
DV25 standard.)
PAGE 6
FireStore DR-DV5000 QuickStart Guide
UTILITIES:
ORGANIZE FOLD
Organizes all scene marked or keeper clips
into respective folders on the HDD for easy
NLE access.
ORGANIZE OMF - Organizes all Avid OMF
recorded clips into a folder named “OMFI
MediaFiles” so that the Avid MediaTool is
able to use the clips in the Avid Timeline.
DELETE CLIP - Allows the selected clip
to be deleted.
FORMAT - Allows any drive to have a
completely new FAT32 format added.
FORMATTING WILL ERASE ALL DATA!
PARTITION - Prepares any unrecognized or
blank HDD for formatting.
REPAIR - In the event that a file is damaged
during recording, repair will fix the particular file.
FILE NAME - Displays the Base File Name
(Date and Time) of the selected clip.
FACTORY RESET - Allows factory settings
and values to be restored to DR-DV5000.
Connect just the FSHDD-1 FireWire HDD
to a Macintosh or Windows computer system
with an OHCI compliant FireWire port.
FireStore utilizes the FAT32 file format, so
the same disk will mount to both Mac and
Windows systems.
In most cases,
the computer will
power FSHDD-1
from its FireWire
port. If not, an
external power
supply may
be needed.
Once connected, FSHDD-1 will mount as a
standard removable FireWire volume. Each
clip on the disk represents a press of REC
and REC STOP.
UTILIZING DR-DV5000 CLIPS IN A
NON-LINEAR EDITING SYSTEM
FireStore DR-DV5000’s unique DTE Technology
allows clips that have been recorded to disk to
be immediately available to a non-linear editing
(NLE) system’s timeline without having to
capture, transfer or convert the files first.
After a recording is complete, remove the
FSHDD-1 FireWire HDD (or external
FireWire HDD) from DR-DV5000.
With DTE supported NLEs, it is possible to
select IMPORT file and make the entire disk
content immediately available to the NLE
timeline. Note: Avid users will need to follow
some additional steps. See the DR-DV5000
User Guide for more detail.
PAGE 7
FireStore DR-DV5000 QuickStart Guide
DR-DV5000 RECORD AND CONTROL LCD AND CAMCORDER VIEWFIDER
DISPLAY MODES
When used with a JVC GY-DV5000 series camcorder, it is possible to monitor DR-DV5000 status
in the camcorder’s viewfinder (EVF) and on the LCD display. When DR-DV5000 is connected to
a GY-DV5000 and powered, a small “DD” icon will appear in the top right side of the camcorder
EVF and LCD. Next to this will be four characters which will appear like “092S”. The three
numerical values (092) represent the remaining disk space on the FireWire disk drive (in this case
92 minutes). The letter displays the DR-DV5000 Record/Playback and Control Mode (S - in this
case STOP). The different display modes are listed below:
PLAY/REC MODE
Stop
Pause
Play
Rec (Pause)
Normal Rec (Rec)
Retro Disk (Stop)
Retro Disk (Standby)
Retro Cache (Stop)
Retro Cache (Standby)
Loop Record (Stop)
Loop Record (Standby
Loop Record (Rec)
Time Lapse (Stop)
Time Lapse (Pause)
Time Lapse (Rec)
Snap (Stop)
Snap (Standby)
Snap (Rec)
CAM EVF/LCD*
S
P blink
> PLAY
R blink
R
S
L blink
S
C blink
S
O Blink
O
S
T blink
T
S
G
G
DR-DV5000 LCD
STOP
ll PLAY
Off
ll REC
REC
L STOP
L REC
C STOP
C REC
O STOP
O REC
O REC
T STOP
ll T REC
T REC
SNAP
ll SNAP
SNAP
TALLY
Off
Off
Normal
Blink
On
Off
Blink
Off
Blink
Off
Blink
On
Off
Blink
On
Off
Off
On
CONTROL TYPE
Series Rec** (Stop)
Series Rec** (Pause)
Series Rec (Rec)
AV/C* (Stop)
AV/C* (Rec Pause)
AV/C* (Rec)
AV/C* (Play Pause)
AV/C* (Play)
Syncro Slave (Stop)
Syncro Slave (Pause)
Syncro Slave (Rec)
Split Slave** (Pause)
Split Slave** (Rec)
CAM EVF/LCD*
D
D
D
A
A
A
A
A
Y
Y
Y
Y
Y
DR-DV5000 LCD
D <REC TYPE> STOP
D ll <REC TYPE>REC
D <REC TYPE>REC
A <REC TYPE> STOP
A ll <REC TYPE> REC
A <REC TYPE> REC
A ll PLAY
A PLAY
Y <REC TYPE> STOP
Y ll <REC TYPE>REC
Y <REC TYPE>REC
Y ll <REC TYPE>STOP
Y <REC TYPE>REC
TALLY
Off
Blink
On
Off
Blink
On
Off
Off
Off
Blink
On
Off
On
* AV/C is only for use when DR-DV5000 is connected to a computer system. To control
DR-DV5000 from a camcorder, use Syncro Slave or Split Slave Mode.
** Series Rec and Split Slave are only available when DR-DV5000 is used with a
JVC GY-DV5000 camcorder.
PAGE 8
MANL-0899-02